- Установка GNU GCC Компилятора и среды разработки на Ubuntu Linux
- Вам необходимо установить следующие пакеты на Debian и Ubuntu Linux:
- Установка компиляторов с помощью команды apt
- Проверка установки
- Установка страниц dev man на Ubuntu Linux
- Узнайте, как установить GCC на Ubuntu с примерами
- Установить компилятор GCC с помощью apt
- Проверка установки
- Установка страниц dev man
- Тестирование компилятора GCC
- Ubuntu Documentation
- Installing the GNU C compiler and GNU C++ compiler
- Installing the GNU Java compiler
- Installing the GNU Fortran compilers
- Installing the GNU autotools
- 32-bit Builds on AMD64
- Installing the Intel Compiler Suite Professional Edition 10.x
- Get the License Number and Extract to a path without spaces
- On 64-bit systems you may also need to issue these commands
- Run the Installation Script
- Edit /etc/bash.bashrc to add the installation path to the PATH environment variable
- Installing the X11 development compilers
- Installing C and C++ compiler (GNU GCC Compiler) On Ubuntu/Debian Linux
- What is GCC?
- Installing Compilers on Ubuntu
- Checking Versions of Compiler
- Installing the manpages for C and C++ development
- Install GCC on Ubuntu
- Installing GCC:
- Compiling C Programs with GCC:
- Compiling C++ Programs with GCC:
Установка GNU GCC Компилятора и среды разработки на Ubuntu Linux
Как установить компилятор GNU / GCC (C и C ++) и связанные с ним инструменты (например, make, debugger, man pages) в операционной системе Ubuntu Linux с использованием параметров командной строки?

Вам необходимо установить следующие пакеты на Debian и Ubuntu Linux:
Build-essential package — Устанавливает следующую коллекцию для компиляции c / c ++-программ на Ubuntu Linux, включая:
- libc6-dev – стандартная C библиотека.
- gcc – C компилятор.
- g++ – C++ компилятор.
- make – GNU делает утилиту для поддержки групп программ.
- dpkg-dev – Инструменты разработки пакетов Debian.
В принципе, build-essential пакет содержит информационный список пакетов, которые считаются необходимыми для создания пакетов Ubuntu, включая gcc-компилятор, make и другие необходимые инструменты. Этот пакет также зависит от пакетов в этом списке, чтобы упростить установку build-essential пакетов. В этом руководстве вы узнаете об установке компилятора GNU C и компилятора GNU C ++ на Ubuntu Linux.
Установка компиляторов с помощью команды apt
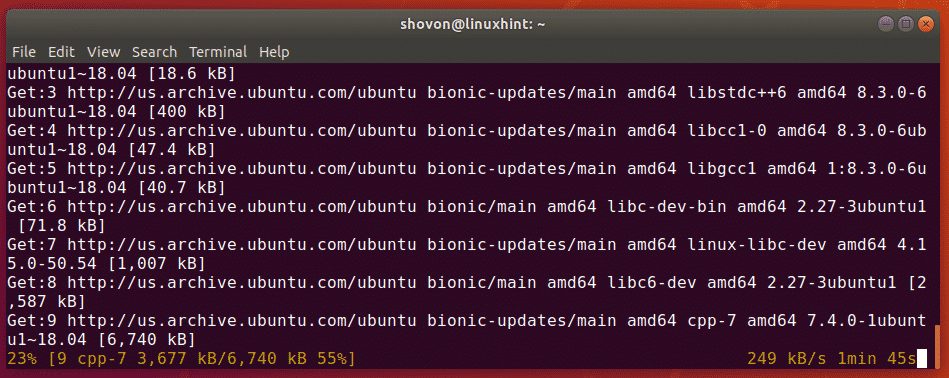
Откройте приложение терминала и введите следующее apt command /apt-get command :
Пример вывода данных:
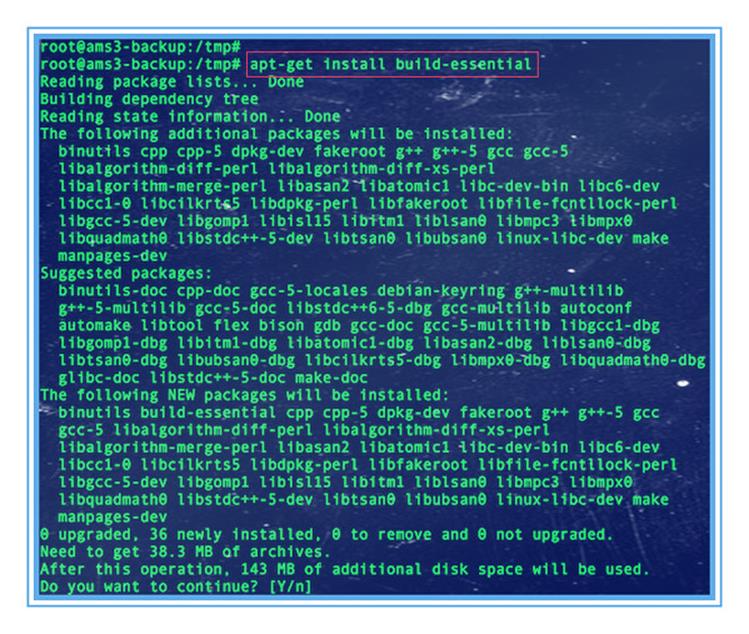 Рис.01: Как я устанавливаю инструменты разработки на Ubuntu Linux?
Проверка установки
Введите следующую команду:
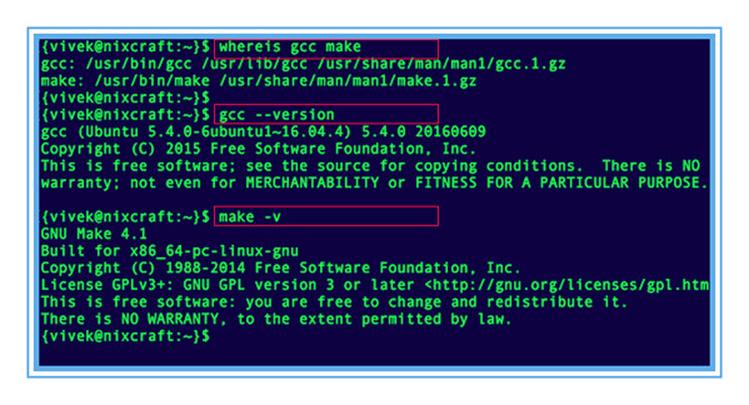 Рис.02: Поиск установленной версии make и gcc
Установка страниц dev man на Ubuntu Linux
Введите следующую команду:
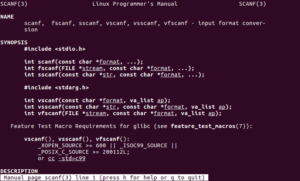
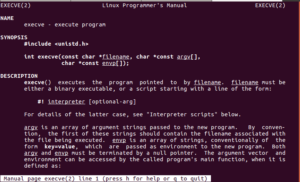
Чтобы посмотреть запросы библиотеки (функция в библиотеках программы) введите:
Источник
Узнайте, как установить GCC на Ubuntu с примерами

GCC, акроним для GNU Compiler Collection, представляет собой сборник компиляторов для языков программирования, включая Java, C и C ++.
В этом руководстве мы покажем вам, как установить компиляторы GCC и связанные с ними инструменты в Ubuntu и Debian
Установить компилятор GCC с помощью apt
Первым шагом в установке компилятора GCC является обновление системы.
Это можно сделать одной командой в терминале, как показано далее
Затем установите пакет, необходимый для сборки.
Необходимый пакет содержит набор пакетов.
Он включает компилятор GCC, make и другие необходимые инструменты.
Проверка установки
Чтобы убедиться, что вы установили gcc запустите команду ниже
Кроме того, вы можете запустить
Чтобы получить версию запустите make
Затем мы собираемся установить страницы dev man на дистрибутивах Ubuntu / Debian
Установка страниц dev man
Для установки страниц dev man выполните следующую команду
Чтобы просмотреть вызовы библиотеки, выполните следующие команды
Теперь, когда мы подтвердили успешную установку компиляторов и основных компонентов, давайте протестируем компилятор GNU GCC
Тестирование компилятора GCC
Давайте сначала создадим простую C ++-программу
Добавьте следующий код
Затем скомпилируйте код следующим образом
Обязательно найдите файл с именем test в своем каталоге, используя команду ls.
Источник
Ubuntu Documentation
Installing the GNU C compiler and GNU C++ compiler
To install the gcc and g++ compilers, you will need the build-essential package. This will also install GNU make.
build-essential contains a list of packages which are essential for building Ubuntu packages including gcc compiler, make and other required tools.
Now, you should able to compile software using C / C++ compilers.
To install the manpages for c and c++ development, install the manpages-dev package.
Installing the GNU Java compiler
Note that GNU’s Java compiler is not the same as the one developed and distributed by Sun Microsystems, and will not provide Java to the firefox browser. For that, please see Java. To install gcj, the GNU Java compiler, install the following package: gcj.
gcj can be used to:
- compile .java files to bytecode (.class files).
- compile .java files to a linux-executable.
To install the GNU Java bytecode interpreter, you need the gij package.
To have gcj compile to executables, install libgcj6-dev (otherwise an error during compilation occurs: libgcj.spec: No such file or directory). Use synaptic to install libgcj6-dev.
Installing the GNU Fortran compilers
To install the GNU Fortran 77 compiler — g77, you need the g77 package.
To install the GNU Fortran 95 compiler — gfortran, the package is: gfortran.
Installing the GNU autotools
To install autoconf and automake, you need the autoconf and automake packages.
Apt-get will tell you to explicitly choose a version of automake. If, for example, you decide to use automake1.9, you need to specify the version, such as the automake1.9 package.
32-bit Builds on AMD64
The GNU compilers have options that allow them to create 32-bit object and executable files on 64-bit operating systems, and vica versa. The critical options are -m32 (to build 32-bit) and -m64 (to build 64-bit).
These options will be present when you install the compiler of your choice. However, they won’t actually work unless you install several additional packages.
The first thing you will need is the multilib package for the compiler you are using. For example, to add multilib support to the default version of g++ (4.1 in gutsy), you would install
The multilib packages are compiler runtime packages. Now, you need 32-bit (or 64-bit) versions of whatever libraries you need to link your application program. 64-bit packages have names that start with lib64. Install these on 32-bit systems to support 64-bit builds. 32-bit packages have names that start with lib32. Install these on 64-bit systems to support 32-bit builds. Whatever else you are doing, you will probably need
Installing the Intel Compiler Suite Professional Edition 10.x
Using the Intel compilers for C, C++, and FORTRAN requires installing 32-bit libraries for Ubuntu if you are using a 64-bit system. Please ensure you have these packages:
gcc, build-essential, libc6-dev (see above)
ia32-libs, g++-multilib, and libc6-dev-i386 (for 64-bit systems)
32-bit packages starting with lib32 (for 64-bit systems)
alien and rpm for installing the RPM packages that Intel distributes.
libstdc++5 and libstdc++5-3.3-dev for good measure because Intel’s builds depend on these runtimes.
before you attempt installing the Intel Compiler Suite.
Get the License Number and Extract to a path without spaces
Ensure that you have obtained the license number for your installation and extracted the downloaded installation archive into a path that does not contain any spaces. This last statement is utterly important. The installer script that comes with the package has a bug that does not allow you to install the compiler suite if you have any spaces in the installer script path.
On 64-bit systems you may also need to issue these commands
because the chklic_32_64 license checking utility from Intel dynamically links to these libraries.
Once you’re done preparing to install the compiler suite, it’s time to go to the installer directory and install the compiler (be sure to also read through accompanying documentation; e.g., README, INSTALL.txt):
Run the Installation Script
After installing the compiler, you need to tell your shell the location of these executables by adding their parent paths to the PATH environment variable.
Edit /etc/bash.bashrc to add the installation path to the PATH environment variable
Where 10.1.012 is the version of the compiler suite installed.
Installing the X11 development compilers
Install script for X11 development libs
InstallingCompilers (последним исправлял пользователь andrius-zilenas 2012-08-10 10:18:50)
The material on this wiki is available under a free license, see Copyright / License for details
You can contribute to this wiki, see Wiki Guide for details
Источник
Installing C and C++ compiler (GNU GCC Compiler) On Ubuntu/Debian Linux
This post will guide you how to install the GNU C compiler and GNU C++ compiler under Ubuntu/Debian Linux. How do I install C, C++ compiler and Development Tools on Ubuntu 16.04/18.04 Linux. How to Install GNU GCC Compiler and Development Environment under Ubuntu/Debian Operating system. How to install the manpages for C and C++ development on Ubuntu.
What is GCC?
GCC is the GNU compiler collection, and it includes front ends for C, C++, Objective-C, Fortran, Ada, and Go, as well as libraries for these languages (libstdc++,…). GCC was originally written as the compiler for the GNU operating system.
To install GCC and G++ compiler, You need to install the build-essential package, and this package contains a list of packages which are essential for building Ubuntu Development including GCC compiler, G++ compiler, Make, dpkg-dev and other packages.
GCC is the compiler of C program, and G++ is the compiler of C++ program.
Installing Compilers on Ubuntu
You can simply install build-essential package using apt-get command on Ubuntu/Debian Linux, Type:
Or you can also use the apt command to install package, type:
Now you should able to compile C/C++ programs using gcc/G++ compilers.
Checking Versions of Compiler
After you installed the build-essential package on your Ubuntu/Debian Linux system, you can check the installed version of gcc or g++ compiler to check if the compilers are installed properly. Type:
Installing the manpages for C and C++ development
To install the manpages for c and c++ development, you can install manpages-dev package, type:
Источник
Install GCC on Ubuntu
In this article, I am going to show you how to install GCC on Ubuntu and compile C and C++ programs. So, let’s get started.
Installing GCC:
GCC and all the required build tools can be installed very easily on Ubuntu as all the required packages are available in the official package repository of Ubuntu. Ubuntu also provides the build-essential meta package that installs all the required packages all at once. So, you can easily GCC on Ubuntu using the APT package manager.
First, update the APT package repository cache with the following command:

The APT package repository cache should be updated.

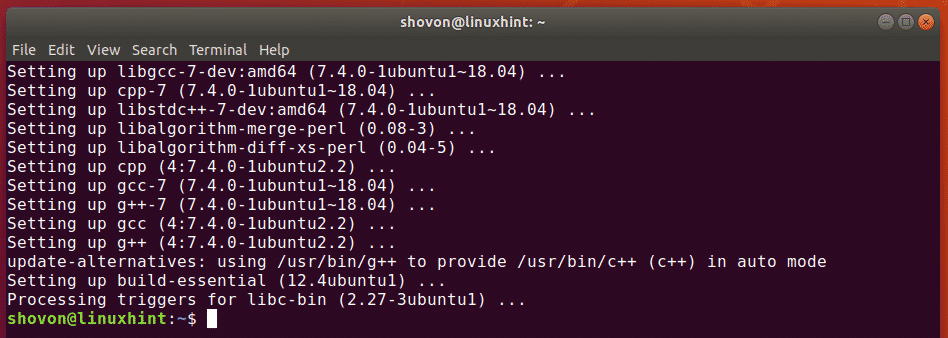
Now, install the build-essential package with the following command:

Now, press y and then press to confirm the installation.

It will take a while for APT to download and install all the required packages from the official Ubuntu package repository.
At this point, GCC and all the required build tools should be installed.
In the next sections of this article, I am going to show you how to compile a simple C and C++ program with GCC.
Compiling C Programs with GCC:
In this section, I will write a simple C program, show you how to compile the C program with GCC and run the compiled program.
I have written a simple C source file and saved it as hello.c in the
/Projects directory. The contents of the hello.c file is as follows:
int main ( void ) <
printf ( «%s \n » , «C -> Welcome to LinuxHint!» ) ;

This program will print “C -> Welcome to LinuxHint!” on the terminal. Very simple.
Before you compile the C source file, navigate to your project directory (
/Projects in my case) as follows:
Now, to compile the hello.c C source file, run the following command:
NOTE: Here, hello.c is the C source file. The -o option is used to define the path and filename of the compiled output binary file. -o hello is used to tell GCC that the compiled output file should be hello and the path where the file will be saved is the current working directory.

Once you compile the hello.c source file, a new file hello will be generated as you can see in the screenshot below. This is the compiled binary file.

Now, run the hello binary file as follows:

As you can see, the correct output is displayed on the terminal. So, we’ve successfully compiled and ran a C program using GCC.

Compiling C++ Programs with GCC:
In this section, I will write a simple C++ program, show you how to compile the C++ program with GCC and run the compiled program.
I have written a simple C++ source file and saved it as helloworld.cpp in the
/Projects directory. The contents of the helloworld.cpp file is as follows:
using namespace std ;
cout «C++ -> Welcome to LinuxHint!» endl ;
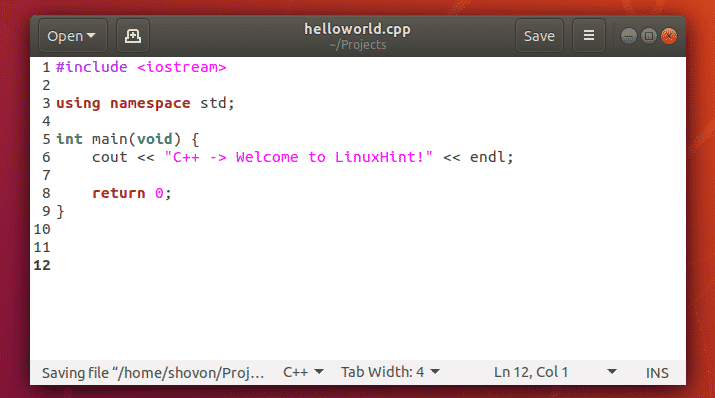
This program will print “C++ -> Welcome to LinuxHint!” on the terminal. Very simple as in the last example.
Before you compile the C++ source file, navigate to your project directory (
/Projects in my case) as follows:
Now, to compile the helloworld.cpp C++ source file, run the following command:
NOTE: Here, helloworld.cpp is the C++ source file. The -o option is used to define the path and filename of the compiled output binary file. -o helloWorld is used to tell GCC that the compiled output file should be helloWorld and the path where the file will be saved is the current working directory.

Once you compile the helloworld.cpp C++ source file, a new file helloWorld will be generated as you can see in the screenshot below. This is the compiled binary file.

Now, run the helloWorld binary file as follows:

As you can see, the correct output is displayed on the terminal. So, we’ve successfully compiled and ran a C++ program using GCC.

So, that’s how you install GCC on Ubuntu and compile C and C++ programs with it. Thanks for reading this article.
Источник


