- Linux Command: Show Mounted Hard Drives Partition
- Examples
- How to List Mounted Drives on Linux
- 1) Listing from /proc using cat command
- 2) Using Mount Command
- 3) Using df command
- 4 ) Using findmnt
- Conclusion
- Linux Commands to Check Mounted Files on the System
- One Response to “Linux Commands to Check Mounted Files on the System”
- Подключение файловых систем. Команда mount в Linux
- Вывод списка смонтированных файловых систем(ФС)
- Монтирование файловой системы
- Примеры использования mount
- Монтирование USB-накопителя/жесткого диска
- Монтирование файлов ISO
- Монтирование NFS
- Размонтирование файловой системы
- Сохранение параметров mount после перезагрузки
- Заключение
Linux Command: Show Mounted Hard Drives Partition
[a] df command – Shoe file system disk space usage.
| Tutorial details | |
|---|---|
| Difficulty level | Easy |
| Root privileges | No |
| Requirements | Linux |
| Est. reading time | N/A |
[b] mount command – Show all mounted file systems. [c] /proc/mounts or /proc/self/mounts file – Show all mounted file systems.
Examples
Open a terminal or login using ssh into the remote server and type the following command:
$ cat /proc/mounts
OR
$ cat /proc/self/mounts
Sample outputs:
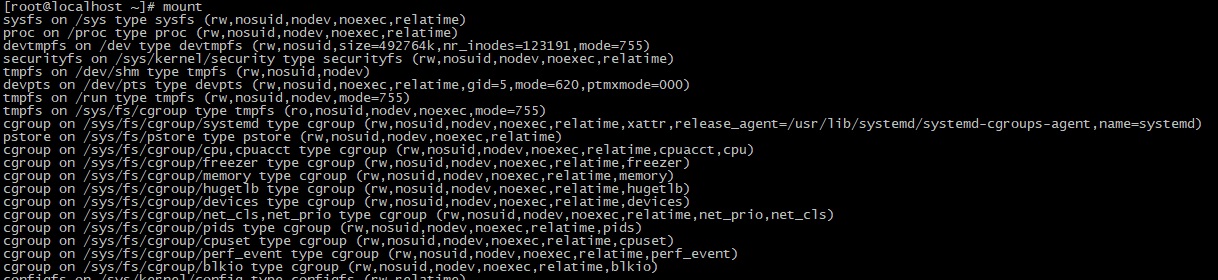
Type the mount command as follows to get same information:
Type the df command shows more human readable output:
- No ads and tracking
- In-depth guides for developers and sysadmins at Opensourceflare✨
- Join my Patreon to support independent content creators and start reading latest guides:
- How to set up Redis sentinel cluster on Ubuntu or Debian Linux
- How To Set Up SSH Keys With YubiKey as two-factor authentication (U2F/FIDO2)
- How to set up Mariadb Galera cluster on Ubuntu or Debian Linux
- A podman tutorial for beginners – part I (run Linux containers without Docker and in daemonless mode)
- How to protect Linux against rogue USB devices using USBGuard
Join Patreon ➔
Fig.01: df command in action
🐧 Get the latest tutorials on Linux, Open Source & DevOps via
| Category | List of Unix and Linux commands |
|---|---|
| Documentation | help • mandb • man • pinfo |
| Disk space analyzers | df • duf • ncdu • pydf |
| File Management | cat • cp • less • mkdir • more • tree |
| Firewall | Alpine Awall • CentOS 8 • OpenSUSE • RHEL 8 • Ubuntu 16.04 • Ubuntu 18.04 • Ubuntu 20.04 |
| Linux Desktop Apps | Skype • Spotify • VLC 3 |
| Modern utilities | bat • exa |
| Network Utilities | NetHogs • dig • host • ip • nmap |
| OpenVPN | CentOS 7 • CentOS 8 • Debian 10 • Debian 8/9 • Ubuntu 18.04 • Ubuntu 20.04 |
| Package Manager | apk • apt |
| Processes Management | bg • chroot • cron • disown • fg • glances • gtop • jobs • killall • kill • pidof • pstree • pwdx • time • vtop |
| Searching | ag • grep • whereis • which |
| Shell builtins | compgen • echo • printf |
| Text processing | cut • rev |
| User Information | groups • id • lastcomm • last • lid/libuser-lid • logname • members • users • whoami • who • w |
| WireGuard VPN | Alpine • CentOS 8 • Debian 10 • Firewall • Ubuntu 20.04 |
Comments on this entry are closed.
command not found…
Which command will display the number of devices in my system (routers/switches/AP)
I purchased the Hp 15-n018 model laptop, when i checking with vendor they said will not support for Linux operating and i didn’t found the driver in internet….. i able found in win 8 and 8.1….
But am very interested in Linux operating system…. any one can please help me where i can the driver.
Sudinhar: it really depends on what driver you’re talking about for which specific device and for which specific Linux distribution.
The laptop itself may require any number of drivers, including HD, CD/DVD, sound, display, network, etc.
Many Linux distributions come with drivers for a wide variety of systems & devices, and you can generally get Linux up & running on just about anything these days with enough patience.
You can generally repartition your hard drive without losing any data using tools provided in distribution ISOs/DVDs & install Linux as a dual boot without fear of not being able to also use Windows if necessary as a backup.
I first installed Linux on a laptop back in the 90s, and it was difficult to get all the drivers but I did eventually & it worked ok.
These days it’s usually much simpler and any up to date Linux distribution should run just fine on your laptop with a little setup & TLC.
As a side note, I’d like to thank the author of this article, the commands worked as advertised & provided the information I required.
Linux has a long history of not “playing well” with laptops, and unless you get a laptop that is “certified” to run with Linux, you’re bound to have headaches. Something else you might try is keeping the laptop as is, and installing Virtual Box, by Sun (Oracle?) I believe it’s available on-line at no charge. This is a VM system, which will allow you to load a real copy of Linux, as it emulates a real computer. Personally, I use VMware Workstation (I’ve had it for years, but it’s a commercial product) which does the same thing, but I’ve heard nothing but good things about Virtual Box. You can then launch Linux in a window, and it’s a “real” linux version, which you will install from the distribution ISO.
Let’s say I want to display on the i3status bar whether a device/share is mounted.
How would that be accomplished?
I’m kind of new to i3, but as of what I’ve found online about the wm, it is a matter of finding the right parameter on i3status or i3blocks (whichever you use).
Источник
How to List Mounted Drives on Linux

In this tutorial, I will show you the different ways to list mounted drives on Linux. We can use mount, findmnt, and df commands to list mounted device any Linux distribution like Ubuntu or Centos.
In Linux, mount command mounts a storage device or filesystem, and let’s go through commands that can display all those mounts.
1) Listing from /proc using cat command
To list mount points you can read contents of the file /proc/mounts.
In the following example, I have used cat command to read the /proc/mounts file:
2) Using Mount Command
You can use mount command to list mount points. When you run mount command without any options it will list mount points.
3) Using df command
You can use df command to list mount points.
The following command shows the output of df with -aTh option:
You can use -t followed by filesystem type (say ext3, ext4, nfs) to display respective mount points. For examples below df command display all NFS mount points.
4 ) Using findmnt
Findmnt is a powerful tool to find mounted filesystems. This command comes with lots of options to list mount filesystems.
The following command print all mounted filesystems:
Print mount point by specific filesystem type:
Search and list fstab contents:
Display all /etc/fstab file and converts LABEL= and UUID= tags to the real device names:
Conclusion
In this tutorial, we learned commands to list mounted drives or filesystems on Linux. I hope you enjoyed reading and please leave your suggestion in the comment section.
Источник
Linux Commands to Check Mounted Files on the System
By Jithin on November 11th, 2016
The common commands to check the mounted devices is the mount command. It can also mount and unmount them whenever needed. In this tutorial, we will discuss about a command similar to the mount command which is called findmnt.
Installation of findmnt
The command can be found in the package util-linux which is installed by default on most of the distributions.
i util-linux – Miscellaneous system utilities
1) Listing the file system
We can view the files system mounted in our system in the form of a tree model by simply typing the command findmnt.

2) Files system in a list format
The same tree style output of the mounted files system can be listed out without any model, by using the option l.

3) Listing the system in df format
The output of findmnt command can be listed in the format of df command output with the help of the option -D or –df.
SOURCE FSTYPE SIZE USED AVAIL USE% TARGET
devtmpfs devtmpfs 887.1M 0 887.1M 0% /dev
tmpfs tmpfs 896M 0 896M 0% /dev/shm
tmpfs tmpfs 896M 86.7M 809.3M 10% /run
tmpfs tmpfs 896M 0 896M 0% /sys/fs/cgroup
/dev/vda3 ext4 46.4G 3G 41.3G 6% /
/dev/vda1 ext4 476.2M 233.1M 214.1M 49% /boot
tmpfs tmpfs 179.2M 0 179.2M 0% /run/user/0
4) fstab output list
File system information can be fetched from /etc/fstab file and /etc/fstab.d directory only by using the option –s or –fstab.
TARGET SOURCE FSTYPE OPTIONS
/ /dev/vda3 ext4 defaults
/boot /dev/vda1 ext4 defaults
swap /dev/vda2 swap defaults
5) Filter out file system
We can filter out the file system required or if more than one files system is needed then separate it by a comma. In the given example, we have filtered ext 4 file system.
TARGET SOURCE FSTYPE OPTIONS
/ /dev/vda3 ext4 rw, relatime, data=ordered
└─/boot /dev/vda1 ext4 rw, relatime, data=ordered
6) RAW OUTPUT
The findmnt output can be displayed in a random fashion using the option –r or –raw.

7) Search with source device
File system can be filtered out with respect to the source device using the option –S.
TARGET SOURCE FSTYPE OPTIONS
/ /dev/vda3 ext4 rw, relatime, data=ordered
8) Search by mount point
Searching the file system with respect to the mount directory can be done with option ‘-T’/’–target’.
TARGET SOURCE FSTYPE OPTIONS
/ /dev/vda3 ext4 rw, relatime, data=ordered
If you need any further assistance please contact our support department.
One Response to “Linux Commands to Check Mounted Files on the System”
How to check which mountpoint is exceed the threshould ?
Источник
Подключение файловых систем. Команда mount в Linux
В ОС Linux команда mount используется для подключения (монтирования) файловых систем и переносных накопителей (например, USB-флешек) к конкретным точкам монтирования в дереве директорий. Команда umount отключает (размонтирует) смонтированную файловую систему от дерева директорий. В данном руководстве мы рассмотрим основы подключения и отключения различных файловых систем при помощи команд mount и umount.
Вывод списка смонтированных файловых систем(ФС)
При выполнении без аргументов команда mount выведет все подключенные в данный момент ФС:
По умолчанию результат будет содержать все ФС, в том числе виртуальные, такие как cgroup, sysfs и т. д. Каждая строка содержит информацию об имени устройства, директории, в которой оно смонтировано, типе и опциях монтирования в следующей форме:
Для отображения только ФС определенного типа используется опция -t. Например, так можно отобразить только разделы ext4:

Монтирование файловой системы
Для подключения файловой системы к конкретному местоположению (точке монтирования) команда mount используется в следующей форме:
После подключения точка монтирования становится корневой директорией смонтированной ФС. Например, смонтировать жесткий диск /dev/sdb1 в директорию /mnt/media можно следующим образом:
Обычно при монтировании устройства с распространенной ФС, например, ext4 или xfs, команда mount автоматически определяет ее тип. Однако, некоторые ФС не распознаются. Их тип нужно указывать в явном виде. Для этого используется опция -t:
Чтобы указать дополнительные опции монтирования, используется флаг -o:
Можно указать несколько опций, разделенных запятыми (после запятых не должно быть пробелов). Ниже предоставлены основные опции команды
-V — вывести версию утилиты;
-h — вывести справку;
-v — подробный режим;
-a, —all — примонтировать все устройства, описанные в fstab;
-F, —fork — создавать отдельный экземпляр mount для каждого отдельного раздела;
-f, —fake — не выполнять никаких действий, а только посмотреть что собирается делать утилита;
-n, —no-mtab — не записывать данные о монтировании в /etc/mtab;
-l, —show-labels — добавить метку диска к точке монтирования;
-c — использовать только абсолютные пути;
-r, —read-only — монтировать раздел только для чтения;
-w, —rw — монтировать для чтения и записи;
-L, —label — монтировать раздел по метке;
-U, —uuid — монтировать раздел по UUID;
-T, —fstab — использовать альтернативный fstab;
-B, —bind — монтировать локальную папку;
-R, —rbind — перемонтировать локальную папку.
Полный список опций можно получить, выполнив команду man mount.
Примеры использования mount
Давайте рассмотрим несколько примеров использования утилиты. Как правило для монтирования нужно выполнить всего два действия
- Создать точку монтирования
- Примонтировать файловую систему
Монтирование USB-накопителя/жесткого диска
В большинстве современных дистрибутивов Linux, например, Ubuntu, USB-накопители автоматически монтируются при подключении, но иногда может потребоваться ручное монтирование устройства. Чтобы смонтировать USB-накопитель, выполните следующие действия.
Создайте точку монтирования
Если USB-накопитель использует устройство /dev/sdd1, его можно смонтировать в директорию /media/usb следующей командой:
Для поиска устройства и типа файловой системы можно воспользоваться любой из следующих команд:
Монтирование файлов ISO
Для монтирования файла ISO используется петлевое (loop) устройство — специальное виртуальное устройство, которое позволяет осуществлять доступ к файлу как к блочному устройству.
Сначала нужно создать точку монтирования в любой желаемой директории:
Смонтируйте файл ISO следующей командой:
Не забудьте заменить /path/to/image.iso на путь к вашему файлу ISO.
Монтирование NFS
Для монтирования системы NFS требуется установить клиент NFS. Установка клиента NFS в Ubuntu и Debian:
Установка клиента NFS в CentOS и Fedora:
Создайте директорию, которая будет точкой монтирования удаленной файловой системы:
Обычно требуется автоматическое монтирование удаленной директории NFS при загрузке. Для этого нужно изменить файл конфигурации /etc/fstab. Откройте его в любом текстовом редакторе, например:
Добавьте в файл следующую строку, заменив сервер:/директория на имя или IP-адрес сервера NFS и экспортируемую директорию:
Смонтируйте ресурс NFS следующей командой:
Размонтирование файловой системы
Для отключения смонтированной файловой системы используется команда umount, в качестве аргумента которой указывается директория, в которую она была смонтирована (точка монтирования) или имя устройства:
Если файловая система используется, umount не сможет ее отключить. В таких ситуациях можно воспользоваться командой fuser, чтобы выяснить, какие процессы осуществляют доступ к файловой системе:
Определив процессы, можно остановить их и размонтировать файловую систему. Также для отключения занятой файловой системы сразу после завершения ее использования можно воспользоваться опцией -l (—lazy, “ленивое” отключение):
Для принудительного размонтирования применяется опция -f (—force). Обычно она используется для отключения недостижимой системы NFS.
Во всех остальных случаях принудительное отключение нежелательно, так как может привести к повреждению данных в файловой системе.
Сохранение параметров mount после перезагрузки
Для того, что бы устройства при перезагрузки системы монтировались автоматически, необходимо прописать инструкции монтирования в файл /etc/fstab. Файл /etc/fstab содержит список записей в следующем формате:
Подключит устройство /dev/sdb1 (например жесткий диск) в директорию /home
После того как инструкция для mount прописаны в /etc/fstab, что бы проверить правильность написания дайте команду
Если команда отработает без ошибок, то все устройства прописанные в /etc/fstab будут подключены, а также изменения не потеряются после перезагрузки.
Заключение
Мы рассмотрели наиболее распространенные примеры подключения различных файловых систем к дереву директорий при помощи команды mount и их отключения командой umount. Для получения более подробной информации об опциях команд mount и umount можно обратиться к соответствующим man-страницам.
Если вы нашли ошибку, пожалуйста, выделите фрагмент текста и нажмите Ctrl+Enter.
Источник


