- Команда dig в Linux
- Синтаксис команды dig
- Опции и флаги dig
- Примеры использования dig
- 1. Получение информации о домене
- 2. Получение определённой записи
- 3. Использование определённого DNS-сервера
- 4. Получение домена по IP
- Выводы
- 3 Ways to check DNS records from Linux terminal
- What’s Domain Name System (DNS)?
- 1) How to verify a domain’s DNS records using the dig command
- 2) Checking DNS records of a domain using nslookup command
- 3) How to check DNS records of a domain using host command
- Closing Notes
- Check your DNS records with dig
Команда dig в Linux
Команда dig (domain information groper) — многофункциональный инструмент для опроса DNS-серверов. Она позволяет получить больше информации о конкретном домене, для того чтобы, например, узнать используемые им IP-адреса.
Этот инструмент может оказаться полезным сетевым администраторам для выявления неисправностей DNS. Аналоги чаще всего предлагают меньше функций и возможностей, чем может предоставить утилита командной строки dig. В этой статье мы рассмотрим что из себя представляет команда dig Linux, а также как ею пользоваться.
Синтаксис команды dig
Использовать команду dig несложно. Достаточно ввести название сервера, имя домена и передать команде подходящие опции:
$ dig @сервер доменное.имя тип записи флаги
- @cервер — IP-адрес или доменное имя DNS-сервера (если не указано, dig будет обращаться к DNS-серверу, используемому по умолчанию);
- доменное.имя — доменное имя интернет-ресурса, о котором необходимо получить информацию;
- тип записи — позволяет указать, для какого типа записи необходим вывод, например A, NS, MX или TXT;
- флаги — с помощью флагов утилите dig отдаются дополнительные команды; оговаривается, каким должен быть вывод команды (что в нём должно быть, а чего нет).
Опции и флаги dig
Во время работы утилиты dig могут использоваться следующие флаги:
- +[no]all — отображает или скрывает все установленные по умолчанию флаги отображения;
- +[no]answer — отображает только ответ на запрос;
- +[no]fail — эта опция указывает, должна ли утилита переключаться на следующий DNS сервер, если текущий не отвечает (по умолчанию стоит +fail);
- +short — сокращает вывод утилиты;
- +[no]cmd — отключает вывод заголовка и информации об использованных опциях утилиты;
- +[no]identify — используется вместе с флагом +short и отображает информацию об IP-адресе сервера;
- +[no]comments — удаляет все комментарии из вывода утилиты;
- +[no]trace — позволяет вывести список DNS серверов через которые прошёл запрос на получение информации о домене, по умолчанию отключено.
Вместе с dig можно применять следующие опции:
- -4 — позволяет использовать только IPv4;
- -6 — позволяет использовать только IPv6;
- -x — предназначена для получения домена по IP;
- -f — используется для чтения списка доменов из файла;
- -b IP-адрес — позволяет указать исходящий IP-адрес, с которого отправлен запрос к DNS-серверу, полезно, если к компьютеру подключено несколько сетевых карт;
- -r — предотвращает чтение настроек из файла
/.digrc;
Здесь указаны лишь некоторые флаги и опции. Если необходимо узнать больше, используйте команду:
Примеры использования dig
1. Получение информации о домене
Для того чтобы получить информацию о домене необходимо передать имя домена команде. Например, для google.com:
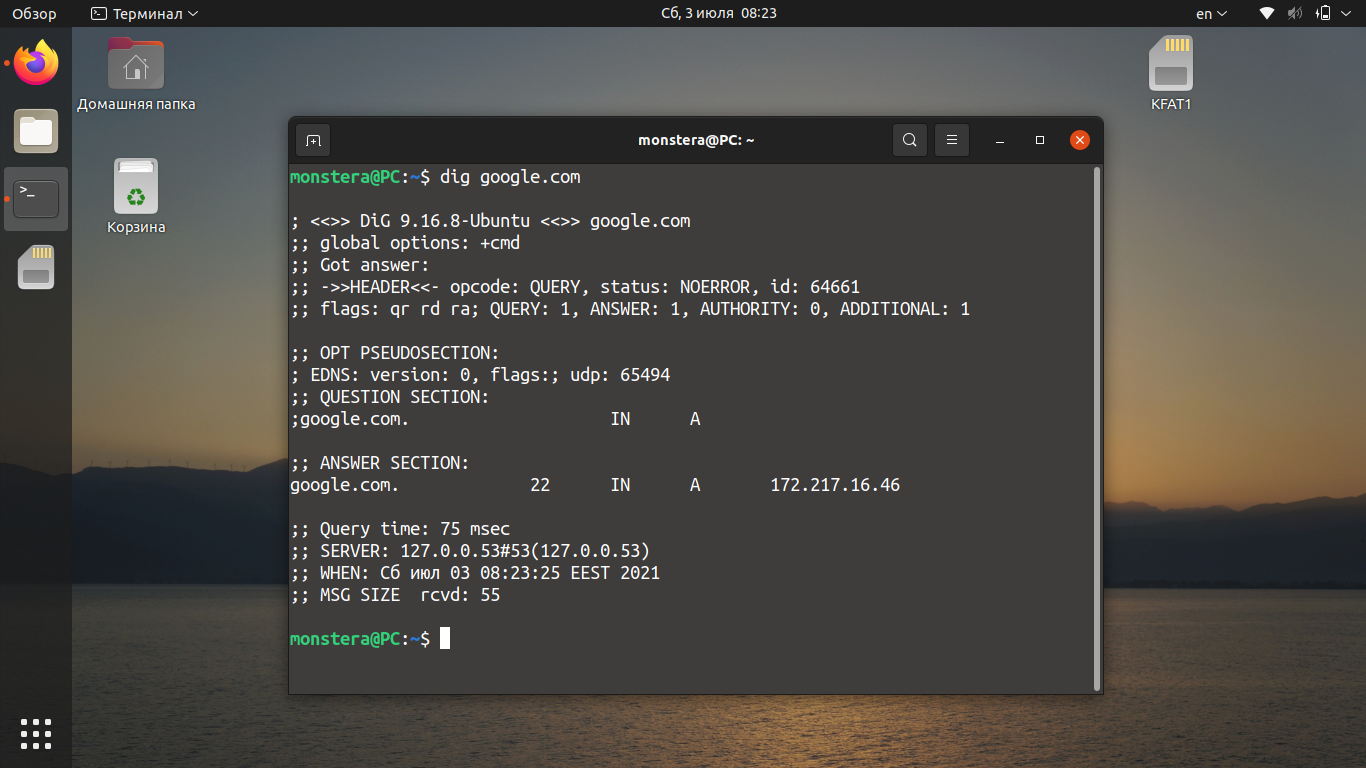
Рассмотрим каждую секцию вывода подробнее:
- HEADER — отображает информацию о версии утилиты, ID запроса, полученных ошибках и использованных флагах вывода. Выводится и другая важная информация о количестве запросов, обращений к DNS-серверу и т. д.;
- QUESTION SECTION — секция, которая отображает текущий запрос;
- ANSWER SECTION — секция, в которой отображается результат обработки созданного запроса (в данном случае это IP-адрес домена).
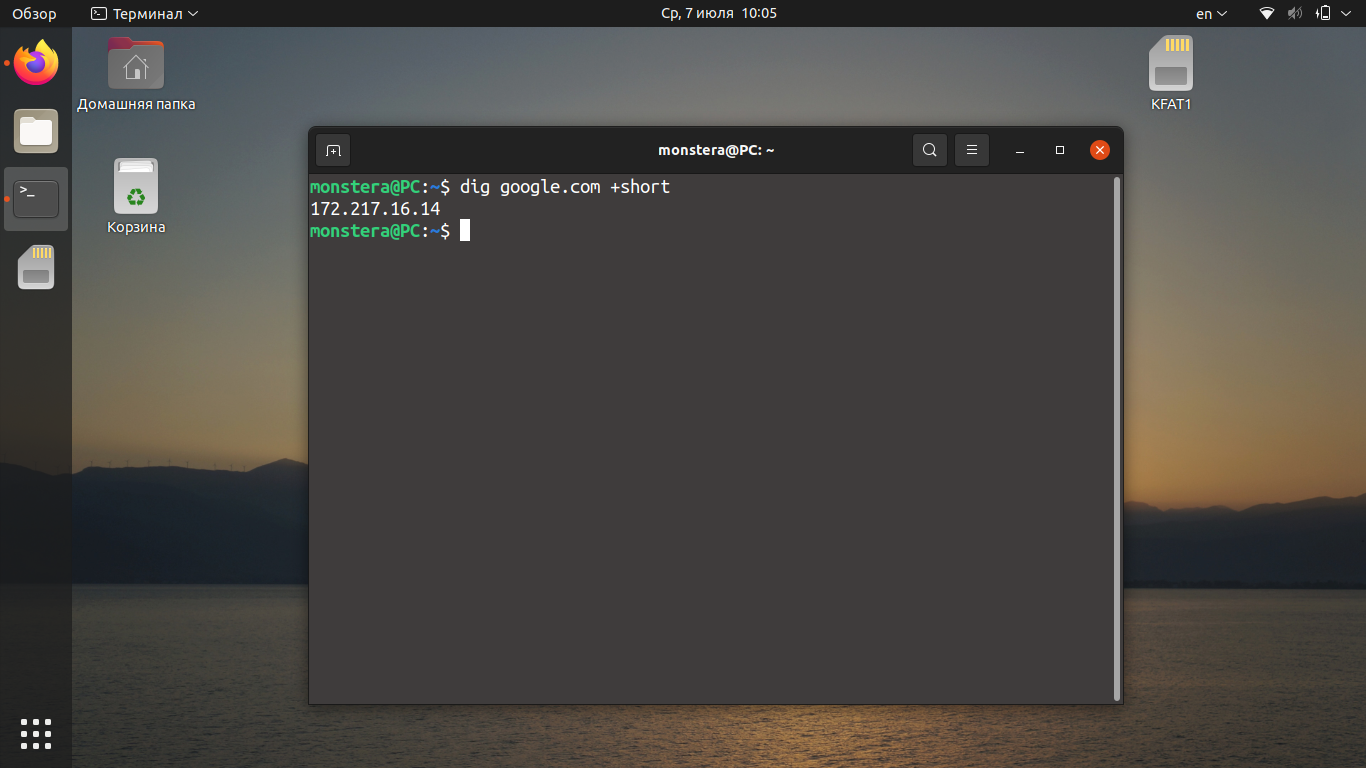
По умолчанию утилита выводит много лишней информации. Для получения только основных данных используйте запрос с флагом +short. Например:
dig google.com +short
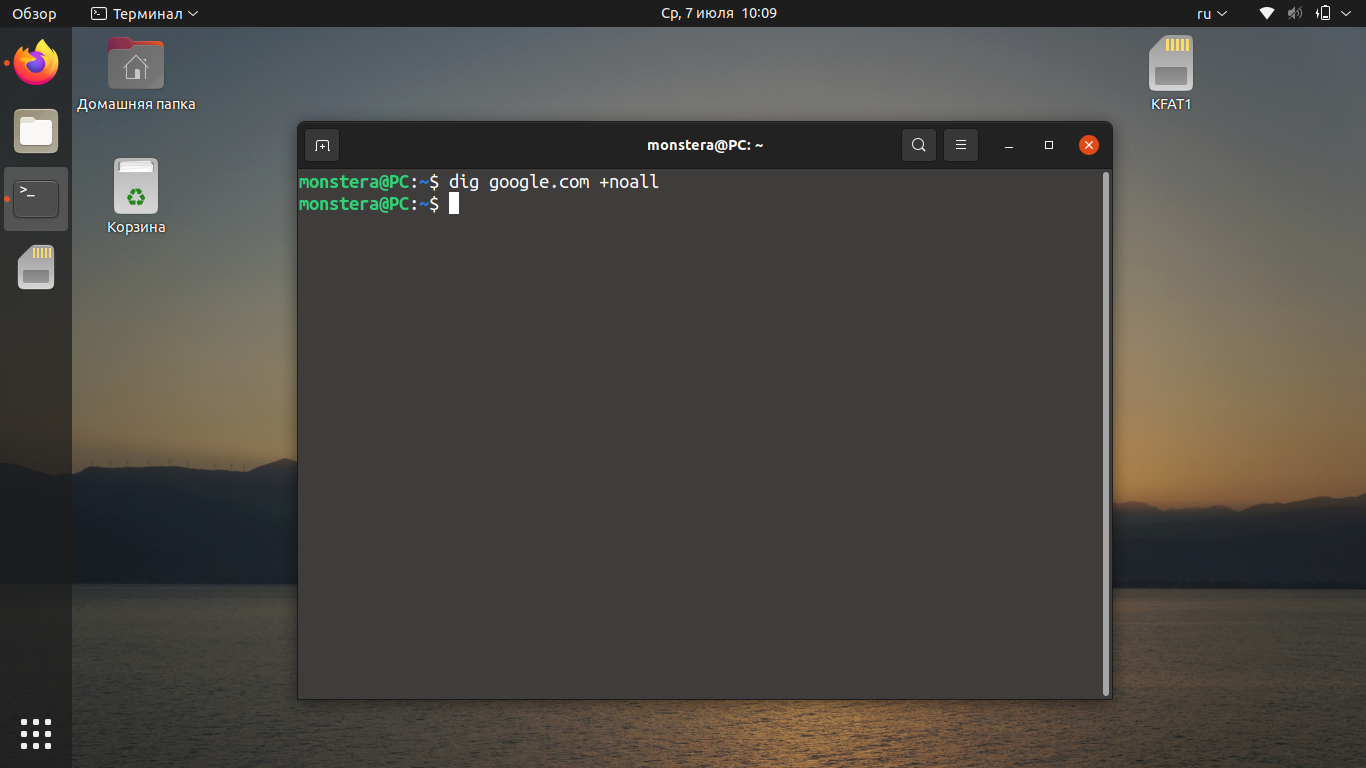
Если использовать команду dig вместе с +noall, вы ничего не увидите, поскольку этот флаг отключает вывод всех секций.
dig google.com +noall
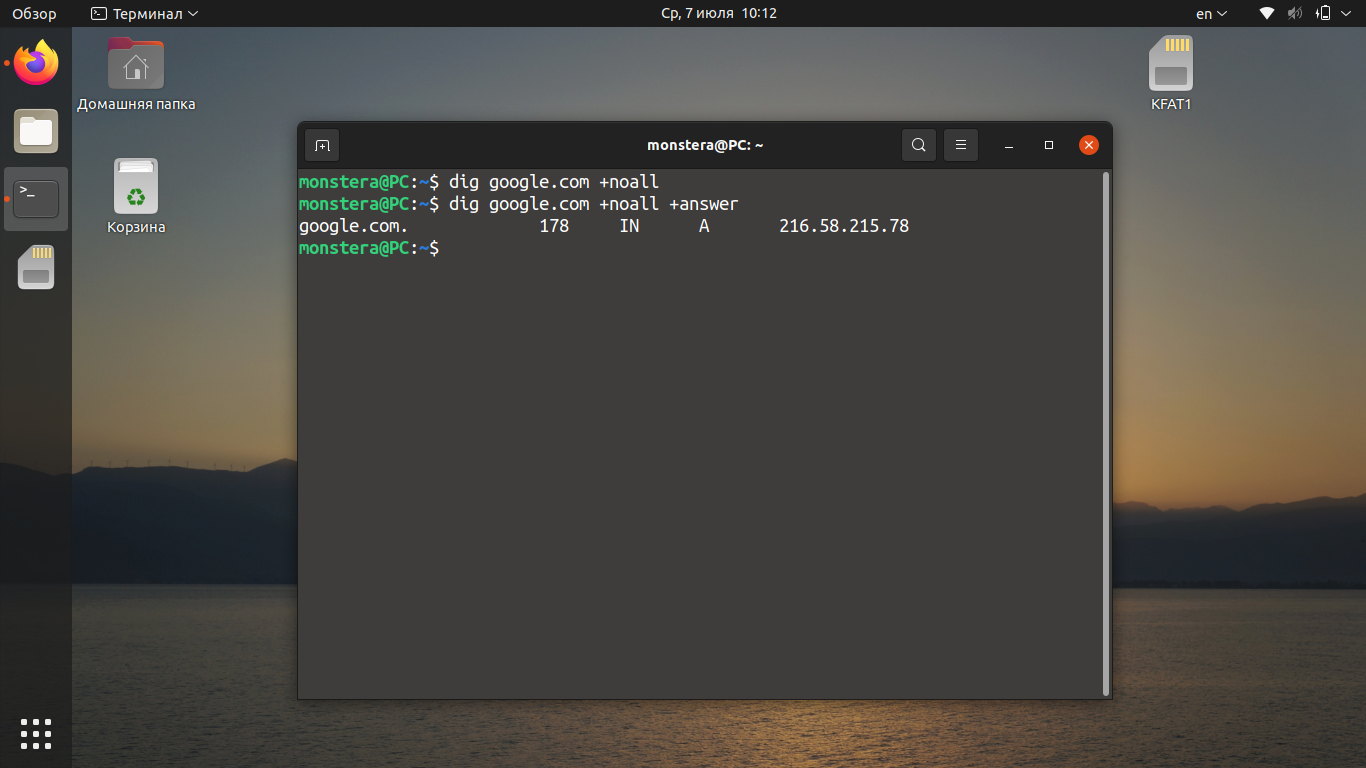
Если вместе с флагом +noall использовать флаг +answer, dig выведет только ту информацию, которая есть в секции ANSWER (IP-адрес, тип записи и пр.).
dig доменное.имя +noall +answer
Для создания комбинированного запроса можно использовать текстовый файл со списком сайтов, например, sites.txt. Чтобы создать текстовый документ с таким именем, введите следующую команду в терминале:
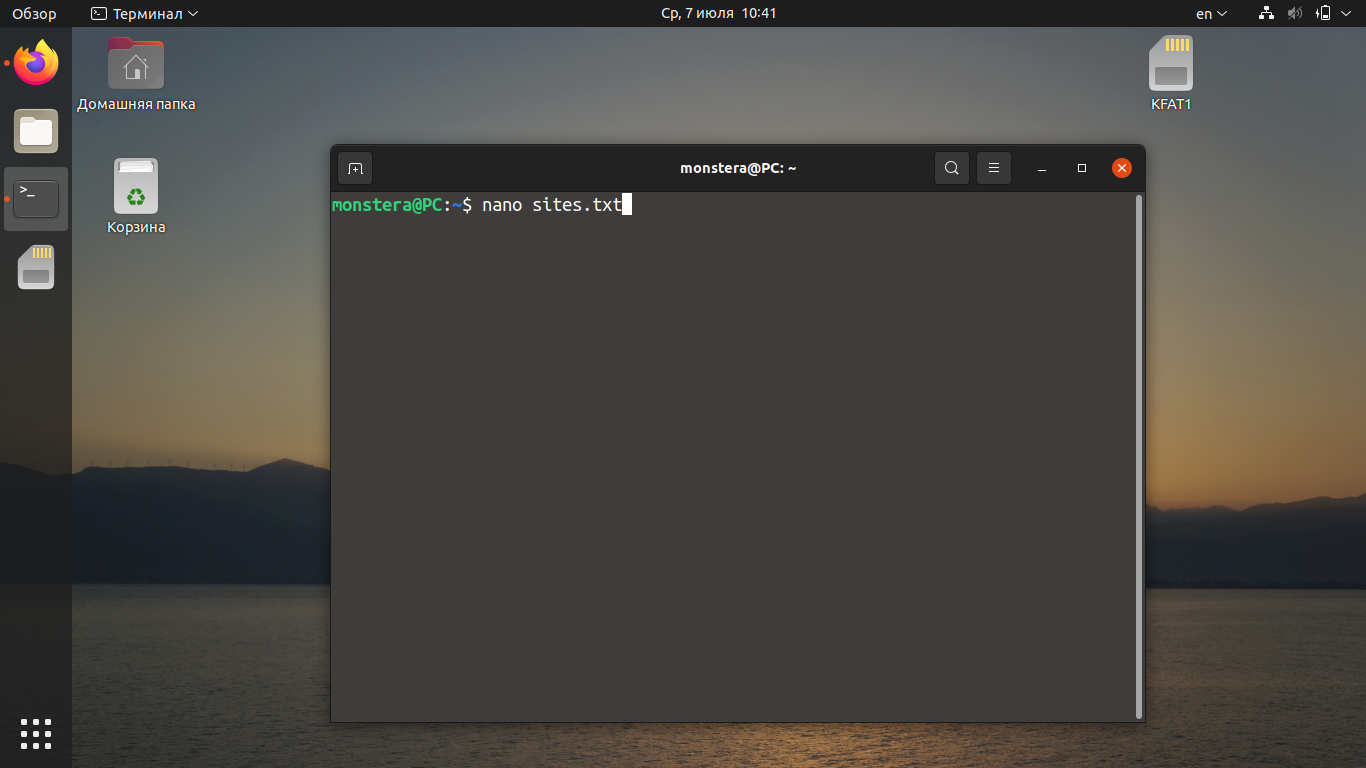
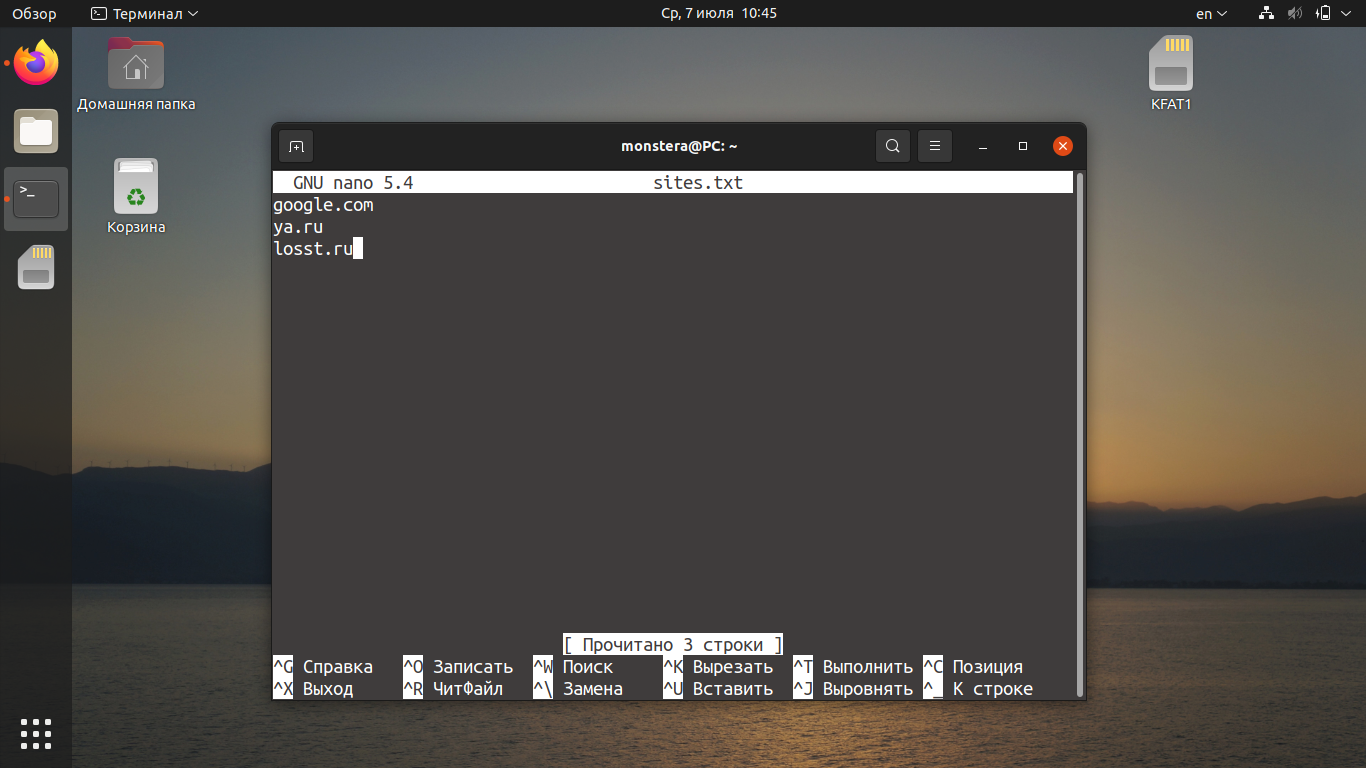
В файл необходимо добавить список доменов, для которых необходимо получить данные, например:
google.com
ya.ru
losst.ru
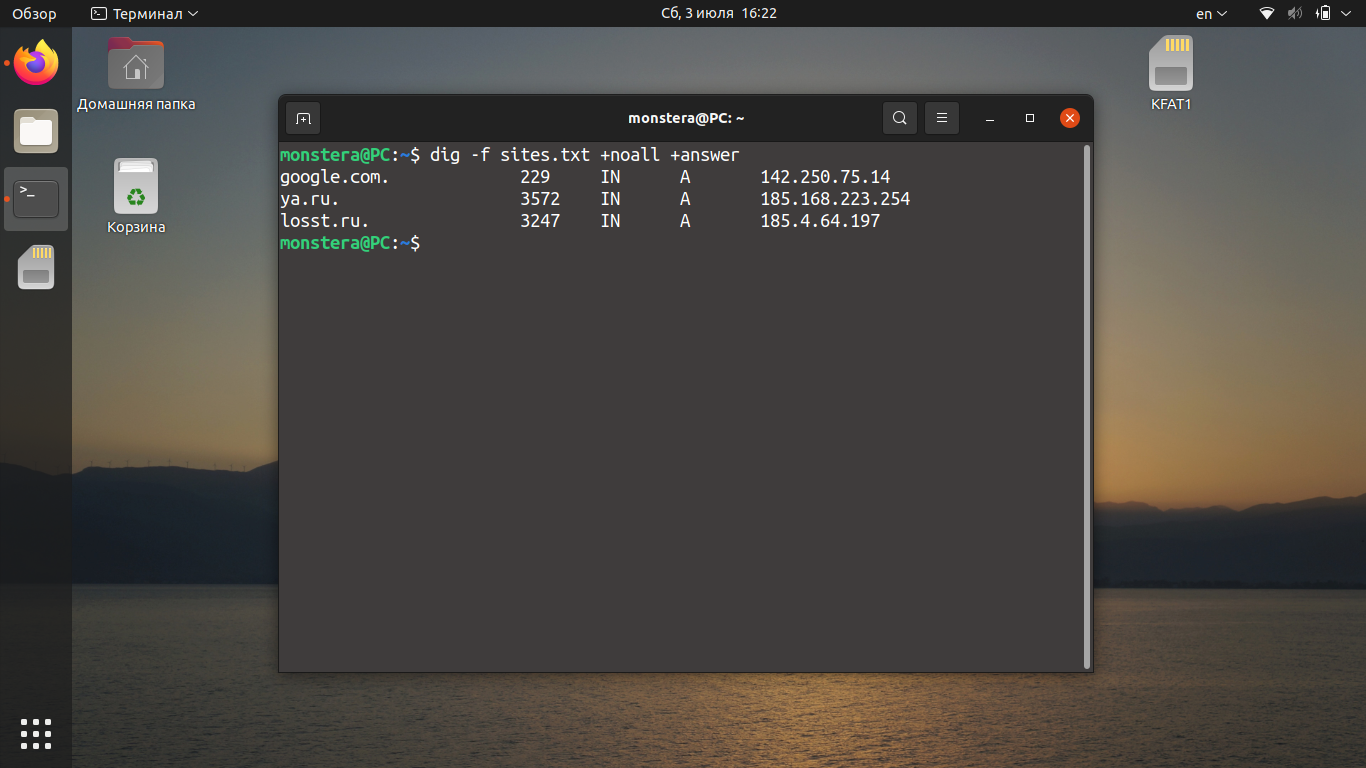
Для того чтобы получить информацию о перечисленных в файле sites.txt доменах, используйте команду:
dig -f sites.txt +noall +answer
2. Получение определённой записи
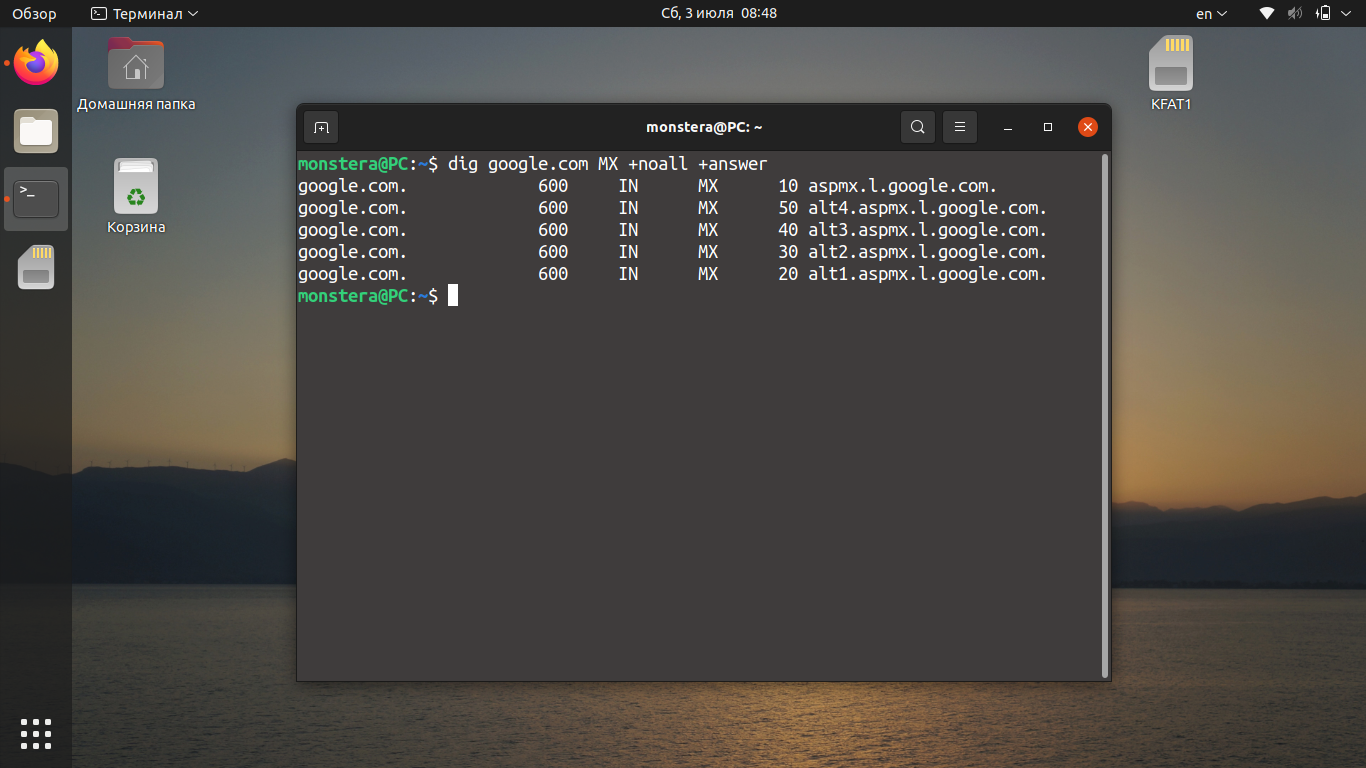
Согласно синтаксису команды dig linux, тип записи указывается после доменного имени. Для того чтобы получить MX-запись домена google.com, используйте команду:
dig google.com MX +noall +answer
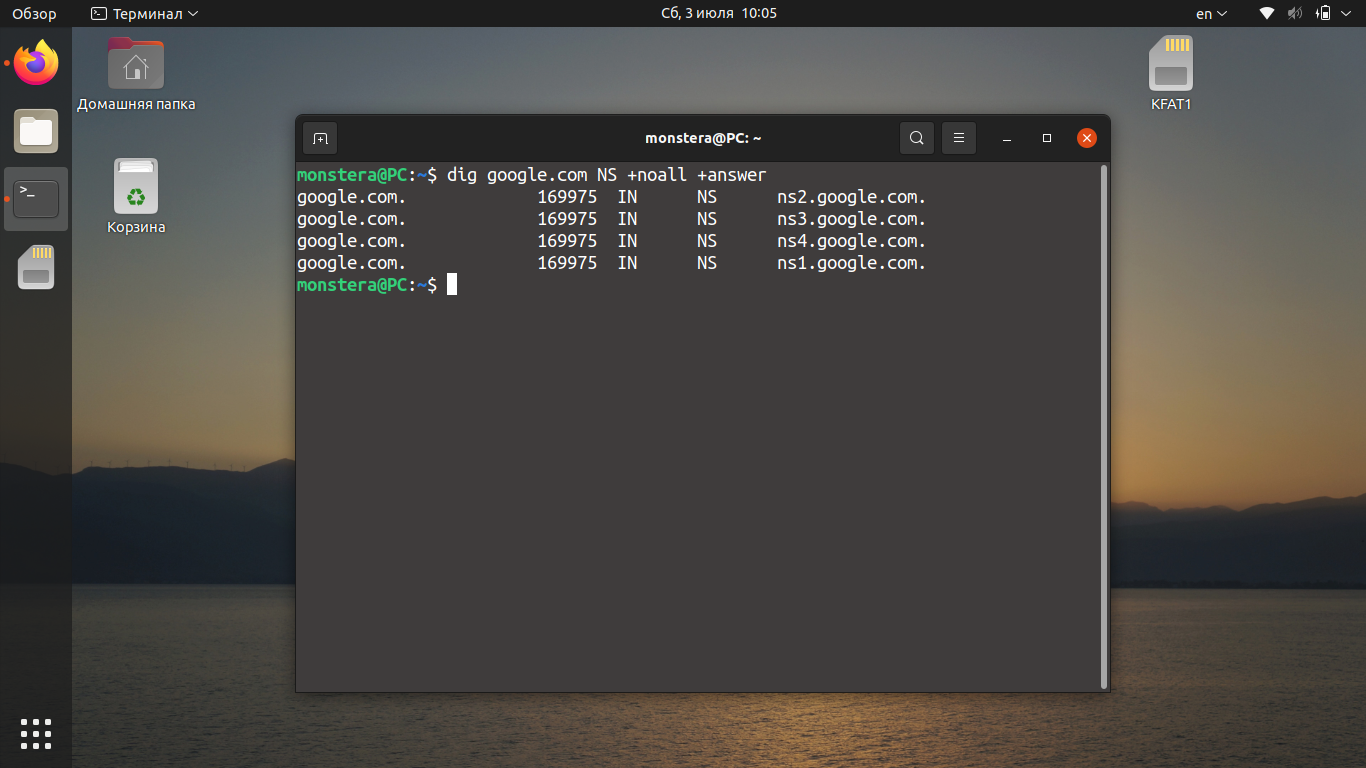
Чтобы получить NS-запись для домена, введите в терминале такую команду:
dig google.com NS +noall +answer
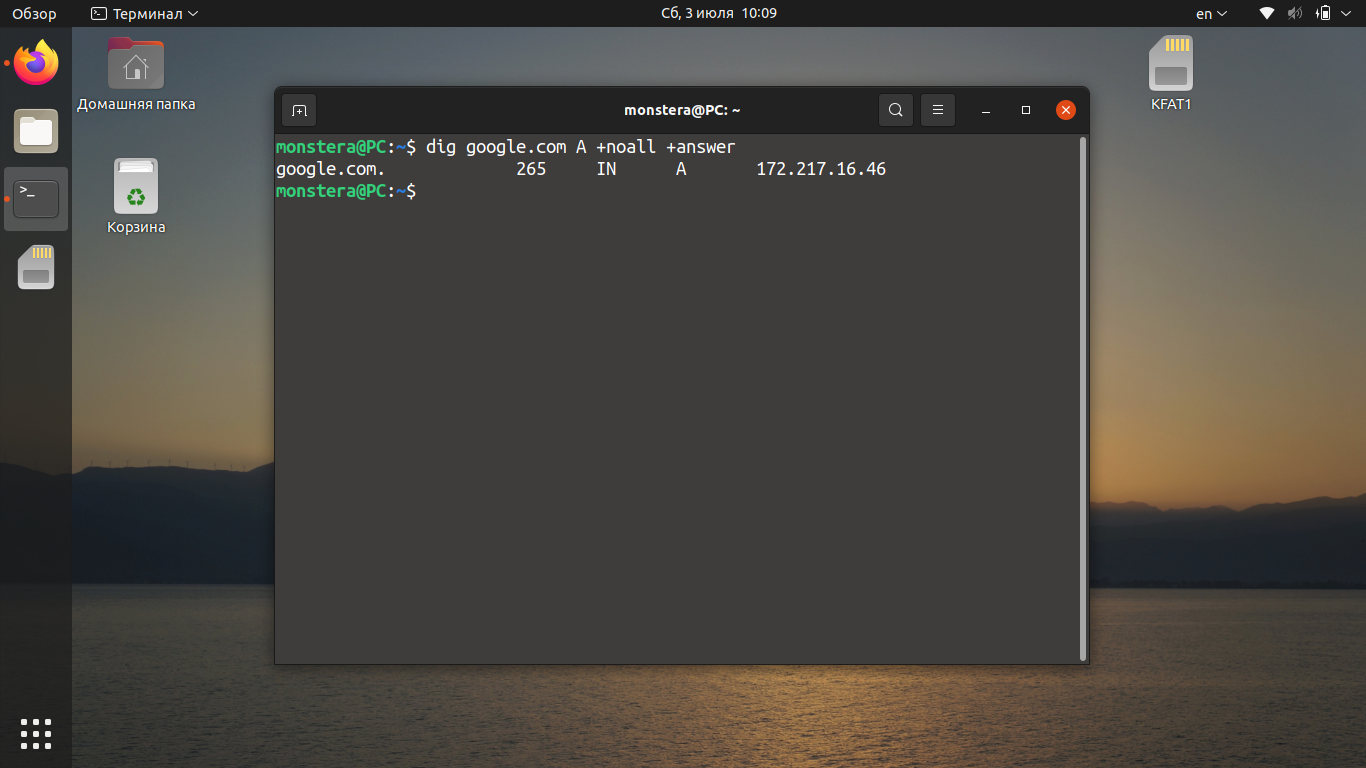
Запрос записи A происходит по умолчанию. Однако мы можем прописать этот запрос отдельно, чтобы обеспечить её вывод без дополнительной информации:
dig google.com A +noall +answer
Для вывода записи TXT аналогичным образом используйте команду вида:
dig google.com TXT +noall +answer

Для просмотра всех типов записей одновременно используйте запрос вида:
dig google.com ANY +noall +answer

3. Использование определённого DNS-сервера
Если DNS-сервер не был указан, как это было показано в предыдущих примерах, утилита dig linux будет по очереди пробовать все серверы из файла /etc/resolv.conf. Если же и там ничего нет, dig отправит запрос на localhost.
Указывать DNS-серверы можно в формате IPv4 или IPv6. Это не имеет значения и не повлияет на вывод dig. Отправим запрос на публичный DNS-сервер Google. Его IP-адрес: 8.8.8.8. В этом случае запрос в dig будет выглядеть следующим образом:
dig @8.8.8.8 google.com +noall +answer
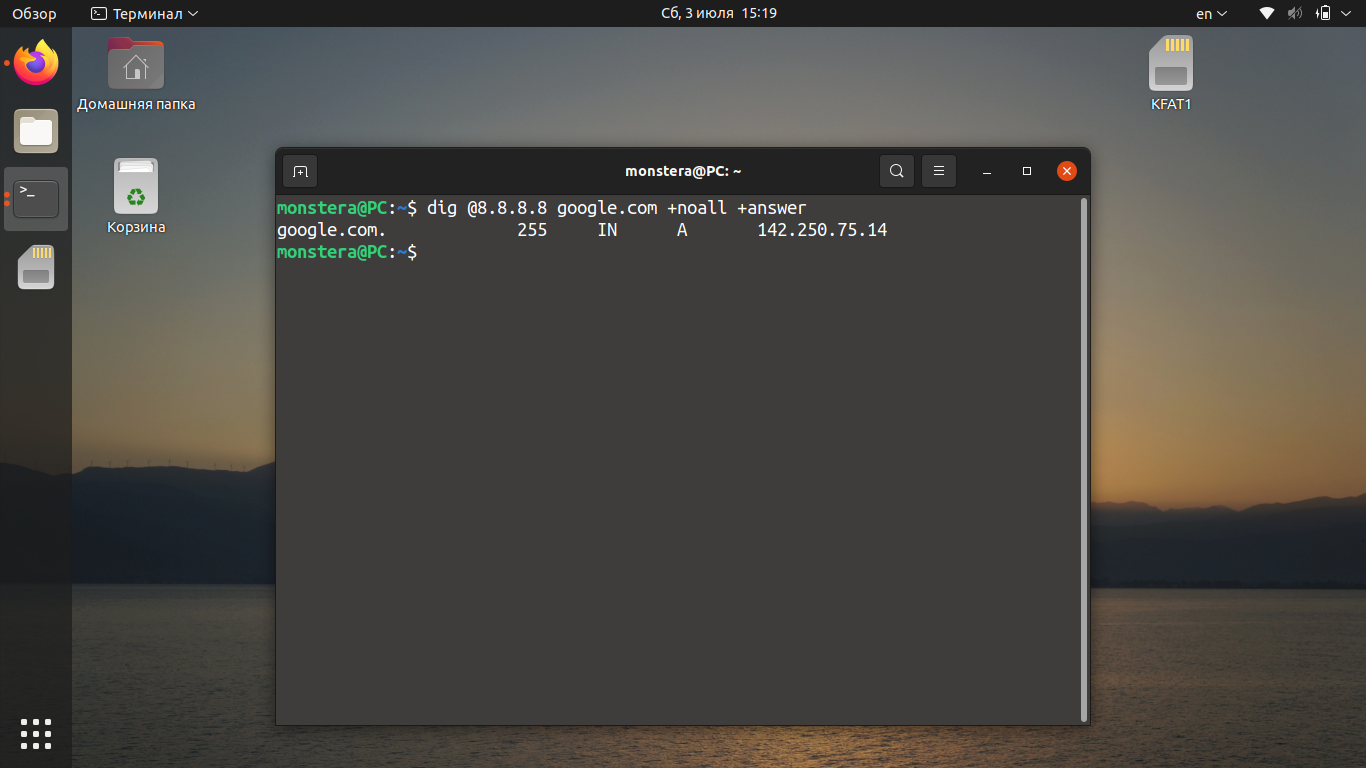
Как видно, для домена google.com используется IP-адрес: 142.250.75.14.
4. Получение домена по IP
Для того чтобы узнать имя домена с помощью команды dig по IP, используйте опцию -x. Например, для того, чтобы узнать домен, привязанный к IP адресу 87.250.250.242 выполните такую команду:
dig -x 87.250.250.242
Как видите, это IP адрес яндекса. Правда такой способ получения доменов работает не всегда. Если к IP привязано несколько доменов программа может вывести только первый. Для того чтобы сократить вывод и оставить только нужную нам информацию, можно ввести запрос следующим образом:
dig -x 87.250.250.242 +short
Команда отображает информацию о том, что это google.com. Как видите команда dig Linux способна на многое.
Выводы
В этой небольшой статье мы рассмотрели, как можно использовать dig для опроса DNS-серверов. Несмотря на то что команда достаточно простая, она позволяет получить много полезной информации. А чем вы пользуетесь для обращения к серверам DNS? Напишите об этом в комментариях ниже.
Источник
3 Ways to check DNS records from Linux terminal
There are many third party websites that can verify a domain’s DNS records.
It can also be done from Linux terminal. Why not try yourself, instead of using 3rd party sites?
NIX users spend more time on terminal and looking for a viable option from the terminal for any purpose.
This will be useful not only for me, but also for others looking for a way to do their daily activities at the terminal.
Domain DNS information can be verified from the Linux terminal using the following three commands.
- host Command
- dig Command
- nslookup Command
Use one of the below command to verify domain owner information from the Linux terminal.
What’s Domain Name System (DNS)?
DNS stands for Domain Name System or Domain Name Servers which translates Internet domain and host names to IP addresses and vice versa.
DNS is a hierarchical decentralized naming system for computers, services, or other resources connected to the Internet or a private network.
It’s basically a set of mapping files that tell the DNS server which IP address each domain or host is associated with, and how to handle requests sent to each domain.
It stores various information about a domain & host such as A, AAAA, CNAME, MX, PTR, NS, SOA, SRV, TXT, and NAPTR.
A Record : A record stands for Address record. The ‘A’ record specifies the IP address (IPv4) of a host. Whenever DNS server get a query to resolve domain-name, it will refer the A record to answer the IP address.
AAA Record : The ‘AAA’ record specifies the IP address (IPv6) of a host.
NS Record : NS Record stands for Name Server record. NS Records maps a domain name to a list of authoritative DNS servers.
MX Record : MX Record stands for mail exchange record. MX Records maps a domain name to a list of mail exchange servers.
PTR Record : PTR record stands for Reverse lookup record or Pointer record. A PTR record maps the IP address to a specific host.
CNAME Record : CNAME Record stands for Canonical Name. CNAME record is used to create aliases that point to other names such as WWW, FTP, MAIL & subdomains to a domain name. Example : a CNAME record can associate the subdomain www.2daygeek.com with 2daygeek.com
SOA Record : SOA record stands for Start of Authority records. SOA records contain information about a DNS zone such as Primary nameserver, Hostmaster E-mail address, zone file seriel number, zone transfer interval and zone expiry details.
TXT Record : TXT Record stands for text record. A TXT record is a type of DNS record that provides text information to sources outside your domain. The text can be either human-or machine-readable and can be used for a variety of purposes.
SPF Record : SPF Record stands for Sender Policy Framework. SPF is an extension to the SMTP mail protocol which is used for e-mail authentication.
SPF record is used to verify whether the message came from an authorized mail server or not. SPF is designed to detect SPAM & PHISHING mail sender’s IP address which was included in the e-mail headers.
DKIM Record : DKIM record stands for Domain Keys Identified Mail. DKIM is an email validation system designed to detect email spoofing by providing encryption authentication to receiving mail exchangers.
It will check whether the incoming mail domain is authorized by the domain’s administrators and that the email (including attachments) has not been modified during transport.
A digital signature included with the message can be validated by the recipient using the signer’s public key published in the DNS.
1) How to verify a domain’s DNS records using the dig command
dig command stands for “domain information groper”. It is a flexible tool for interrogating DNS name servers. It performs DNS lookup and displays the answers that are returned from the name server(s) that were queried.
Most DNS administrators use dig to troubleshoot DNS problems because of its flexibility, ease of use and clarity of output. Other lookup tools tend to have less functionality than dig.
2) Checking DNS records of a domain using nslookup command
nslookup command is a program to query Internet domain name servers. Nslookup has two modes interactive and non-interactive.
Interactive mode allows the user to query name servers for information about various hosts and domains or to print a list of hosts in a domain.
Non-interactive mode is used to print just the name and requested information for a host or domain. It’s a network administration tool which will help them to check and troubleshoot DNS related issues.
3) How to check DNS records of a domain using host command
host command is a simple utility for performing DNS lookup. It is normally used to convert names to IP addresses and vice versa. When no arguments or options are given, host prints a short summary of its command line arguments and options as shown below:
Closing Notes
We have shown you three commands to find DNS records of a domain in Linux.
If you have any questions or feedback, feel free to comment below.
Источник
Check your DNS records with dig
Have you ever wanted to query the Domain Name System (DNS) to discover what information it holds about your domain? Do you have some important changes to make to your DNS records and need a way to verify your changes? Here’s how to check your DNS records with a tool called dig.
DNS is an Internet service that translates domain names into IP addresses. Each time you use a domain name, DNS translates the name into the corresponding IP address. In order to do the translation DNS holds records for each domain. The most important are the A, CNAME, and MX records. The A record stores the host IP address. The CNAME is an alias record, which is used to give multiple aliases to a single computer. The MX record is the mail exchange record, which tells mail servers how to route email for this domain.
For example, the DNS record for www.newsforge.com looks like this:
This says that www.newsforge.com is an alias for newsforge.com and that newsforge.com has the IP address 66.35.250.177. If you want to read newsforge.com with your Web browser, your computer will query DNS for the IP address and then make a connection over the Internet to the Web server at that address and start downloading the page.
Dig
To query DNS and see the records it holds, you can use a software tool called dig that queries DNS servers directly. Dig comes standard with all the major Linux distributions, and is useful for verifying and troubleshooting DNS problems.
To check the record for your domain, run dig with your domain name as the parameter. For example:
This command causes dig to look up the A record for the domain name www.hungrypenguin.net. To do this dig starts by looking in your /etc/resolv.conf file and querying the DNS servers listed there. The response from the DNS server is what dig displays:
Lines beginning with ; are comments that are not part of the information received from the DNS server, but they do reflect some of the low-level protocol used in making the query.
The first two lines tell us the version of dig ( 9.2.4 ), the command line parameters ( www.hungrypenguin.net ) and the query options ( printcmd ). The printcmd option means that the command section (the name given to these first two line) is printed. You can turn it off by using the option +nocmd .
Next, dig shows the header of the response it received from the DNS server. Here it reports that an answer was obtained from the query response ( opcode: QUERY ) and that the response contains one answer, two pieces of information in the authority section, and a further two in the additional section. The flags are used to note certain things about the DNS server and its response; for example, the RA flag shows that recursive queries are available.
Next comes the question section, which simply tells us the query, which in this case is a query for the A record of www.hungrypenguin.net. The IN means this is an Internet lookup (in the Internet class).
The answer section tells us that www.hungrypenguin.net has the IP address 67.15.117.250.
Along with the IP address the DNS record contains some other useful information. The authority section contains a list of name servers that are responsible for the domain name — those that can always give an authoritative answer. Here we find two name servers listed, which are the name servers of the company with which the domain was registered. To save an extra lookup, dig lists the IP addresses of those name servers in the additional section.
Lastly there are some stats about the query. You can turn off these stats using the +nostats option.
By default dig is quite verbose. One way to cut down the output is to use the +short option:
which will drastically cut the output to:
However, for diagnosing DNS problems, you generally need fuller output. You can find a happy medium by putting the following lines into a file called .digrc in your home directory:
Querying different types of DNS records
By default dig looks for the A record of the domain specified, but you can specify other records for it to examine. The MX or Mail eXchange record tells mail servers how to route the email for the domain. You can examine your MX records using dig like this:
Note that we asked for hungrypenguin.net and not www.hungrypenguin.net, since normally when you send email to someone, you send it to the domain and not to one of the subdomains like www or ftp —
This e-mail address is being protected from spambots. You need JavaScript enabled to view it
, not
This e-mail address is being protected from spambots. You need JavaScript enabled to view it
.
The salient part of the response is:
This tells us that there is a mail server called mx0.123-reg.co.uk that handles the email for the hungrypenguin.net domain. There is also a backup server (mx1) that handles the mail if mx0 is unavailable for any reason. The 10 and the 20 are the preference values for the domain; lower values are preferred over the higher ones.
Querying other DNS servers
By default dig queries the DNS servers listed in your /etc/resolv.conf file, which are normally the DNS servers of your ISP. However, it can also be useful to query other DNS servers, and particularly the authoritative DNS server.
If you need to modify your DNS records, for example when migrating your Web site from one hosting provider to another, it is essential to ensure that your DNS records are updated correctly. The problem with DNS updates is that they can take up to 48 hours to propagate through the Internet. For a successful migration it is important to know that your DNS records are correct now rather than waiting 48 hours to discover that they contain an error!
Earlier we saw that ns.hosteurope.com is the authoritative (responsible) name server for the hungrypenguin.net domain. That information came from that domain’s ISP’s DNS server. To use a different name server, call dig with the first parameter of @nameserver . For example you can query ns.hosteurope.com directly like this:
This will return a response directly from the name server that has responsibility for the hungrypenguin domain. One way to verify the authority of the answer is to look for the aa flag in the header.
Real life
Recently I migrated the hungrypenguin.net Web site from one hosting provider to another. I changed the DNS settings using the control panel software of the domain registration company. I updated the A record to contain the IP address of the new Web server and the MX record to the names of the new mail servers. As expected, because of propogation time delays, my ISP still showed the old IP address after the change. To check the updates, I used dig to query the authoritative DNS server. There DNS showed the new IP address — but the MX records contained a mistake! I quickly returned to the control panel software and rectified the mistake. After a final check, I could sit back and relax, knowing that the next day DNS nodes around the world would have the correct information.
Gary Sims has a degree in Business Information Systems from a British university. He worked for 10 years as a software engineer and is now a freelance Linux consultant and writer.
Источник


