- Linux gnome display manager
- Contents
- Installation
- Starting
- Autostarting applications
- Configuration
- Log-in screen background image
- dconf configuration
- Log-in screen logo
- Changing the cursor theme
- Larger font for log-in screen
- Turning off the sound
- Configure power button behavior
- Enabling tap-to-click
- Disable/Enable Accessibility Menu
- Enable Night Light on GDM
- Keyboard layout
- Change the language
- Users and login
- Automatic login
- Passwordless login
- Passwordless shutdown for multiple sessions
- Enable root login in GDM
- Hide user from login list
- Setup default monitor settings
- Configure X server access permission
- Troubleshooting
- Wayland and the proprietary NVIDIA driver
- Failure on logout
- Rootless Xorg
- Use Xorg backend
- GDM does not start until input is provided
- Incomplete removal of gdm
- GDM auto-suspend (GNOME 3.28)
- GDM ignores Wayland and uses X.Org by default
- Black screen on AMD or Intel GPUs when an NVidia (e)GPU is present
- How to change the display manager on Linux
- Gnome Display Manager
- Ubuntu
- Debian
- Arch Linux
- Fedora
- OpenSUSE
- Stop or restart GDM
- Disable GDM
- LXDE Display Manager
- Ubuntu
- Debian
- Arch Linux
- Fedora
- OpenSUSE
- Stop or restart LXDM
- Disable LXDM
- Ubuntu
- Debian
- Arch Linux
- Fedora
- OpenSUSE
- Stop or restart SDDM
- Disable SDDM
- Leave a Reply Cancel reply
Linux gnome display manager
From GDM — GNOME Display Manager: «The GNOME Display Manager (GDM) is a program that manages graphical display servers and handles graphical user logins.»
Display managers provide X Window System and Wayland users with a graphical login prompt.
Contents
Installation
GDM can be installed with the gdm package, and it is installed as part of the gnome group.
If you would prefer to use legacy GDM which was used in GNOME 2 and has its own configuration utility, install the gdm-old AUR package. Note that the rest of this article discusses current GDM, not legacy GDM, unless indicated otherwise.
You might also wish to install the following:
Starting
To start GDM at boot time enable gdm.service .
Autostarting applications
 The factual accuracy of this article or section is disputed.
One might want to autostart certain commands, such as xrandr for instance, on login. This can be achieved by adding a command or script to a location that is sourced by the display manager. See Display manager#Autostarting for a list of supported locations.
Configuration
Log-in screen background image
The factual accuracy of this article or section is disputed.
Firstly, you need to extract the existing GNOME Shell theme to a folder in your home directory. You can do this using the following script:
Navigate to the created directory. You should find that the theme files have been extracted to it. Now copy your preferred background image to this directory.
Next, you need to create a file in the directory with the following content:
Replace filename with the filename of your background image or remove the line to use a hex color value instead.
Now, open the gnome-shell.css file in the directory and change the #lockDialogGroup definition as follows:
Set background-size to the resolution that GDM uses, this might not necessarily be the resolution of the image. For a list of display resolutions see Display resolution. Again, set filename to be the name of the background image.
If you only want to change the background color, adjust the #lockDialogGroup definition as follows:
where [COLOR] is the new hex-encoded background color.
Finally, compile the theme using the following command:
Then copy the resulting gnome-shell-theme.gresource file to the /usr/share/gnome-shell directory.
Then restart gdm.service (note that simply logging out is not enough) and you should find that it is using your preferred background image.
For more information, please see the following forum thread. A shell script to automate the above steps is available on DimaZirix’s github repository.
dconf configuration
Some GDM settings are stored in a dconf database. They can be configured either by adding keyfiles to the /etc/dconf/db/gdm.d directory and then recompiling the GDM database by running dconf update as root or by logging into the GDM user on the system and changing the setting directly using the gsettings command line tool. Note that for the former approach, a GDM profile file is required—this must be created manually as it is no longer shipped upstream, see below:
For the latter approach, you can log into the GDM user with the command below:
Log-in screen logo
Either create the following keyfile
and then recompile the GDM database or alternatively log in to the GDM user and execute the following:
Changing the cursor theme
GDM disregards GNOME cursor theme settings and it also ignores the cursor theme set according to the XDG specification. To change the cursor theme used in GDM, either create the following keyfile
and then recompile the GDM database or alternatively log in to the GDM user and execute the following:
Larger font for log-in screen
Click on the accessibility icon at the top right of the screen (a white circle with the silhouette of a person in the centre) and check the Large Text option.
To set a specific scaling factor, you can create the following keyfile:
and then recompile the GDM database or alternatively log in to the GDM user and execute the following:
Turning off the sound
This tweak disables the audible feedback heard when the system volume is adjusted (via keyboard) on the login screen.
Either create the following keyfile:
and then recompile the GDM database or alternatively log in to the GDM user and execute the following:
Configure power button behavior
Either create the following keyfile:
and then recompile the GDM database or alternatively log in to the GDM user and execute the following:
where action can be one of nothing , suspend or hibernate .
Enabling tap-to-click
Tap-to-click is disabled in GDM (and GNOME) by default, but you can easily enable it with a dconf setting.
To enable tap-to-click, either create the following keyfile:
and then recompile the GDM database or alternatively log in to the GDM user and execute the following:
Disable/Enable Accessibility Menu
To disable or enable the Accessibility Menu, either create the following keyfile:
and then recompile the GDM database or alternatively log in to the GDM user and execute the following:
The menu is disabled when the key is false , enabled when it is true .
Enable Night Light on GDM
To enable Night Light on GDM, run
Keyboard layout
The system keyboard layout will be applied to GDM. See Keyboard configuration in Xorg#Using X configuration files.
When using Wayland, you may need to specify the X keyboard layout manually with localectl:
If a system has multiple users, it is possible to specify a keyboard layout for GDM to use which is different from the system keyboard layout. Firstly, ensure the package gnome-control-center is installed. Then start gnome-control-center and navigate to Region & Language > Input Sources. In the header bar, hit the Login Screen toggle button and then choose a keyboard layout from the list. Note that the Login Screen button will not be visible in the header bar unless multiple users are present on the system [5].
Users of GDM 2.x (legacy GDM) may need to edit
/.dmrc as shown below:
Change the language
The system language will be applied to GDM. If a system has multiple users, it is possible to set a language for GDM different to the system language. In this case, firstly ensure that gnome-control-center is installed. Then, start gnome-control-center and choose Region & Language. In the header bar, check the Login Screen toggle button. Finally, click on Language and choose your language from the list. You will be prompted for your root password. Note that the Login Screen button will not be visible in the header bar unless multiple users are present on the system [6].
Users and login
Automatic login
To enable automatic login with GDM, add the following to /etc/gdm/custom.conf (replace username with your own):
or for an automatic login with a delay:
You can set the session used for automatic login (replace gnome-xorg with desired session):
Passwordless login
If you want to bypass the password prompt in GDM then simply add the following line on the first line of /etc/pam.d/gdm-password :
Then, add the group nopasswdlogin to your system. See User group for group descriptions and group management commands.
Now, add your user to the nopasswdlogin group and you will only have to click on your username to login.
Passwordless shutdown for multiple sessions
GDM uses polkit and logind to gain permissions for shutdown. You can shutdown the system when multiple users are logged in by setting:
You can find all available logind options (e.g. reboot-multiple-sessions) in org.freedesktop.login1(5) .
Enable root login in GDM
It is not advised to login as root, but if necessary you can edit /etc/pam.d/gdm-password and add the following line before the line auth required pam_deny.so :
The file should look something like this:
You should be able to login as root after restarting GDM.
Hide user from login list
The users for the gdm user list are gathered by AccountsService. It will automatically hide system users (UID /var/lib/AccountsService/users/ to contain at least:
Setup default monitor settings
Some desktop environments store display settings in
/.config/monitors.xml . xrandr commands are then generated on the base of the file content. GDM has a similar file stored in /var/lib/gdm/.config/monitors.xml .
If you have your monitors setup as you like (resolution, refresh rate, orientation, scaling, primary and so on) in
/.config/monitors.xml and want GDM to honor those settings:
The relevant parts of monitors.xml for screen rotation and scaling are:
Changes will take effect on logout. This is necessary because GDM does not respect xorg.conf .
Configure X server access permission
You can use the xhost command to configure X server access permissions.
For instance, to grant GDM the right to access the X server, use the following command:
Troubleshooting
Wayland and the proprietary NVIDIA driver
GDM does not work well in Wayland mode with the proprietary NVIDIA driver. When using this driver, GDM will use Xorg instead.[7]
To force-enable Wayland, disable the udev rule responsible for disabling Wayland in GDM:
If, instead of GDM, a black screen appears, try disabling integrated graphics in your computer’s BIOS settings.
Failure on logout
If GDM starts up properly on boot, but fails after repeated attempts on logout, try adding this line to the daemon section of /etc/gdm/custom.conf :
Rootless Xorg
Use Xorg backend
The Wayland backend is used by default, and the Xorg backend is used only if the Wayland backend cannot be started. You may wish to use the Xorg backend instead if, for example:
To use the Xorg backend by default, uncomment the following line in /etc/gdm/custom.conf :
GDM does not start until input is provided
If, after booting, the screen stays black and GDM does not start until the mouse is moved or something is typed on the keyboard, it may be due to a lack of entropy required for random number generation. To confirm, check that the following line appears inside systemd-random-seed’s log (which can be read by running journalctl —unit systemd-random-seed with root privileges):
To fix this, you can pass the random.trust_cpu=on kernel parameter if your CPU supports the RDRAND instruction, or you can use haveged which also provides entropy, albeit it is of allegedly low quality. See Debian’s article on the topic for other solutions.
Incomplete removal of gdm
After removing gdm , systemd may report the following:
To remove this warning, login as root and delete the primary user gdm and then delete the group gdm :
Verify that gdm is successfully removed via pwck and grpck with root privileges. To round it off, you may want to double-check no unowned files for gdm remain.
GDM auto-suspend (GNOME 3.28)
GDM uses a separate dconf database to control power management. To apply your user’s power settings, copy them to GDM’s dconf database:
where username is your username.
To only disable auto-suspend on AC, run:
(To also disable auto-suspend on battery, run the command with battery instead of ac .)
Restart GDM to activate your changes.
GDM ignores Wayland and uses X.Org by default
Wayland requires Kernel Mode Setting (KMS) running in order to work, and on some machines the GDM process start earlier than KMS, resulting in GDM unable to see Wayland and working only with X.Org. This might result in messages like the following showing up in your log:
Alternatively, the same issue may lead to GDM not appearing or monitor only displaying the TTY output.
You can solve this problem by starting KMS earlier.
Also, if you use a NVIDIA driver, the Wayland session might be blocked by a udev rule (see the notes under GNOME#Wayland sessions). This might result in messages like the following:
In this case, you might see lines like this in /usr/lib/udev/rules.d/61-gdm.rules :
To let GDM use Wayland, copy 61-gdm.rules from /usr/lib/udev/rules.d/ to /etc/udev/rules.d/ (where the latter file will override the former) and comment out the related line:
Black screen on AMD or Intel GPUs when an NVidia (e)GPU is present
At first, without an NVidia device, GDM starts and works normally on Wayland, but stops working once an NVidia eGPU is plugged in (or the nvidia module is loaded for other reasons). A typical symptom of the problem is a black screen with a blinking cursor upon logouts and GDM restarts and the following message in GDM’s logs (accessed by running journalctl -u gdm -b as root):
The solution is the same as above: Prevent /usr/lib/gdm-disable-wayland from running upon nvidia module loading.
Источник
How to change the display manager on Linux
Oct 17, 2018
Comment
Have you ever wanted to change the login screen on your Linux PC but were unsure about how to do it? It’s not as hard as it sounds! As it turns out, it is straightforward to swap between different login windows on Linux, with a few terminal commands. In this tutorial, we’ll go over how to change the display manager on Linux. We’ll cover GDM (Gnome Display Manager,) LXDM (LXDE Display Manager,) and SDDM.
Gnome Display Manager
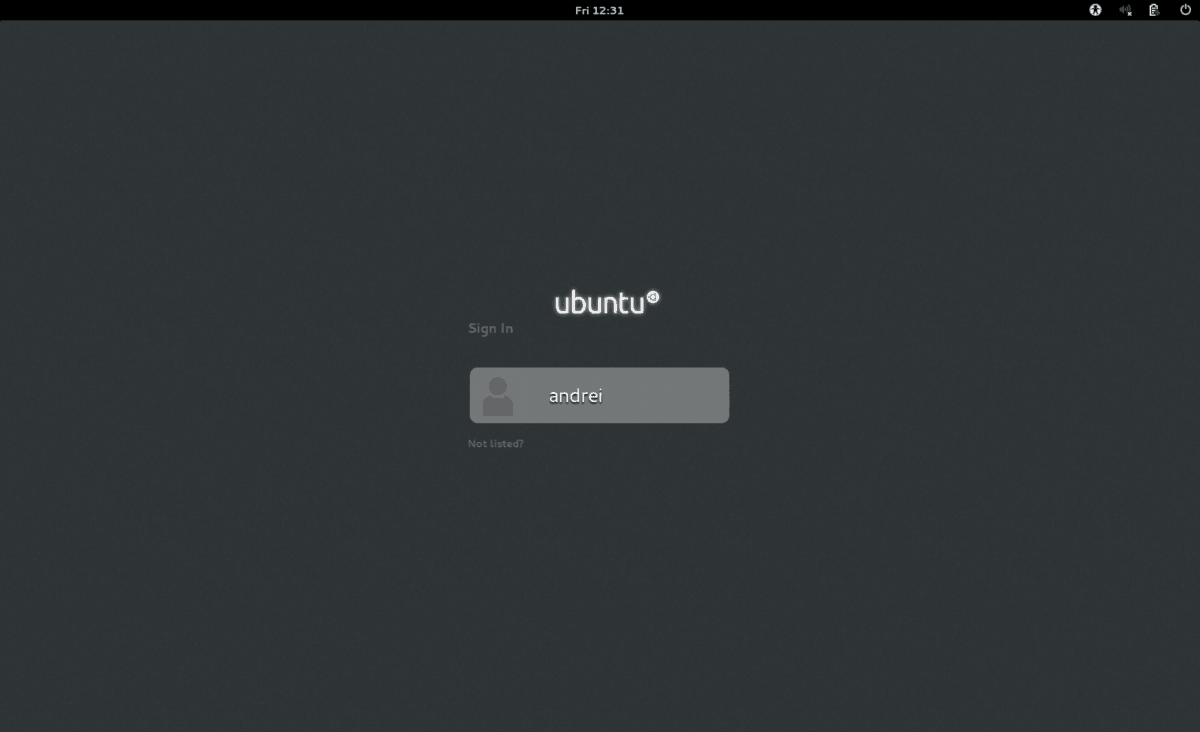
GDM aka Gnome Display Manager is the DM of choice for many Linux distributions that choose to offer up Gnome Shell as their primary desktop environment. It’s modern, easy on the eyes and fast.
To set up GDM as your default display manager on Linux, you must first install it. Open up a terminal and use the commands that match your Linux OS to get it going.
Ubuntu
Debian
Arch Linux
Fedora
OpenSUSE
Gnome Display Manager is done installing. The next step is to enable it on your Linux PC with the systemd init system. In a terminal window, use the systemctl enable command. Be sure to add the “f” switch, as it will automatically disable your old display manager.
With GDM set as default, reboot your system. When it comes back online, Gnome Display Manager will be the new login manager you see.
Stop or restart GDM
For whatever reason, you may need to stop or restart the GDM login manager temporarily.
To restart GDM, do:
To temporarily stop GDM (till next boot,) use the stop command.
Disable GDM
Need to turn off GDM for an extended period? Run the disable command.
With GDM turned off, log out of the desktop and restart the computer. After restarting, you’ll notice the Gnome Display Manager is now a terminal prompt.
LXDE Display Manager
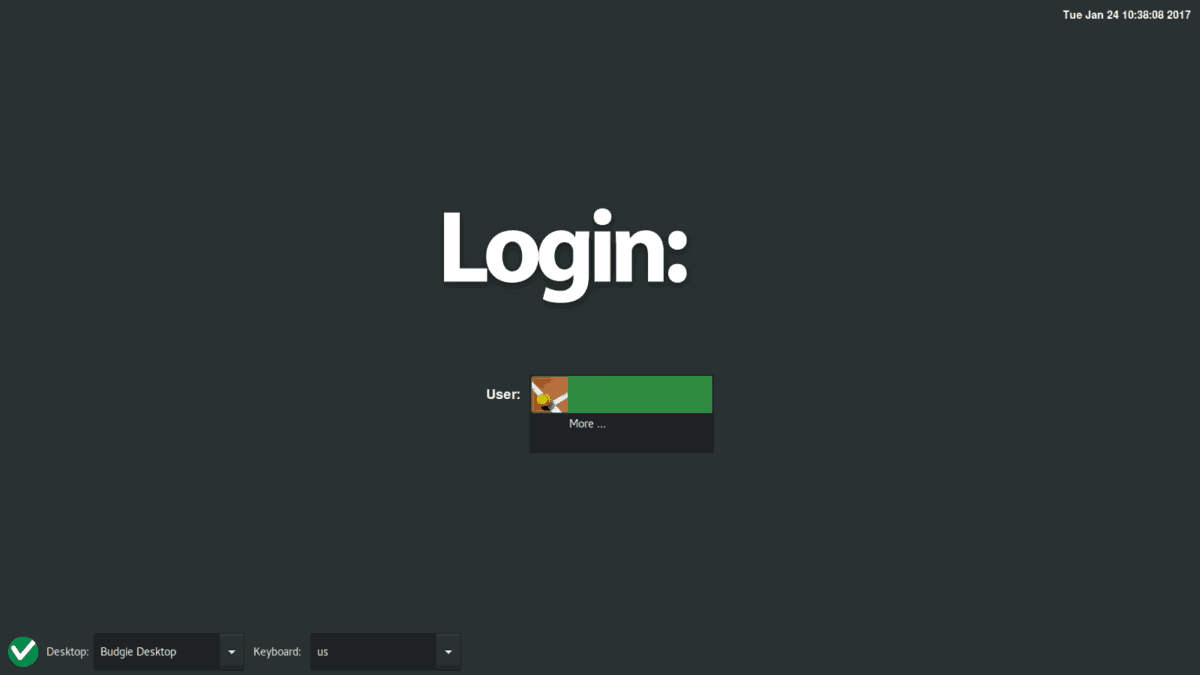
LXDM is the default desktop login manager for LXDE and many other lesser-known desktop environments on Linux. It is very light, and for this reason, lots of people choose to use it.
Using LXDM on your system doesn’t require LXDE or any other LXDE-related package. The display manager is entirely independent of the rest of the desktop. Install it by opening up a terminal and entering one of the commands below.
Ubuntu
Debian
Arch Linux
Fedora
OpenSUSE
LXDM, like all login managers, is set up on the system via systemd. Open up a terminal and enable it (with the “f” switch) to set it as your default display manager.
Reboot your Linux PC. Upon restarting, LXDM will be the new display manager on the system.
Stop or restart LXDM
Stopping LXDM is done with the stop command. Running it will allow you to stop it from running, till you reboot again temporarily.
It is also possible to reboot LXDM with the restart command.
Disable LXDM
To disable the LXDE Display Manager, run the disable command in a terminal window. Keep in mind that you must re-run the enable command to start it back up!
With LXDM disabled, reboot your Linux computer. When it loads back up, LXDM will be replaced with a terminal window.
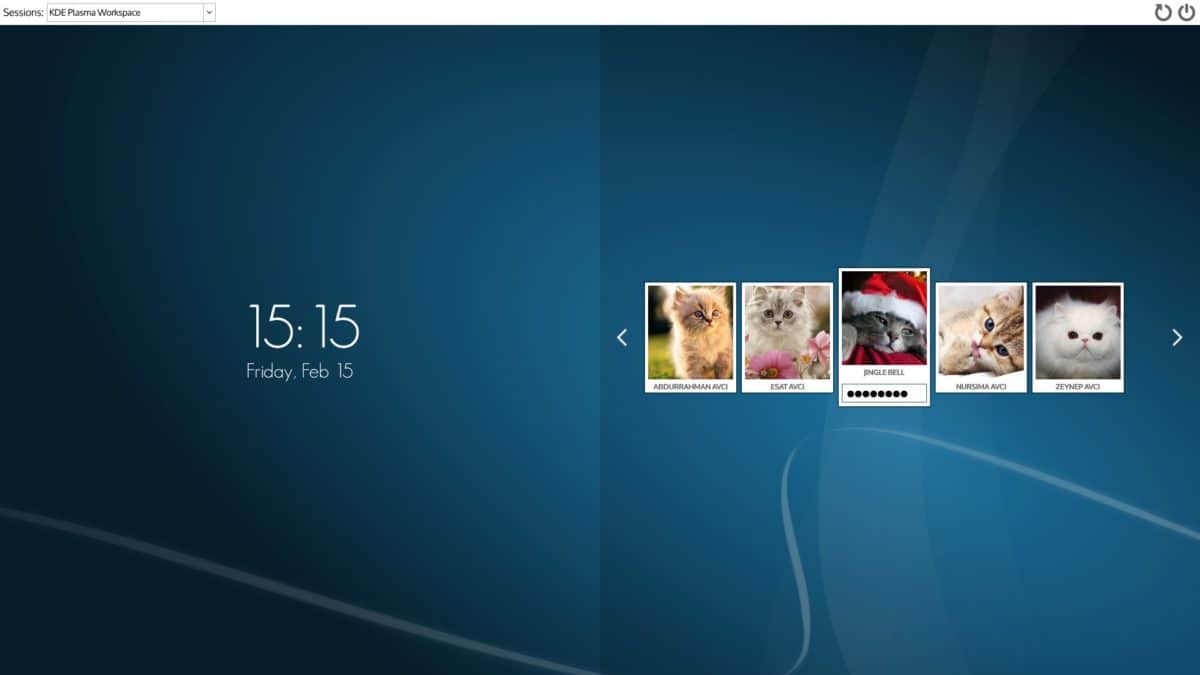
Though not as well known, SDDM is quickly making a name for itself as the display manager of choice for Qt desktop environments. Currently, both KDE Plasma 5 and LXQt make heavy use of it, due to it’s highly customizable and configurable nature. However, anyone can use SDDM, even without a Qt-based desktop like KDE or LXQt, as it handles pretty much any desktop thrown at it.
Installing SDDM requires just the “sddm” package. Install it with one of the following terminal commands below.
Ubuntu
Debian
Arch Linux
Fedora
OpenSUSE
To use SDDM, you must first enable it within the systemd login manager, with the “f” switch.
Finish up the SDDM setup process by rebooting your Linux machine. When it comes back online, SDDM will greet you as the default login screen.
Stop or restart SDDM
Thanks to the power of systemd, users can reboot or stop the SDDM login manager at any time, right from the terminal. To temporarily stop SDDM from running, enter the following command into a terminal.
Alternatively, reboot SDDM and restart its process on your Linux PC with the restart command.
Disable SDDM
At some point, you may need to disable SDDM on your Linux PC. Like GDM and LXDM, this display manager can be turned off (upon reboot) with the disable command:
Leave a Reply Cancel reply
This site uses Akismet to reduce spam. Learn how your comment data is processed.
Источник


