- Linux Installation, Step by Step
- Ubuntu Linux
- Debian GNU/Linux
- Mandriva Linux
- Red Hat Linux
- How to Install Linux on PC – Ubuntu Step by Step Guide
- Linux Installation Overview
- How to Install Linux on PC – Steps With Screenshots
- Conclusion – You successfully Installed Linux on PC
- Using the installer step by step
- Language selection
- Refresh
- Keyboard
- Zdev (s390x only)
- Network
- Proxy
- Mirror
- Storage
- Identity
- Snaps
- Installation logs
- How to install Linux step-by-step
- How to install Linux?
Linux Installation, Step by Step
If you have come directly to this page hoping to install Linux without doing any more reading, I suggest that you reconsider. Without the proper knowledge and preparation, attempting to install any operating system (whether Linux or any other) can be a disaster. So before I launch into the resources for your step by step Linux installation, here are some things you should already have read:
Each Linux installation has its own setup utility, every one vastly different from all the others. This makes it very difficult if not impossible to write a step by step Linux installation manual. The closest thing in existence is the Linux Installation and Getting Started Guide, which should be included in HTML format with every Linux distribution, and is available online thanks to the Linux Documentation Project. This book contains a fairly good comparison of the major distributions and an outline of the installation process for each one. It also covers the basic technical concepts you need to understand during installation, and covers some issues of usability following your install. I highly recommend that new users at least skim through this book, and preferably absorb every word.
Also well worth the time it takes to read it is the Linux Installation HOW-TO. This document will give you some invaluable background knowledge about what is involved in the installation process.
Now that you are armed with the knowledge you need, it is time to present you with your map to Linux. Below are links to the official installation documentation for the various Linux distributions. I had originally intended to add my own reviews, comments and tips to this documentation, but with each vendor releasing two new versions every year, I just can’t keep up.
Ubuntu Linux
Debian GNU/Linux
Installation Manual — Also the Online Support Page lists mailing lists and chat channels.
Mandriva Linux
Mandriva Documentation Page gives access to install guides for all recent versions of Mandriva in multiple languages. Wow!
Red Hat Linux
Red Hat Linux Manuals Page includes install guides for all recent versions of Red Hat Linux.
Источник
How to Install Linux on PC – Ubuntu Step by Step Guide
Learn How to Install Linux on PC. Ubuntu is a linux Operating System. It is a very firm OS for developers. Read step by step guide to install linux on PC.

Linux Installation Overview
Ubuntu has some pre-installed tweaks that we cant forget. It is a freeware, so you can download it from its official website Here. In this tutorial, you will learn to install Ubuntu OS on your PC. Just follow the given instructions step by step.
Step#1 There are two ways of installing Ubuntu OS on your PC.
You can also download linux iso from here.
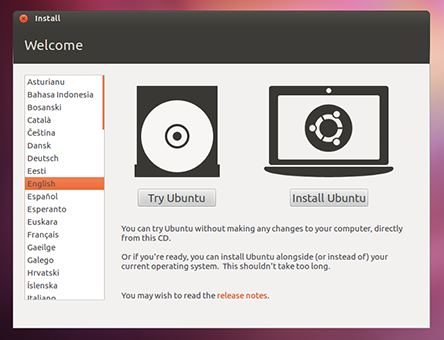
If you are using a CD/DVD, Restart your computer and Insert your disk.There you will see is an option to ‘BOOT FROM DVD”. Select it and next you will be watching is a ‘WELCOME’ Screen. Now choose your language and begin the installation.
How to Install Linux on PC – Steps With Screenshots
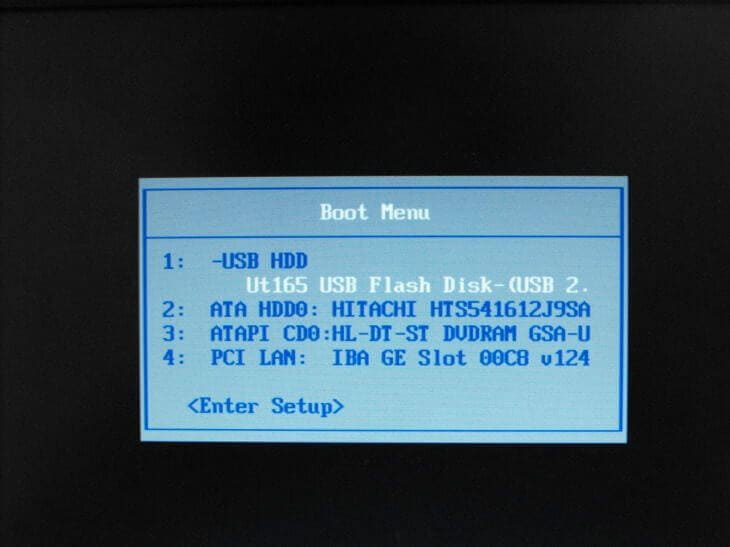
If your are using a USB drive. Press F12 key continuously and then you will get your BOOT options. Select on ‘BOOT FROM USB”. Select it, choose your language and begin the installation.
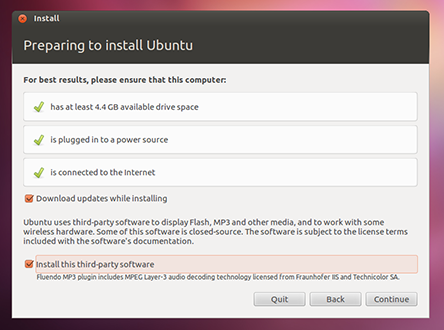
Step#2 The next step is to prepare your PC for installing Ubuntu. It will check that your PC is connected to a POWER SOURCE and you have enough space yo install the OS on your drive.
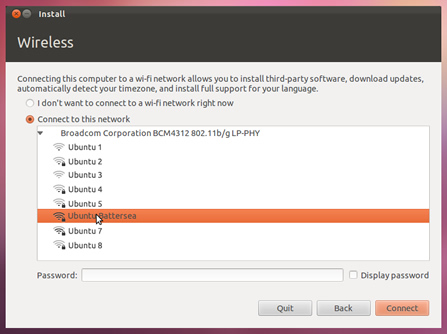
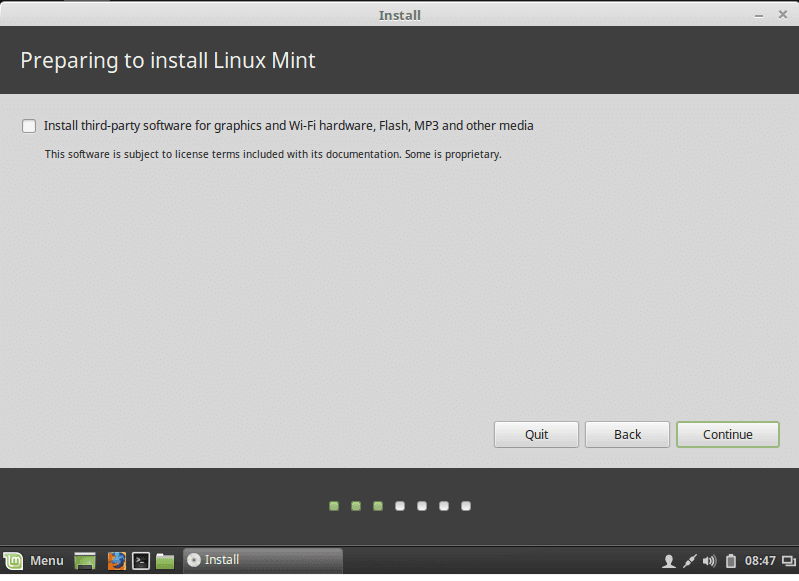
Step#3 While installing the OS there is an option to Download the updates. If you want to download check on it and select your Wi-Fi Connection and give it the WEP key, if you have one.
Step#4 Now Allocate the drive to install your OS. If you are a windows user and also have windows installed on your drive, you can use both on your PC but once at a time. If you want to clear the drive and only want to use Ubuntu then select the second option. If you are an Advance User and want to Install it by your own way then select ‘SOMETHING ELSE’.
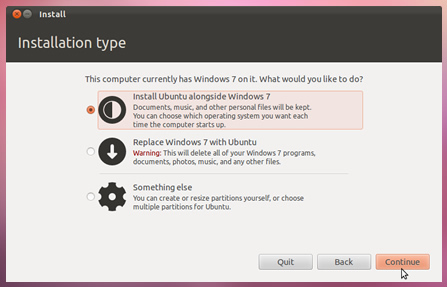
Step#5 Ubuntu needs 4.8 GB of space to install. If you have selected the Installation type then click on the drive to install. Don’t worry about installing it along windows.It is easy and simple, also very safe to use. You can uninstall any of the OS at any-time.

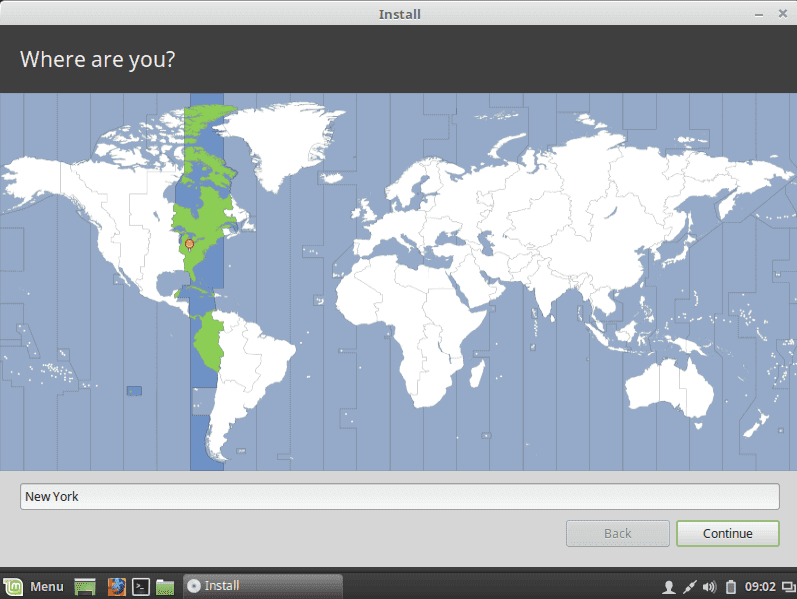
Step#6 Select you location and Proceed to ‘Forward’. If you are connected to Internet, it will auto detect your location. If its wrong then change it.

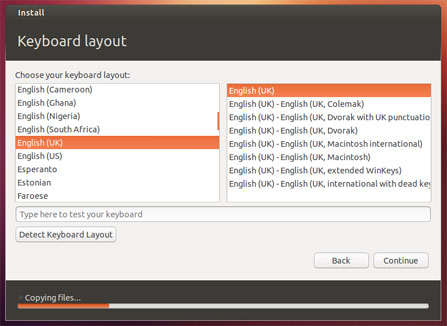
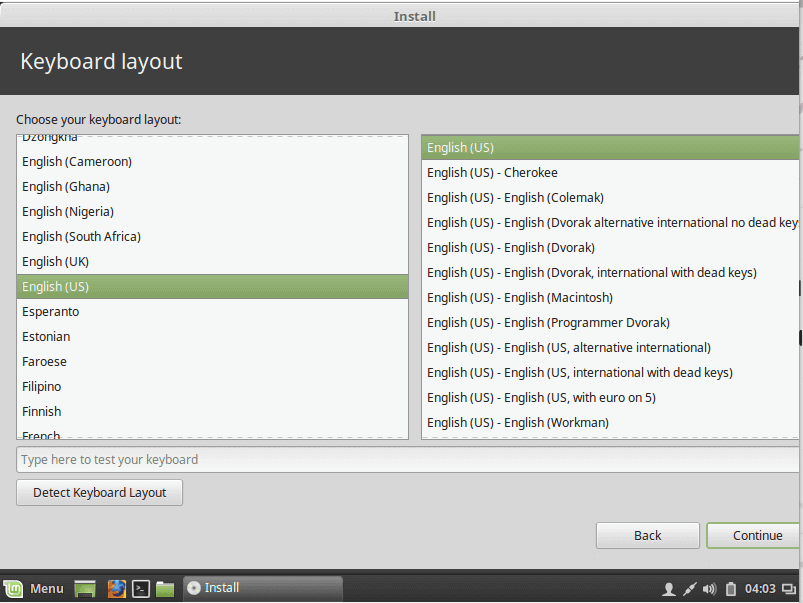
Step#7 Select your ‘Preferred Keyboard Layout’, if you dont know what it means then click on ‘AUTO DETECT’.
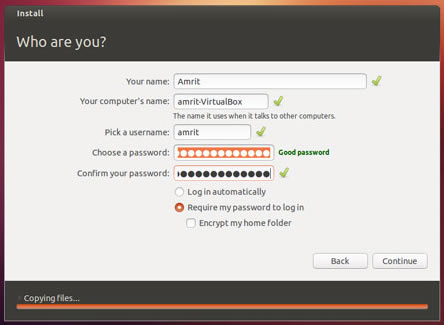
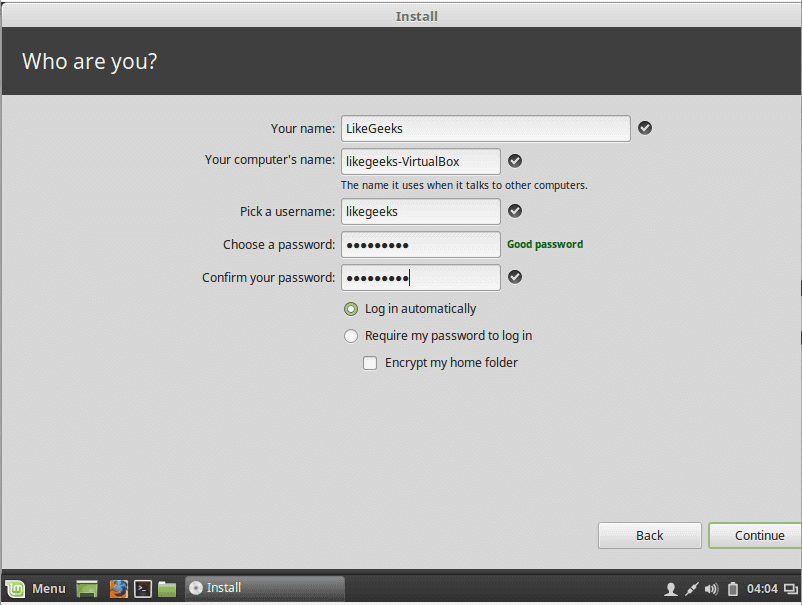
Step#8 Now Setup you Login Credentials, it will require your name, Username and Password.
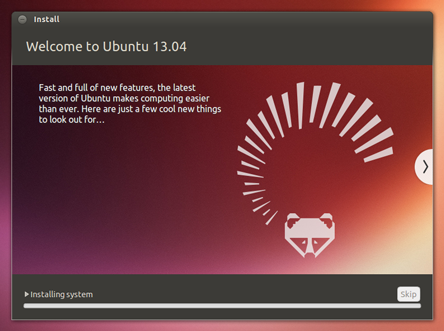
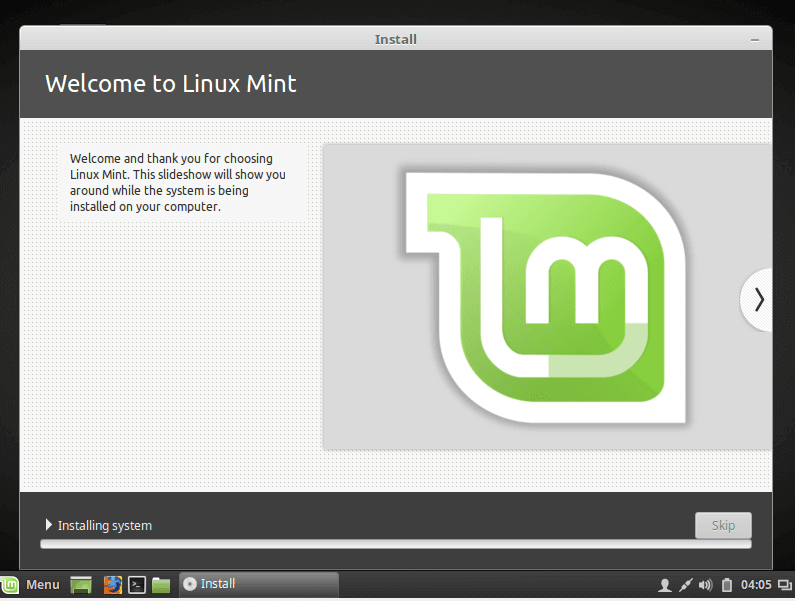
Step#9 While Ubuntu Installs its Important components Grab a cup of coffee and learn more about Using Ubuntu.
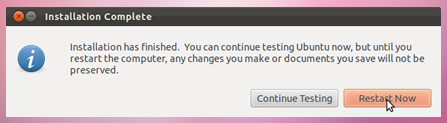
Step#10 Congratulations, You have Installed Ubuntu OS on your PC. To get started click on ‘Reboot Now’ and when it gets boot, enjoy your new OS.
Conclusion – You successfully Installed Linux on PC
If you have followed the above tutorial with step by step. Linux is very secure and high performing as compared to windows. Let us know if you faced any issues during Linux installation on PC.
Источник
Using the installer step by step
The installer is designed to be easy to use without constant reference to documentation.
Language selection
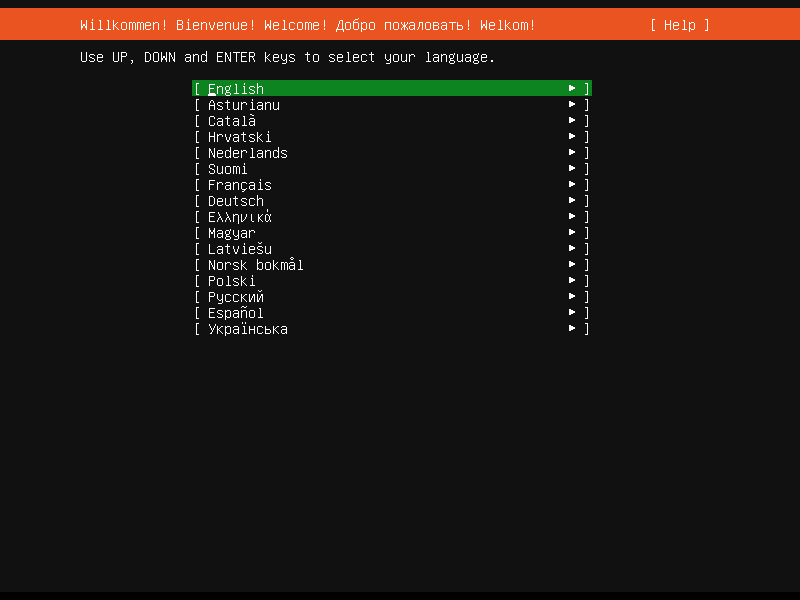
This screen selects the language for the installer and the default language for the installed system.
More languages can be displayed if you connect via SSH.
Refresh
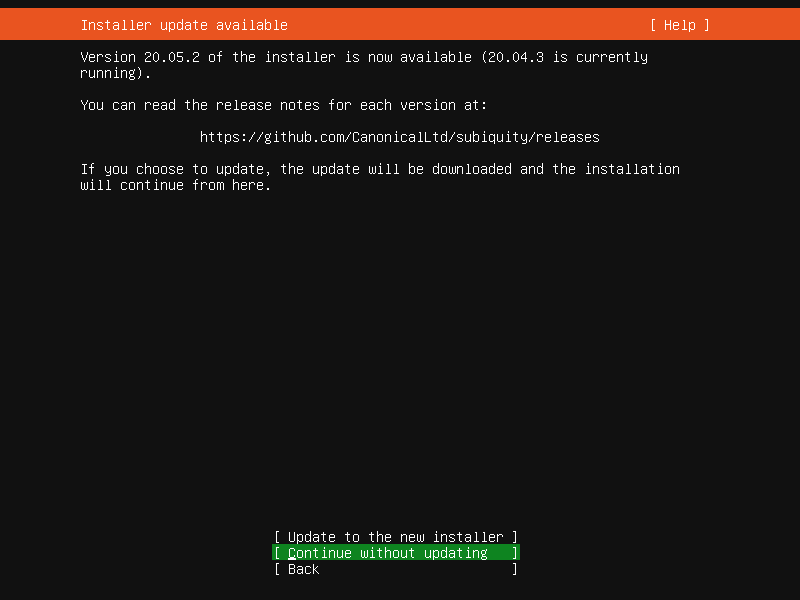
This screen is shown if there is an update for the installer available. This allows you to get improvements and bug fixes made since release.
If you choose to update, the new version will be downloaded and the installer will restart at the same point of the installation.
Keyboard
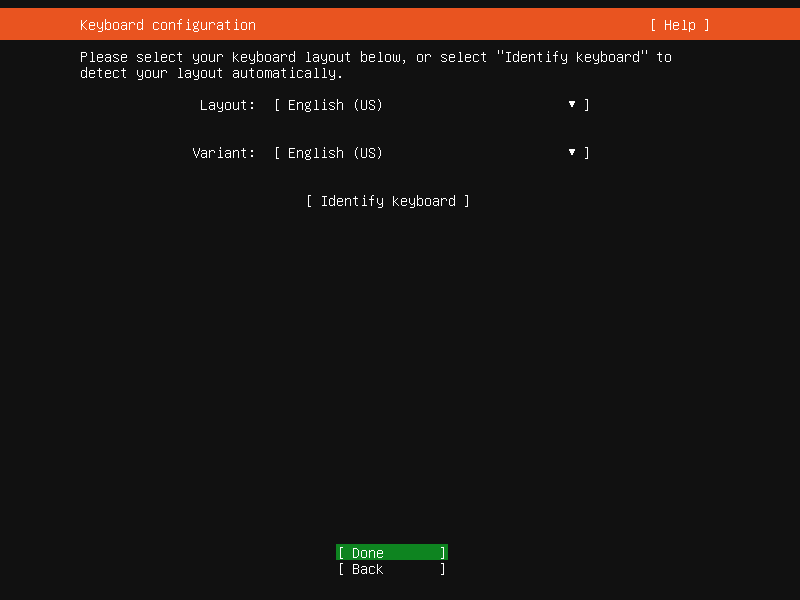
Choose the layout and variant of keyboard attached to the system, if any. When running in a virtual terminal, it is possible to guess the layout and variant by answering questions about the keyboard.
Zdev (s390x only)
This screen is only shown on s390x and allows z-specific configuration of devices.
The list of device can be long. Home / End / Page Up / Page Down can be used to navigate through the list more quickly.
Network

This screen allows the configuration of the network. Ubuntu Server uses netplan to configure networking and the UI of the installer can configure a subset of netplan’s capabilities. In particular it can configure DHCP or static addressing, VLANs and bonds.
If networking is present (defined as “at least one interface has a default route”) then the installer will install updates from the archive at the end of installation.
Proxy

The proxy configured on this screen is used for accessing the package repository and the snap store both in the installer environment and in the installed system.
Mirror

The installer will attempt to use geoip to look up an appropriate default package mirror for your location. If you want or need to use a different mirror, enter its URL here.
Storage

Storage configuration is a complicated topic and has its own page for documentation.

Once the storage configuration is confirmed, the install begins in the background.
Identity
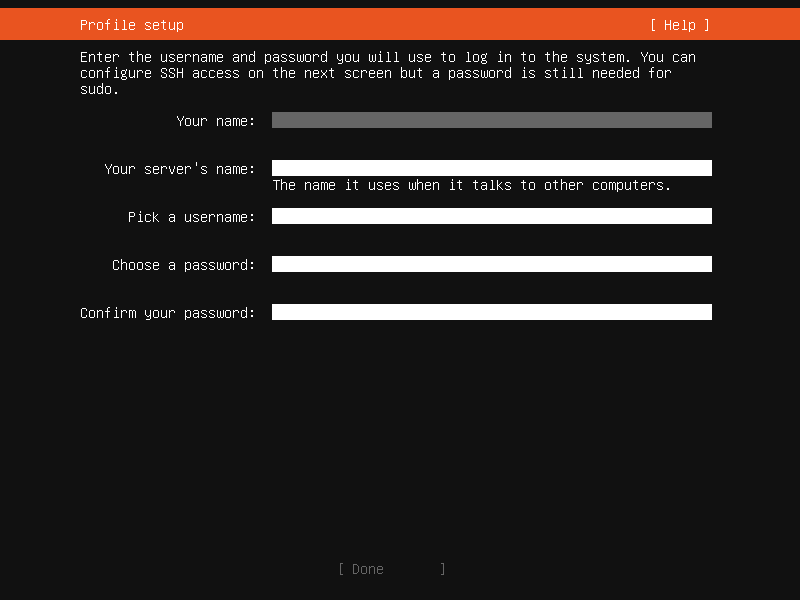
The default user will be an administrator, able to use sudo (this is why a password is needed, even if SSH public key access is enabled on the next screen).

A default Ubuntu install has no open ports. It is very common to administer servers via SSH so the installer allows it to be installed with the click of a button.
You can import keys for the default user from Github or Launchpad.
If you import a key, then password authentication is disabled by default but it can be re-enabled again if you wish.
Snaps
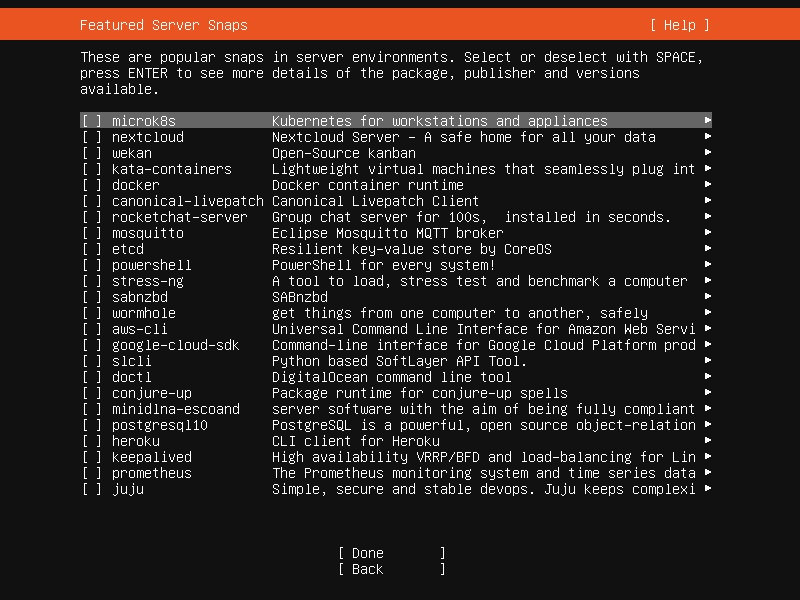
If a network connection is enabled, a selection of snaps that are useful in a server environment are presented and can be selected for installation.
Installation logs

The final screen of the installer shows the progress of the installer and allows viewing of the full log file. Once the install has completed and security updates installed, the installer waits for confirmation before restarting.
Источник
How to install Linux step-by-step
How to install Linux?
After you’ve chosen the Best Linux Distro, now it’s time to know how to install Linux.
If you want to install Linux, there are two ways to do that:
The first way is to download the Linux distribution you want and burn it into a DVD or USB stick and boot your machine with it and complete the installation process.
The second way is to install it virtually on a virtual machine like VirtualBox or VMware without touching your Windows or Mac system, so your Linux system will be contained in a window you can minimize and continue working on your real system.
For me, I prefer VirtualBox, it’s free and runs very fast on my PC than VMware, and support installing Windows, Linux and Mac OS with all versions.
Let’s choose any Linux distro and install it using both two ways.
I’m going to choose Linux mint; they call it the Mac OS of Linux. It is a good distro for personal use.
The version we are going to install is 18.1 “Serena” at the time of writing that article.
Go to this link and download it:
I prefer the Cinnamon desktop version; it is promising and elegant.
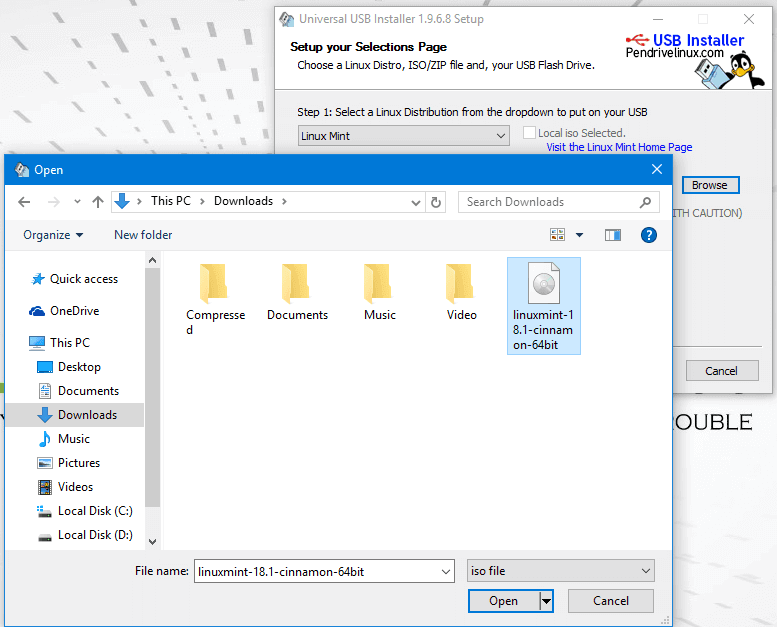
Once you download the ISO file, you will have to burn it on DVD or the easy way, copying it on a USB stick using a program called Universal USB installer, you can download this program from this link:
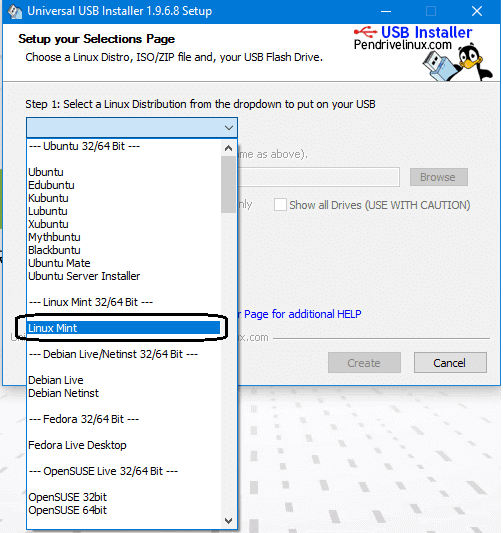
After downloading the application, open it and choose from the list the distro you want to install; in our case, we will select Linux mint.
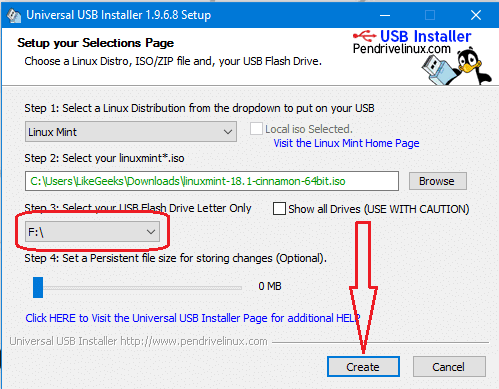
Make sure that you put your memory stick on the computer and click next and wait till the copying process is finished.
Now Finally we click create to create bootable USB
And now you can boot with this memory stick.
Then Restart your PC and go to BIOS settings and select boot options and make sure that the USB is the first option, then save your BIOS settings and reboot.
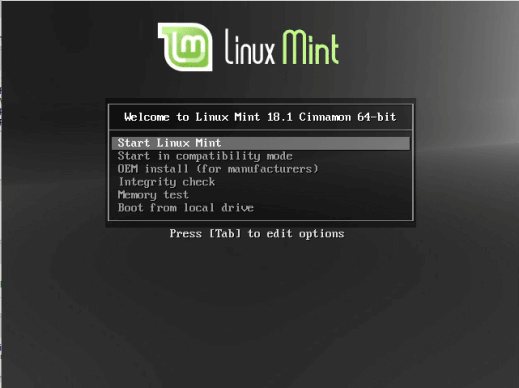
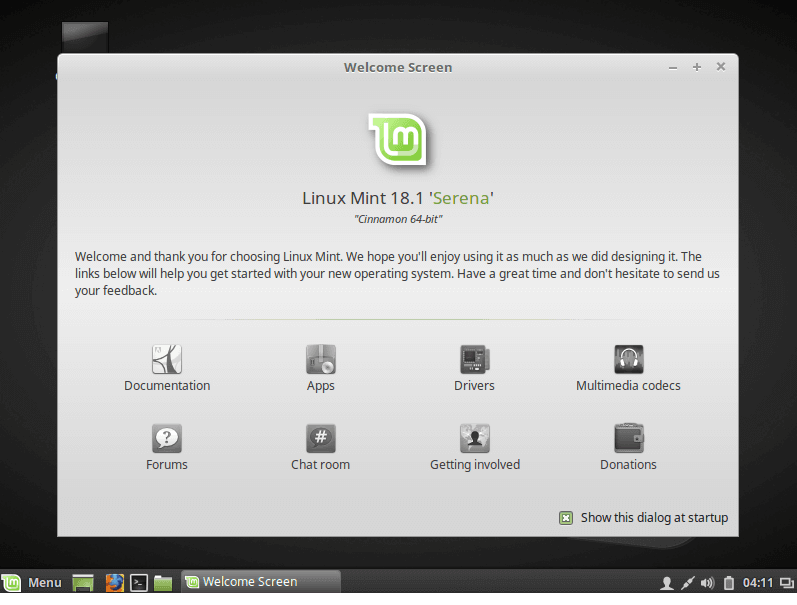
Then it will show the installation screen, press Enter, and it will load the live CD content.
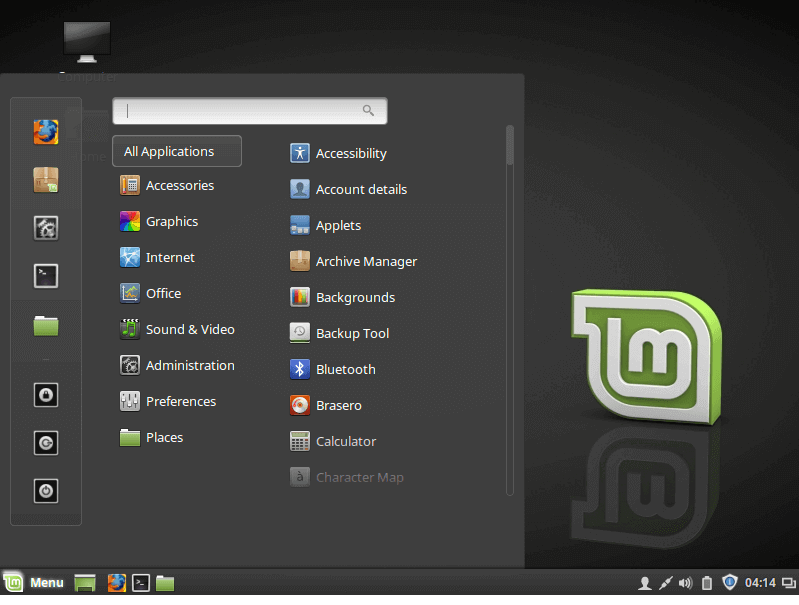
Now the desktop should appear like that:
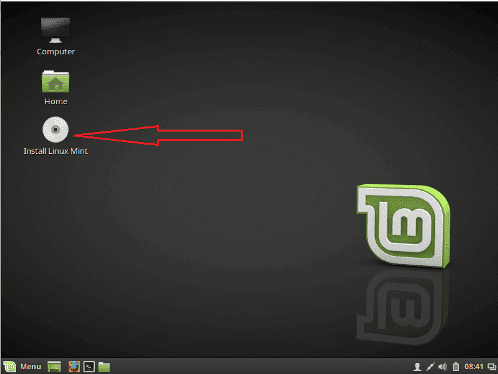
Click install Linux Mint.
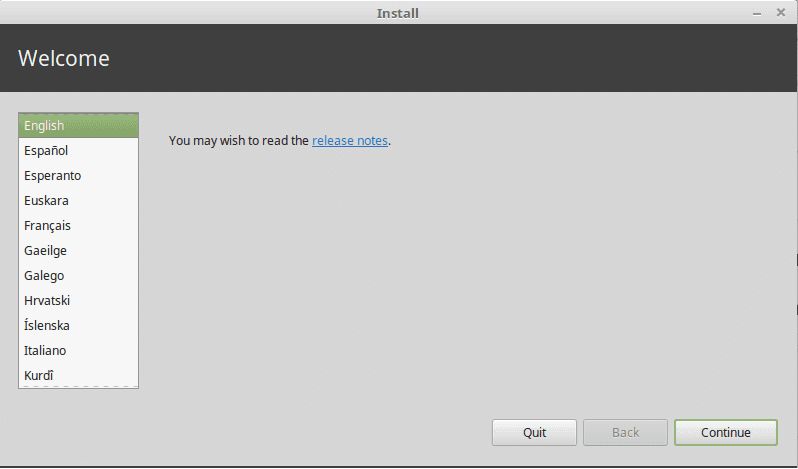
Then choose the language used for installation.
Then choose the installation type, and TAKE CARE if you are installing Linux on a disk that contains other operating systems, you MUST select the option called something else.
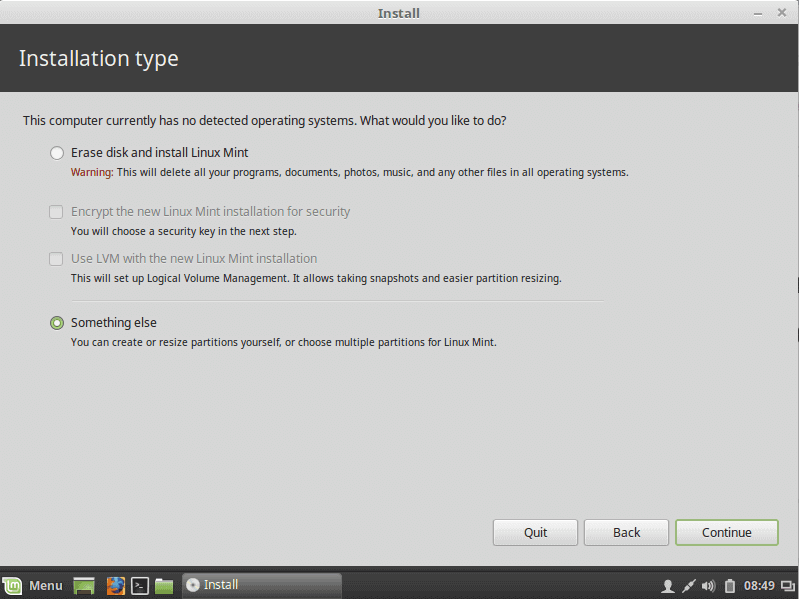
If you are installing it on a new disk, choose the option Erase disk.
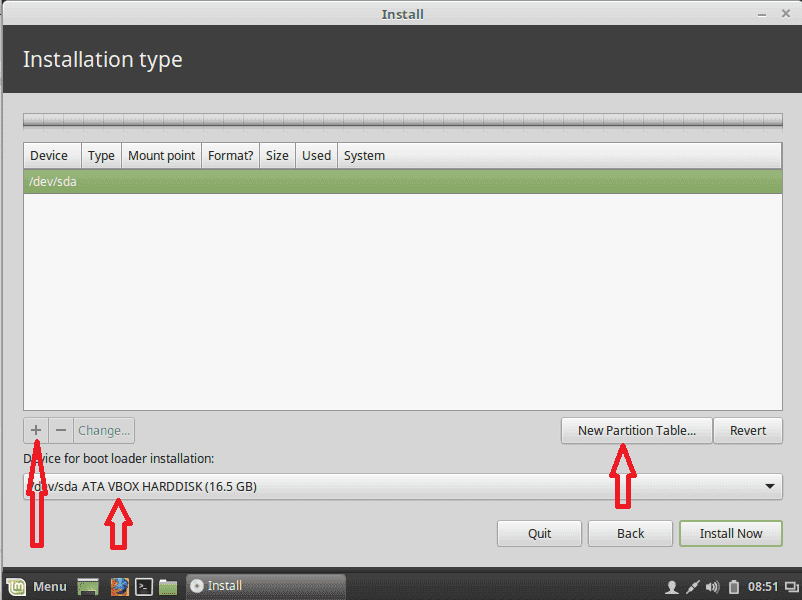
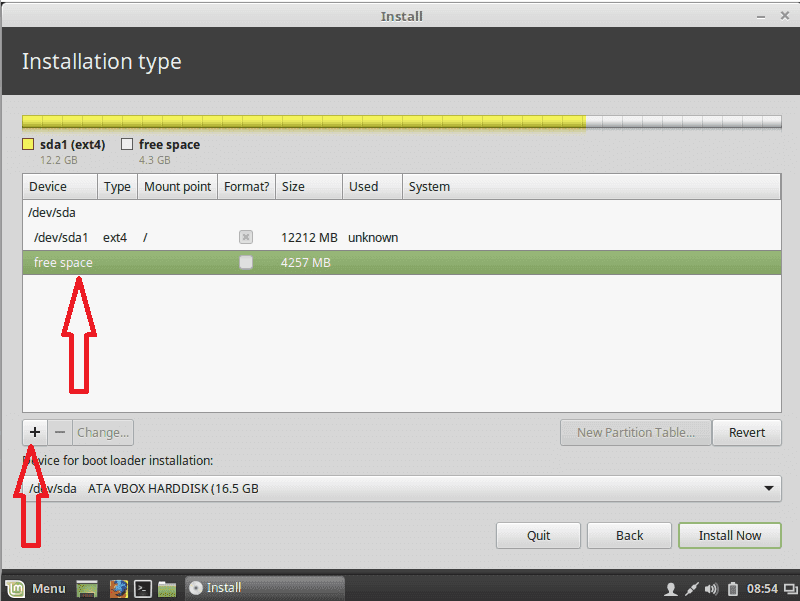
Linux requires two partitions to work, the root partition and the swap partition.
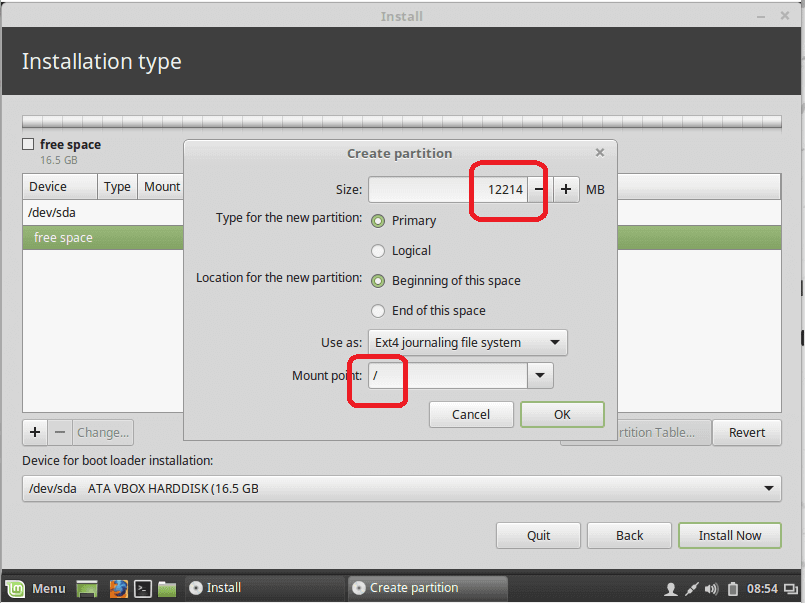
Now we will create them by clicking the plus button and choose about 12 GB or more as you need but not less than that for the root partition and choose mount type as / which stands for root and of course format will be Ext4.
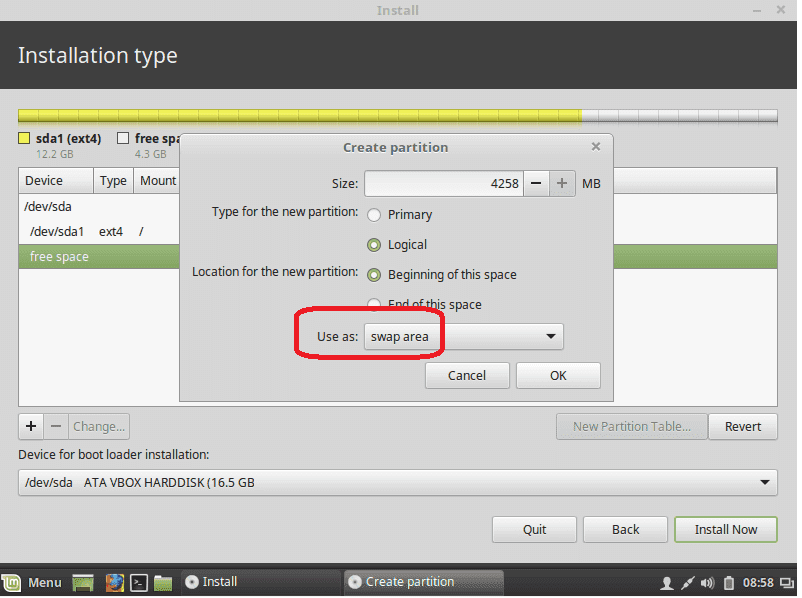
Now we create a swap partition, choose the remaining free space and click the plus button and choose the swap area as shown:
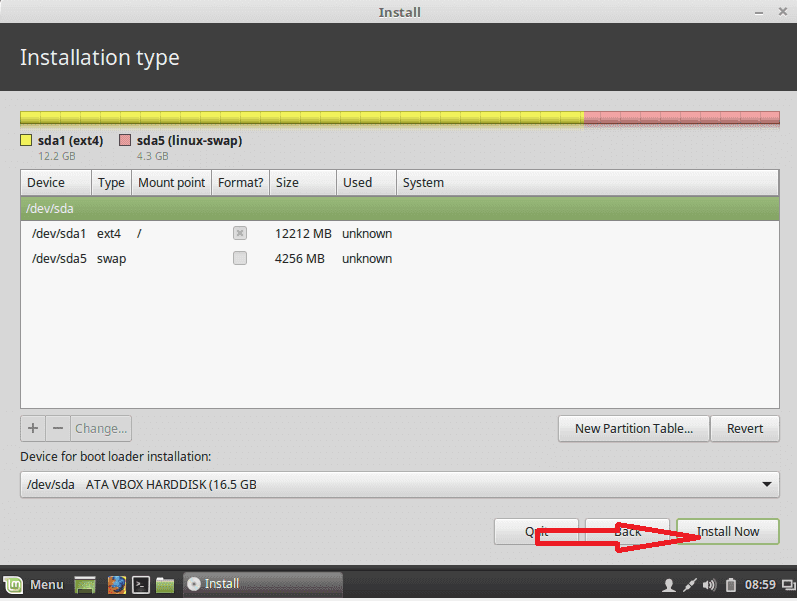
Then Create the swap area:
Then click install now and agree about writing changes to disk:
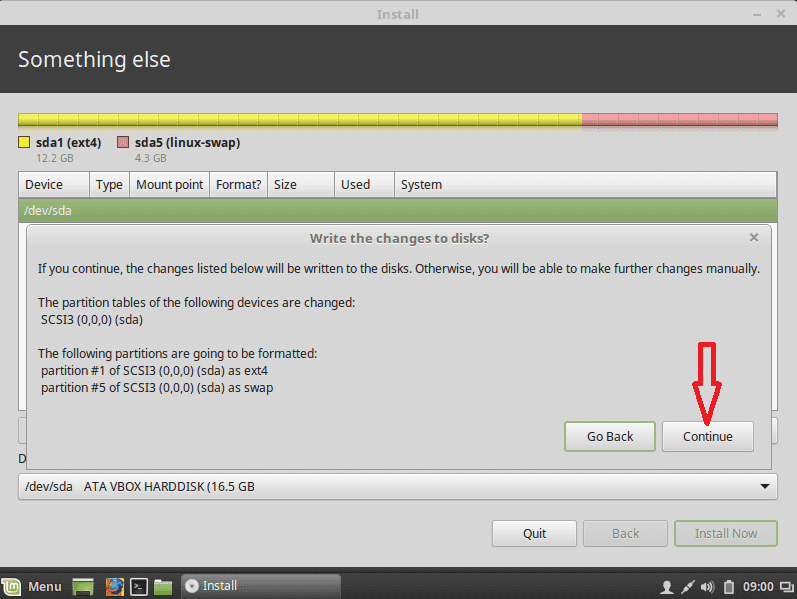
Now you choose the time zone and click continue the choose the language:
Now you write your username and password and click continue:
Finally, the installation started:
After finishing the installation, it will prompt you to reboot the machine and remove the installation media, whether it is a DVD or USB.

And yes, this is how to install Linux on Physical machine.
The second way it to install Linux is to install it on VirtualBox First download VirtualBox from here:
There are two ways to use Linux on VirtualBox:
- Install it from the ISO file we downloaded above
- Download a ready to use VirtualBox image that contains the system and run it without effort from here: http://www.osboxes.org/virtualbox-images/
The first way is easy, it like the normal installation process
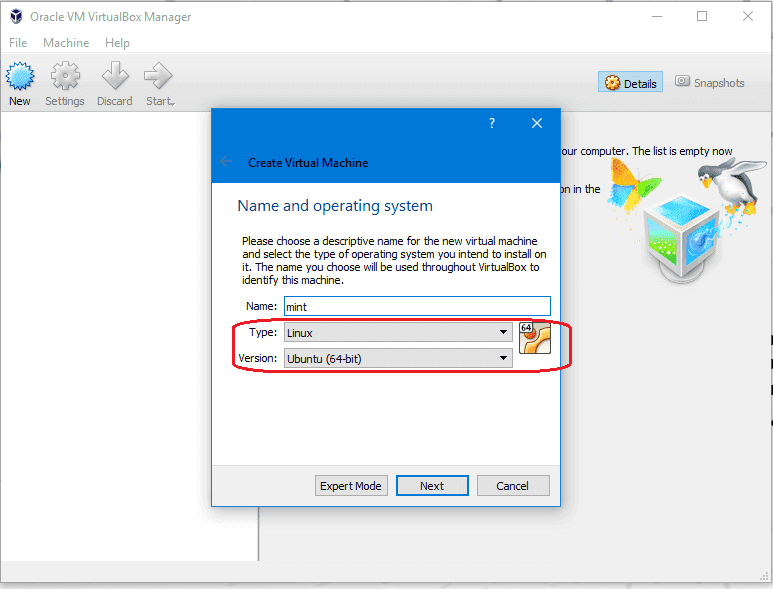
Open VirtualBox and click new and choose Linux and Ubuntu 64:
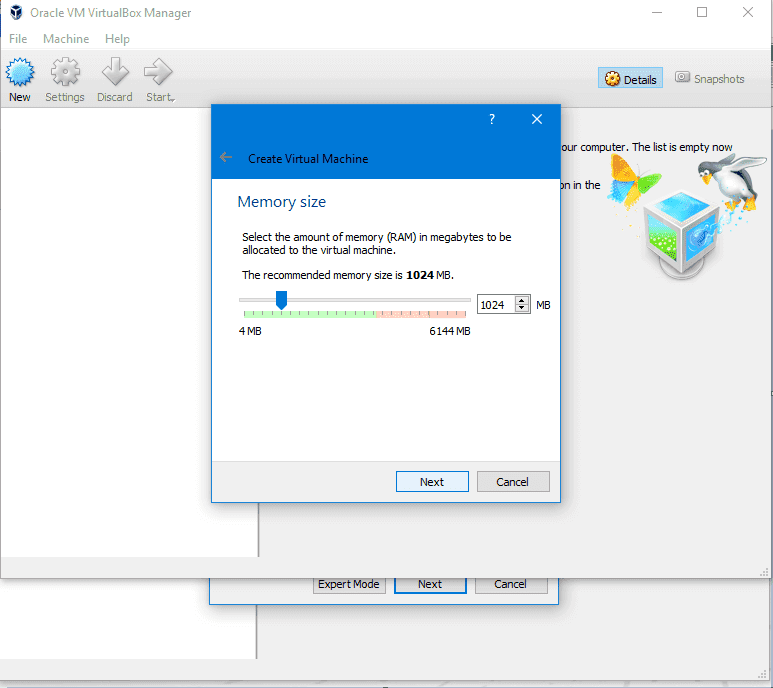
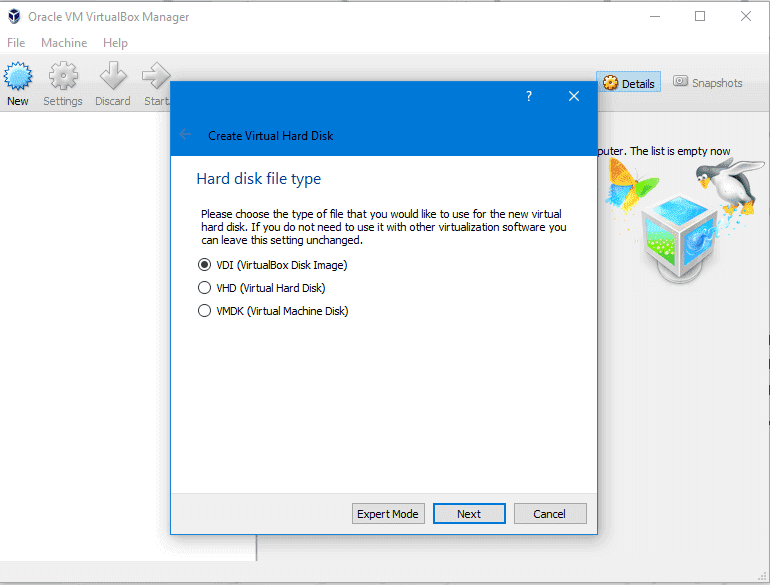
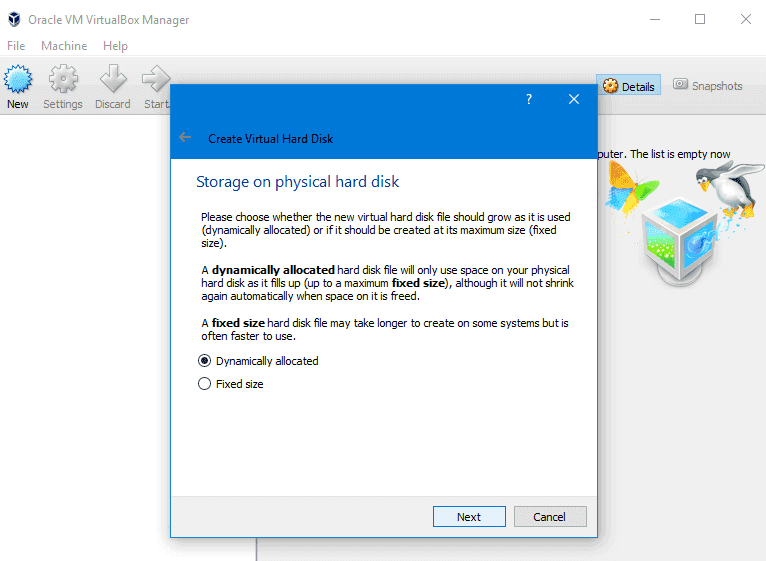
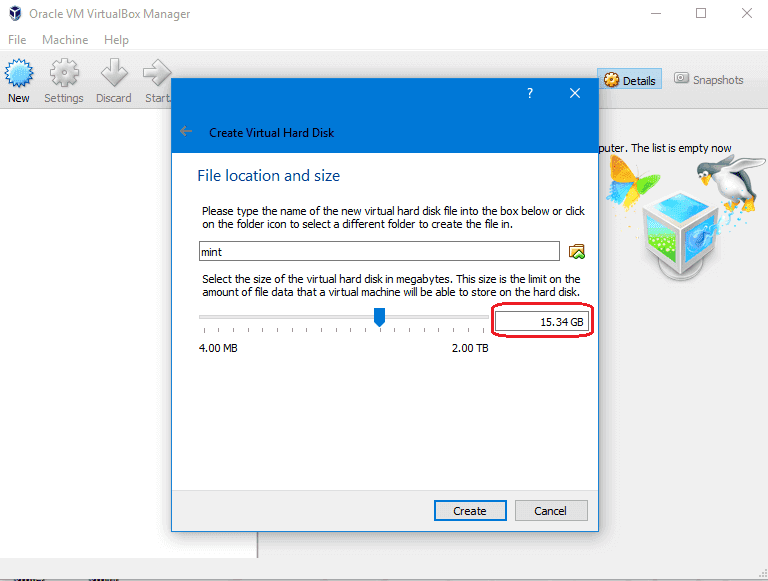
Then select the RAM required not less than 1 GB and select the disk file type or leave it as VDI and dynamically allocated, and the size not less than 12 GB and hit OK.
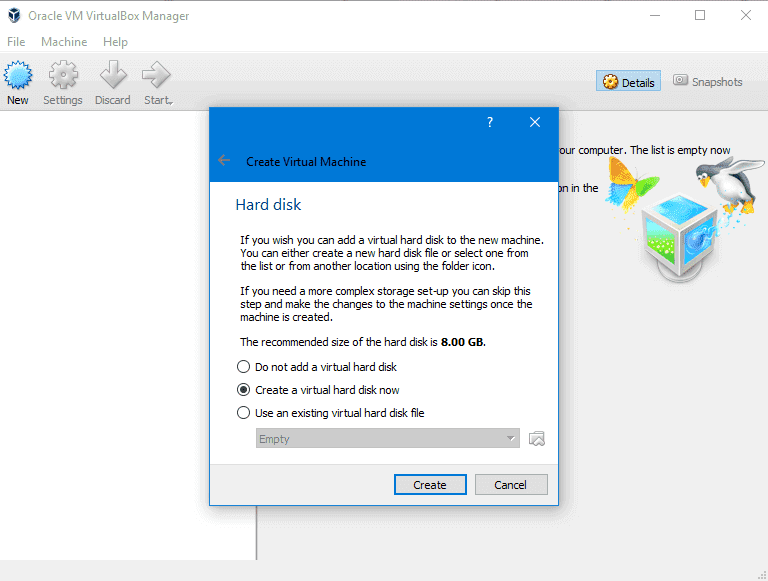
 Then file location for the disk to be used.
So now the VirtualBox is created, we just need to make it boot from the DVD that we’ve downloaded.
Choose from settings > Storage and choose the ISO image and click OK.
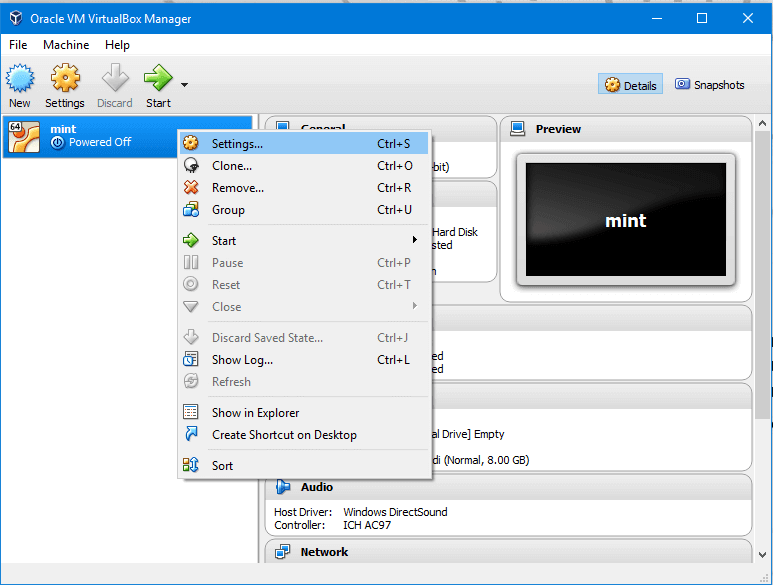 Then choose the iso image
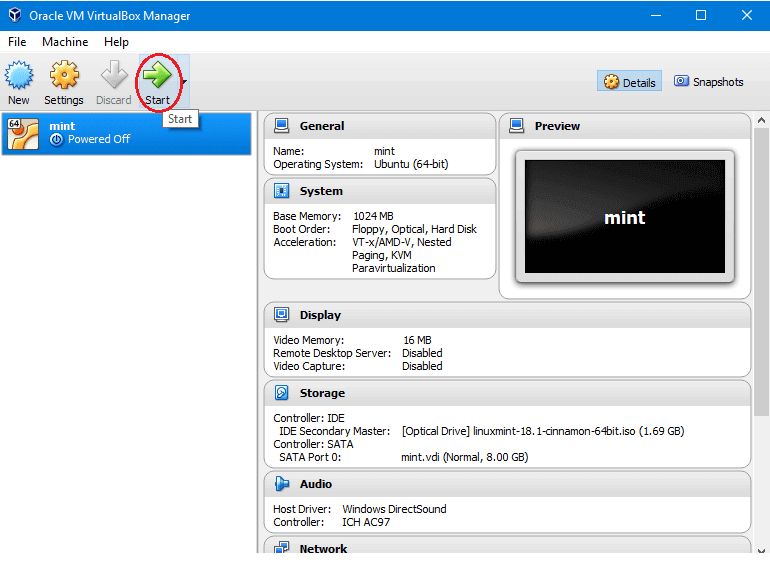
 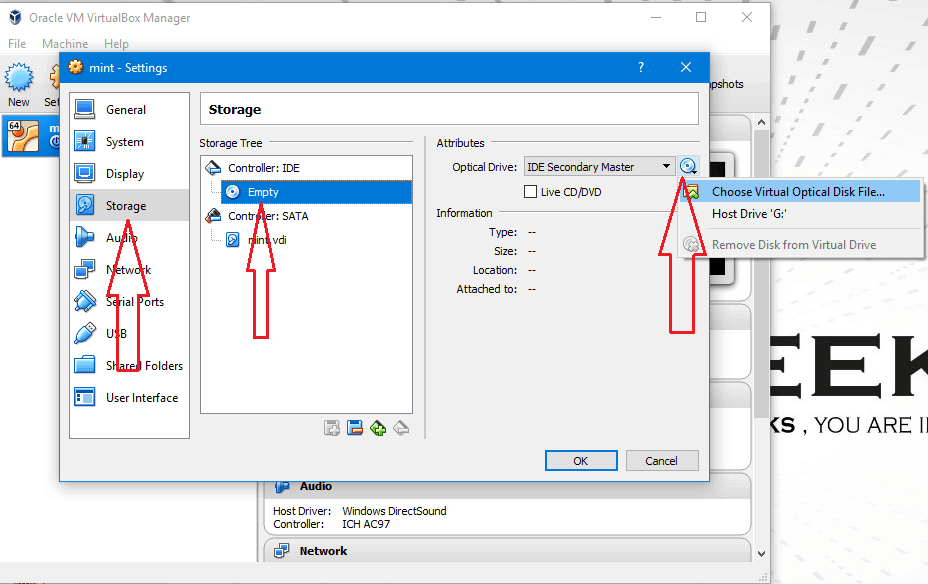 Then Click start
After loading the desktop, click install Linux mint, and the rest of the steps are the same as the above mentioned without any change, And this is how to install Linux on a virtual machine.
Источник


