- Обзор нововведений Linux Mint 19.1 Tessa – что нового в этой версии?
- Что нового в Linux Mint 19.1 Tessa?
- Системные требования для установки Linux Mint 19.1 Tessa
- Где скачать Linux Mint 19.1 Tessa?
- Установка Linux Mint 19.1 Tessa
- Скриншоты Linux Mint 19.1 Tessa Cinnamon
- Видео-инструкция по установке Linux Mint 19.1 Cinnamon
- New Features
- Linux Mint 19.1 Xfce
- Update Manager
- Software Sources
- Input Methods
- XApps improvements
- Other improvements
- Artwork improvements
- Main components
- LTS strategy
- Release notes
- Known issues
- Touchpad drivers
- Virtualbox
- Home directory encryption
- Guest sessions
- Scanner not detected
- Vertical band in scanned documents
- Samba
- Wine 4.0
- Upgrading Wine to version 4
- Sound and microphone issues
- DVD Playback with VLC
- Issues with KDE apps
- Force UEFI dialog hanging the installation
- Other issues
- Username and password in the live session
- Moving windows which don’t fit in the screen
- Installing multimedia codecs offline
- Booting with non-PAE CPUs
- Solving freezes during the boot sequence
- Choosing the right version of Linux Mint
Обзор нововведений Linux Mint 19.1 Tessa – что нового в этой версии?
Вышла новая версия дистрибутива Linux Mint 19.1 Tessa, в этой заметке мы рассмотрим основные нововведения данного выпуска, т.е. узнаем, что же нового добавили разработчики в эту версию дистрибутива.
Linux Mint – это бесплатный дистрибутив операционной системы Linux, предназначенный для домашних компьютеров и начинающих пользователей (подробно о том, какие дистрибутивы лучше всего подходят начинающим или для маломощных компьютеров, мы говорили в статье «Дистрибутивы Linux – какой выбрать»). Linux Mint основан на Ubuntu, и является одним из самых популярных дистрибутивов Linux.
Что нового в Linux Mint 19.1 Tessa?
Кодовое название версии «Tessa», основана данная версия на пакетной базе Ubuntu 18.04. Linux Mint 19.1 имеет долгосрочную поддержку, и поддерживаться данный релиз будет до 2023 года.
Примечание! Обзор сделан на примере редакции Linux Mint 19.1 Tessa Cinnamon.
Обзор основных улучшений и изменений:
- Ядро Linux 4.15;
- Среда рабочего стола Cinnamon 4.0;
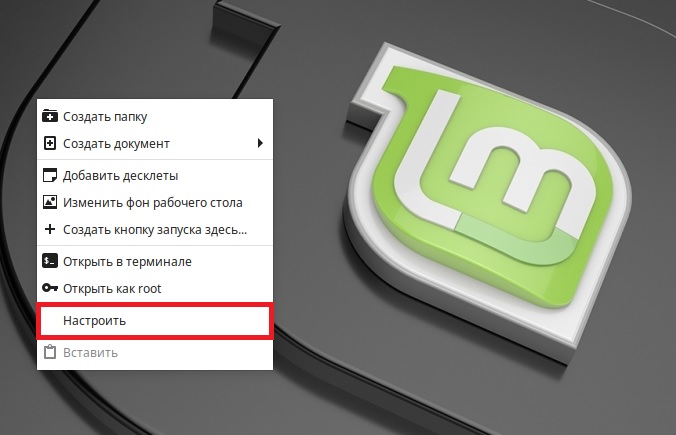
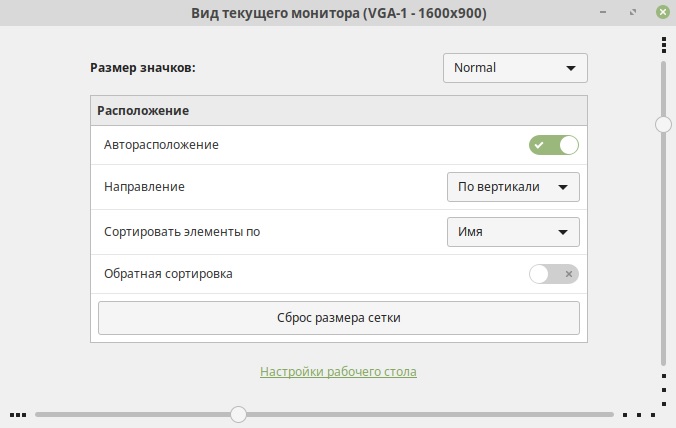
- Добавлен новый вид рабочего стола. Выбрать новый вид или классический можно в приложении «Экран приветствия» в разделе «Первые шаги». Там же доступен предварительный просмотр, т.е. Вы можете видеть, чем отличается новый вид от традиционного. Чтобы выбрать традиционный вид, просто щелкните на соответствующий вид, в результате среда Cinnamon перезапустится с новым видом панели;
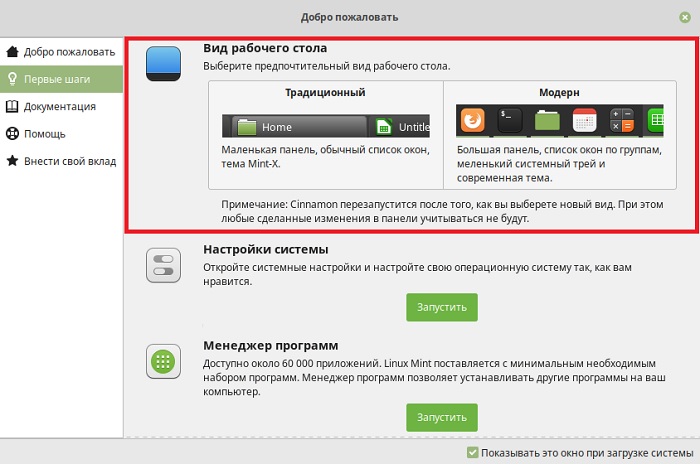
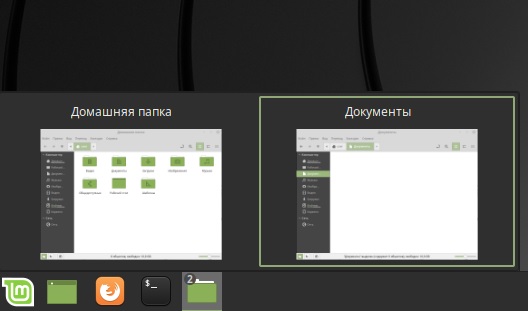
Также стоит отметить что новая панель теперь группирует открытые окна приложений;
Системные требования для установки Linux Mint 19.1 Tessa
У этой версии Linux Mint минимальные системные требования не изменились по сравнению с предыдущей версией, они следующие:
- Оперативной памяти 1 гигабайт (рекомендовано 2 ГБ);
- Свободного места на диске 15 гигабайт (рекомендовано 20 ГБ и более);
- Поддержка разрешения экрана 1024×768.
Где скачать Linux Mint 19.1 Tessa?
Скачать актуальную версию Linux Mint можно на странице загрузки официального сайта, вот она — https://linuxmint.com/download.php
Прямые ссылки на скачивание Linux Mint 19.1 Tessa (64-bit):
Торрент
Через браузер
Примечание! Если нужна 32 битная версия Linux Mint 19.1, то ссылки Вы можете найти на странице загрузки официального сайта.
Установка Linux Mint 19.1 Tessa
Процесс установки Linux Mint 19.1 Tessa простой, и он точно такой же, как и у предыдущей версии, подробная инструкция по установке представлена в материале «Linux Mint 19 – установка и обзор дистрибутива».
На заметку! Linux для обычных пользователей – книга про основы операционной системы Linux для начинающих
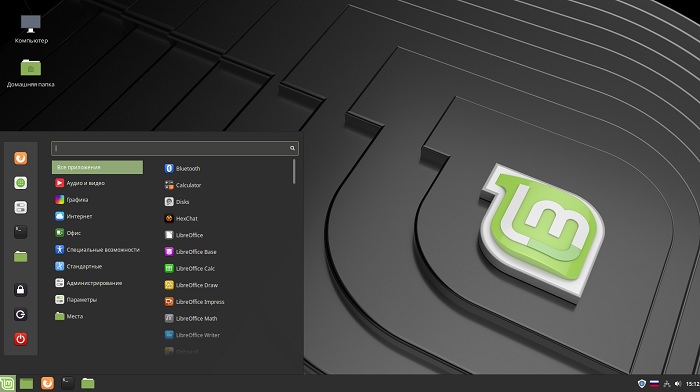
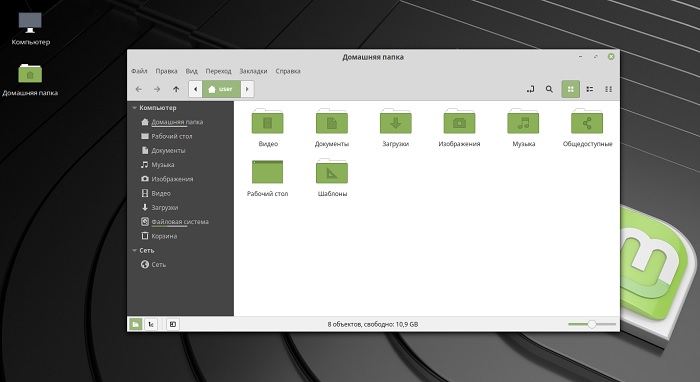
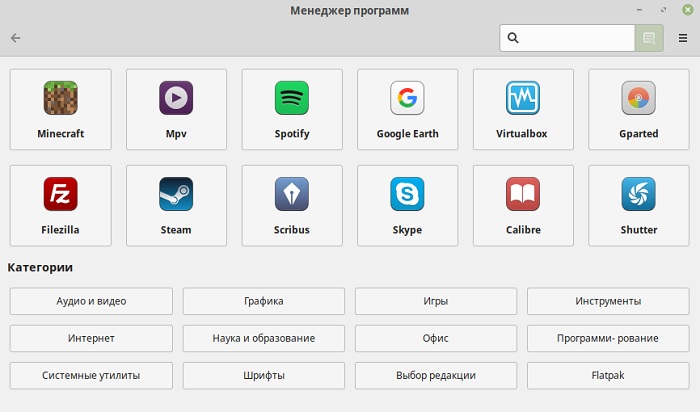
Скриншоты Linux Mint 19.1 Tessa Cinnamon
Рабочий стол
Файловый менеджер
Менеджер программ
Видео-инструкция по установке Linux Mint 19.1 Cinnamon
На этом мой обзор дистрибутива Linux Mint 19.1 Tessa Cinnamon закончен, пока!
Источник
New Features
Linux Mint 19.1 Xfce
Linux Mint 19.1 is a long term support release which will be supported until 2023. It comes with updated software and brings refinements and many new features to make your desktop experience more comfortable.
Update Manager
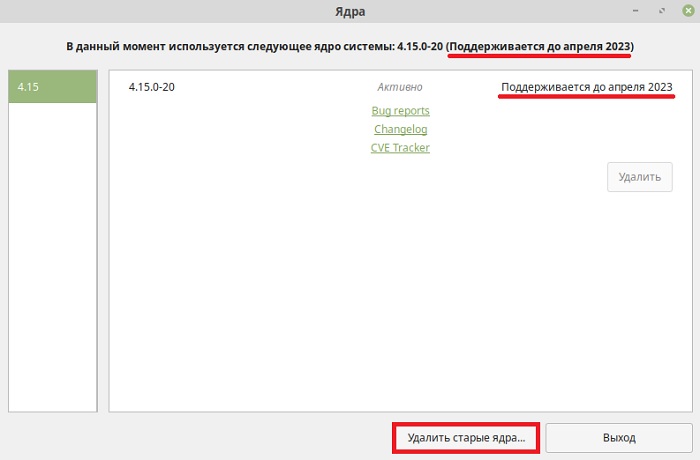
The Update Manager is able to list mainline kernels and to show their support status:
A new button was added to make it easier to remove unused kernels:
Software Sources
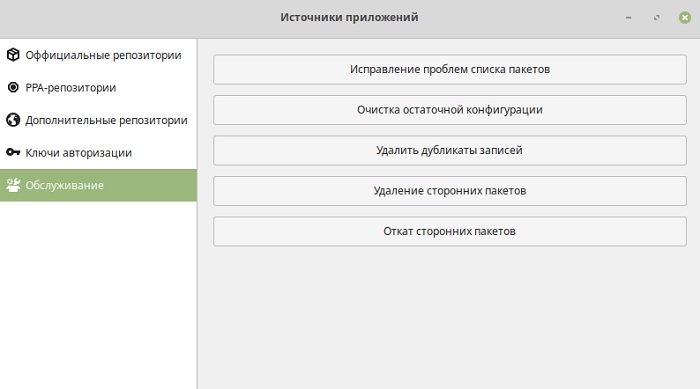
The Software Sources tool was given a new look. Similar to the welcome screen, it’s now using an Xapp sidebar and a headerbar.
When software crashes tools such as mintreport produce a stack trace our developers can look at to understand the cause of the crash. This is the first step towards fixing such a bug. For the stack trace to be meaningful, users need to have debug symbols installed. In an effort to reduce bandwidth for their mirrors, Debian decided to move debug symbols outside of the main repositories. This decision affected not only Debian and LMDE but also Ubuntu and Linux Mint and made it much more difficult for users to install these symbols. To simplify this process, support for debug symbols was added into the Software Sources tool. Adding debug symbol repositories can now be done with a click of the mouse.
A new button was also added within the “Maintenance” tab to remove duplicate entries in your repositories.
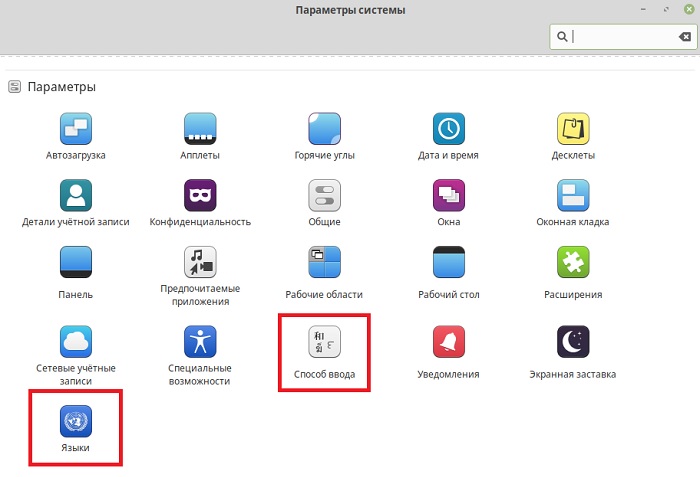
Input Methods
The Language Settings and the Input Methods are now two separate applications.
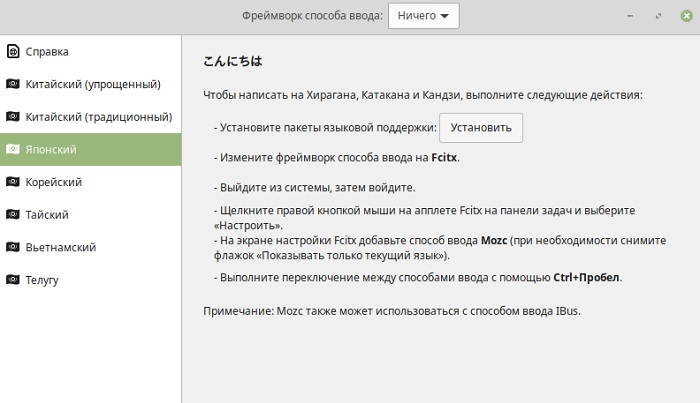
The user interface for the Input Methods tool was revamped. It uses an icon sidebar and now shows a dedicated page for each supported language.
Clear instructions are provided for each language to guide you through not only installing support packages but also selecting the right input method framework and the right input method.
XApps improvements
Xreader
Improvements were made to the look and feel of the document viewer. Thumbnails and page borders in particular look more crisp:
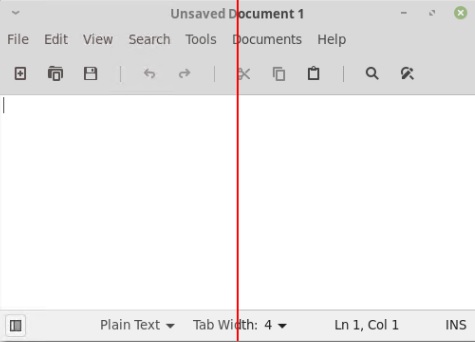
Xed, the text editor, moved to libpeas, python3 and the MESON build system.
Its statusbar was reworked. It now indicates whether the document is in tabs or spaces mode and highlight modes are searchable.
LibXApp
Four new widgets are available in libxapp:
XAppStackSidebar makes it easy to create icon sidebars, such as the ones used in the Welcome Screen or the Software Sources.
XAppPreferencesWindow provides a multi-page preference window with a built-in icon sidebar. This component is used to display application preferences in Xed, Xreader and Nemo.
XAppIconChooserDialog provides a dialog which lets you choose an icon name or an icon path.
XAppIconChooserButton provides a button which shows an icon or an image, and lets you choose a new one when clicked.
Other improvements
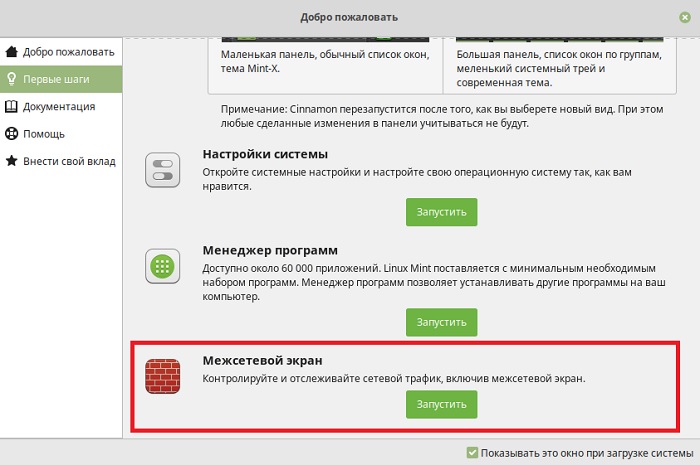
Firewall configuration was added to the «First Steps» section of the welcome screen.
To prevent you from typing your password into the wrong window (and sending it online by mistake), sudo now shows asterisks when you type your password.
This release ships with linux-firmware 1.173.2 and the Linux kernel 4.15.0-20.
Artwork improvements
The Mint-Y, Mint-Y-Dark and Mint-Y-Darker themes are now available in Aqua, Blue, Brown, Grey, Orange, Pink, Purple, Red, Sand and Teal.
Mint-Y themes were given more contrast:
Labels look sharper and stand out more on top of their backgrounds. So do the icons which now look darker than before. As a result, it’s easier to visually identify the focused window:
To support both light and dark panels, Linux Mint 19.1 ships with symbolic status icons for Redshift, mate-volume-control-applet, onboard and network-manager-applet.
Main components
Linux Mint 19.1 features Xfce 4.12, a Linux kernel 4.15 and an Ubuntu 18.04 package base.
LTS strategy
Linux Mint 19.1 will receive security updates until 2023.
Until 2020, future versions of Linux Mint will use the same package base as Linux Mint 19.1, making it trivial for people to upgrade.
Until 2020, the development team won’t start working on a new base and will be fully focused on this one.


Thanks to your donations and advertising Linux Mint is completely free of charge. We hope you’ll enjoy using it as much as we enjoy working on it.
Источник
Release notes
This is Linux Mint 19.1, codename Tessa.
Linux Mint 19.1 is a long term support release which will be supported until 2023. It comes with updated software and brings refinements and many new features to make your desktop experience more comfortable.
Known issues
Touchpad drivers
The default touchpad driver in this edition is «synaptics» (provided by the xserver-xorg-input-synaptics package).
If you experience problems with it, you can switch to another driver called «libinput» (provided by the xserver-xorg-input-libinput package).
To know which driver is used by your input devices, run the following command:
grep -i «Using input driver» /var/log/Xorg.0.log
When both drivers are installed, «synaptics» takes priority.
To switch to the «libinput» driver, remove «synaptics» with the commands:
apt remove xserver-xorg-input-synaptics
Then log out and log back in.
To go back to using «synaptics», simply reinstall it:
apt install xserver-xorg-input-synaptics
Then log out and log back in.
Note: You can also try installing the «evdev» driver (provided by the xserver-xorg-input-evdev).
Virtualbox
If the screen is black when launching Linux Mint in Virtualbox, change the VirtualBox graphics controller to «VMSVGA». Do this by opening up the settings for your VM and select Display -> Graphics Controller.
If the screen is garbled when launching Linux Mint in Virtualbox, switch to console with HOST+F1 (e.g. the RIGHT Ctrl key, no ALT) and back to tty7 with HOST+F7.
Another workaround is to disable «nested paging» (in the System -> Acceleration settings) and to increase the video memory to 128MB (in the Display settings).
Note: This issue only affects the live session. You don’t need these workarounds post-installation.
To add support for shared folders, drag and drop, proper acceleration and display resolution in Virtualbox, click on the «Devices» menu of Virtualbox and choose «Insert Guest Additions CD Image». Choose «download» when asked and follow the instructions.
Home directory encryption
Benchmarks have demonstrated that, in most cases, home directory encryption is slower than full disk encryption.
The move to systemd caused a regression in ecrypts which is responsible for mounting/unmounting encrypted home directories when you login and logout. Because of this issue, please be aware that in Mint 19 and newer releases, your encrypted home directory is no longer unmounted on logout: https://bugs.launchpad.net/ubuntu/+source/gnome-session/+bug/1734541.
Guest sessions
You can still enable guest sessions in the «Login Window» utility, but this option is now disabled by default.
Scanner not detected
A regression in libsane affects many scanners (Epson, Brother, Xerox, Samsung..etc).
The bug report contains various workarounds for the different branch of scanners.
Vertical band in scanned documents
Ubuntu 18.04 introduced another libsane regression:
Samba
Samba isn’t very stable in Ubuntu 18.04. Two issues in particular, https://bugs.launchpad.net/ubuntu/+source/samba/+bug/1827041 and https://bugs.launchpad.net/ubuntu/+source/gvfs/+bug/1778322 make it very hard to browse Windows networks and connect to Windows shares.
To work around this issue, edit /etc/samba/smb.conf and add the following lines under «workgroup = WORKGROUP», in the «[global]» section:
name resolve order = bcast host lmhosts wins
client max protocol = NT1
Save the file and reboot.
You should then be able to see the workgroup and the hosts in the network neighbourhood.
To connect to a share, use «Connect to Server. » from the «File» menu.
If you are trying to connect anonymously and it isn’t working, type «anonymous» in the username field and type a dummy password.
If you use Samba a lot, until these issues are resolved, we recommend you use Linux Mint 18.3 instead.
Wine 4.0
To install the stable version of WINE from WineHQ, open a terminal and type:
apt install —install-recommends wine-installer
Among other things, this will install wine-desktop-files, which adds menu entries for regedit, your C:\ drive and other items which are missing from upstream WINE.
Upgrading Wine to version 4
If you installed wine-stable 3.0 or wine-development 3.0 before wine 4.0 was added to the repositories, apply the updates to bring it up to version 4.0 and run the following command to install the missing packages:
apt install —install-recommends wine-installer
To clean up, run the following command to list all wine 3.0 packages:
dpkg -l | grep wine | grep «3\.»
These packages can be removed.
You can also reinstall PlayOnLinux if it was removed during the update.
Sound and microphone issues
If you’re facing issues with your microphone or your sound output, please install «pavucontrol».
This will add «PulseAudio Volume Control» to your menu. This application has more configuration options than the default volume control.
DVD Playback with VLC
If VLC does not find your DVD player, click on Media->Open Disc, and specify ‘/dev/sr0’ as the disc device.
Issues with KDE apps
If you’re experiencing issues with KDE apps (Okular, Gwenview, KStars..etc) run the following command:
apt install kdelibs-bin kdelibs5-data kdelibs5-plugins
Force UEFI dialog hanging the installation
The issue occurs in EFI mode, when the HDD (or SSD) is new (without a partition table) and the installer is connected to the Internet.
To work around this problem, disable your Internet connection before launching the installer, or let the installer partition your drive automatically first (during a first install) and then install a second time with manual partitioning.
Other issues
Linux Mint 19.3 is based on Ubuntu 18.04. Make sure to read the Ubuntu release notes.
Username and password in the live session
In the live session, the username is «mint» and the password is empty (i.e. just press Enter if asked for a password).
Moving windows which don’t fit in the screen
If your screen resolution is too low, some windows might not fit in the screen.
While pressing the ALT key, you can grab any part of a window with the mouse and move it across the screen.
Installing multimedia codecs offline
To download the multimedia codecs into an installable archive:
- Boot from the Linux Mint ISO on a computer which is connected to the Internet
- Open a terminal and type «apt download mint-meta-codecs» (without the quotes)
- This creates a «mint-meta-codecs.tgz» archive
On computers which do not have an Internet access, you can decompress this archive and run ./install.sh (or alternatively «sudo dpkg -i *.deb») to install the multimedia codecs.
Booting with non-PAE CPUs
To boot Linux Mint on CPUs which do not officially support PAE (Pentium M processors for instance), please use the «Start Linux Mint with PAE forced» option from the boot menu.
Solving freezes during the boot sequence
Some graphics cards don’t work well with the open-source driver present in Linux Mint.
If Linux Mint freezes during boot time, use the «nomodeset» boot option as illustrated in the video below:


