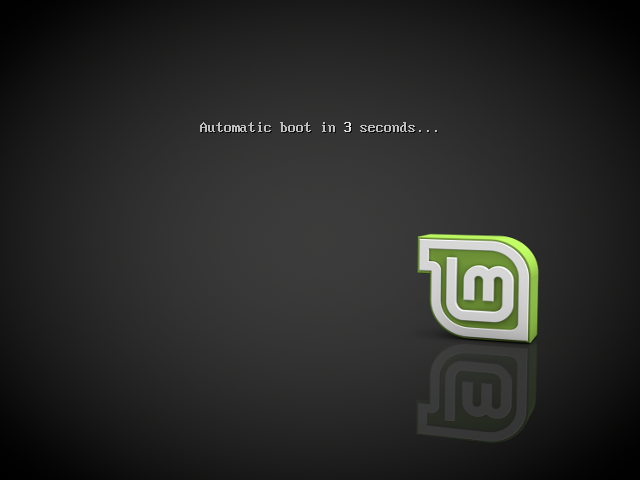
- Boot Linux Mint
- Boot options
- Compatibility mode
- Nomodeset boot option
- Other boot options
- Install an older release
- compizomania
- Страницы
- 14 мая 2014
- Как отобразить меню загрузки GRUB постоянно при установленной единственной системой Ubuntu/Linux Mint
- Параметры загрузки
- Режим совместимости
- Параметр загрузки Nomodeset
- Другие параметры загрузки
- Установить старый выпуск
- Show the GRUB Boot Menu in Linux Mint at Startup
- Show Boot Menu Using Manual Method
- Show Boot Menu by Editing GRUB Config File
Boot Linux Mint
Now that you have Linux Mint on a USB stick (or DVD) boot the computer from it.
- Insert your USB stick (or DVD) into the computer.
- Restart the computer.
- Before your computer boots your current operating system (Windows, Mac, Linux) you should see your BIOS loading screen. Check the screen or your computer’s documentation to know which key to press and instruct your computer to boot on USB (or DVD).
Most BIOS have a special key you can press to select the boot device and all of them have a special key to enter the BIOS configuration screen (from which you can define the boot order). Depending on the BIOS, these special keys can be Escape , F1 , F2 , F8 , F10 , F11 , F12 , or Delete . That information is usually briefly written on the screen during the boot sequence.
On Macs, keep your finger pressed on the Alt or Option key after hearing the boot sound.
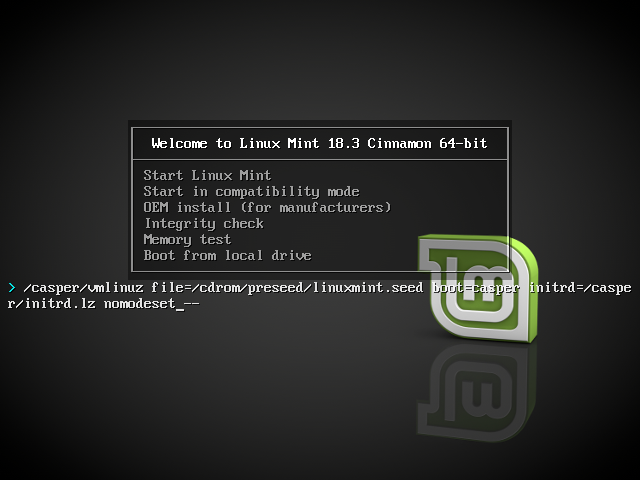
- The Linux Mint ISO can be booted both in EFI or BIOS mode. In EFI mode it shows a grub menu. In BIOS mode it shows an isolinux menu.
The isolinux menu in BIOS mode
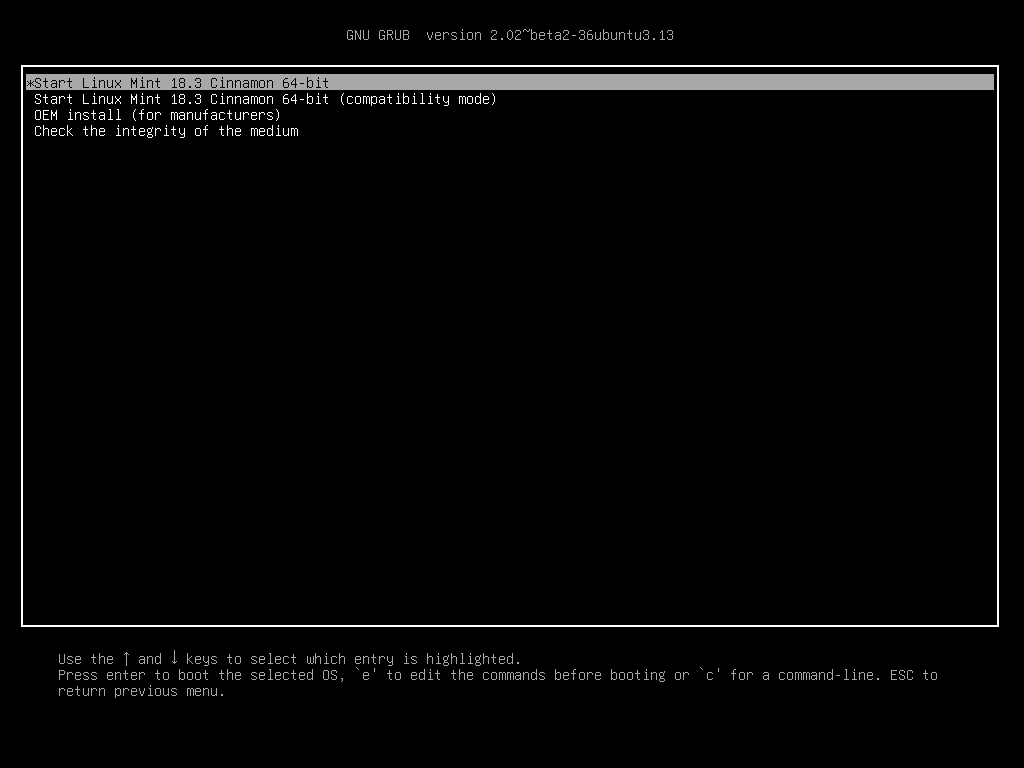
The grub menu in EFI mode
- From one of these menu, press Enter to start Linux Mint from your USB stick (or DVD).
© Copyright 2017, Linux Mint Revision 11740971 .
Источник
Boot options
Some graphics cards and motherboards don’t work well with the open-source drivers present in Linux Mint by default.
Compatibility mode
The easiest option is to select compatibility mode from the USB stick (or DVD) boot menu.
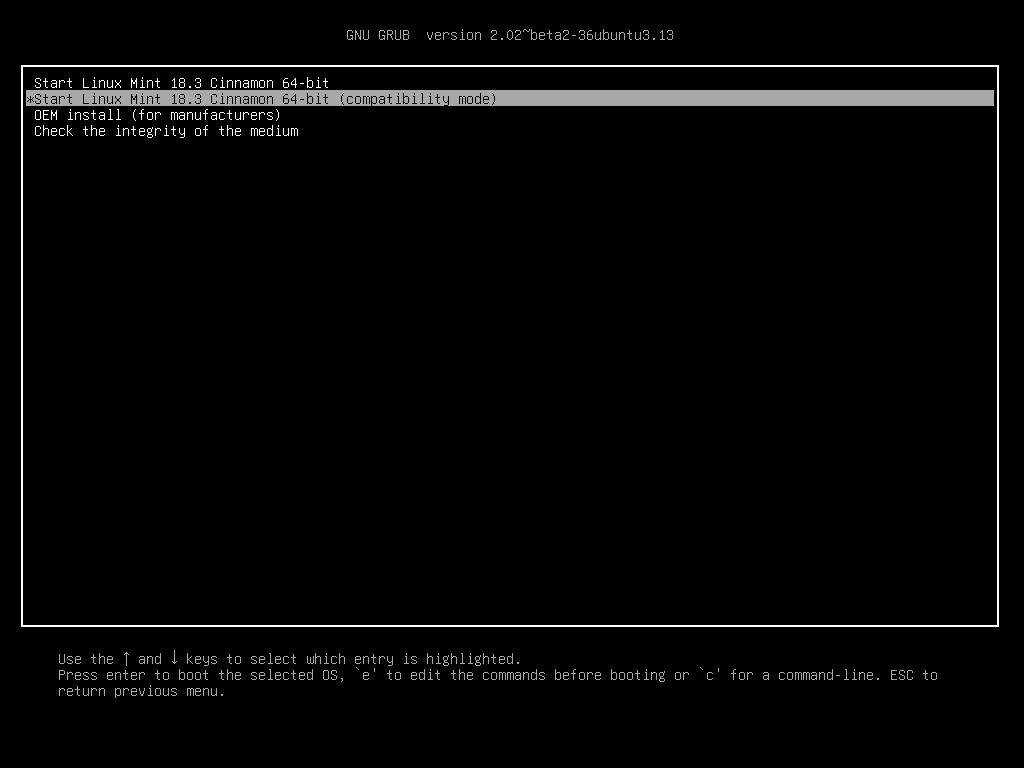
Grub menu (EFI mode)
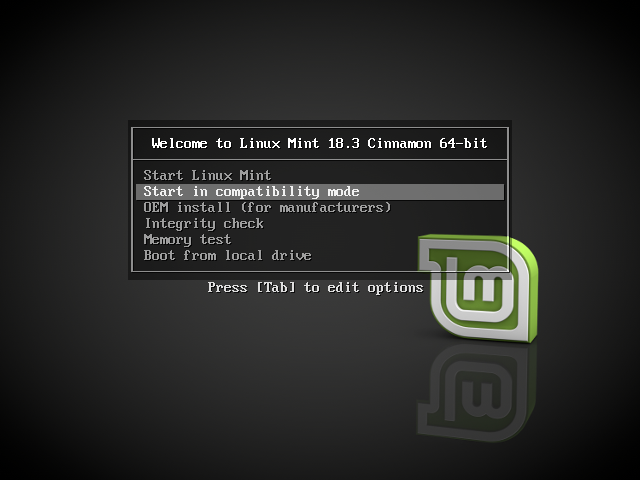
Isolinux menu (BIOS mode)
If that doesn’t work, you can try the nomodeset boot option.
Nomodeset boot option
In EFI mode, highlight the Start Linux Mint option and press e to modify the boot options.
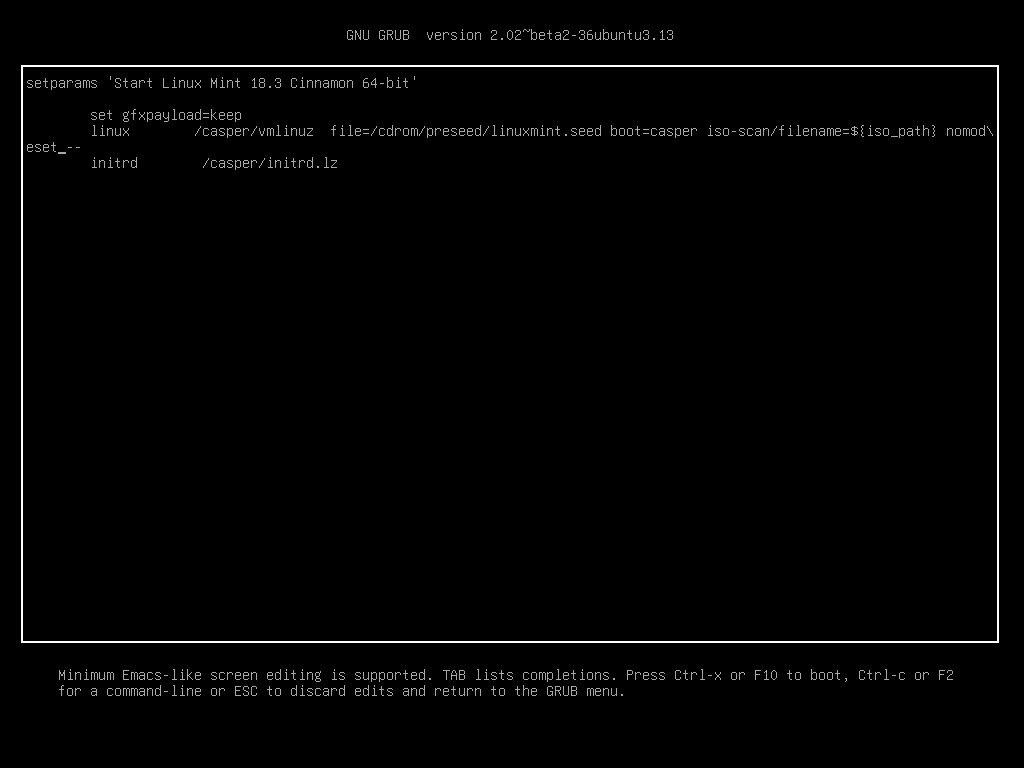
Replace quiet splash with nomodeset and press F10 to boot.
In BIOS mode, highlight Start Linux Mint and press Tab to modify the boot options.
Replace quiet splash with nomodeset and press Enter to boot.
Repeat this operation post-install in your grub boot menu and read Hardware drivers to install additional drivers.
Other boot options
If you still cannot boot try one of the following solutions:
- Try nouveau.noaccel=1 instead of nomodeset .
- After the installation, use Advanced Options ‣ Recovery mode from the boot menu and choose resume .
Install an older release
If your computer has compatibility issues with the latest Linux Mint release, install a previous release from the same Linux Mint series.
For instance, if you can’t install Linux Mint 18.3 (which comes with a 4.10 kernel), install Linux Mint 18 (which comes with a 4.4 kernel) and upgrade to 18.3.
The first release in each series uses an LTS (Long Term Support) kernel. Upgrading from this release to the latest one in the series does not change your kernel.
© Copyright 2017, Linux Mint Revision 11740971 .
Источник
compizomania
Азбука в Linux для начинающих и не только. Я знаю только то, что ничего не знаю, но другие не знают и этого. Сократ
Страницы
14 мая 2014
Как отобразить меню загрузки GRUB постоянно при установленной единственной системой Ubuntu/Linux Mint

После установки дистрибутива Ubuntu/Linux Mint на жесткий диск компьютера единственной системой, как правило меню загрузки GRUB не появляется во время загрузки и система загружается автоматически.
С одной стороны это хорошо, быстрее грузится система и не нужно нажимать Enter, чтобы освободиться от таймера GRUB, но с другой стороны, пользователь не может попасть в пункт Дополнительные параметры, который отображается в меню, где можно изменить загрузку системы с другого ядра, произвести восстановление системы в случае какого-то сбоя и т.п.
Если вы хотите, чтобы ваша система использовала меню загрузки GRUB, для выбора другого ядра или режима восстановления, то нужно сделать следующее:
Откройте редактор на редактирование файла grub:
Для Ubuntu/Linux MInt Cinnamon следующей командой в терминале:
sudo gedit /etc/default/grub
Для Linux Mint MATE:
sudo pluma /etc/default/grub
Когда откроется редактор с файлом, нужно закомментировать (поставить знак решётки # ) перед следующей строкой:
Должно получиться следующее:

А также измените на своё усмотрение время отображения GRUB в строке GRUB_TIMEOUT=10.
После изменений сохраните файл Ctrl+S и закройте редактор.
Затем обновите загрузчик GRUB следующей командой:
Перезагрузите компьютер, чтобы увидеть присутствие меню загрузки GRUB во время загрузки:
Источник
Параметры загрузки
Свободные драйвера, которые по умолчанию есть в Linux Mint, не очень хорошо работают с некоторыми видеокартами и материнскими платами.
Режим совместимости
Самый лёгкий способ — выбрать compatibility mode в меню загрузки с USB-носителя (или DVD).

Меню Grub (режим EFI)

Меню Isolinux (режим BIOS)
Если это не работает, попробуйте использовать параметр загрузки nomodeset .
Параметр загрузки Nomodeset
В режиме EFI выберите Start Linux Mint и нажмите e для изменения параметров загрузки.

Измените quiet splash на nomodeset и нажмите F10 для загрузки.
В режиме BIOS выберите Start Linux Mint и нажмите Tab для изменения параметров загрузки.

Измените quiet splash на nomodeset и нажмите Enter для загрузки.
Повторите эту операцию в загрузочном меню grub после установки и ознакомьтесь с драйверы для установки дополнительных драйверов.
Другие параметры загрузки
Если система так и не загрузилась, попробуйте одно из следующих решений:
- Попробуйте nouveau.noaccel=1 вместо nomodeset .
- После установки выберите «Дополнительные параметры –> Режим восстановления» в меню загрузки и выберите «восстановить».
Установить старый выпуск
Если ваш компьютер имеет проблемы с совместимостью с последним выпуском Linux Mint, установите предыдущий выпуск из той же серии Linux Mint.
Например, если вы не можете установить Linux Mint 18.3 (который поставляется с ядром 4.10), установите Linux Mint 18 (который поставляется с ядром 4.4) и обновите до 18.3.
Первый выпуск в каждой серии использует ядро LTS (долгосрочная поддержка). Обновление до последней версии не изменяет ядро.
© Copyright 2017, Linux Mint Revision 11740971 .
Источник
Show the GRUB Boot Menu in Linux Mint at Startup
The boot menu, known as GRUB, is usually disabled by default in Linux Mint. You can show the boot menu at startup using the following methods.
Show Boot Menu Using Manual Method
When you start Linux Mint, simply press and hold down the Shift key to display the GRUB boot menu at startup. The following boot menu appears in Linux Mint 20.

The GRUB boot menu will display with available boot options. Select the one you want and press Enter.
Show Boot Menu by Editing GRUB Config File
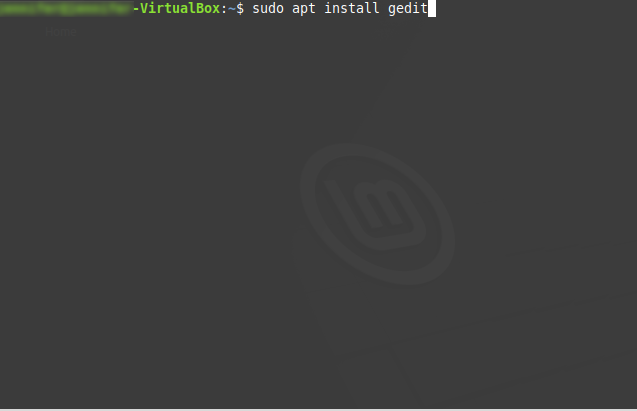
In Linux Mint, open a terminal.
We are going to use GEDIT to edit the GRUB configuration file. But since GEDIT doesn’t come pre-installed with Linux Mint, we must install it first. Type:
Then press Enter.
Scroll down to to the lines that deal with GRUB configuration. These will appear as follows:

The above GRUB configuration file appears in Linux Mint 20. If you’re using a different version of Linux Mint, your GRUB configuration file may look different. Scroll down to the following line:
Place a hash mark in front of it so that it appears like this:
This hash mark “comments out” this line in the configuration file so that it will be ignored by Linux at boot time. By doing this you are basically disabling the “hidden” configuration of the GRUB boot menu, thus allowing it to appear when Linux Mint starts up.
In earlier versions of Linux Mint, the line might look more like this:
If you like, you can also change the timeout time in seconds.
This timeout configuration setting causes the GRUB menu to automatically choose the selected item after ten seconds.
Now scroll down and remove the hash mark in front of this line:
Save the file and exit GEDIT. Now, go back to the terminal and type:
Then wait for the file to update.
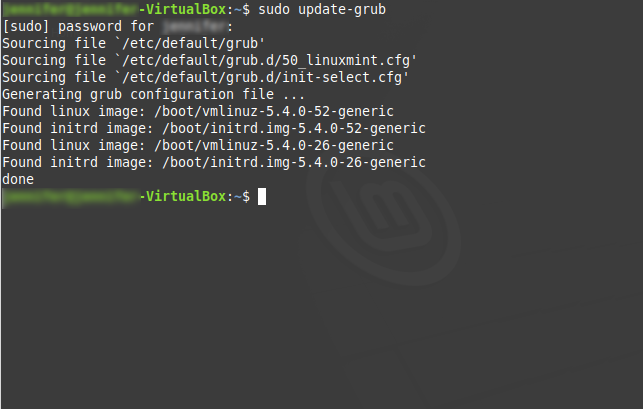
Now, reboot Linux Mint, and the GRUB boot menu should appear automatically at startup.
Источник


