- Как обновить Linux Mint до новой версии
- Создание резервной копии
- Подготовка
- Обновление Linux Mint
- Перезагрузка компьютера
- Linux mint cinnamon обновления
- Release notes
- Known issues
- Shutdown timeout
- Grub2 theme in HiDPI
- Snap Store
- Virtualbox
- Home directory encryption
- Guest sessions
- Touchpad drivers
- Sound and microphone issues
- DVD Playback with VLC
- Other issues
- Username and password in the live session
- Moving windows which don’t fit in the screen
- Installing multimedia codecs offline
- Solving freezes during the boot sequence
- Choosing the right version of Linux Mint
Как обновить Linux Mint до новой версии
Рассмотрим, как обновить установленную систему Linux Mint до свежей версии.
Мы будем рассматривать процесс обновления дистрибутива Linux Mint 19.1 до Linux Mint 19.2.
Создание резервной копии
Перед обновлением желательно создать резервную копию важных данных и сделать снимок системы (снапшот).
Снимок системы позволит вам восстановить прежнее состояние системы, если во время обновления возникнут какие-нибудь сбои.
Для создания снимка системы можно использовать программу Timeshift. Запустить программу можно из главного меню из раздела Администрирование ( Administration ) .
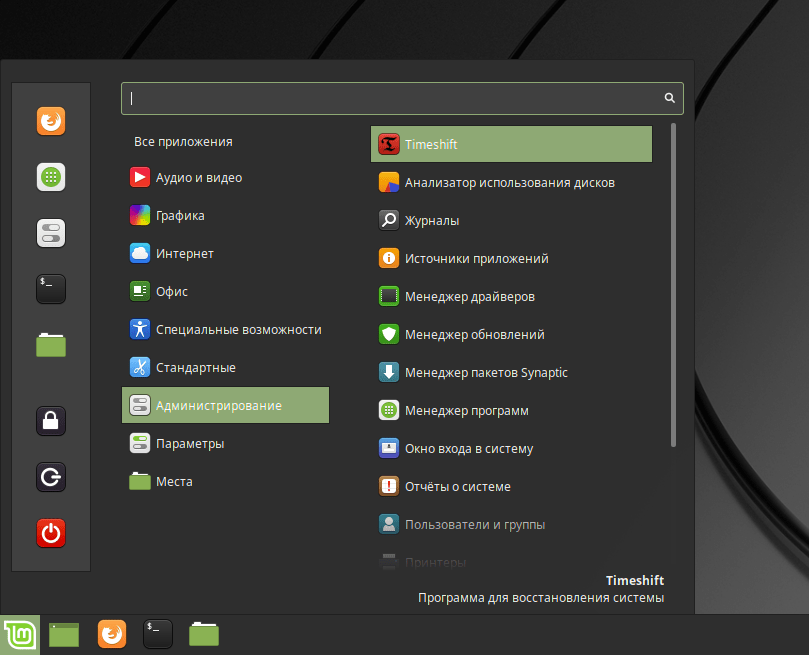 Запуск программы Timeshift
Подготовка
Разработчики дистрибутива рекомендуют отключить экранную заставку (скринсейвер) перед началом обновления, так как в некоторых случаях она может заблокировать вам доступ к рабочему столу. Чтобы отключить заставку в главном меню выберите пункт Параметры→Экранная заставка ( Preferences→Screensaver ) .
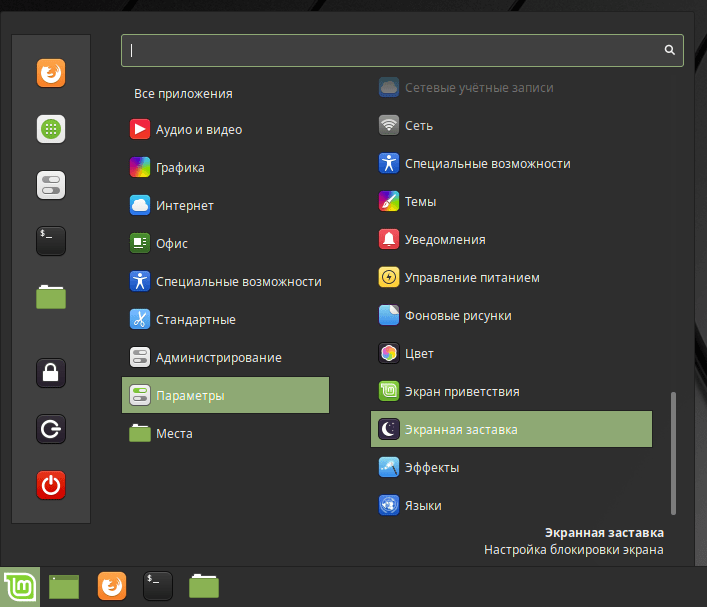 Запуск настроек Экранной заставки
В открывшемся окне в разделе Настройки заставки установите время задержки в состояние Никогда
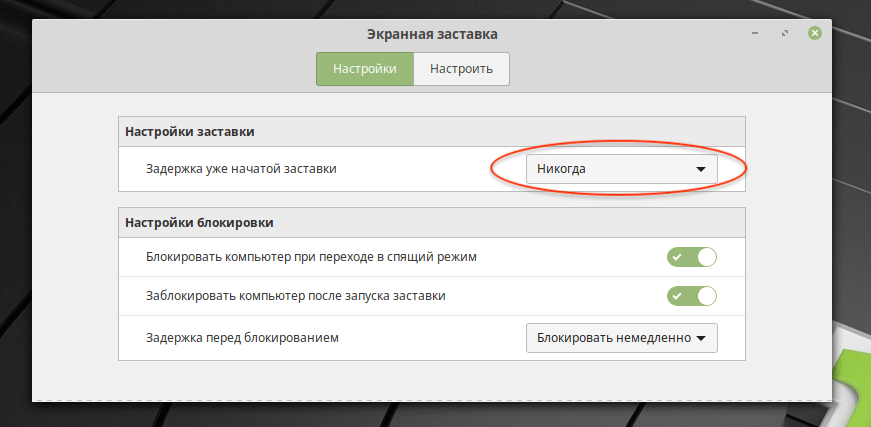 Настройки экранной заставки
Также, если ранее вы устанавливали дополнения Cinnamon spices, обновите их через системные настройки.
Обновление Linux Mint
Теперь можно выполнить обновление дистрибутива.
Запустите утилиту Менеджер обновлений (Update Manager). Для этого в главном меню выберите пункт
Администрирование→Менеджер обновлений ( Administration→Update Manager )
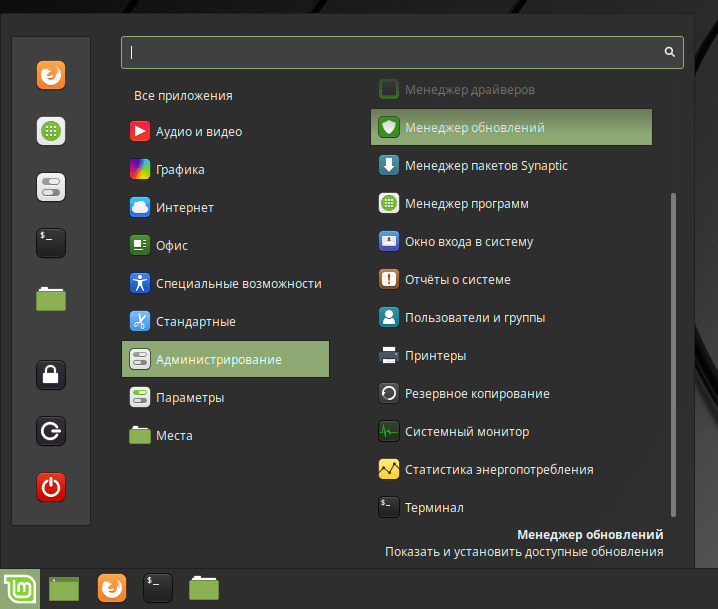 Запуск Менеджера обновлений
В Менеджере обновлений нажмите кнопку Проверить обновления , чтобы проверить не появилась ли новая версия самой утилиты «Менеджер обновлений» (в которой вы сейчас находитесь): пакеты mintupdate и mint-upgrade-info.
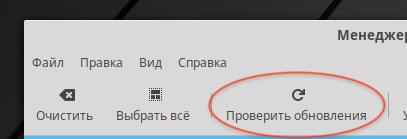 Проверка обновлений
Если есть обновления для пакетов mintupdate и mint-upgrade-info, то отметьте их галочками и нажмите кнопку Установить обновления
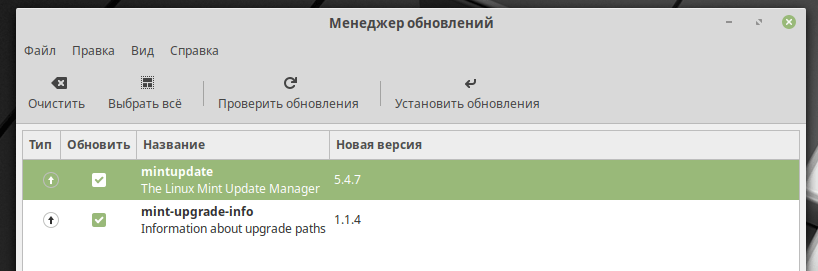 Обновление пакетов mintupdate и mint-upgrade-info
Теперь в меню выберите пункт Правка→Обновить до «Linux Mint 19.2 Tina» ( Edit→Upgrade to «Linux Mint 19.2 Tina» ) (версия дистрибутива может отличаться).
 Запуск обновления Linux Mint
Откроется утилита, в которой необходимо выполнить несколько простых шагов.
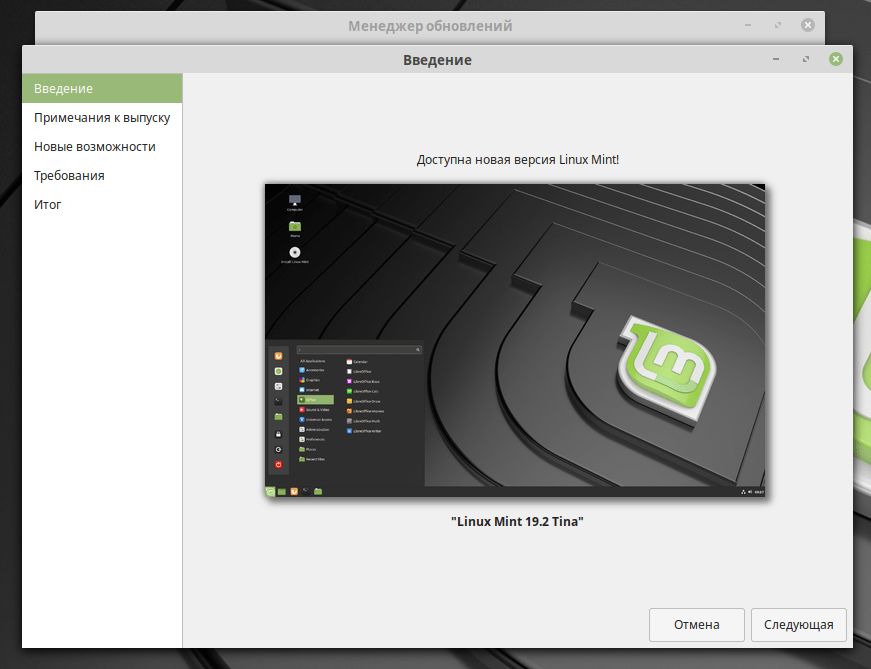 Утилита обновления Linux Mint
Вам требуется только нажимать кнопку Следующая ( Next ) . На предпоследнем шаге установите галочку у пункта « Я понимаю риск. Я хочу обновиться до Linux Mint.. » и нажать кнопку Применить .
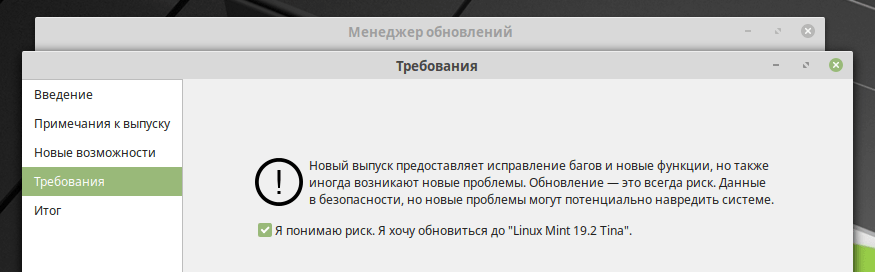 Утилита обновления Linux Mint до новой версии
Начнется процесс обновления системы. Сначала будут загружены новые версии пакетов, затем будет произведена их установка. Процесс может занять продолжительное время.
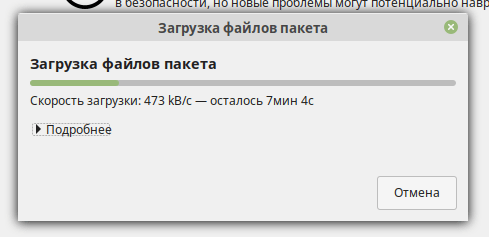 Процесс обновления
Перезагрузка компьютера
Когда обновление завершится, необходимо перезагрузить компьютер.
 Обновление Linux Mint завершено
Источник
Linux mint cinnamon обновления
10 июл 2020, 01:01
Это неофициальный перевод официальной инструкции. Оригинал находится тут:
https://community.linuxmint.com/tutorial/view/2485
А. Введение
Из этой инструкции вы узнаете, как перейти на Linux Mint 20.
B. Требования
B1. Только 64 бита
Хотя до апреля 2023 года будут поддерживаться как 32-разрядные, так и 64-разрядные версии Linux Mint 19.3, новые релизы, начиная с Linux Mint 20, будут доступны только в 64-разрядной версии. Для обновления до Linux Mint 20 вам нужно иметь 64-битную версию Linux Mint 19.3. Чтобы узнать, какую версию вы используете, наберите в терминале:
dpkg —print-architecture
Если команда выдаст «amd64», вы можете перейти на Linux Mint 20.
Если вы видите «i386», значит, вы используете 32-битную версию. В этом случае вы не сможете обновиться.
В2. Опыт
Для обновления до Linux Mint 20 вам нужен опыт работы с APT и командной строкой. Обновление до более новой пакетной базы — нетривиальная задача, и не должна выполняться начинающими пользователями. Вы должны знать, как вводить команды и читать их вывод. Вы также должны иметь опыт работы с APT. Во время обновления вы должны понимать вывод команд APT. Вам нужно будет понять, стоит ли удалить пакет, блокирует ли он обновление или конфликтует с другим пакетом.
C. Подготовка
С1. Обновите текущую систему
Чтобы создать снимок системы:
- Запустите Timeshift с помощью «Меню -> Администрирование -> Timeshift».
- Следуйте указаниям мастера, чтобы выбрать место назначения для ваших снимков.
- На панели инструментов нажмите кнопку «Создать», чтобы создать снимок вашей операционной системы вручную.
D. Обновление
D1. Установите утилиту обновления
Чтобы установить утилиту обновления, откройте терминал и введите:
apt install mintupgrade
D2. Проверьте возможность обновления
Чтобы смоделировать обновление, откройте терминал и введите:
mintupgrade check
Затем следуйте инструкциям на экране. Эта команда временно переведёт вашу систему на репозитории Linux Mint 20 и оценит возможность обновления. Обратите внимание, что эта команда никак не влияет на вашу операционную систему. После завершения симуляции ваши исходные репозитории будут восстановлены. Вывод команды покажет, возможно ли обновление, и если да, то какие пакеты будут обновлены, установлены, удалены и сохранены. Чрезвычайно важно уделить пристальное внимание выводу этой команды. (При необходимости приведите систему к более «первозданному» виду, удалив сторонние или проблемные пакеты — прим.пер.) Продолжайте использовать mintupgrade check и не переходите к следующему шагу, пока вы не будете довольны результатом.
D3. Загрузите обновления пакетов
Чтобы загрузить пакеты, необходимые для обновления, введите следующую команду:
mintupgrade download
Обратите внимание, что эта команда на самом деле не выполняет обновление, а просто загружает пакеты.
D4. Примените обновления
Примечание. Этот шаг необратим. Как только вы его сделаете, будет только один способ вернуться назад — восстановить снимок системы.
Чтобы применить обновления, введите следующую команду:
mintupgrade upgrade
Источник
Release notes
This is Linux Mint 20, codename Ulyana.
Linux Mint 20 is a long term support release which will be supported until 2025. It comes with updated software and brings refinements and many new features to make your desktop experience more comfortable.
Known issues
Shutdown timeout
For your convenience, the shutdown timeout is reduced to 10s.
If you rely on lengthy operations to finish before shutdown, read /etc/systemd/system.conf.d/50_linuxmint.conf and override the timeout value in /etc/systemd/system.conf.d/60_custom.conf.
Grub2 theme in HiDPI
If the grub2 theme looks too small in your HiDPI monitor, install the «grub2-theme-mint-2k» package.
Snap Store
The Snap Store is disabled in Linux Mint 20. For more information on this or to re-enable it read https://linuxmint-user-guide.readthedocs.io/en/latest/snap.html.
Virtualbox
If the screen is black when launching Linux Mint in Virtualbox, change the VirtualBox graphics controller to «VMSVGA». Do this by opening up the settings for your VM and select Display -> Graphics Controller.
If the screen is garbled when launching Linux Mint in Virtualbox, switch to console with HOST+F1 (e.g. the RIGHT Ctrl key, no ALT) and back to tty7 with HOST+F7.
Another workaround is to disable «nested paging» (in the System -> Acceleration settings) and to increase the video memory to 128MB (in the Display settings).
Note: This issue only affects the live session. You don’t need these workarounds post-installation.
To add support for shared folders, drag and drop, proper acceleration and display resolution in Virtualbox, click on the «Devices» menu of Virtualbox and choose «Insert Guest Additions CD Image». Choose «download» when asked and follow the instructions.
Home directory encryption
Benchmarks have demonstrated that, in most cases, home directory encryption is slower than full disk encryption.
The move to systemd caused a regression in ecrypts which is responsible for mounting/unmounting encrypted home directories when you login and logout. Because of this issue, please be aware that in Mint 20 and newer releases, your encrypted home directory is no longer unmounted on logout: https://bugs.launchpad.net/ubuntu/+source/gnome-session/+bug/1734541.
Guest sessions
You can still enable guest sessions in the «Login Window» utility, but this option is now disabled by default.
Touchpad drivers
The default touchpad driver in this edition is «libinput» (provided by the xserver-xorg-input-libinput package).
If you experience problems with it, you can switch to another driver called «synaptics» (provided by the xserver-xorg-input-synaptics package).
To know which driver is used by your input devices, run the following command:
grep -i «Using input driver» /var/log/Xorg.0.log
When both drivers are installed, «synaptics» takes priority.
To switch to the «synaptics» driver, install it with the command:
apt install xserver-xorg-input-synaptics
Then log out and log back in.
To go back to using «libinput», simply remove the «synaptics» driver:
apt remove xserver-xorg-input-synaptics
Then log out and log back in.
Note: You can also try installing the «evdev» driver (provided by the xserver-xorg-input-evdev).
To install the complete version of WINE, open a terminal and type:
apt install wine-installer
Among other things, this will install wine-desktop-files, which adds menu entries for regedit, your C:\ drive and other items which are missing from upstream WINE.
Sound and microphone issues
If you’re facing issues with your microphone or your sound output, please install «pavucontrol».
This will add «PulseAudio Volume Control» to your menu. This application has more configuration options than the default volume control.
DVD Playback with VLC
If VLC does not find your DVD player, click on Media->Open Disc, and specify ‘/dev/sr0’ as the disc device.
Other issues
Linux Mint 20 is based on Ubuntu 20.04. Make sure to read the Ubuntu release notes.
Username and password in the live session
In the live session, the username is «mint» and the password is empty (i.e. just press Enter if asked for a password).
Moving windows which don’t fit in the screen
If your screen resolution is too low, some windows might not fit in the screen.
While pressing the ALT key, you can grab any part of a window with the mouse and move it across the screen.
Installing multimedia codecs offline
To download the multimedia codecs into an installable archive:
- Boot from the Linux Mint ISO on a computer which is connected to the Internet
- Open a terminal and type «apt download mint-meta-codecs» (without the quotes)
- This creates a «mint-meta-codecs.tgz» archive
On computers which do not have an Internet access, you can decompress this archive and run ./install.sh (or alternatively «sudo dpkg -i *.deb») to install the multimedia codecs.
Solving freezes during the boot sequence
Some graphics cards don’t work well with the open-source driver present in Linux Mint.
If Linux Mint freezes during boot time, use the «Compatibility Mode» boot option.
In this mode you should be able to boot Linux Mint and install it on your computer.
After the installation, reboot the computer and wait for the boot menu to appear.
Add the «nomodeset» option as illustrated below:


