- Как установить и использовать GParted на Linux Mint
- Начало работы с GParted
- Получить информацию об устройстве
- Попытка спасения данных
- Создать новую таблицу разделов
- Создать новый раздел
- Вывод
- Как изменить часовой пояс в Ubuntu?
- Как установить VirtualBox на CentOS 8
- комментарий
- Добавить комментарий Отменить ответ
- Популярные статьи
- How to install and use GParted on Linux Mint
- Installing GParted on Linux Mint
- Getting started with GParted
- Get device information
- Attempt Data Rescue
- Create a new partition table
- Create new partition
- Conclusion
- About the author
- Kamran Sattar Awaisi
- Downloads
- Download Links
Как установить и использовать GParted на Linux Mint
Gparted — популярный и бесплатный инструмент для управления дисками в Linux. Используя GParted, мы можем создавать разделы диска и управлять ими. Это позволяет нам создавать новые таблицы разделов, разделы, просматривать информацию о диске и т.д.
Я использую Linux Mint 20 для выполнения команд и подготовки этого сообщения.
GParted — это хорошо известный инструмент, доступный в стандартных репозиториях Linux Mint.
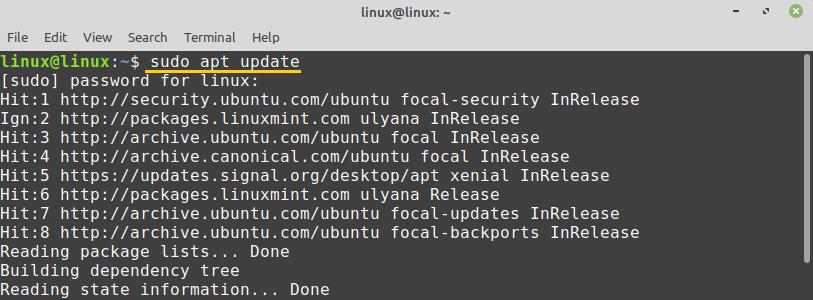
Вам нужно открыть терминал и ввести:

Пришло время две установки gparted, и способ сделать это:
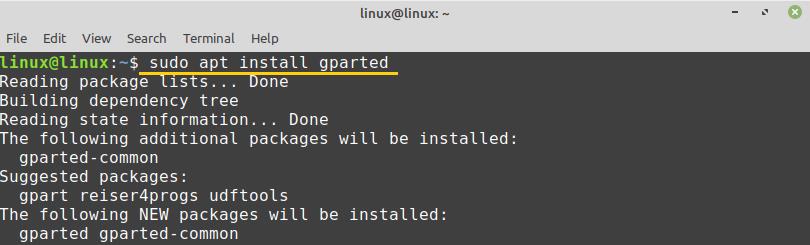
Нажмите «y» на клавиатуре вашего компьютера, чтобы установить GParted.

GParted будет успешно установлен на Linux Mint.
Начало работы с GParted
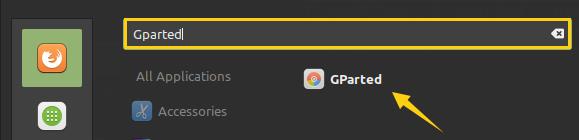
После установки приложения GParted откройте меню приложения и найдите «GParted».

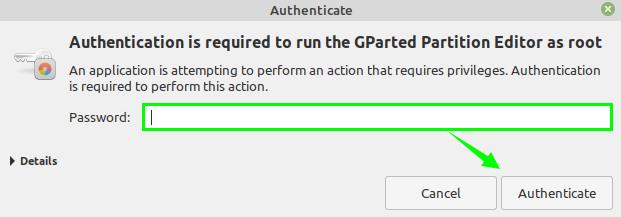
Щелкните «GParted», чтобы открыть его. Для запуска приложения GParted требуется аутентификация. Введите свой пароль и нажмите кнопку «Аутентификация».
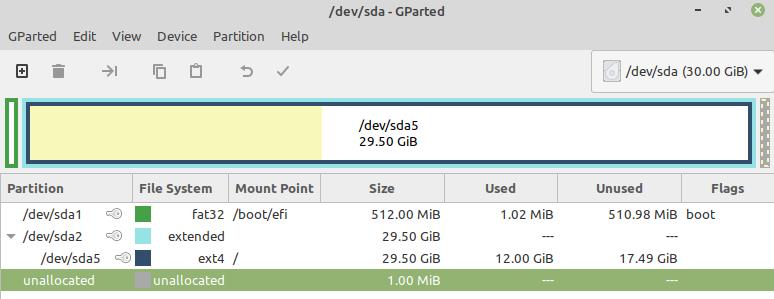
Откроется GParted, и вы увидите его интерфейс.

В правом углу выберите раскрывающееся меню и выберите диск, если у вас несколько дисков. Я выбрал размер жесткого диска 30 ГБ.
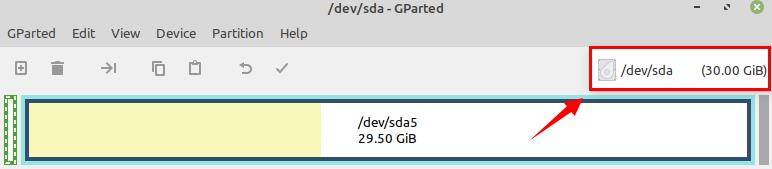
/dev/sda5 — это мой основной жесткий диск, на котором хранятся все файлы и приложения в системе Linux Mint.

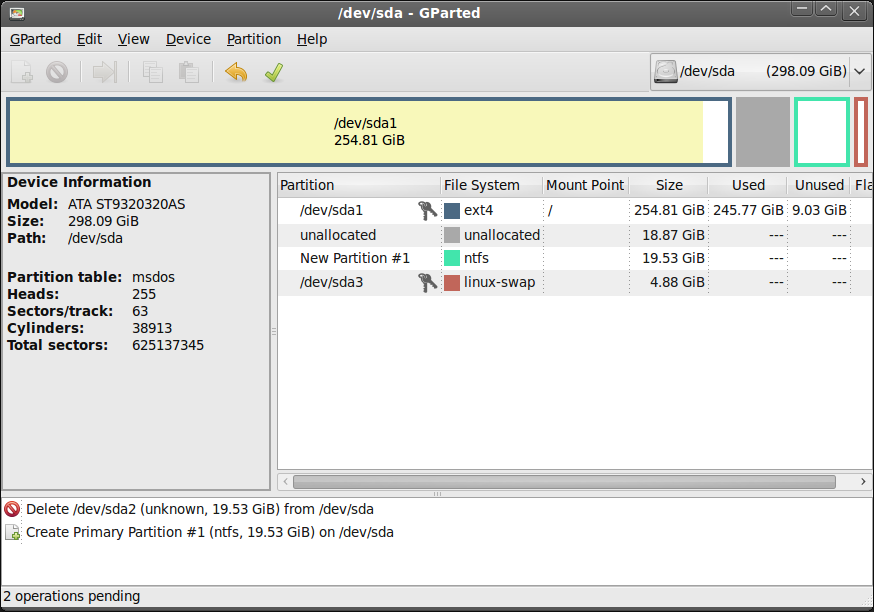
Получить информацию об устройстве
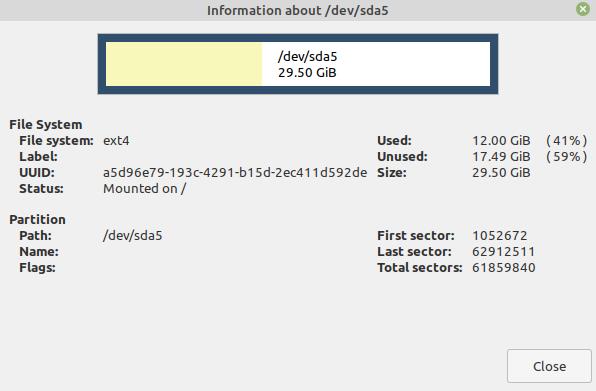
Если вы хотите увидеть информацию о диске, выберите диск и щелкните его правой кнопкой мыши.
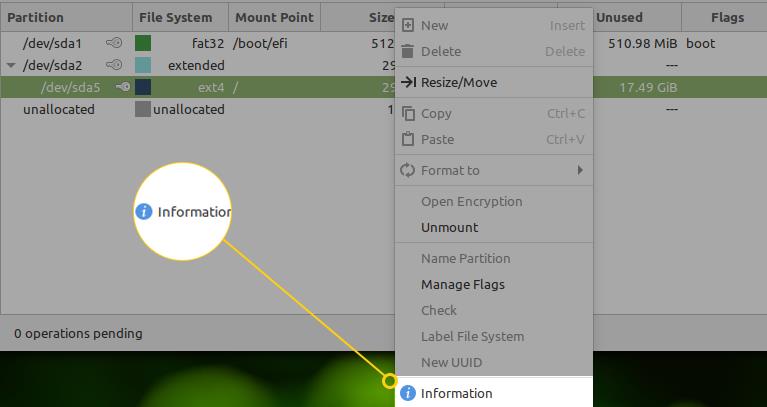
Выберите опцию «Информация». Информация о диске будет отображаться на новом экране.

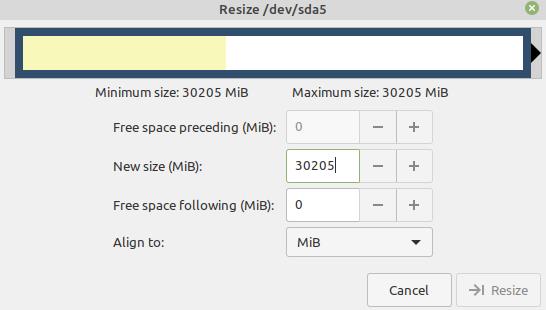
Используя GParted, вы можете легко изменять размер или перемещать разделы. Для этого выберите раздел и щелкните его правой кнопкой мыши. Теперь выберите параметр «Изменить размер/переместить».

Введите новый размер диска в мегабайтах для изменения размера раздела и нажмите «Изменить размер».

Попытка спасения данных
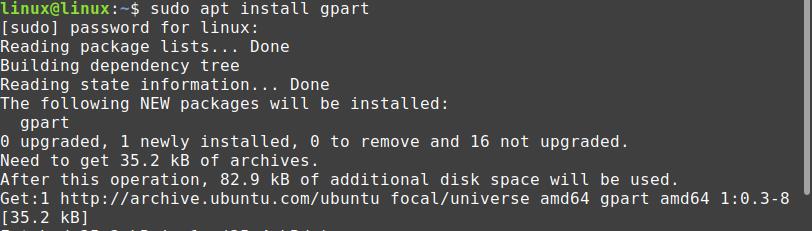
Мы можем восстановить потерянные данные в Linux с помощью GParted. Чтобы восстановить потерянные данные, сначала нам нужно установить команду gpart. Запустите терминал и установите gpart с помощью команды:

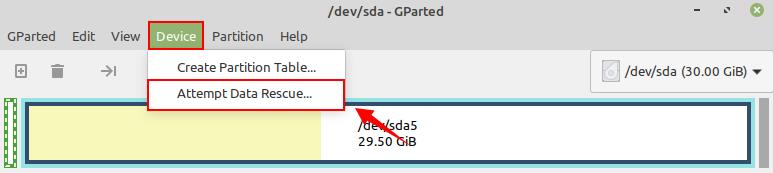
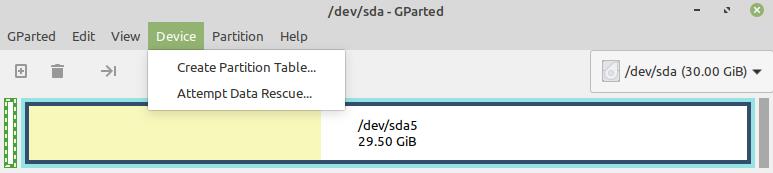
Нажмите «Устройство» в верхнем меню и выберите «Попытка восстановления данных».
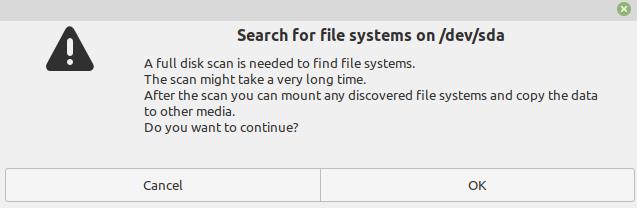
Для поиска файловых систем будет выполнено полное сканирование диска. Это может занять много времени. Найдя файловую систему, вы можете легко смонтировать ее и скопировать на другой носитель.
Создать новую таблицу разделов
Вы можете создать новую таблицу разделов с помощью Gparted. Щелкните «Устройство» и выберите «Создать таблицу разделов». При создании таблицы разделов вы также сможете выбрать тип раздела.

Создать новый раздел
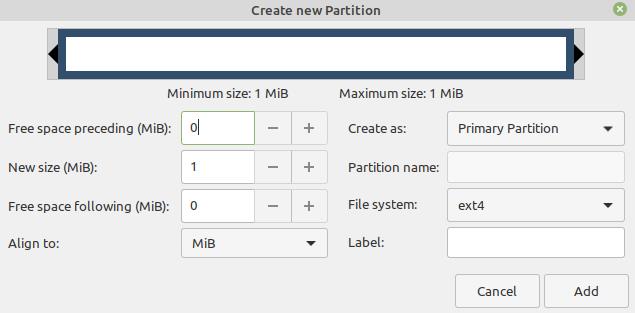
Чтобы создать новый раздел, нажмите «Раздел» и выберите опцию «Новый».

У вас должно быть свободное место для создания нового раздела. Введите соответствующие данные во все обязательные поля и нажмите «Добавить».
Вывод
GParted — это бесплатный инструмент для управления дисками и разделами с открытым исходным кодом. Используя инструмент GParted, мы можем проверить информацию о диске, восстановить потерянные данные и создать новую таблицу разделов и новые разделы. В этой статье объясняется установка и использование GParted в Linux Mint.
Как изменить часовой пояс в Ubuntu?
Как установить VirtualBox на CentOS 8
комментарий
Доброго!
Я аматер. 16 часов (на работе 8+8))) бился, чтобы увеличить на минте 19-ть 32х битовом при помощи GParted объем на dev/sda 1 (ntfs) 30 GB (то есть КОРНЕВОМ), где пополам минт и винда ХР — оба занимают 16 ГБ, а остальное пространство в 14 ГБ — НЕ ЗАНЯТО. Кроме этого на компе еще 70 гб есть в других директориях (на физических дисках).
Комп рабочий, переустанавливать ну очень не хочется (устал уже старую технику всем на работе реанимировать). Есть ли выход без переустановки? Все время на минте пишет, что осталось 9 мб места, хотя вроде благодаря GParted на подкачку добавил 4 ГБ, но не вижу после операции этого результата. По-прежнему пишет же, что мало места! Заранее благодарю за ЧТО ДЕЛАТЬ по Чернышевскому )))
Скрины есть, могу выслать
Старый дед Миша
Добавить комментарий Отменить ответ
Этот сайт использует Akismet для борьбы со спамом. Узнайте, как обрабатываются ваши данные комментариев.
Популярные статьи

Copyright © 2021 Сеть без проблем. Все права защищены.
Источник
How to install and use GParted on Linux Mint
Installing GParted on Linux Mint
GParted is a well-known tool and is available in the standard repositories of Linux Mint.
You need to open up a terminal and type in:
It’s about time now two installs gparted and the way to do that is:

Hit ‘y’ on your computer keyboard for the installation of GParted.

GParted will be installed successfully on Linux Mint.
Getting started with GParted
Once the GParted application is installed, open the Application Menu and search for ‘GParted’.
Click on ‘GParted’ to open it. Authentication is required to run the GParted application. Put in your password and hit the ‘Authenticate’ button.

GParted would open up, and you can see its interface.
On the right corner, select the drop-down menu and choose the disk if you have multiple disks. I selected the size of the hard drive to be 30GB.

/dev/sda5 is my main hard disk which stores all the files and applications on the Linux Mint system.

Get device information
If you want to see the information of the disk, select the disk and right-click on it.

Select the ‘Information’ option. The disk-related information will be displayed on a new screen.
Using GParted, you can easily resize or move your partitions. To do so, select the partition and right-click on it. Now select the ‘Resize/Move’ option.

Enter the disk’s new size in Megabytes for resizing the partition, and click ‘Resize’.
Attempt Data Rescue
We can recover our lost data on Linux using GParted. To recover the lost data, first, we need to install the gpart command. Fire up the terminal and install gpart with the command:
Click ‘Device’ from the top menu and select the ‘Attempt Data Rescue’ option.

A full disk scan will be performed to find the file systems. It could be a time-consuming process. Once you find the file system, you can easily mount it and copy it to other media.

Create a new partition table
You can create a new partition table using Gparted. Click on ‘Device’ and select the ‘Create Partition Table’ option. While creating the partition table, you will be able to select the type of partition as well.
Create new partition
For creating a new partition, click on ‘Partition’ and select the ‘new’ option.

You must have free space for creating the new partition. Enter the appropriate data in all the required fields and click ‘Add’.

Conclusion
GParted is a free and open-source disk management and partition tool. Using the GParted tool, we can check the disk information, recover lost data, and create the new partition table and new partitions. This article explains the installation and use of GParted on Linux Mint.
About the author

Kamran Sattar Awaisi
I am a software engineer and a research scholar. I like to write article and make tutorial on various IT topics including Python, Cloud Computing, Fog Computing and Deep Learning. I love to use Linux based operating systems.
Источник
Downloads
GParted is a free partition manager that enables you to resize, copy, and move partitions without data loss.
The best way to access all of the features of the GParted application is by using the GParted Live bootable image. GParted Live enables you to use GParted on GNU/Linux as well as other operating systems, such as Windows or Mac OS X.
CAUTION: Editing partitions has the potential to cause LOSS of DATA.
You are advised to BACKUP your DATA before using gparted.
Download Links
 If you use GParted and it helps you with your task, then please consider making a donation to help us make GParted better.
NOTE: GParted Live is available in three different architectures
| Architecture | Description |
| amd64 | 64-bit version runs on x86-64 based computers, with ability to access more than 4 gigabytes of memory, and supports use of multiple processor cores. Works with UEFI secure boot. |
| i686 | 32-bit version runs on x86 and x86-64 based computers, limited to physical address space of 4 gigabytes, and uses one processor only. |
| i686-PAE | 32-bit version runs on x86 (i686 and higher) and x86-64 based computers, with Physical Address Extension to access more than 4 gigabytes of memory, and supports use of multiple processor cores. |
| GParted Live CD/USB/HD/PXE Bootable Image Stable Releases | |||
|---|---|---|---|
| Download gparted-live-1.3.1-1-amd64.iso Stable directory (.iso/.zip) | Release notes | Changelog | Checksums Checksums.gpg (Signed by GParted live maintainer Steven Shiau, updated on Sep/18/2017), or available on the 2nd key server. See steps to verify checksums. |
| Testing Releases | |||
| Testing directory (.iso/.zip) (for i686, i686-pae and amd64 architectures) | Release notes and checksums in same directory. See steps to verify checksums. | ||
| GParted Application Source Code | |
|---|---|
| Source code directory (.tar.gz) | Release notes and checksums in same directory. |
| Linux Distribution * | Package | Command Prompt Install |
|---|---|---|
| Debian | gparted | |
| Fedora | gparted | |
| Mageia | gparted | |
| OpenSUSE | gparted | |
| Ubuntu | gparted |
* NOTE: Distribution packages might not contain the most recent versions of GParted.
Источник


