- Как установить TeamViewer на Linux Mint 20
- Как установить TeamViewer на Linux Mint 20
- Установите TeamViewer на Linux Mint 20 Ulyana
- Шаг 1. Перед запуском приведенного ниже руководства важно убедиться, что ваша система обновлена, выполнив следующие apt команды в терминале:
- Шаг 2. Установка TeamViewer на Linux Mint 20.
- Шаг 3. Доступ к TeamViewer в Linux Mint.
- How To Install TeamViewer On Linux (Ubuntu, Debian, Mint, Kali, Fedora, Arch, CentOS, Red Hat)?
- Install TeamViewer For Ubuntu, Debian, Mint, and Kali
- Download TeamViewer For Ubuntu, Debian, Mint, and Kali
- Install For Ubuntu, Debian, Mint, and Kali
- Update For Ubuntu, Debian, Mint, and Kali
- Remove/Delete For Ubuntu, Debian, Mint, and Kali
- Install TeamViewer For Fedora, Red Hat and CentOS
- Download TeamViewer For Fedora, Red Hat and CentOS
- Install TeamViewer For Fedora, Red Hat and CentOS
- Update TeamViewer For Fedora, Red Hat and CentOS
- Remove/Delete TeamViewer For Fedora, Red Hat and CentOS
- Install TeamViewer For All (Generic) Linux Distributions
- Download TeamViewer For All (Generic) Linux Distributions
- Install TeamViewer For All (Generic) Linux Distributions
- First Run Of TeamViewer
- Running TeamViewer
- Run From Command Line
- Run From Start Menu
- Run From Application List
- Скачать и установить Teamviewer на Linux Mint 18
- Максимально широкий охват подключенных устройств
- Удаленный доступ
- Teamviewer linux mint установка
- Преимущества
- How to Install TeamViewer on Linux Mint
- Unattained access
- Multi-session handling
- Cutting down costs
- Freedom
- Cautions
- TeamViewer for remote desktop
- Getting TeamViewer
- Using TeamViewer
- About the author
- Sidratul Muntaha
Как установить TeamViewer на Linux Mint 20
Как установить TeamViewer на Linux Mint 20
В этом руководстве мы покажем вам, как установить TeamViewer на Linux Mint 20. Для тех из вас, кто не знал, TeamViewer — отличный инструмент для удаленного управления, видеоконференций, рабочего стола и обмена файлами по сети. Доступны версии для операционных систем Microsoft Windows, Mac OS, Desktop Linux, iOS, Android и Windows Phone. Также можно получить доступ к машине, на которой запущен TeamViewer, через веб-браузер. Хотя основное внимание в приложении уделяется удаленному управлению компьютерами, в него включены функции совместной работы и презентации.
В этой статье предполагается, что у вас есть хотя бы базовые знания Linux, вы знаете, как использовать оболочку, и, что наиболее важно, вы размещаете свой сайт на собственном VPS. Установка довольно проста и предполагает, что вы работаете с учетной записью root, в противном случае вам может потребоваться добавить ‘ sudo ‘ к командам для получения привилегий root. Я покажу вам пошаговую установку общего доступа к удаленному рабочему столу TeamViewer на Linux Mint 20 (Ulyana).
Установите TeamViewer на Linux Mint 20 Ulyana
Шаг 1. Перед запуском приведенного ниже руководства важно убедиться, что ваша система обновлена, выполнив следующие apt команды в терминале:
Шаг 2. Установка TeamViewer на Linux Mint 20.
Теперь скачиваем пакет TeamViewer для систем на базе Linux:
После этого используйте команду apt a для установки TeamViewer на Linux Mint:
Шаг 3. Доступ к TeamViewer в Linux Mint.
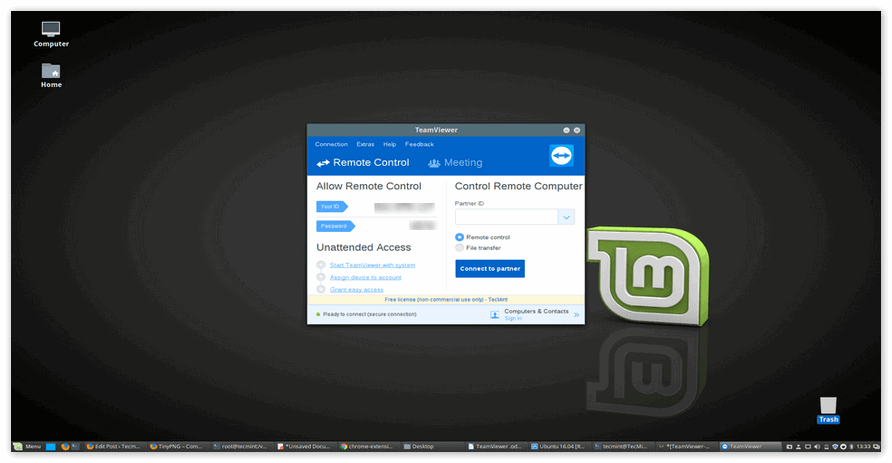
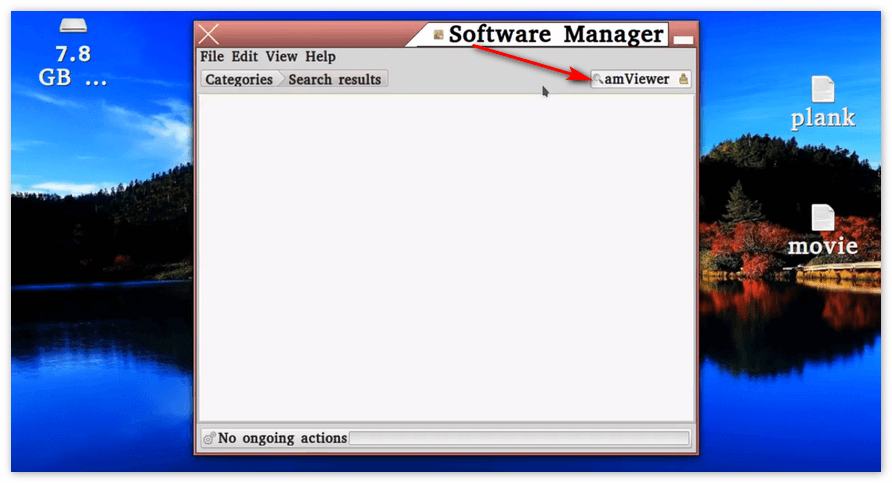
После успешной установки приложение TeamViewer можно запустить из командной строки, набрав teamviewer или щелкнув его значок в меню «Приложения».
Поздравляю! Вы успешно установили TeamViewer . Благодарим за использование этого руководства для установки последней версии TeamViewer в системе Linux Mint. Для получения дополнительной помощи или полезной информации мы рекомендуем вам посетить официальный сайт TeamViewer .
Источник
How To Install TeamViewer On Linux (Ubuntu, Debian, Mint, Kali, Fedora, Arch, CentOS, Red Hat)?
TeamViewer is the most popular remote desktop and support application used in the IT world. TeamViewer can be used to connect remote systems from different operating systems and platforms like Windows, Android, Linux, MacOSX, etc. This makes TeamViewer cross-platform. TeamViewer is also free which is very attractive for the end-users. In this tutorial, we will learn “How To Install TeamViewer On Linux?” for different distributions in different ways.
Install TeamViewer For Ubuntu, Debian, Mint, and Kali
Ubuntu, Debian, Mint, and Kali are all deb based distributions where they are using deb packages, apt, dpkg for package management. Debian is also upstream for distributions like Ubuntu, Mint, and Kali.
Download TeamViewer For Ubuntu, Debian, Mint, and Kali
We will download the TeamViewer from the following URL. As we can see 32 and 64-bit architectures are supported for installation.
 Download TeamViewer For Ubuntu, Debian, Mint, and Kali
OR we can use wget in order to download the package from the command line.
 Download TeamViewer Deb with wget
Install For Ubuntu, Debian, Mint, and Kali
We will use dpkg command in order to install the downloaded package named teamviewer_amd64.deb . We will also use sudo for root privileges.
 Install For Ubuntu, Debian, Mint, and Kali
AND as we can see in previous command output there are some dependency errors which will cancel TeamViewer installation. We can complete the installation by installing the dependencies and TeamViewer with the following command.
 Install For Ubuntu, Debian, Mint, and Kali
Update For Ubuntu, Debian, Mint, and Kali
We can update TeamViewer by using the apt command like below.
Remove/Delete For Ubuntu, Debian, Mint, and Kali
We can remove the TeamViewer for Ubuntu, Debian, Mint, and Kali with the following apt remove command.
 Remove/Delete For Ubuntu, Debian, Mint, and Kali
Install TeamViewer For Fedora, Red Hat and CentOS
TeamViewer is also provided for the rpm based distributions like Fedora, Red Hat and CentOS. All of these rpm distributions are related to each other to provide support, testbed, etc.
Download TeamViewer For Fedora, Red Hat and CentOS
We will download the TeamViewer installation package from the same URL with the deb package which is like below. We will use the 64-bit package but also 32-bit package is provided too.
 Download TeamViewer For Fedora, Red Hat and CentOS
 Download TeamViewer For Fedora, Red Hat and CentOS
Install TeamViewer For Fedora, Red Hat and CentOS
In order to install TeamViewer package for Fedora, Red Hat and CentOS we have to install some dependencies which are mainly qt5 library-related. We will use the following command to install dependencies.
 Install TeamViewer For Fedora, Red Hat and CentOS
Then we can use rpm package manager to install the downloaded package with the -i option like below.
In Fedora, CentOS, Red Hat TeamViewer runs are services which name is teamviewerd . We can start, stop and list status with the following command.
 Fedora, CentOS, Red Hat TeamViewer Service Start, Stop, Status
Update TeamViewer For Fedora, Red Hat and CentOS
As the installation of the TeamViewer package also adds TeamViewer repositories we can use yum or dnf command for TeamViewer update.
Remove/Delete TeamViewer For Fedora, Red Hat and CentOS
We can remove the installed TeamViewer with the dnf or yum command. This will also remove the TeamViewer service too.
Install TeamViewer For All (Generic) Linux Distributions
TeamViewer is also provided as binary with its dependencies. It is called Tar package or Linux generic installation. It is provided as a compressed tar file and used by just downloading and extracting it. Keep in mind that this version is not officially supported but will work in most of the cases for different Linux distributions.
Download TeamViewer For All (Generic) Linux Distributions
We can download the tar.xz file for TeamViewer from the following URL.
 Download TeamViewer For All (Generic) Linux Distributions
We can use wget command to download like below.
 Download TeamViewer.tar.xz with wget
Install TeamViewer For All (Generic) Linux Distributions
Installing the generic TeamViewer is just extracting the downloaded tar archive. We will use tar command with the xvf options and then enter the extracted directory and run the teamviewer binary.

We will navigate to the directory named teamviewer and then run the teamviewer binary like below.

First Run Of TeamViewer
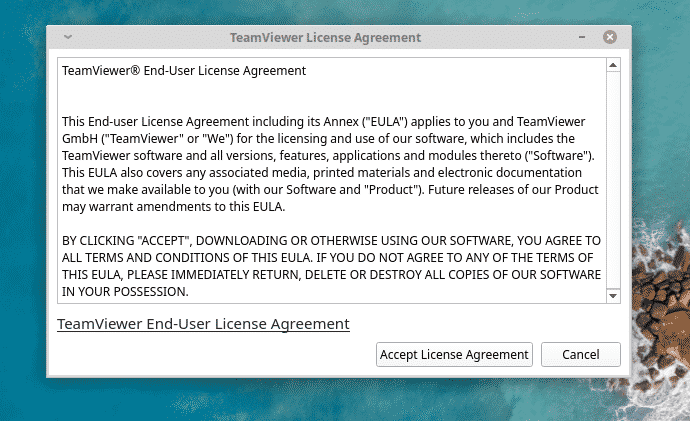
TeamViewer is a closed source or paid application where there is an End-User License Agreement. We have to accept the license agreement in the first run of the TeamViewer like below.
 First Run Of TeamViewer
Running TeamViewer
TeamViewer can be started or launched in different ways. It can also change according to the installation.
Run From Command Line
We can start the TeamViewer command line with the teamviewer command like below.
 Run From Command Line
Run From Start Menu
In desktop environments like XFCE, LXDE or GNOME Menu TeamViewer can be provided in different categories like the Internet, System etc like below.
 Run From Start Menu
Run From Application List
Desktop environments like KDE, Unity, Gnome provides advanced search or application lists like below. We can open the teamviewer just typing team etc.
 Run From Application List
Источник
Скачать и установить Teamviewer на Linux Mint 18
Linux Mint – это один из дистрибутивов Линукса, который был создан и объединяет в себе черты других дистрибутивов – Убунту и Дебиан.
Несмотря на то, что linux mint 18 не является официально поддерживаемой операционной системой для установки ТимВивер на ПК или сервер, тем не менее продукты совместимы, установка ТимВьювера на минт происходит без особых проблем.
Стоит разобраться, почему даже пользователи Линукса, которые считаются технически более грамотными, выбирают Teamviewer.

Максимально широкий охват подключенных устройств
Программа вышла в свет в 2005 году и с тех пор непрерывно развивалась. Каждый год по 2-3 новые версии с оптимизацией, ликвидацией ошибок, новыми функциями.
- 1 500 000 000 устройств имеют установленный Тимввивер, включая серверы, стационарные системные блоки, моноблоки и ноутбуки, планшеты, смартфоны.
- От 20 миллионов онлайн в любой момент.
- Ежедневный заход порядка 200 миллионов.
- Около 200 стран на линии, 30 официальных языков.
- На фейсбук миллионы людей оставили свой лайк в специальной записи сообщества
Именно поэтому даже пользователи таких операционных систем, о которых обыватели и не слышали, выбирают также Тимвивер.
Удаленный доступ
Изначально утилита была создана для работы в графической среде, однако благодаря детальной настройке и адаптивному дизайну она прекрасно работает и в среде Linux, благодаря чему можно удаленно подключаться к устройствам удаленно и выполнять там целый комплекс мероприятий:
- Удаленное изменение настроек, включая остановку и запуск системных служб и процессов дистанционно через диспетчер задач, или альтернативно
- Проверять информацию, открывать файлы. Файлы с любым содержимым можно также и передавать дистанционно, используя Тимвьювер как файлообменник.
- Подключаться одновременно с другими пользователями к одному экрану, работать группой на одном ПК
- Общаться с помощью чата, голоса, видео
Teamviewer linux mint установка
Если в Windows процедура установки ограничивается скачиванием и открытием щелчком мыши, после чего остается только поставить галочки на некоммерческое применение и начать пользоваться, то относительно линукса процесс несколько сложней, так как не всегда есть поддержка графической оболочки и нужно применять команды.
Все сведения по подключению есть в официальных источниках, но если вкратце – то нужно:
- Скачать с помощью команды sudo wget «адрес сайта» версию, соответствующую вашему дистрибутиву. В данном случае – из раздела другое.
- Вводим sudo rm -rf teamviewer_linux.deb. Если название скачанного дистрибутива отличается, то нужно ввести корректировку в команду.
Не забывайте, что все действия нужно проводить из-под рута, проверить зависимость пакетов и поддержку вашей архитектуры.
Преимущества
На линукс минт 18 работают и другие программы по удаленному доступу, однако Тимвювер топовый по своим характеристикам, технической поддержке, скорости работы, русификации клиента и другим показателям.
Источник
How to Install TeamViewer on Linux Mint
So, why do we need to have the facility of remote desktop control?
Unattained access
In some cases, there may not be anyone nearby available for fixing a PC problem. Now, let’s say you have a friend or a support technician on the line for solving the issue.
There can be numerous other scenarios like above that may require unattained access to your system. In this case, the friend/technician or others gain access of the system for a certain amount of time. After doing the job, it’s complete!
It’s more important for the enterprise and technical level where things can get pretty messy quite easily.
Multi-session handling
In the professional workspace, you may need to work on several sessions that, if effectively managed, will offer a HUGE boost in productivity and performance.
With a remote desktop at hand, you can seamlessly switch from one system to another. With each instance at hand, you can directly perform different tasks on each of them.
Cutting down costs
In the remote desktop, it’s possible to reduce the costing DRAMATICALLY. The same machine can be used among a number of users; no need to get individual software and machinery.
For example, take Microsoft Office Suite into account. With remote desktop, multiple people can work on the same machine, using the same software! No need to purchase for individual MS Office Suite while enjoying the full features completely LEGALLY!
Freedom
This is the aspect I prefer the most. Using a remote desktop connection, you can directly access your workstation from anywhere, anytime. All you need is just allowing remote desktop connection with suitable software and an internet connection.
Cautions
The remote desktop connection is, undoubtedly, a powerful tool that’s really valuable in tons of situations. However, it’s never without issues and because of its nature, the remote desktop connection can be pretty dangerous.
The first and foremost important thing is security. You’re allowing someone else into your system. In fact, you’re giving the power of even the most critical abilities. A crook with such ability can easily perform illegal actions on your system. So, make sure that you’re allowing someone who’s trustworthy.
You also need a safe internet connection for the purpose. If there’s someone snooping on you via the network, it’s possible to modify the network data and result in a real mess.
Moreover, the network shouldn’t become a bottleneck for the remote desktop connection. If the network is a bottleneck, then the overall experience and performance will be lowered to the worst.
TeamViewer for remote desktop
Now, whenever we’re talking about the remote desktop, the first thing that crosses our mind is the TeamViewer. It’s a powerful and popular software that allows secure remote desktop connection in an easy manner for all types of purposes – personal, professional and business.
In the case of TeamViewer, it’s free for personal usage. For the paid plans, the price is also extremely affordable and cheap despite providing so much feature. It’s safe, fast and above all, reliable. TeamViewer has earned its name in the sector as one of the finest remote desktop services of all.
Let’s check out TeamViewer Linux Mint – one of the most popular Linux distros of all time.
Getting TeamViewer
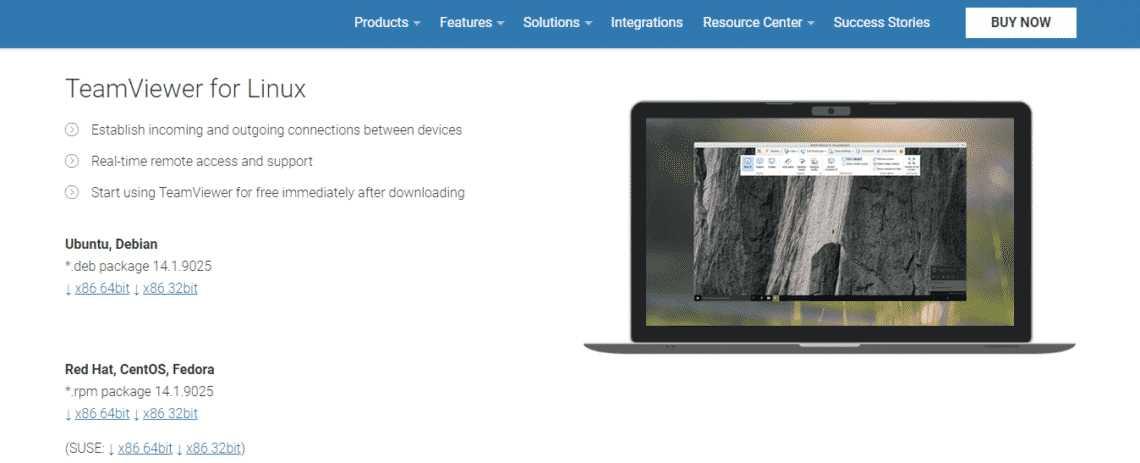
Start downloading the DEB package of TeamViewer.

Once the download is complete, run the following commands –
/ Downloads /
sudo apt install . / teamviewer_14.1.9025_amd64.deb
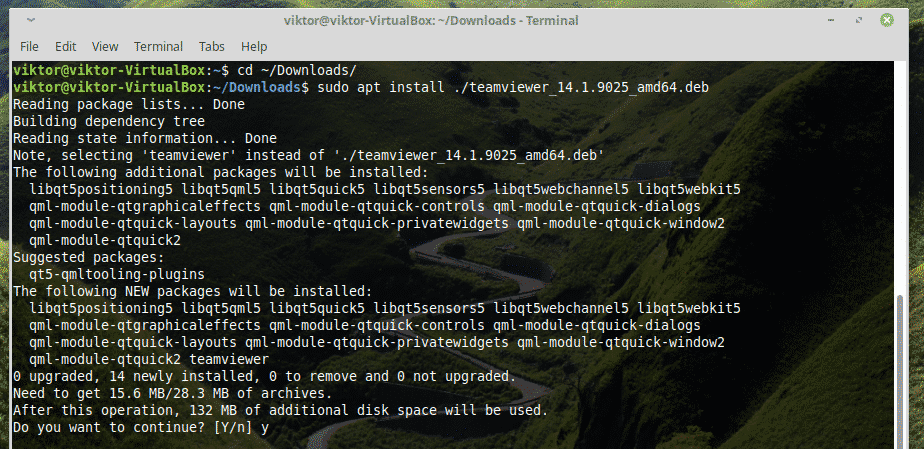
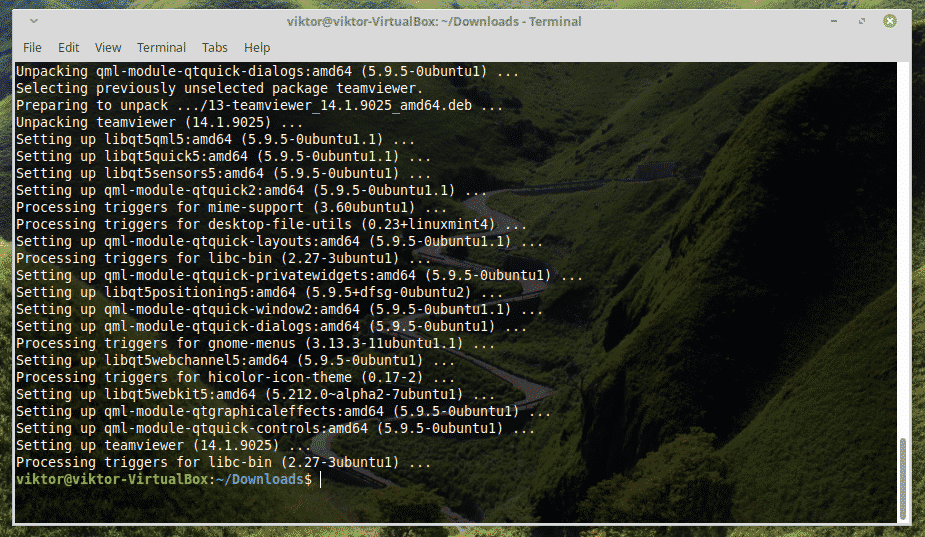
Did you notice that I’m using APT for doing the installation job? It takes care of the dependencies during the installation.
Using TeamViewer
Once the installation is complete, start TeamViewer –

Accept the license agreement –
Voila! TeamViewer is ready to use!
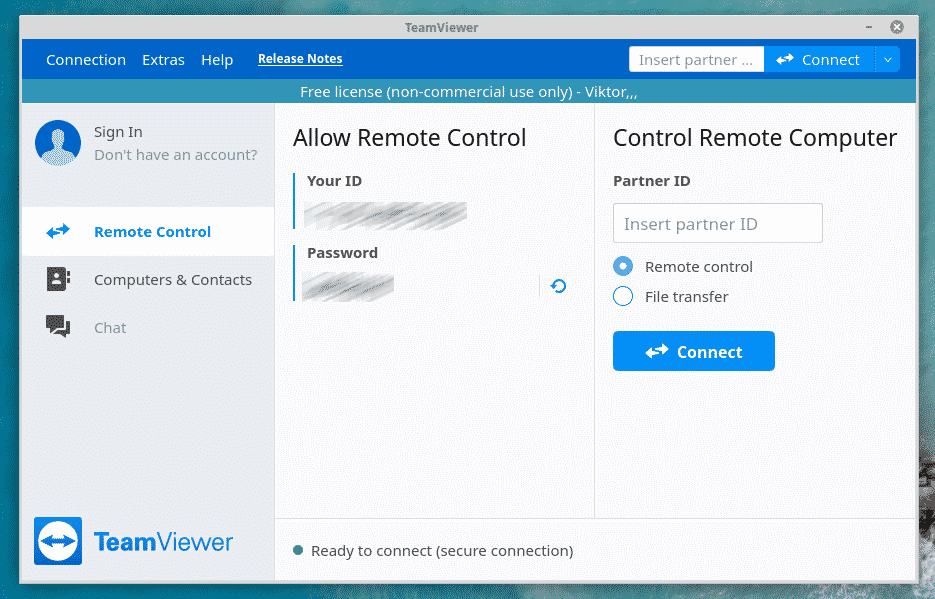
If you want someone else to connect to your system, then you have to provide him the ID and password.
For example, I’m on my Windows system and I wish to connect to my Linux machine.
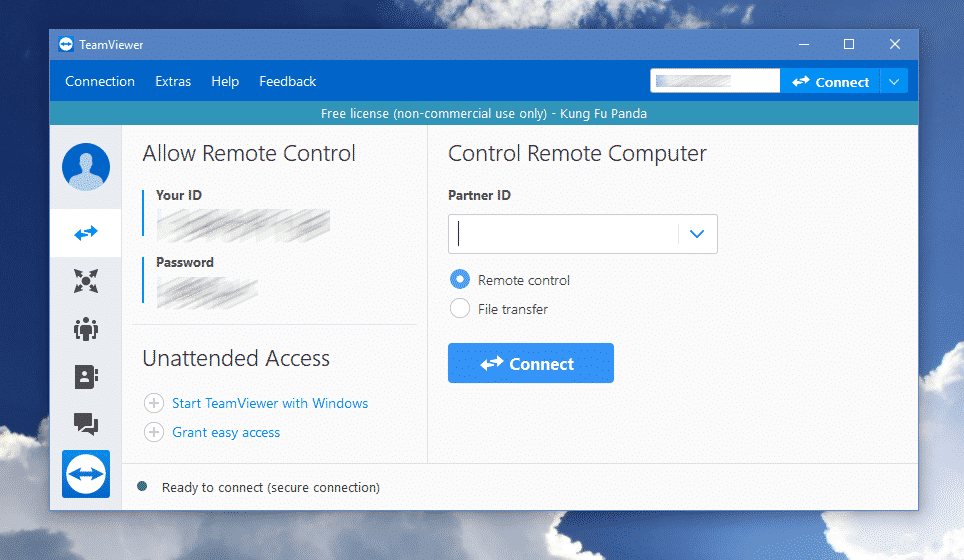
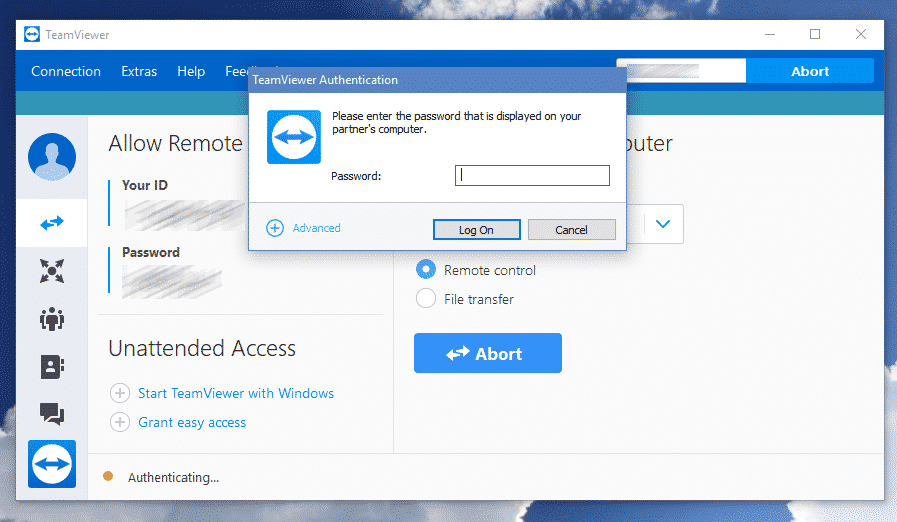
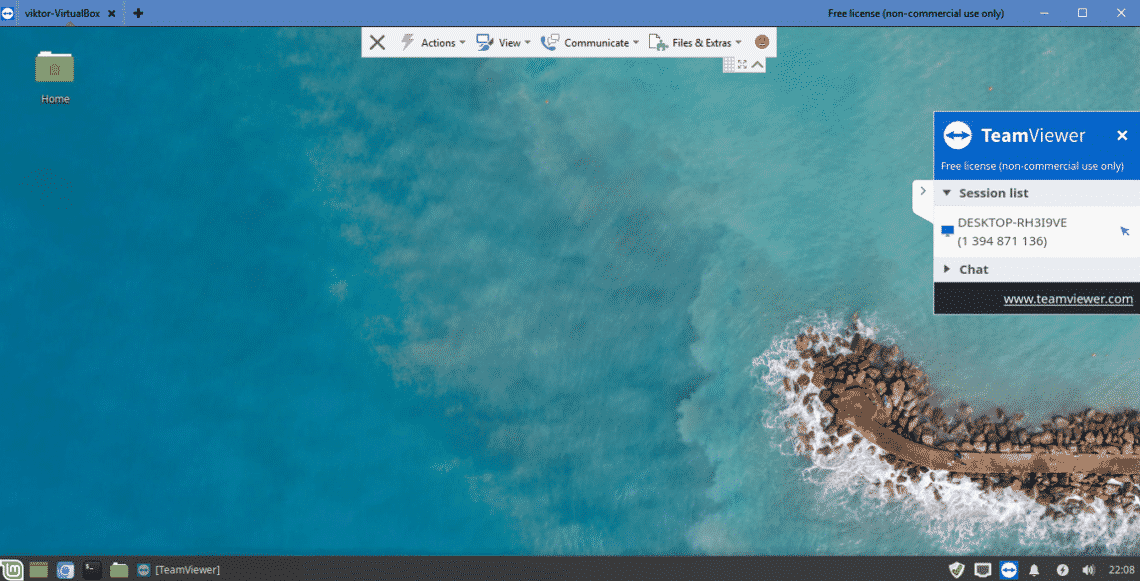
Voila! I’m accessing my Linux machine directly from my Windows machine!
Now, follow the same steps on your Linux system –
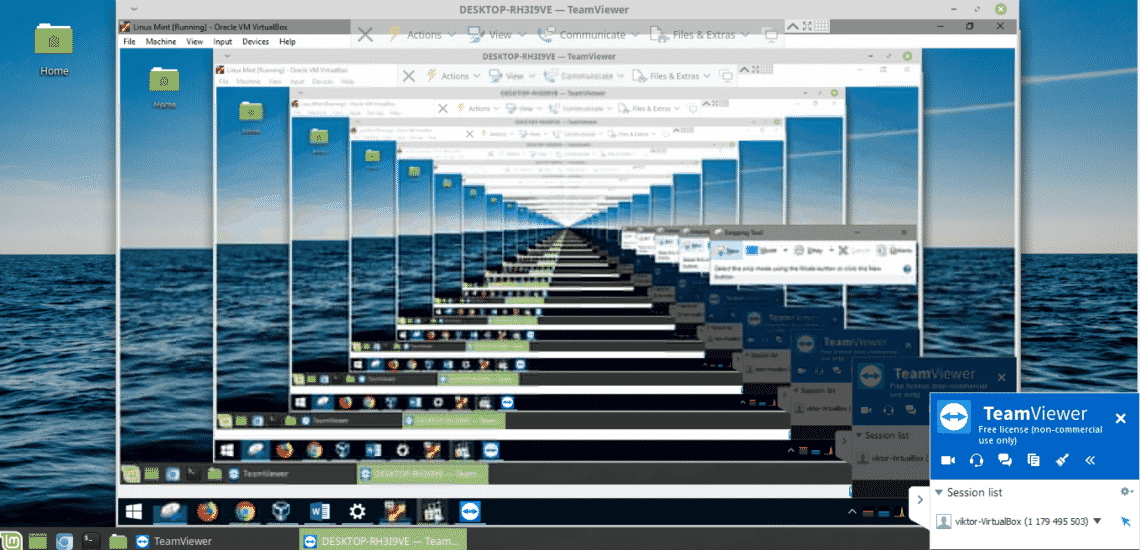
So, a new lesson for me – NEVER access the host system via TeamViewer while you’re using VirtualBox! Learn how to install Linux Mint on VirtualBox.
About the author

Sidratul Muntaha
Student of CSE. I love Linux and playing with tech and gadgets. I use both Ubuntu and Linux Mint.
Источник


