- Install KVM Virtualization on Linux Mint 20
- Installing KVM Virtualization
- Step 1: Verify processor support for hardware virtualization
- Step 2: Install KVM
- Step 3: Add the user to ‘libvert’ and ‘kvm’ group
- Step 4: Verify Installation
- Step 5: Create a virtual machine in KVM
- About the author
- Karim Buzdar
- KVM virtualization on a home PC with Linux Mint
- Linux mint kvm installation
Install KVM Virtualization on Linux Mint 20
In this article, we will explain how to install KVM virtualization on the Linux Mint system. Then we will also explain how to create a virtual machine in KVM. We will be using the command line Terminal application for the installation process. To open the command line Terminal, you can use the Ctrl+Alt+T keyboard shortcut.
Note:
- We have run the procedure and commands on Linux Mint 20 OS. More or less the same procedure can be followed in older Mint versions.
- For installing or removing any package in any Linux distribution including Linux Mint, you must be root user or a standard user with sudo privileges.
Installing KVM Virtualization
Follow the below steps to install KVM virtualization in Linux Mint 20 system:
Step 1: Verify processor support for hardware virtualization
For installing KVM, you must have a processor that supports hardware virtualization. You can verify this using the following command in Terminal:

If the above command returns 0, then it means that the processor does not support hardware virtualization. The value of 1 or greater than it means the processor supports hardware virtualization.
Next, you will need to check whether the virtualization is enabled in the BIOS or not. You can use the kvm-ok command for this purpose which will also tell whether you can run KVM virtual machines in your system or not. To use the kvm-ok, you will need to install the cpu-checker utility. Use the below command to install cpu-checker utility.
Once installed, run kvm-ok:

The above output indicates that virtualization is enabled in the BIOS and you can run KVM virtual machines.
If the virtualization is not enabled in the BIOS, then in the output you might receive hints to enable virtualization by entering into BIOS and then hard poweroff/poweron the system.
Step 2: Install KVM
Now install KVM using the following command in Terminal:
When prompted for a password, enter the sudo password.

Now you will be asked if you want to continue the installation or not. Hit y to continue the installation process. Once it is finished, move on to the next step.
Step 3: Add the user to ‘libvert’ and ‘kvm’ group
Now you will need to add a user to the ‘libvert’ and ‘kvm’ groups. Issue the following commands in Terminal to do so:
Replace the username with the name of the user who will work with KVM.
Now logout and login back to the system to have the user becomes an effective member of the ‘libvert’ and ‘kvm’ groups. This user will be able to run and manage virtual machines.
Step 4: Verify Installation
You can verify the installation with the following command in Terminal:

The output above indicates that the installation has been successful. If something goes wrong, you will receive some error in the above output.
Step 5: Create a virtual machine in KVM
Now you can create a virtual machine in KVM using the GUI based Virtual Machine Manager. Also, download the ISO of any OS you want to install in the virtual machine.
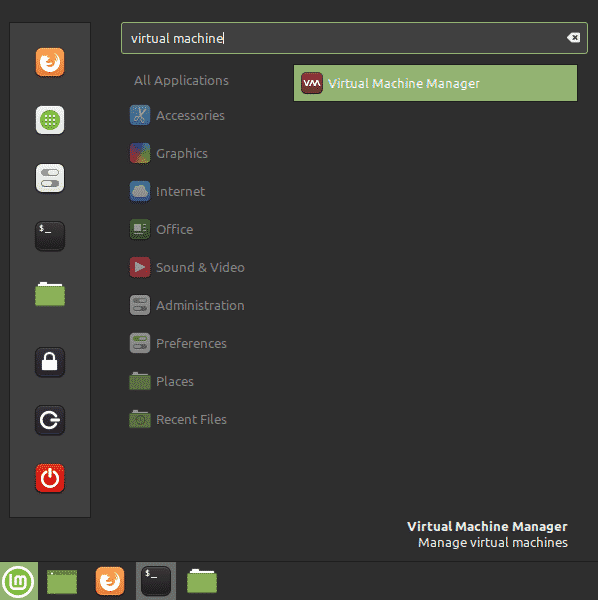
To open the Virtual Machine Manager, hit the super key on your keyboard and type virtual machine. From the search results, click on the Virtual Machine Manager icon to open it.
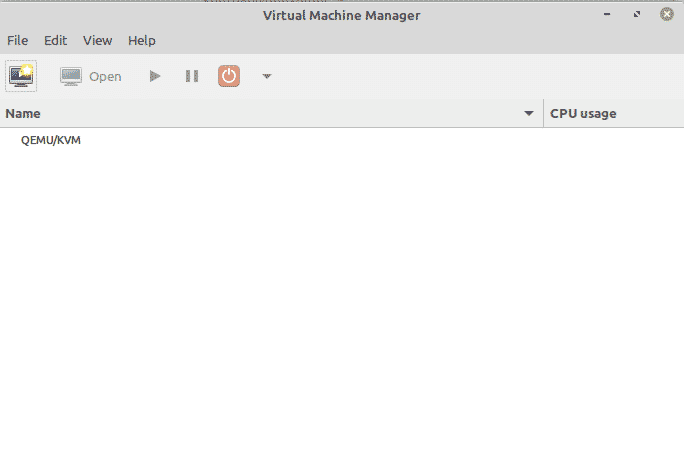
When the Virtual Machine Manager will open, you will see the following window.
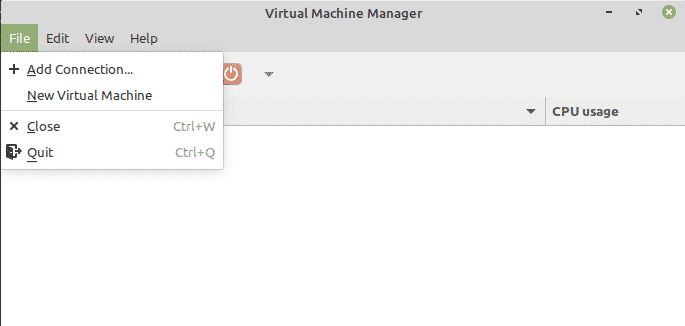
To create a new virtual machine, go to the File menu at the top and then click the New Virtual machine.
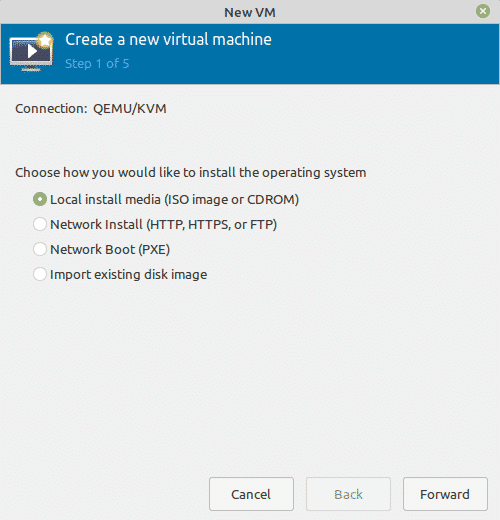
The following window will appear allowing you to choose the method through which you will install the OS. If you have the ISO file on your system, choose the Local install media (ISO image or CDROM) option and click the Forward button.
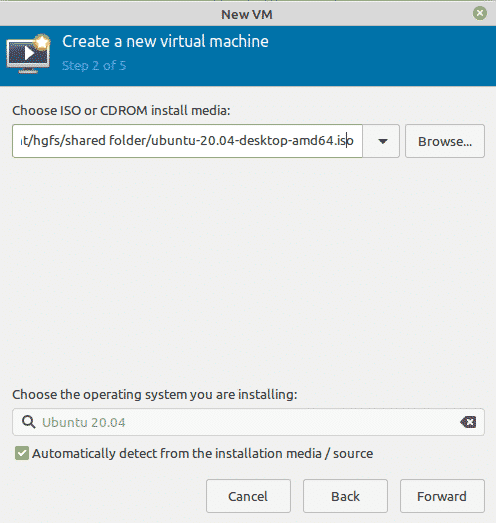
Next in the following window, click the Browse button to locate the ISO of the OS you want to install in your virtual machine. Then click the Forward button.
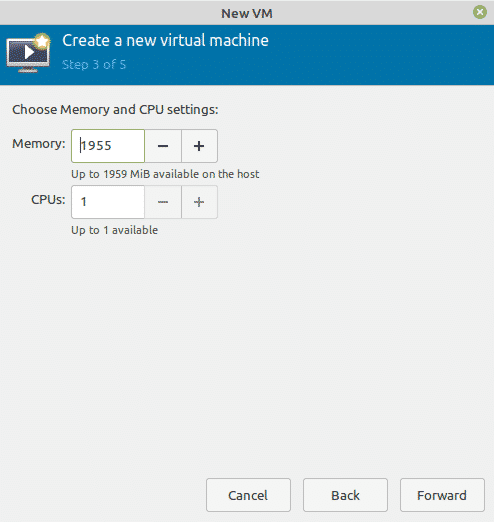
In the next window, set memory and the number of CPU cores you want to use for the new VM. Then click Forward.
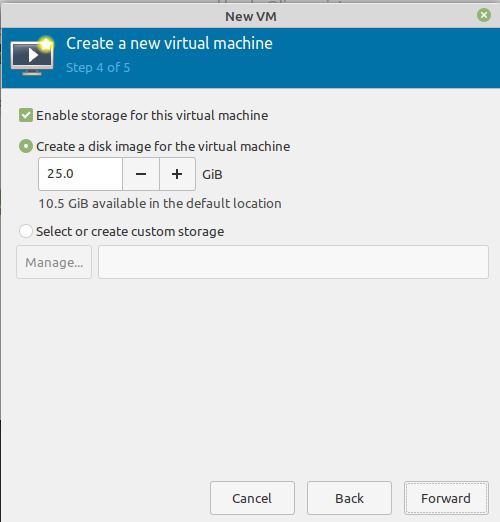
Now enable the storage for your virtual machine and once done, click the Forward button.
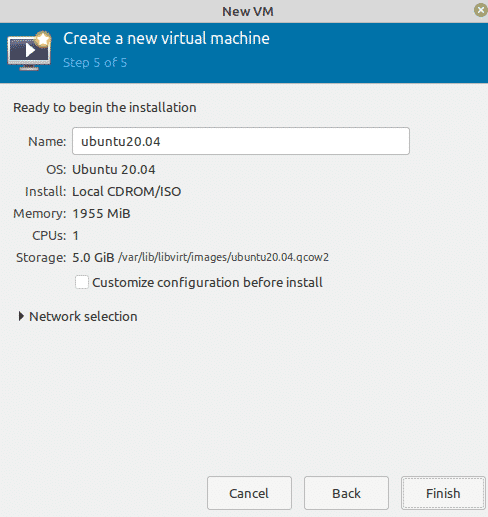
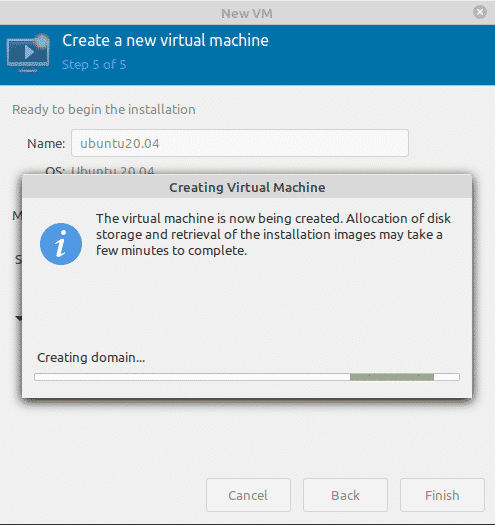
Now type a name for your virtual machine. You can also perform some other configurations here. Once you are done, click the Finish button.
Now the VM will be created based on the configurations and the installation options you have provided.
Now the OS installation will be started in a new window. Follow the instructions on the screen to complete the installation process. Once the installation is completed, you will be able to run the virtual machine.
That is all there is to it! In this article, you have learned how to install KVM virtualization on Linux Mint 20 system. You have also learned how to create a virtual machine in KVM and install any operating system inside it.
About the author

Karim Buzdar
Karim Buzdar holds a degree in telecommunication engineering and holds several sysadmin certifications. As an IT engineer and technical author, he writes for various web sites. He blogs at LinuxWays.
Источник
KVM virtualization on a home PC with Linux Mint

KVM – Kernel-based Virtual Machine , virtualization solution for Linux . Allows you to run a virtualized OS with hardware support for CPU (Intel VT, AMD-V , etc.) and emulate the periphery using qemu .
The benefits of virtualization on the desktop
For me as a home user, the main advantage of virtualization is the ability to save the state of the operating system. This means that all open window tabs in the browsers, the background program, working tables, etc when the computer shuts down and will remain when you switch to recover. You can immediately continue working.
The second advantage is that the computer can safely experiment and not be afraid to Bang data, Samusocial file system or to violate the dependencies of the package Manager. In a virtual environment you can do anything, and then, if necessary, to quickly reset all the changes.
Thirdly, to do backup is a pleasure, because the whole system is in one file. Leaked image on an external HDD and ready.
Fourthly, it is sufficient to install and configure how it should work environment and after that you can replace a long and tedious process of installation quick and fun process of cloning. Copied the system image, start the virtual machine, apt-get upgrade – and you can work.
Fifthly, you can have the operating system image in the RAM disk and get a truly enchanting acceleration all at once. I did an experiment: 4 GB host left, and 12 GB gave way with Debian. Inside GNOME, GIMP, LibreOffice, Firefox. All starts at 1000 times faster than even with SSD.
There is a million of advantages, but it is worth saying something about the cons.
Cons of virtualization on a home computer
First, the virtual machine will run slower than a physical computer. Before the performance drop was 50-90% now (in the presence of hardware support) performance loss is 1-5%.
Secondly, there is the problem of data exchange host-guest systems. The solutions are many: shared directories, FTP, Samba, etc.
In General, the disadvantages quite small and it is time to move to the lighting settings.
Configuring KVM in Linux Mint 13/14/15/16/17/17 . 1 :
As a means of virtualization for a long time I used a free software VirtualBox . But recently, out of curiosity, I tested the KVM and was very impressed . KVM runs fast , very easy to set up and run , and still relies on KVM RedHat , as the most promising solution in this area.
Installation is very simple . KVM support is already in the kernel, it remains to establish some small things :
Check that your CPU supports hardware virtualization
If 0 it means that your CPU doesn’t support hardware virtualization.
If 1 or more it does – but you still need to make sure that virtualization is enabled in the BIOS.
Installation
You can start working immediately. For example, run a wonderful distro Linux Mint directly from the ISO :
Please note that if you do not explicitly specify the amount of RAM the -m option, the guest will receive only 128 MB and die in terrible agony.
If you want to install the OS on the drive, then first you should prepare a separate file that will contain the image. This is done all your favorite dd command:
if: indicates the source . Specifies a file that can be either a regular file or a device file .
of : specifies the destination file . The same can write to a regular file , or directly into the device.
bs : the number of bytes that will be written at a time. You can present this argument as the size of the piece of data to be written or read , and the number of pieces can be regulated by the following parameter .
count: the number that indicates how many bits will be copied .
Now the file LM_test_os.image can be used as a hard disk in a virtual environment :
With a hard drive you can do anything, for example, to install the OS or give under separate mount point, for example, under /home. Of course, when you install the OS, option -cdrom no longer needed.
GUI
Much easier to use a GUI frontend for KVM . The most popular is the Virtual Machine Manager ( virt-manager ).
The virt-manager application is a desktop user interface for managing virtual machines through libvirt. It primarily targets KVM VMs, but also manages Xen and LXC (linux containers). It presents a summary view of running domains, their live performance & resource utilization statistics. Wizards enable the creation of new domains, and configuration & adjustment of a domain’s resource allocation & virtual hardware. An embedded VNC and SPICE client viewer presents a full graphical console to the guest domain.
 KVM virtualization on a home PC Linux Mint
 KVM virtualization on a home PC Linux Mint
Installation latest version into Linux Mint:
After installation , look in the menu of Virtual Machine Manager and run it.
Источник
Linux mint kvm installation
Linux KVM QEMU SPICE on LInux Mint 17.1 Cinnamon really rocks.
It is quite easy to add the QEMU/KVM virtualization hypervisor to your Mint desktop. The hypervisor provides a virtualized system that you can build virtual machines in. You can perform virtualized networking and run an entire array of virtual machines within the hypervisor. In addition, if you want a virtual desktop experience that provides full acclerated 2D video at the client, then add SPICE.
You will need a multicore processor desktop or server system that includes hardware virtualization extensions (AMD or Intel). Most modern 64 bit processors include these extensions. It is possible that they may have to be enabled in the host BIOS settings as some systems have virtualization support disabled by default.
Management of the KVM hypervisor can be accomplished through a graphical managment program called virt-manager. Virt-manager is a lot like a typical virtual machine manager and supports remote connections to other hypervisors for management of those resources. In this case it can be used to manage VM and virtual network at the local host. Virt-manager also provide a very flexible virtual network management and storage facility, providing the ability to creat and manage virtual networks and specialized routing infrastructures within the hypervisor.
I started out with a Mint 17.1 Cinnamon 64 bit system, fully updated with the latest components. To this system we perform the following:
Virtualization with virt-manager:
# apt-get install qemu-system
# apt-get install qemu-utils
# apt-get install libvirt-bin
# apt-get install virt-manager
Installing SPICE for KVM remote and local access to VMs
# apt-get install python-spice-client-gtk
# apt-get install virt-viewer
Any users that want to manage VMs will need to be added to the «libvirtd» group.
Once these components and their related dependencies are installed, shut-down and restart your system. Bring the system back up and login to your desktop. Now you can run virt-manager. The virt-manager interface appears to be very simple at first glance, but dig a little deeper into it and you can see some very advanced features for virtual maching management and virtualized network management.
Once you create your first VM you will be hooked. Virtualization totally rocks! You can’t beat Linux virtualization with KVM.
Virtual machines, by default will use VNC for viewing them. You can also use Spice for the display component of the VM.
To create a high performance virtual desktop interface (VDI), use SPICE as the display device in your VM detail «Display» settings instead of VNC. Spice can be configured to serve desktops to remote clients. Spice efficiently provides an accelerated video interface to the view client. It can be so fast that you don’t realize that you are running in a remote VM. There are Spice clients for all major operating systems. On windows systems the Spice client is called virt-viewer. On Linux systems the view client is called remote-viewer. Other spice clients are available as well.
To change your VM from default VNC to Spice; Go into the details, remove the Display device. Add a new Display device and specify Spice as the interface. Set it to listen on all public interfaces if you want to access it remotely. You can also set a password for access at this point. The port is normally assigned from a pool of values starting at 5900 automatically whenever the VM is started, but you can set it to a static value, such as 5999 using the virt-manager GUI when you are adding the Spice virtual display device.
There are other ways to manage KVM as well, such as with virsh, the virtualization management command line utility.
I have set up KVM/QEMU with Spice on many Linux systems, including high end Cisco UCS servers. I normally use it on servers in our enterprise environment.
Accessing the VM:
You can use always virt-manager to access the VM and interact with the guest, BUT for full capability VDI you should use «Remote Viewer» remote-viewer on Linux or Windows desktops. Remote viewer provides full screen auto resizing capability for the guest VM connection and full accelerated 2D video to the VM running at the hypervisor.
VM guest software agents and drivers:
Most Linux distributions can simply use the spice-vdagent utilities for copy-paste from remote and auto screen resize to the client.
Windows VM guests require guest-tools for accessing the VM using spice. This is called Windows guest tools: http://www.spice-space.org/download.html. Windows also requires the QXL video driver be installed into the guest which supports direct connection to the hypervisor Spice adapter.
I kid you not, this stuff really works and works well. I have been using it on systems for a couple of years now. It is very stable.
— updated 2014-07-13 for setup on Linux Mint 17 64-bit
— updated 2015-02-17 for setup on Linux Mint 17.1 64-bit
I have details, with graphics, detailed at my website here:
Источник


