- How To Install Icon Themes In Linux Mint Cinnamon [Beginner Tip]
- Install icon themes in Linux Mint 18:
- Install Paper icon set in Linux Mint 18:
- Change icons in Linux Mint 18:
- 8 Best Icon Themes for Ubuntu (2021 Edition)
- Best Icon Themes for Ubuntu
- 1. Papirus Icon Theme
- 2. Numix Circle
- 3. Qogir Icon Theme
- 4. WhiteSur
- 5. Vimix
- 6. we10x
- 7. Obsidian
- 8. Newaita
- Themes to keep an eye on
- How to Install Icon themes on Ubuntu
- compizomania
- Страницы
- 06 сентября 2017
- Установка и активация флажков в раскладке клавиатуры в Linux Mint 18.х MATE/Ubuntu MATE
How To Install Icon Themes In Linux Mint Cinnamon [Beginner Tip]
Last updated November 10, 2019 By Abhishek Prakash 21 Comments
Brief: This quick tutorial for beginners shows how to install and change icon themes in Linux Mint.
If you think the default Mint themes and icons are not good enough for you, why not change it? In this quick tip for beginners, we shall see how to install icon themes in Linux Mint 18 and more than that how to change the icons in Linux Mint. We shall see this quick tutorial by installing gorgeous Paper icon theme.
Just a quick note, if you do not know it already, there is a difference between ‘themes’ and ‘icon themes’. An icon theme just changes the look of icons while a theme changes a lot of other things along with the looks of icons.
Install icon themes in Linux Mint 18:
There are two ways to install icon themes in Linux Mint (and many other Linux distributions, if not all). If you download the icon theme in a zipped folder, you can extract it in
/.icons directory. Usually, this directory does not exist. Feel free to create it.
The second way to install an icon theme is using a PPA. Most of the standard and popular icon themes have their own PPA. Lets see how to install Moka icons set in Mint using PPA.
Install Paper icon set in Linux Mint 18:
Open a terminal (Ctrl+Alt+T) and use the following commands:
Change icons in Linux Mint 18:
Changing an icon theme in Ubuntu was straight forward. It is slightly hidden in Linux Mint though. Once you have installed the icon themes, go to Settings from the Menu. And then go to Themes.
Now you might have realized why I said that changing the icon is slightly hidden in Linux Mint. It is inside Themes option. To change only the icon, click on Icons there.
You’ll see all the icons set available here. Choose the one you like.
The changes will be reflected immediately. No need of a restart. Here is how my Linux Mint desktop looks after applying Moka icon themes:

I hope you find this quick to install and change icon themes in Linux Mint helpful. Don’t forget to check the best icon themes in Ubuntu, you’ll find some beautiful icons there to make your desktop prettier. Any questions, suggestion, thoughts? Feel free to drop a comment.
Like what you read? Please share it with others.
Источник
8 Best Icon Themes for Ubuntu (2021 Edition)
Feast your eyes on the following set of exceptional icon themes that you can use on Ubuntu, Linux Mint, and pretty much every Linux distro out there.

Changing icon theme is a quick and easy way to give your desktop a bold new look, without needing to switch Linux distro or migrate to a new Linux desktop environment.
But with hundreds of epic Linux icon packs available it can be hard to know where to start – hence the need for a post like this one!
Below is our pick of the best icon themes currently available for Ubuntu and Linux Mint, with styles ranging from subtle, flat, and 2D to those heavy on gloss, gradient, and detail.
Better yet, we keep this list of icon themes up to date. This means you don’t have to worry about any links being broken or any of the packs being outdated. What you see, you can use!
Ready to revamp your desktop? Then read on!
Best Icon Themes for Ubuntu
1. Papirus Icon Theme
We start with a classic: the Papirus icon theme is hugely popular with Ubuntu users and it’s not hard to see why.
Colourful, inventive, and shapely: Papirus weaves a deft visual cohesiveness throughout its glyph set, despite the breadth of its coverage. Designers who work on the icon set are also incredibly receptive to feedback through GitHub, meaning if you use an app that has no Papirus icon you can request one to be added.
The best way to install Papirus icon theme on Ubuntu is to add the official Papirus Team PPA to your list of software sources. This ensures you are always using the latest pack (updates are released often) as new versions get installed alongside your other software updates.
Open a new Terminal window and copy/paste this command, hitting the enter or return key after:
Once the PPA is added run this command to install the Paprius icon theme on Ubuntu 18.04 LTS and above:
Finally, switch icon theme using your preferred tweak tool.
2. Numix Circle
Lusting after a circular icon theme with lashings of color? Look no further than Numix Circle.
Setting every app icon inside of the same shape can feel over the top and extreme (it makes apps which don’t conform stand out even more) but thankfully that’s not the case with the Numix Circle icon theme thanks to its exhaustive app coverage.
Numix Circle now spans several thousand application icons, including venerable faves like Firefox, Blender, and GIMP, to newer apps and those in early stages of development.
You can install the Numix Circle icon theme on Ubuntu in a couple of ways but to get the very latest version of the icon set (which I recommend) you need to the official Numix PPA (supports Ubuntu 18.04 LTS and above) to your list of software sources via the command line:
Next, install the most recent version of the set with:
Finally, switch icon theme using your preferred tweak tool.
3. Qogir Icon Theme
The Qogir icon theme is designed to compliment the Qogir GTK theme, but don’t be put off if you don’t use it as it’s a fine icon set in its own right too.
Based on combination of the Arc, Faba and Tela icon sets, Qogir is billed by its author as a “flat colorful design icon theme for Linux desktops”.
But it’s not flat flat.
The decision to use simple 2D glyphs with minimal layering and stick to a set of consistent shapes and shades, Qogir icons maintains the balance between soft and inviting and serious and professional. Iconsin this set don’t look over designed or too cartoony.
To install Qogir icon theme on Ubuntu download the latest release from the link above. When the download is complete extract the archive and move the top level folder inside to the hidden
/.icons folder in your Home directory. If this directory doesn’t exist, create it.
4. WhiteSur
Desktop Linux operating systems differ from their closed-source counterparts in many many ways. But the sheer amount of control you have over the way things look is perhaps the most prominent.
So if you want to make Ubuntu look like a Mac — you may like the look of the OS, but not its limitations — then an icon set like WhiteSur is an easy way to do that.
While WhiteSur is an icon pack inspired by the look of macOS Big Sur and its new app icons it is not a verbatim copy. Instead, the authors translate the overall motifs and concepts behind the new icon style to an (arguably) softer yet superior set to the real deal.
To install this icon theme on Ubuntu first download the latest release from the link above. When the download is complete extract the archive. Then move the extracted folder to the hidden
/.icons folder in your Home directory. If this directory doesn’t exist, create it.
5. Vimix
Vimix icons is based on (but now very different to) the Paper icon theme popular a few years ago. While that theme started out as a material design one, it’s since evolved a look of its own.
Like Qogir, Vimix is designed to be used with the same-name GTK theme, but that’s not a concrete requirement. You can use it with any GTK theme you like.
The icon pack is distributed in a number of different colour variants, including red (‘ruby’), black, and purple (‘amethyst’). These can be downloaded and installed individually, or you can use the included command-line script (do read over its contents first) to automate the process.
6. we10x
Microsoft is introducing a new design language for the Windows operating system and the accompanying app and services ecosystems. The new look has found fans beyond Redmond’s active user base, with many Linux users eager to use the colourful glyphs on their desktops too.
However, We10X icon set is not a 1:1 port of Windows icons for Linux. It’s not a clone. It is heavily inspired by Windows’ “fluent” aesthetic, but it interprets it independently, making allowances and deviations from the icons Microsoft’s designed, where necessary.
Having a more familiar set of icons can, for some users, make it easier to use their system. Regardless of you reasons for wanting to use a pack like this the beauty of using Linux is that you can — so go for it!
To install We10x icons on Ubuntu first download the latest version of the pack using the link above. When the download is complete extract the archive and move the top level folder to the hidden
/.icons folder in your Home directory. If this directory doesn’t exist, create it.
7. Obsidian
Do flat themes leave you feeling a little, well, flat? If so, definitely check out Obsidian.
Obsidian is a continuation of the Faenza icon theme that was insanely popular with Linux users a few years ago. Alas, Faenza itself is no longer updated.
Enter Obsidian. It reworks Faenza for 2020, packing in a stack of reworked and rewind icons for classic apps like Firefox, GIMP and LibreOffice, as well as support for newer software like Cawbird, Foliate, and GNOME Extensions.
There’s no fear of 3D elements here: Obsidian fully embraces gloss, lighting effects, drop shadows, and bevels. The result is icon pack with a pronounced and distinctive “tiled” look that is, in my opinion, rather unlike anything offered by any other Linux icon theme.
To install Obsidian icons on Ubuntu download the latest version of the pack from the link above. When the download is complete extract the tar.xz archive and move the top level folder to the hidden
/.icons folder in your Home directory. If this directory doesn’t exist, create it.
8. Newaita
Last, but by no means least on this list is Newaita. It’s the current icon pack du jour in that everyone is talking about it — and it’s easy to see why!
It reminds me of the Tango desktop project that tried to curate a consistent look for Linux apps across toolkits and desktops, albeit a touch more modern. App icons aren’t super realistic, but they aren’t entirely characterless. In fact, some of the icons are superbly drawn.
The use of a border outline on most of the icons provides a distinctive look, with glyphs having a slightly raised appearance in situ. The inclusion of an optional dark set is a nice touch.
In short, Newaita icons gives the Linux desktop a bold, confident look that fuses modern trends in colour design with an older, more intricately modelled style.
To install Newaita icons on Ubuntu first download the latest version of the pack, then extract the .zip archive when complete. Move both of the top level folders to the hidden
/.icons folder in your Home directory. If this directory doesn’t exist, create it.
Themes to keep an eye on
There you have it: 8 exceptionally well-made full icon themes for Ubuntu, Linux Mint, and other distros, perfect for getting started with — but design trends don’t stay still and new icon packs are developed all the time.
While I chose to limit this list to just 8 (for now) there are scores of striking icons sets out there. If you’re a fan of soft look with pastel colours then there’s deft appeal in the Boston, Tela and Zafiro packs. Those after a circular set may want to sample Tela Circle.
If you’re using Ubuntu 18.04 LTS or above you may want to try out the new, improved upstream GNOME icons. The glyphs have a very distinct vibe of its own these days. Just install it from the Ubuntu Software app.
Finally, if you really dig the Yaru icons Ubuntu ships with, but wished the set covered more apps, then check out Yaru++. This provides a flood of additional Yaru style icons for a glut of additional apps.
How to Install Icon themes on Ubuntu
Some of the icon packs we’ve picked require you to manually install them — but don’t let this put you off as it’s not as hard or as complicated as you might think.
First download the latest version of your chosen pack using the link(s) provided. Depending on the packaging this may come as a zip file or a .tar.gz — but it doesn’t matter.
When the download completes you need to extract the archive, i.e. right-click on it in the file manager and select ‘extract here’.
Finally, move the top level folder inside the extracted folder to the hidden
/.icons folder in your Home directory. If this directory doesn’t exist, create it.
Now you’re all set. You can change icon theme similar to how you change Ubuntu theme: using the GNOME Tweaks app (see, there’s a reason I make getting it one of the top things to do after installing Ubuntu 😉) or the Linux Mint appearance tool.
Theme changes take effect instantly and can be “undone” quickly. This means you can confidently experiment with different sets to find the set-up that works the best (not to mention looks best) for you.
Home » List » 8 Best Icon Themes for Ubuntu (2021 Edition)
Источник
compizomania
Азбука в Linux для начинающих и не только. Я знаю только то, что ничего не знаю, но другие не знают и этого. Сократ
Страницы
06 сентября 2017
Установка и активация флажков в раскладке клавиатуры в Linux Mint 18.х MATE/Ubuntu MATE


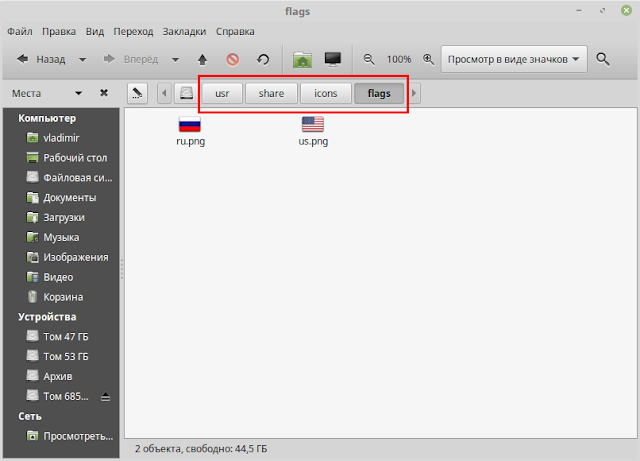
Прежде нужно создать папку flags в папке icons, выполнив следующую команду в терминале (Ctrl+Alt+T):
sudo mkdir /usr/share/icons/flags
Теперь перейдём в папку flags следующей командой:
И загрузим в папку flags наши флажки: российский и американский (ru.png и us.png), следующей командой в терминале:
sudo wget https://www.dropbox.com/s/wkc79epuw6elarv/ru.png https://www.dropbox.com/s/7m67sc72wveq4pq/us.png
На этом установка флажков закончена, остаётся их активировать.
Для этого нужно установить Редактор dconf, который есть в Менеджере программ или выполните команду в терминале:
sudo apt install dconf-editor
После установки откройте Редактор dconf, перейдите по адресу: org-mate-desktop-peripherals-keyboard-indicator и поставьте крыжик в параметре show flags (показывать флаги):

Флажок должен тут же отобразится на панели в раскладке:

Примечание. Если вы хотите установить флажки других стран, загрузите их из сети, обязательно с расширением .png (ua.png — Украина; de.png — Германия и т.п.) и размером не более 80х60, переместив в папку flags, открытую с правами Администратора, выполнив команду в терминале:
sudo caja /usr/share/icons/flags
Флажки других стран можно скачать и распаковать ZIP-файл ОТСЮДА.
Источник


