- Install Linux Mint Cinnamon
- Cinnamon desktop
- Installing Cinnamon
- Installing Cinnamon only
- Installing Linux Mint Cinnamon
- Switching to Cinnamon
- Final thoughts
- About the author
- Sidratul Muntaha
- Release notes
- Known issues
- Shutdown timeout
- Grub2 theme in HiDPI
- Snap Store
- Virtualbox
- Home directory encryption
- Guest sessions
- Touchpad drivers
- Sound and microphone issues
- DVD Playback with VLC
- Other issues
- Username and password in the live session
- Moving windows which don’t fit in the screen
- Installing multimedia codecs offline
- Solving freezes during the boot sequence
- Choosing the right version of Linux Mint
Install Linux Mint Cinnamon
Cinnamon desktop
Linux Mint is a nice distro that’s based on Ubuntu. This feature allows Linux Mint to enjoy the support from one of the largest Linux communities of all. Moreover, as it’s based on Ubuntu, it’s stable and fluent. Now, on top of Ubuntu, Linux Mint comes up in different desktop environments. The Cinnamon desktop is a unique one by nature. It mimics the functionality of Windows. Moreover, it’s homemade. Linux Mint is primarily focused on Cinnamon. The Cinnamon desktop is derived from the modern GNOME 3. However, it prefers to tweak the system to meet the traditional “desktop metaphor” conventions.
If you happen to have Linux Mint with any other desktop environment, then the following guide will help you to smoothly shift to the Cinnamon desktop. It’s super simple and there’s really nothing tough about it.
Installing Cinnamon
There are 2 ways we can enjoy the Cinnamon desktop: installing the Cinnamon desktop only or reinstalling Linux Mint with Cinnamon desktop.
Installing Cinnamon only
This is the easiest way of enjoying Cinnamon. However, having 2 or more desktop environment on the same system is a risky move. In cases, desktop environments clash and cause compatibility issues, resulting in weird glitches and bugs. That’s why you’ll see that Linux Mint offers standalone Linux Mint installation with Cinnamon and other desktop environments. Ubuntu offers different Ubuntu flavors like Xubuntu (Xfce), Kubuntu (KDE Plasma), Lubuntu (LXQt), etc.
Fire up the terminal and refresh the APT cache.
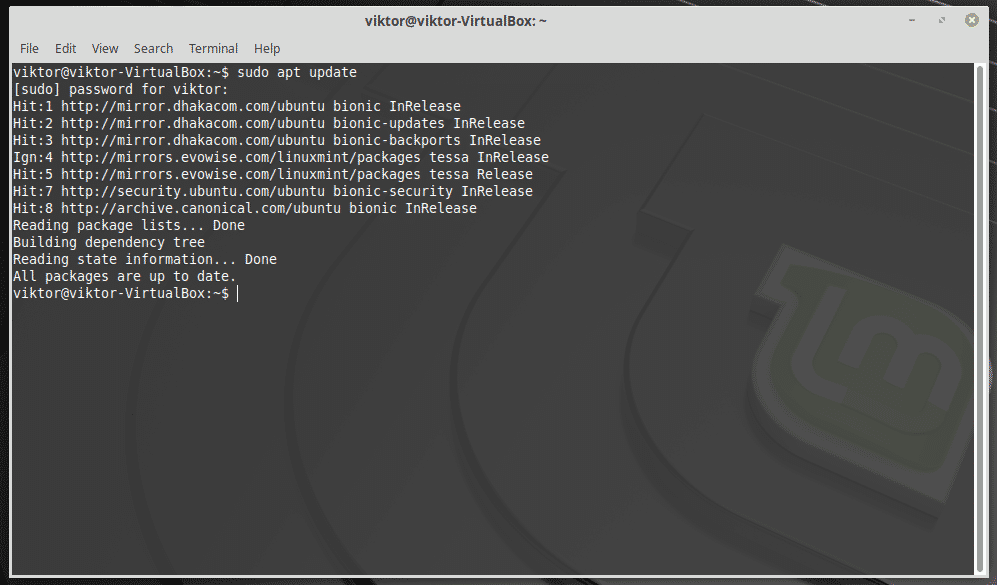
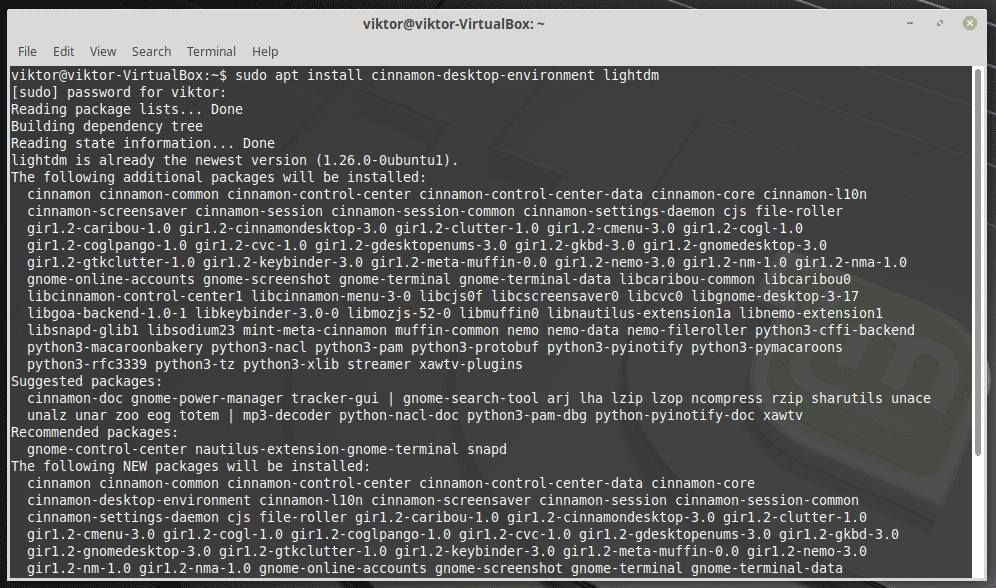
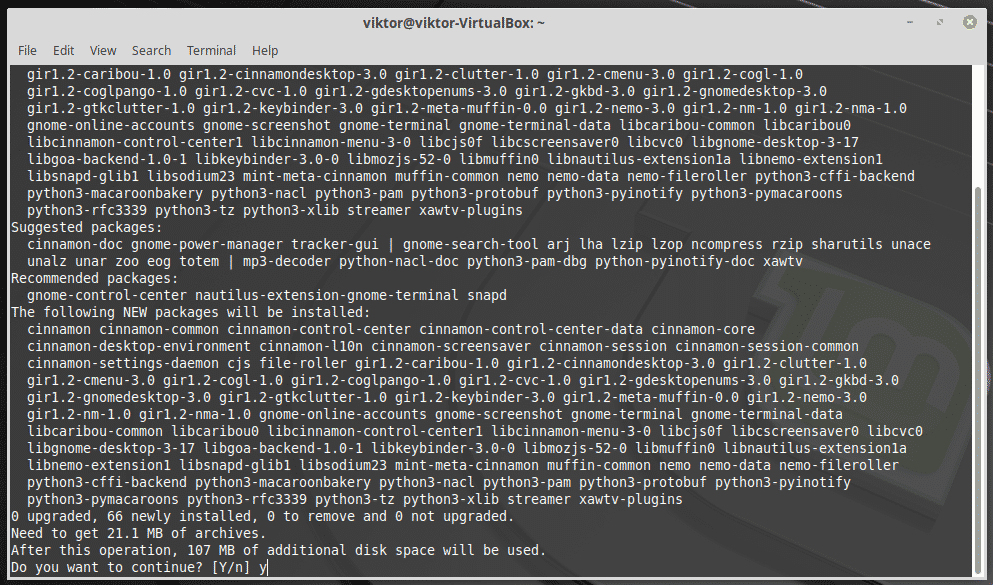
Run the next command for installing Cinnamon and LightDM. LightDM is the default
Note: My current system is running MATE desktop.
Installing Linux Mint Cinnamon
This is the best way to avoid any potential conflict and remain stable. However, all the tweaks and changes you made previously won’t be available in your new system. If you prioritize stability and decide to go through this way, then make sure that you backup all the file(s) and tweaks in a safe place.
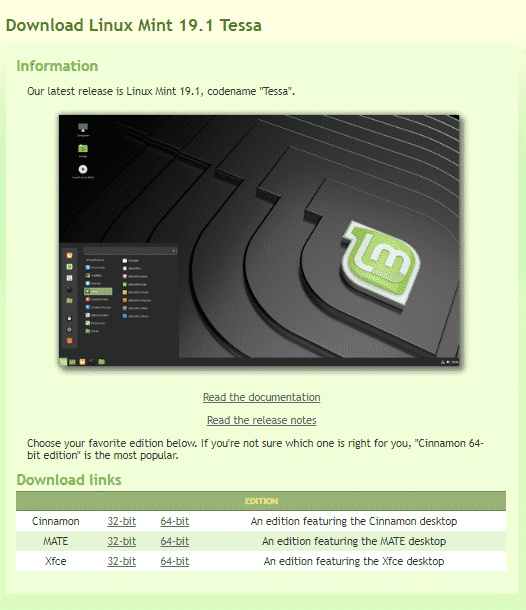
Ready? Grab the latest Linux Mint ISO with Cinnamon desktop.
Download complete? Make sure that the ISO file is not corrupted. Verify the SHA-256 hash of the downloaded file against the official SHA-256 hash. Learn how to check SHA-256 checksum of a file. Here are the official SHA-256 hashes for Linux Mint Cinnamon ISOs as of this writing.
- linuxmint-19.1-cinnamon-32bit.iso: b580052c4652ac8f1cbcd9057a0395642a722707d17e1a77844ff7fb4db36b70
- linuxmint-19.1-cinnamon-64bit.iso: bb4b3ad584f2fec1d91ad60fe57ad4044e5c0934a5e3d229da129c9513862eb0

Is your ISO file okay? If alright, then proceed to the next step. Otherwise, you have to download it again.
Make a bootable USB flash drive using Etcher or dd. Once ready, reboot the system and boot the USB flash drive.
Select the option “Start Linux Mint”. This will start a live session of Linux Mint Cinnamon.
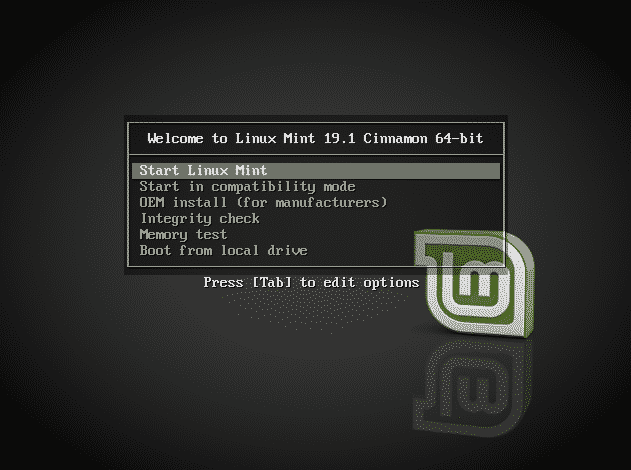
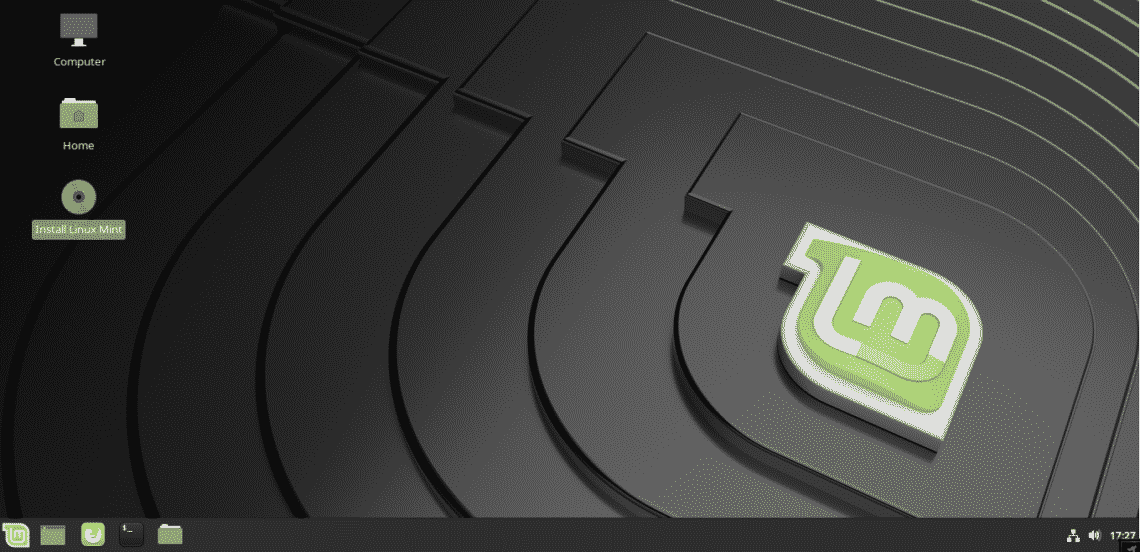
Once the system is ready, you’ll be able to roam freely throughout the entire system and feel the change. For this guide, we’ll be proceeding with the installation procedure. Fire up the installer!
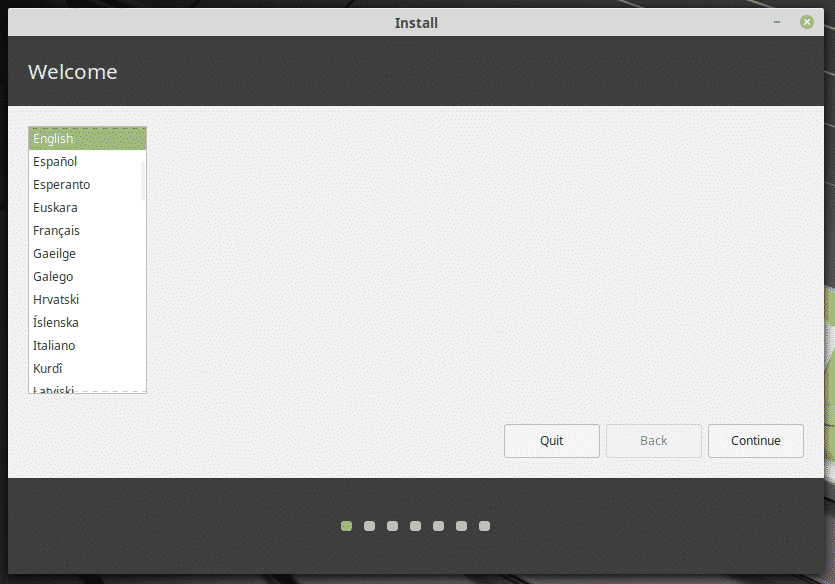
The first option is to choose a language. Select your native one for comfort or go with “English”.
Now, it’s time to choose the keyboard layout. If you’re using any specific keyboard layout, make sure to research on the internet and find out which layout to choose for your keyboard. In my case, I’m using a general QWERTY keyboard, so my layout of choice would be “English (US)”.
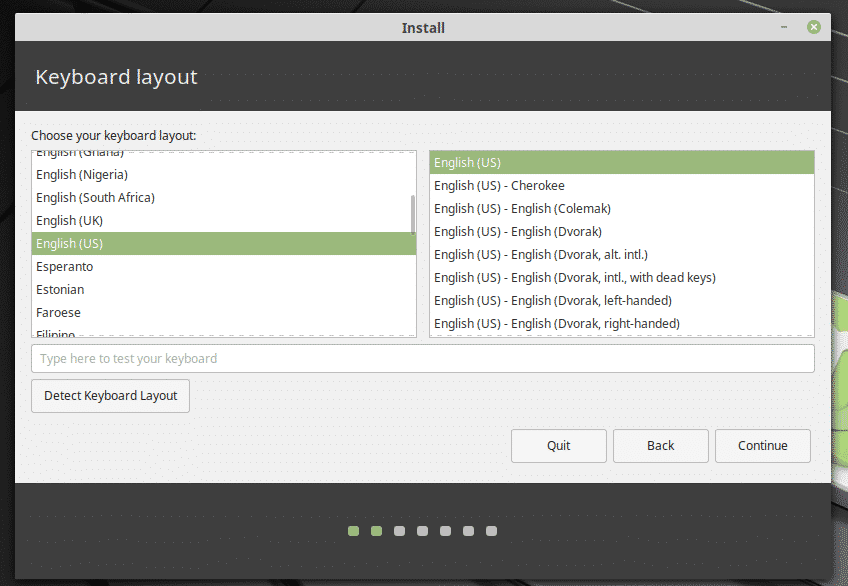
Note: You can also enjoy other keyboard layouts on QWERTY or other keyboard layouts. For that, choose the desired layout. Be careful; things will be tougher for you!
You’ll be asked to choose whether you want to install additional software and 3 rd -party apps right now. I always recommend checking the box. This will make things easier after completing the OS installation.

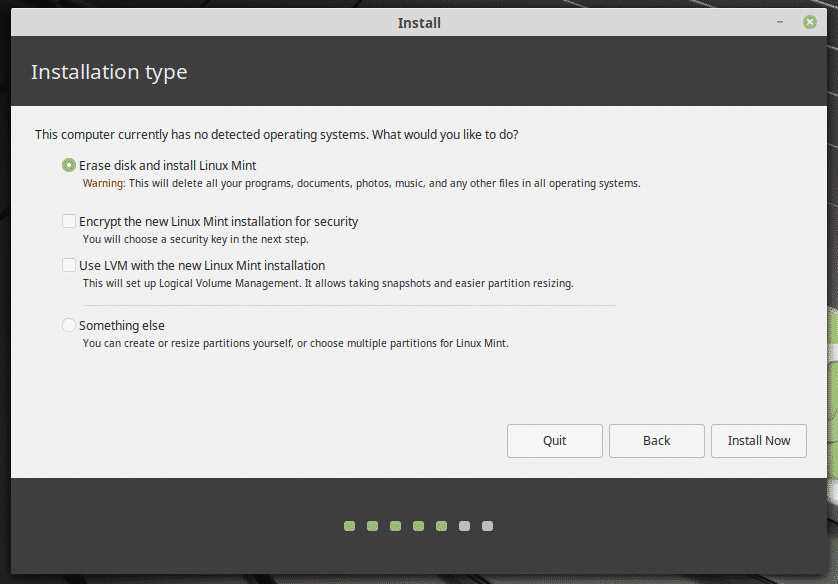
Next up, the partitioning. The recommended setup would be a separate partition with 20-30GB of space dedicated to the OS. Depending on your situation, things can change.
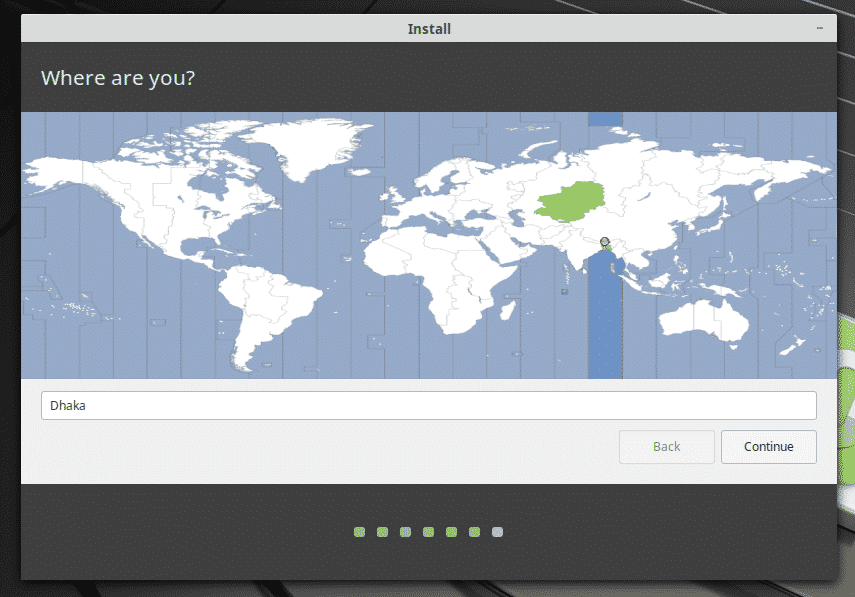
Choose the right region for your current position. It’ll be the crucial factor for deciding the time zone of your system, location, and others.
Enter the credentials for the new user account. This user will be the main admin account. The password will also be the default password for “root”. You can change it later, though. Learn how to change the root password. The tutorial is for Debian but remember: Linux Mint is Ubuntu-based and Ubuntu is Debian-based. Everything will work just fine.

All you have to do now is enjoy your cup of coffee and let the installer do its job.

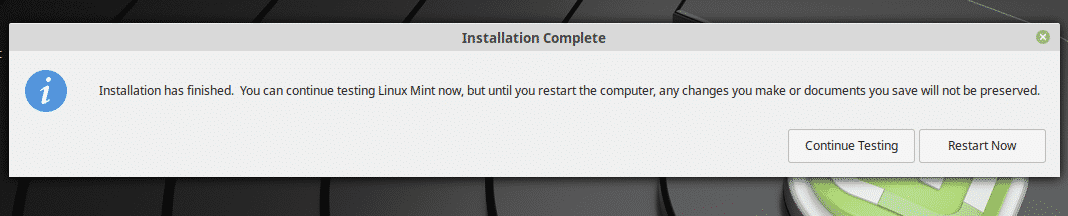
Installation complete? Restart the system from the prompt!
Switching to Cinnamon
In either case, restart your system and reach the login page.
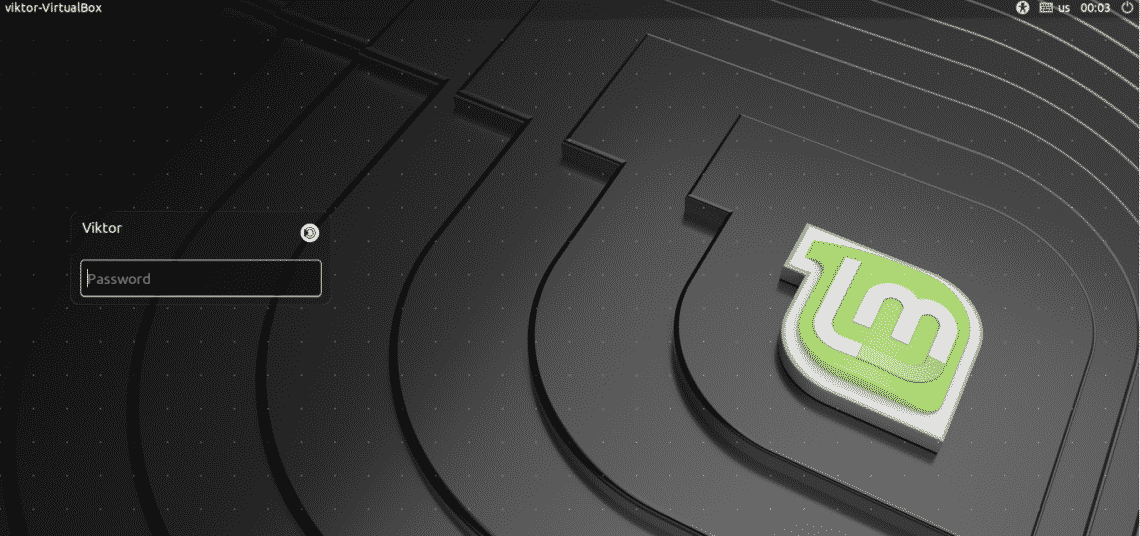
From the icon, you can choose which desktop environment to choose. If you’ve installed Cinnamon now, then choose Cinnamon. Don’t worry; from this time on, Linux Mint will always load Cinnamon desktop by default (unless you change it again).

Voila! Enjoy Cinnamon!
Final thoughts
The Cinnamon desktop is a phenomenal one. It holds the potential to attract any new and even veteran Linux user. It’s lightweight but modern; simple and intuitive. Give it a try if you’re on Linux Mint. After all, it’s one of the most powerful features of Linux Mint family!
About the author

Sidratul Muntaha
Student of CSE. I love Linux and playing with tech and gadgets. I use both Ubuntu and Linux Mint.
Источник
Release notes
This is Linux Mint 20, codename Ulyana.
Linux Mint 20 is a long term support release which will be supported until 2025. It comes with updated software and brings refinements and many new features to make your desktop experience more comfortable.
Known issues
Shutdown timeout
For your convenience, the shutdown timeout is reduced to 10s.
If you rely on lengthy operations to finish before shutdown, read /etc/systemd/system.conf.d/50_linuxmint.conf and override the timeout value in /etc/systemd/system.conf.d/60_custom.conf.
Grub2 theme in HiDPI
If the grub2 theme looks too small in your HiDPI monitor, install the «grub2-theme-mint-2k» package.
Snap Store
The Snap Store is disabled in Linux Mint 20. For more information on this or to re-enable it read https://linuxmint-user-guide.readthedocs.io/en/latest/snap.html.
Virtualbox
If the screen is black when launching Linux Mint in Virtualbox, change the VirtualBox graphics controller to «VMSVGA». Do this by opening up the settings for your VM and select Display -> Graphics Controller.
If the screen is garbled when launching Linux Mint in Virtualbox, switch to console with HOST+F1 (e.g. the RIGHT Ctrl key, no ALT) and back to tty7 with HOST+F7.
Another workaround is to disable «nested paging» (in the System -> Acceleration settings) and to increase the video memory to 128MB (in the Display settings).
Note: This issue only affects the live session. You don’t need these workarounds post-installation.
To add support for shared folders, drag and drop, proper acceleration and display resolution in Virtualbox, click on the «Devices» menu of Virtualbox and choose «Insert Guest Additions CD Image». Choose «download» when asked and follow the instructions.
Home directory encryption
Benchmarks have demonstrated that, in most cases, home directory encryption is slower than full disk encryption.
The move to systemd caused a regression in ecrypts which is responsible for mounting/unmounting encrypted home directories when you login and logout. Because of this issue, please be aware that in Mint 20 and newer releases, your encrypted home directory is no longer unmounted on logout: https://bugs.launchpad.net/ubuntu/+source/gnome-session/+bug/1734541.
Guest sessions
You can still enable guest sessions in the «Login Window» utility, but this option is now disabled by default.
Touchpad drivers
The default touchpad driver in this edition is «libinput» (provided by the xserver-xorg-input-libinput package).
If you experience problems with it, you can switch to another driver called «synaptics» (provided by the xserver-xorg-input-synaptics package).
To know which driver is used by your input devices, run the following command:
grep -i «Using input driver» /var/log/Xorg.0.log
When both drivers are installed, «synaptics» takes priority.
To switch to the «synaptics» driver, install it with the command:
apt install xserver-xorg-input-synaptics
Then log out and log back in.
To go back to using «libinput», simply remove the «synaptics» driver:
apt remove xserver-xorg-input-synaptics
Then log out and log back in.
Note: You can also try installing the «evdev» driver (provided by the xserver-xorg-input-evdev).
To install the complete version of WINE, open a terminal and type:
apt install wine-installer
Among other things, this will install wine-desktop-files, which adds menu entries for regedit, your C:\ drive and other items which are missing from upstream WINE.
Sound and microphone issues
If you’re facing issues with your microphone or your sound output, please install «pavucontrol».
This will add «PulseAudio Volume Control» to your menu. This application has more configuration options than the default volume control.
DVD Playback with VLC
If VLC does not find your DVD player, click on Media->Open Disc, and specify ‘/dev/sr0’ as the disc device.
Other issues
Linux Mint 20 is based on Ubuntu 20.04. Make sure to read the Ubuntu release notes.
Username and password in the live session
In the live session, the username is «mint» and the password is empty (i.e. just press Enter if asked for a password).
Moving windows which don’t fit in the screen
If your screen resolution is too low, some windows might not fit in the screen.
While pressing the ALT key, you can grab any part of a window with the mouse and move it across the screen.
Installing multimedia codecs offline
To download the multimedia codecs into an installable archive:
- Boot from the Linux Mint ISO on a computer which is connected to the Internet
- Open a terminal and type «apt download mint-meta-codecs» (without the quotes)
- This creates a «mint-meta-codecs.tgz» archive
On computers which do not have an Internet access, you can decompress this archive and run ./install.sh (or alternatively «sudo dpkg -i *.deb») to install the multimedia codecs.
Solving freezes during the boot sequence
Some graphics cards don’t work well with the open-source driver present in Linux Mint.
If Linux Mint freezes during boot time, use the «Compatibility Mode» boot option.
In this mode you should be able to boot Linux Mint and install it on your computer.
After the installation, reboot the computer and wait for the boot menu to appear.
Add the «nomodeset» option as illustrated below:


