- Release notes
- Known issues
- Shutdown timeout
- Grub2 theme in HiDPI
- Snap Store
- Virtualbox
- Home directory encryption
- Guest sessions
- Touchpad drivers
- Sound and microphone issues
- DVD Playback with VLC
- Other issues
- Username and password in the live session
- Moving windows which don’t fit in the screen
- Installing multimedia codecs offline
- Solving freezes during the boot sequence
- Choosing the right version of Linux Mint
- Xubuntu-ru.net
- Делаем Linux терминал красивым и удобным
- Добавляем функциональность
- Командная оболочка
- Настройка Zsh
- Настраиваем внешний вид
- Install XFCE in Linux Mint 20
- Installing XFCE Desktop via Command-Line
- View Current Desktop
- Install XFCE desktop
- Installing XFCE Desktop via GUI
- View Current Desktop
- Install XFCE desktop
- Switching to the XFCE Desktop
- Uninstall XFCE via Command-Line
- Uninstall XFCE via GUI
- Conclusion
- About the author
- Karim Buzdar
Release notes
This is Linux Mint 20, codename Ulyana.
Linux Mint 20 is a long term support release which will be supported until 2025. It comes with updated software and brings refinements and many new features to make your desktop experience more comfortable.
Known issues
Shutdown timeout
For your convenience, the shutdown timeout is reduced to 10s.
If you rely on lengthy operations to finish before shutdown, read /etc/systemd/system.conf.d/50_linuxmint.conf and override the timeout value in /etc/systemd/system.conf.d/60_custom.conf.
Grub2 theme in HiDPI
If the grub2 theme looks too small in your HiDPI monitor, install the «grub2-theme-mint-2k» package.
Snap Store
The Snap Store is disabled in Linux Mint 20. For more information on this or to re-enable it read https://linuxmint-user-guide.readthedocs.io/en/latest/snap.html.
Virtualbox
If the screen is black when launching Linux Mint in Virtualbox, change the VirtualBox graphics controller to «VMSVGA». Do this by opening up the settings for your VM and select Display -> Graphics Controller.
If the screen is garbled when launching Linux Mint in Virtualbox, switch to console with HOST+F1 (e.g. the RIGHT Ctrl key, no ALT) and back to tty7 with HOST+F7.
Another workaround is to disable «nested paging» (in the System -> Acceleration settings) and to increase the video memory to 128MB (in the Display settings).
Note: This issue only affects the live session. You don’t need these workarounds post-installation.
To add support for shared folders, drag and drop, proper acceleration and display resolution in Virtualbox, click on the «Devices» menu of Virtualbox and choose «Insert Guest Additions CD Image». Choose «download» when asked and follow the instructions.
Home directory encryption
Benchmarks have demonstrated that, in most cases, home directory encryption is slower than full disk encryption.
The move to systemd caused a regression in ecrypts which is responsible for mounting/unmounting encrypted home directories when you login and logout. Because of this issue, please be aware that in Mint 20 and newer releases, your encrypted home directory is no longer unmounted on logout: https://bugs.launchpad.net/ubuntu/+source/gnome-session/+bug/1734541.
Guest sessions
You can still enable guest sessions in the «Login Window» utility, but this option is now disabled by default.
Touchpad drivers
The default touchpad driver in this edition is «libinput» (provided by the xserver-xorg-input-libinput package).
If you experience problems with it, you can switch to another driver called «synaptics» (provided by the xserver-xorg-input-synaptics package).
To know which driver is used by your input devices, run the following command:
grep -i «Using input driver» /var/log/Xorg.0.log
When both drivers are installed, «synaptics» takes priority.
To switch to the «synaptics» driver, install it with the command:
apt install xserver-xorg-input-synaptics
Then log out and log back in.
To go back to using «libinput», simply remove the «synaptics» driver:
apt remove xserver-xorg-input-synaptics
Then log out and log back in.
Note: You can also try installing the «evdev» driver (provided by the xserver-xorg-input-evdev).
To install the complete version of WINE, open a terminal and type:
apt install wine-installer
Among other things, this will install wine-desktop-files, which adds menu entries for regedit, your C:\ drive and other items which are missing from upstream WINE.
Sound and microphone issues
If you’re facing issues with your microphone or your sound output, please install «pavucontrol».
This will add «PulseAudio Volume Control» to your menu. This application has more configuration options than the default volume control.
DVD Playback with VLC
If VLC does not find your DVD player, click on Media->Open Disc, and specify ‘/dev/sr0’ as the disc device.
Other issues
Linux Mint 20 is based on Ubuntu 20.04. Make sure to read the Ubuntu release notes.
Username and password in the live session
In the live session, the username is «mint» and the password is empty (i.e. just press Enter if asked for a password).
Moving windows which don’t fit in the screen
If your screen resolution is too low, some windows might not fit in the screen.
While pressing the ALT key, you can grab any part of a window with the mouse and move it across the screen.
Installing multimedia codecs offline
To download the multimedia codecs into an installable archive:
- Boot from the Linux Mint ISO on a computer which is connected to the Internet
- Open a terminal and type «apt download mint-meta-codecs» (without the quotes)
- This creates a «mint-meta-codecs.tgz» archive
On computers which do not have an Internet access, you can decompress this archive and run ./install.sh (or alternatively «sudo dpkg -i *.deb») to install the multimedia codecs.
Solving freezes during the boot sequence
Some graphics cards don’t work well with the open-source driver present in Linux Mint.
If Linux Mint freezes during boot time, use the «Compatibility Mode» boot option.
In this mode you should be able to boot Linux Mint and install it on your computer.
After the installation, reboot the computer and wait for the boot menu to appear.
Add the «nomodeset» option as illustrated below:
Источник
Install XFCE in Linux Mint 20
This tutorial will show you how to install the XFCE desktop in Linux Mint. The installation can occur through the following two ways:
- Installation of XFCE Desktop via the Command-Line
- Installing XFCE Desktop via GUI
The procedure and commands in this article were performed using the Linux Mint 20 OS. The same procedure can be followed in older Mint versions.
Note: To install or remove packages in any Linux distribution, including in Linux Mint, you must be either the root user or a standard user with sudo privileges.
We will use the command-line Terminal application for the installation process. To open the command-line Terminal, use the Ctrl+Alt+T keyboard shortcut.
Installing XFCE Desktop via Command-Line
Follow the procedure below to install the XFCE desktop in Linux Mint through the command-line Terminal application.
View Current Desktop
You can find information about your system by issuing the following command in Terminal:
To find out which desktop you are currently running, enter the following command in Terminal:

From the above output, you can see that I am currently running the Cinnamon desktop on my Linux Mint 20 system.
Install XFCE desktop
To install XFCE desktop using the command-line, follow the steps below:
First, update the system repository index using the following command in Terminal:
Now, you can install the XFCE desktop. Issue the following command in Terminal to do so:
When prompted for the password, enter the sudo password.
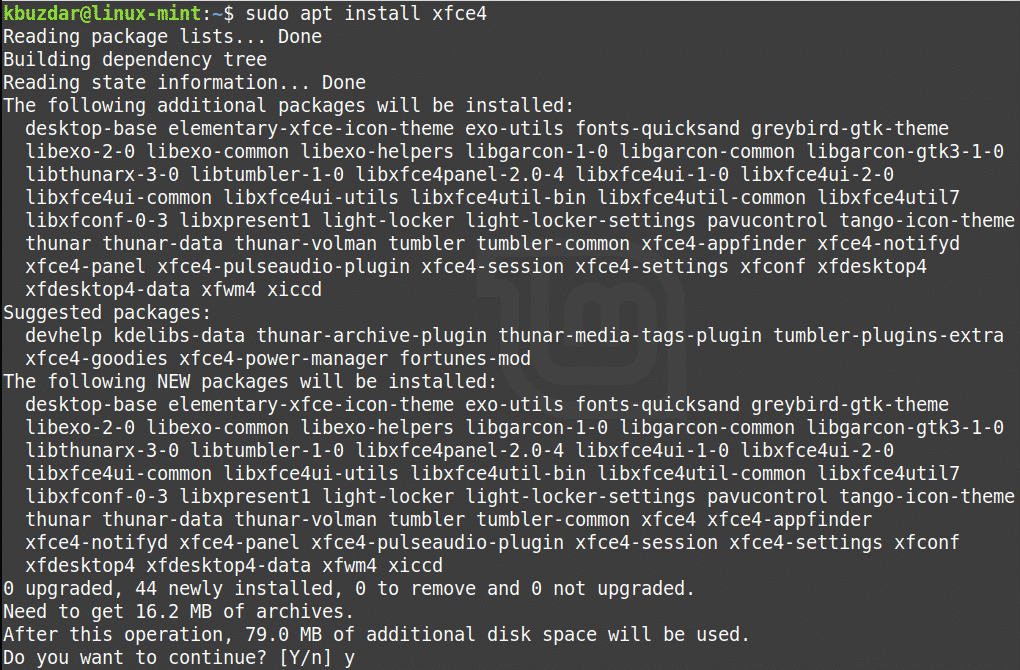
After running the above command, the system might ask for confirmation that you want to continue the installation. Press ‘y’ to continue and the installation of the XFCE desktop will be started on your system. The installation will take some time, as it also installs all the necessary packages required for the XFCE desktop environment.
Once the installation is completed, run the following command to set the default target to graphical:
Installing XFCE Desktop via GUI
Follow the procedure below to install the XFCE desktop in Linux Mint through the Graphical User Interface (GUI). We will use the Synaptic Package Manager for this purpose.
View Current Desktop
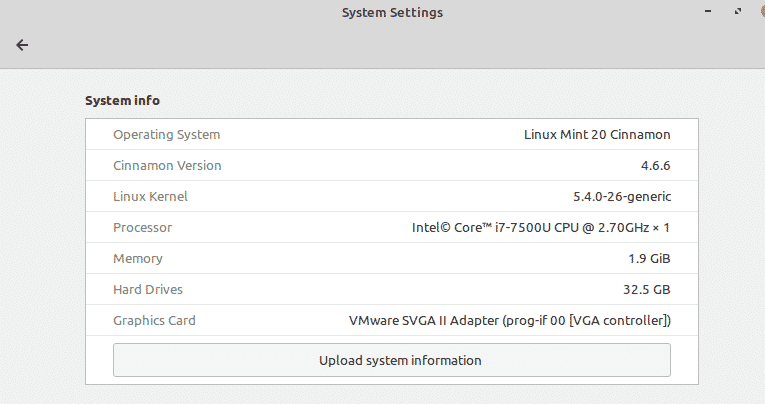
You can find your system information and the current desktop you are using through the System Settings. Hit the super key on your keyboard and type “system settings.” From the search results, click on the System Settings icon to open it. Here, you will see the system information, including the current desktop that your system is running.
Install XFCE desktop
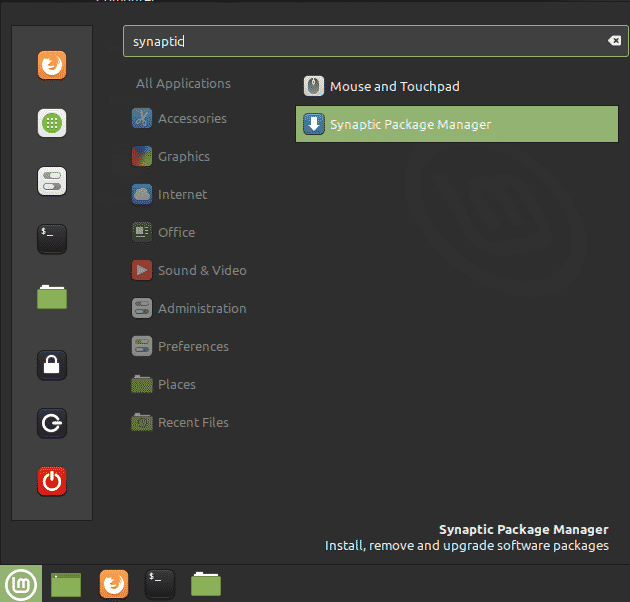
We will install the XFCE desktop through the Synaptic Package Manager. To open the Synaptic Package Manager application, hit the super key on your keyboard and type “synaptic.” From the search result, click the Synaptic Package Manager icon to open the application.
When the Synaptic Package Manager opens, it will prompt you for authentication. Type the password and click the Authenticate button.
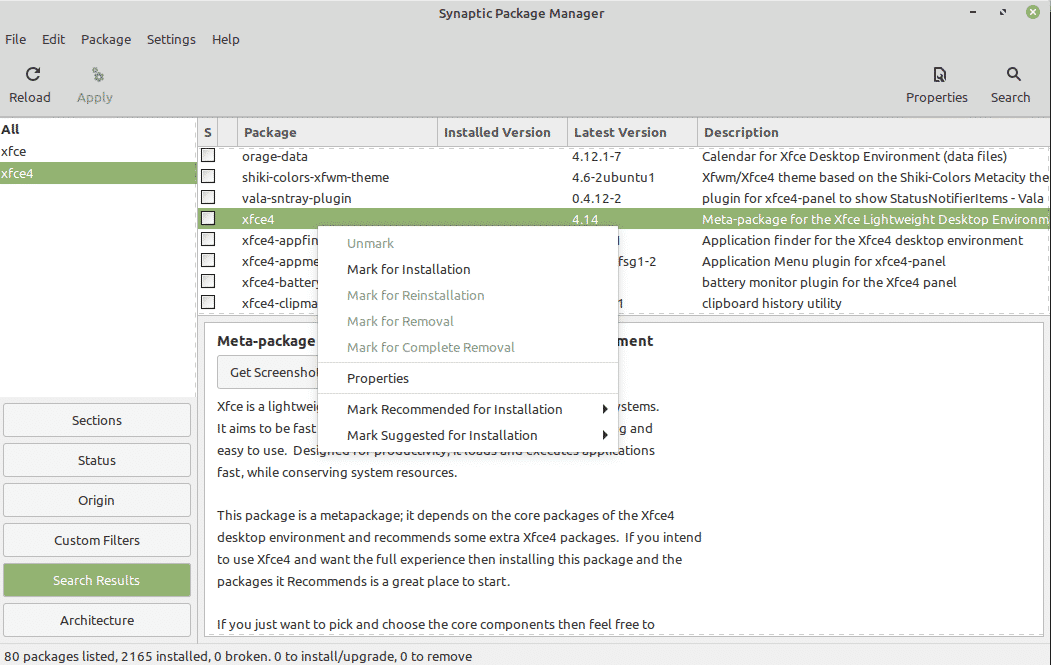
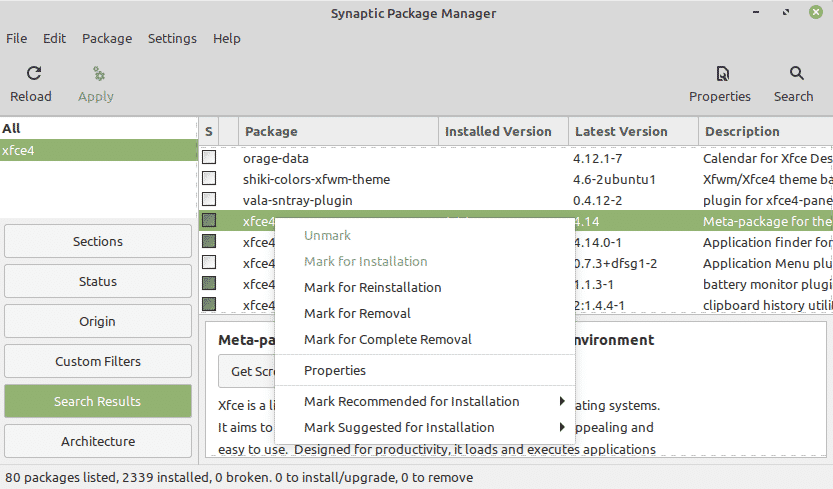
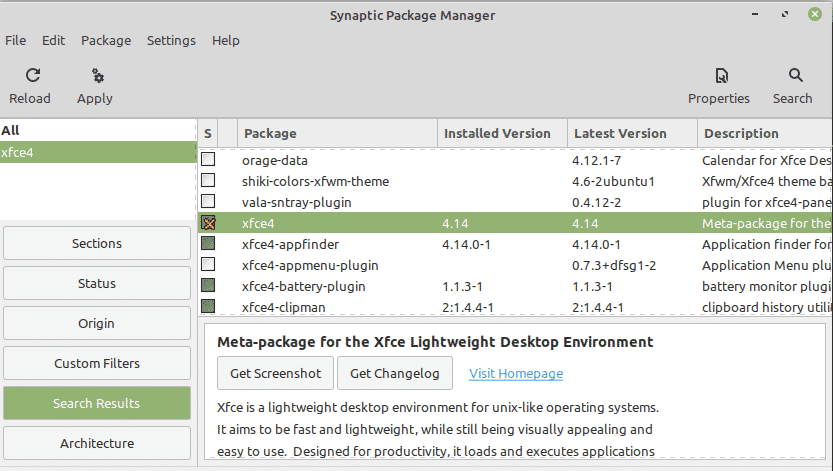
In the Synaptic Package Manager application, search for the xfce4 package. To do so, click the search icon at the right corner of the toolbar. Then type “xfce4” in the search bar and hit Enter.
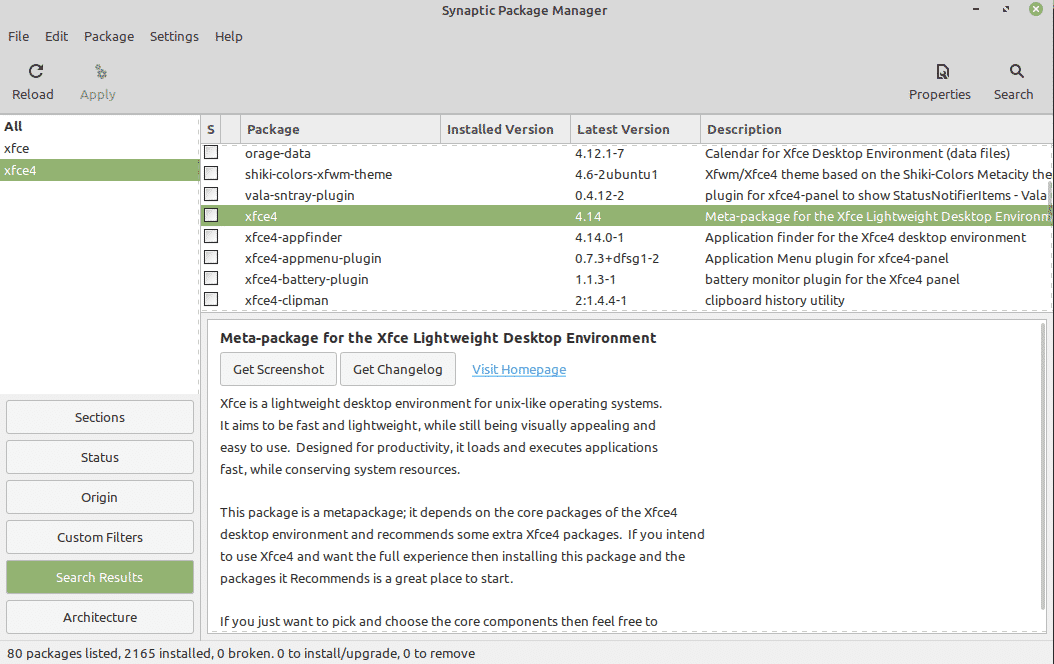
Once you find the package, right-click and select Mark for Installation.
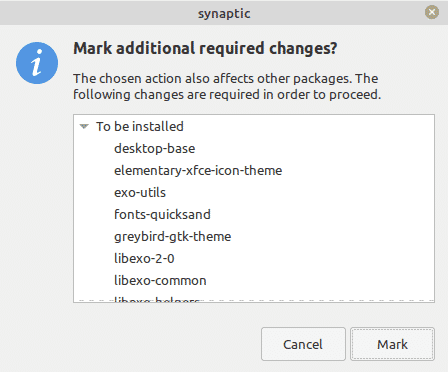
The following dialog will appear, asking you to install some dependencies. Click Mark to select the dependencies for installation.
Next, click the Apply button in the toolbar at the top.
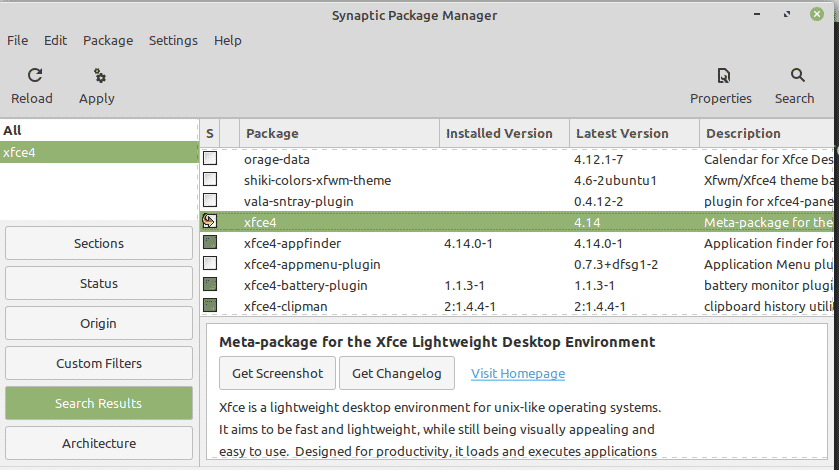
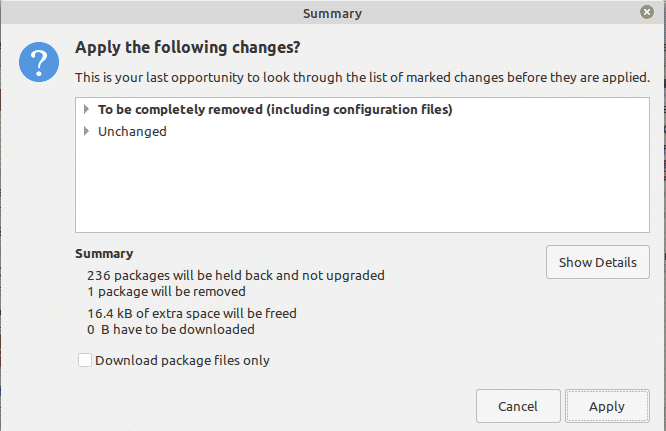
The following dialog will appear, showing the summary of the packages to be installed. Click the Apply button to initiate the installation process.

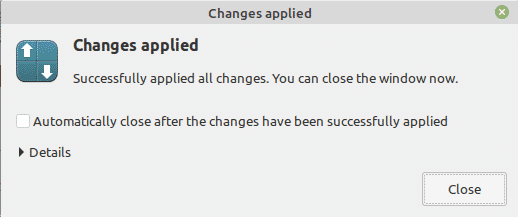
Now, the installation will start and you will see the following window appear on your screen:
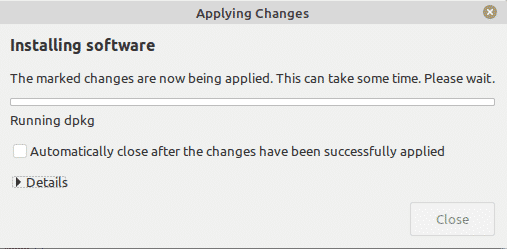
Once the installation is complete, you will see the following window. Click the Close button to close the window.
Switching to the XFCE Desktop
After you have installed the XFCE desktop, either via the command-line or via GUI, reboot or log out of the system to open the new desktop. When the following login screen appears, click the icon in front of the username.
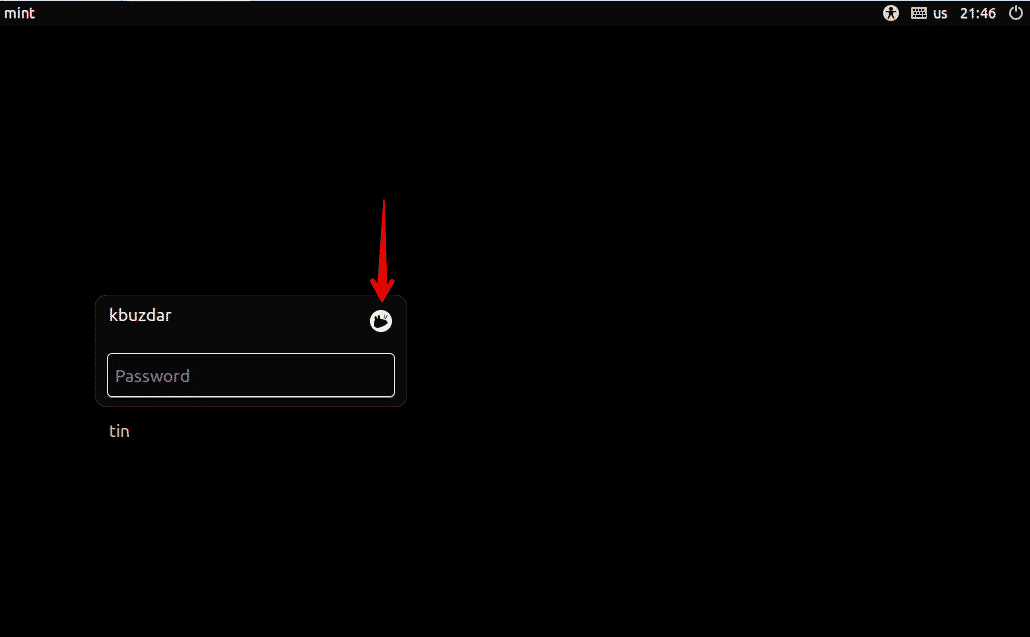
This will list all the installed desktop environments. Select Xfce Session and sign in.

Now, you will see the XFCE desktop on your screen.
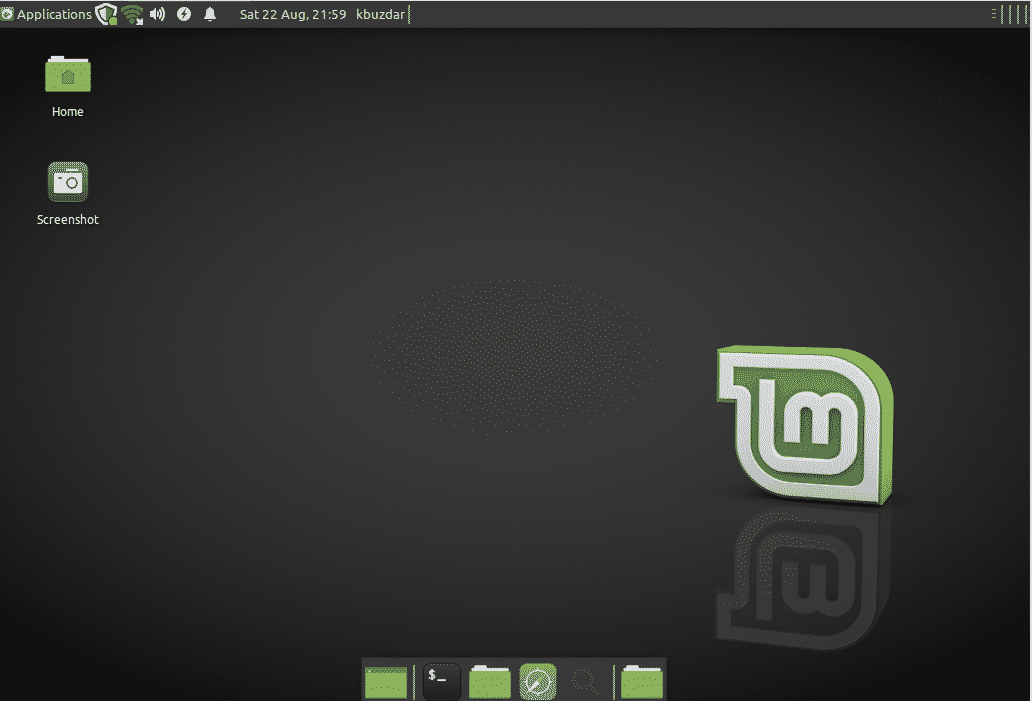
You can verify that it is the correct desktop by issuing the following command in Terminal:
From the output, you can see that the desktop currently in use is XFCE.

Uninstall XFCE via Command-Line
To uninstall XFCE via the command-line, first, log out of the current desktop and log in to the other desktop environment you were using before. Then, open the Terminal and issue the following command to remove the XFCE desktop:
When prompted for the password, enter the sudo password.
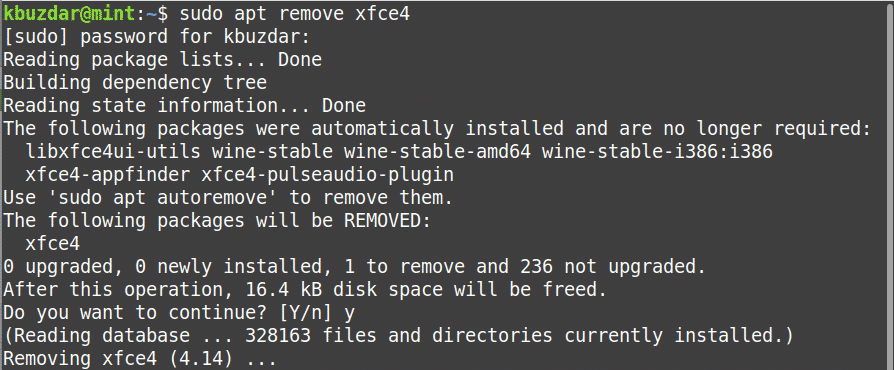
After running the above command, the system might ask for confirmation to continue the process. Press “y” to continue, after which the xfce4 package will be removed from your system.
Uninstall XFCE via GUI
To uninstall XFCE via GUI, first, log out of the current desktop and log in to the other desktop environment you were using before. Then, follow the steps below to remove the XFCE desktop from your system.
1. Open the Synaptic Package Manager using the same way as shown previously.
2. Search for the xfce4 package using the search button in the toolbar.
3. Right-click the xfce4 package and select Mark for Removal or Mark for Complete Removal.
4. Click the Apply button in the toolbar at the top.
5. The following dialog will appear, showing a summary of the packages to be removed. Click the Apply button to remove the packages.
6. Wait for a while, until XFCE is removed completely from your system.
Conclusion
That is all there is to it! In this article, you learned how to install the XFCE desktop on your Linux Mint 20 system. Based on your preference, you can either use the command-line or the GUI to install the XFCE desktop.
About the author

Karim Buzdar
Karim Buzdar holds a degree in telecommunication engineering and holds several sysadmin certifications. As an IT engineer and technical author, he writes for various web sites. He blogs at LinuxWays.
Источник


