- MPD — установка и настройка Music Player Daemon.
- Music Player Daemon
- Contents
- Installation
- Configuration
- Per-user configuration
- Configure the location of files and directories
- Audio configuration
- Autostart with systemd
- Autostart on tty login
- Scripted configuration
- System-wide configuration
- Music directory
- Start with systemd
- User id startup workflow
- Multi-MPD setup
- Running an Icecast server
- Satellite setup
- Clients
- Настройка музыкального сервера MPD.
MPD — установка и настройка Music Player Daemon.
Music Player Daemon — музыкальный плеер с клиент-серверной архитектурой и широкими возможностями. Он умеет воспроизводить музыку из указанного каталога и транслировать ее по сети. Управлять демоном можно как локально, так и удаленно, а также есть широкий выбор фронтэндов — клиентов к mpd.
Рассмотрим процесс установки и первоначальной настройки нашего демона.
Установим с помощью apt-get (или любым удобным для вас способом)
sudo apt-get install mpd
И перейдем к настройке. За конфигурацию демона отвечает файл /etc/mpd.conf
sudo -e /etc/mpd.conf
Нам откроется структурированный файл с кучей комментариев после каждой из переменных настроек. Отредактируем некоторые из них:
Указываем пути на наши папки, не забыв создать необходимые с помощью команды mkdir -p
/.mpd/playlists
music_directory «/home/username/Music»
playlist_directory «/home/username/.mpd/playlists»
db_file «/home/username/.mpd/tag_cache»
log_file «/home/username/.mpd/mpd.log»
pid_file «/home/username/.mpd/pid»
state_file «/home/username/.mpd/state»
Настроим пользователя и адрес нашего демона
user «mpd» #оставим без изменений
bind_to_address «localhost» #оставим без изменений
Отключим вывод через alsa
#audio_output <
# type «alsa»
# name «My ALSA Device»
# device «hw:0,0» # optional
# format «44100:16:2» # optional
# mixer_device «default» # optional
# mixer_control «PCM» # optional
# mixer_index «0» # optional
#>
Настроим вывод звука через pulseaudio
audio_output <
type «pulse»
name «My Pulse Output»
# server «remote_server» # optional
# sink «remote_server_sink» # optional
>
Настроим потоковое вещание (открыть :8000/mpd.ogg в любой плеере, например vlc. Если хотите проигрывать поток как mp3 — замените ниже vorbis на lame).
audio_output <
type «httpd»
name «My HTTP Stream»
encoder «vorbis» # optional, vorbis or lame
port «8000»
# quality «5.0» # do not define if bitrate is defined
bitrate «128» # do not define if quality is defined
format «44100:16:1»
>
Пока достаточно. Еще раскоментируйте опцию mixer_type, выбрав наиболее подходящий вам. Я выбрал mixer_type «software»
Основные настройки закончены. Теперь применим несколько команд, позволяющих избежать проблем с уровнем доступа или с pulseaudio. Вы можете как столкнуться с этими проблемами, так и не встретить их. В любом случае перестраховка не помешает.
#Настроим права доступа
sudo usermod -a -G
sudo chmod g+rX
где folder_owner — имя владельца папки (в моем случае — username), mpd_user — пользователь указанный в mod.conf (в нашем случае — mpd), ну и path_to_folder в нашем случае /home/username/Music и /home/username/.mpd
sudo usermod -a -G username mpd
sudo chmod g+rX /home/username/Music
sudo chmod a+rwx /home/username/.mpd/
#Настраиваем права доступа в pulseaudio для mpd_user
sudo usermod -a -G pulse-access mpd
sudo usermod -a -G pulse mpd
Перезапустим mpd (после установки он запускается автоматически):
sudo /etc/init.d/mpd stop
sudo /etc/init.d/mpd start-create-db
Настройка демона готова. Перейдем к настройке клиента. Поставим простой консольный клиент mpc (пригодится во многих случаях), а также ncurses фронтэнд — ncmpc или ncmpcpp
sudo apt-get install mpc ncmpcpp
С его помощью можно создавать плейлисты, управлять воспроизведением и прочее. Чтобы узнать о его возможностях — нажмите цифру 1 в окне клиента. С помощью установленного нами mpc — можно настроить горячие клавиши. Просто зайдите в настройки клавиатурных сочетаний вашего DE и настройте mpc toggle, mpc prev, mpc next, mpc volume +5, mpc volume -5 (полный список возможностей узнать можно командой mpc help).
Вот так просто мы установили и настроили нетребовательный к ресурсам музыкальный плеер и научили его проигрывать музыку по сети (возможно ее принимать на любом устройстве).
Автор статьи Platon Puhlechev aka iFalkorr разрешает печатать данный текст.
Источник
Music Player Daemon
MPD (music player daemon) is an audio player that has a server-client architecture. It plays audio files, organizes playlists and maintains a music database, all while using very few resources. In order to interface with it, a separate client is needed.
Contents
Installation
Install the mpd package, or mpd-git AUR for the development version.
Configuration
MPD is able to run in #Per-user configuration or #System-wide configuration mode (settings apply to all users). Also it is possible to run multiple instances of MPD in a #Multi-MPD setup. The way of setting up MPD depends on the way it is intended to be used: a local per-user configuration is easier to setup and may prove more adapted on a desktop system. The system-wide setup might be better suited for a always-on audio server with multiple users but a shared MPD instance.
In order for MPD to be able to playback audio, ALSA, optionally with PulseAudio, must be setup and working. The #Audio configuration section thereafter describes the parameters needed for ALSA or PulseAudio.
MPD is configured in the file mpd.conf(5) which can be located in various paths depending on the setup chosen (system-wide or per-user). In short, the two common locations used are:
/.config/mpd/mpd.conf in per-user configuration mode, this is the first location searched,
These are some of the most commonly used configuration options:
- pid_file — The file where MPD stores its process ID
- db_file — The music database
- state_file — MPD’s current state is noted here
- playlist_directory — The folder where playlists are saved into
- music_directory — The folder that MPD scans for music
- sticker_file — The sticker database
Per-user configuration
MPD can be configured per-user. Running it as a normal user has the benefits of:
- Regrouping into one single directory
/.config/mpd/ (or any other directory under $HOME ) all the MPD configuration files.
Configure the location of files and directories
In user mode, the configuration is read from $XDG_CONFIG_HOME/mpd/mpd.conf . We will assume here $XDG_CONFIG_HOME equals the default of
To build the user configuration, the MPD configuration example included in the package is a good starting point, copy it using the following lines:
A good practice is to use this newly created
/.config/mpd/ directory to store, together with the configuration file, other MPD related files like the database or the playlists. The user must have read write access to this directory.
Then edit the configuration file in order to specify the required and optional files and directories:
If playlists are enabled in the configuration, the specified playlist directory must be created:
MPD can now be started (an optional custom location for the configuration file can be specified):
In order to build the database file, MPD must scan into the music_directory defined above. To request this task, one of the MPD clients must be used. For example with mpc the command is:
or alternatively one can set the option auto_update to «yes» in the configuration to refresh the database whenever files are changed in music_directory .
Audio configuration
If ALSA is used, autodetection of the default device should work out of the box without any particular setting. If not, the syntax for ALSA audio output definition is provided thereafter; the required name parameter specifies a unique name for the audio output. The exact device as displayed using aplay —list-pcm from the package alsa-utils can optionally be indicated with the device option.
Users of PulseAudio will need to make the following modification:
Starting with version 0.23 of MPD, PipeWire support can be configured:
Autostart with systemd
The mpd package provides a user service file. The service starts the process as user, there is no need to change permission nor use the user and group variables in the MPD configuration file.
Start/enable the user unit mpd.service (i.e. with the —user flag).
/.config/mpd/mpd.conf , see systemd#Editing provided units if you would like to indicate a custom configuration file path.
Autostart on tty login
To start MPD on login add the following to
Scripted configuration
The mpd-configure tool creates a MPD configuration optimized for bit perfect audio playback, without any resampling or conversion, using the ALSA interface hardware address (hw:x,y).
System-wide configuration
The default /etc/mpd.conf keeps the setup in /var/lib/mpd which is assigned to user as well as primary group MPD.
Music directory
The music directory is defined by the option music_directory in the configuration file /etc/mpd.conf .
MPD needs to have execute permission on all parent directories of the music collection and also read access to all directories containing music files. This may conflict with the default configuration of the user directory, like
/Music , where the music is stored.
While there are several solutions to this issue, one of these should be most practical:
- Switch to the #Per-user configuration mode instead
- Add the mpd user to the user’s group and grant group execute permission to the user directory. This way the mpd user has permission to open the user directory:
- Store the music collection in a different path, either:
- by moving it entirely,
- with a bind mount,
- or with Btrfs#Subvolumes (you should make this change persistent with an entry to /etc/fstab ).
The MPD configuration file must define only one music directory. If the music collection is contained under multiple directories, create symbolic links under the main music directory in /var/lib/mpd . Remember to set permissions accordingly on the directories being linked.
To exclude a file — or files — from the update, create a file called .mpdignore in its parent directory. Each line of that file may contain a list of shell wildcards. Matching files in the current directory and all subdirectories are then excluded from subsequent updates.
Start with systemd
MPD can be controlled with mpd.service using systemd. The first startup can take some time as MPD will scan your music directory.
Test everything by starting a client application ( ncmpc is a light and easy to use client), and play some music!
Socket activation
mpd provides a mpd.socket unit. If mpd.socket is enabled (and mpd.service is disabled), systemd will not start MPD immediately, it will just listen to the appropriate sockets. Then, whenever an MPD client attempts to connect to one of these sockets, systemd will start mpd.service and transparently hand over control of these ports to the MPD process.
If you prefer to listen to different UNIX sockets or network ports (even multiple sockets of each type), or if you prefer not to listen to network ports at all, edit the mpd.socket unit appropriately and modify /etc/mpd.conf to match the configuration (see mpd.conf(5) for details).
User id startup workflow
MPD should never run as root, you may use the user option in the configuration to make MPD change its user id after initialization. Do not use this option if you start MPD as an unprivileged user. To describe how MPD drops its superuser privileges and switch to those of the user set in the configuration, the steps of a normal MPD startup are listed thereafter:
- Since MPD is started as root by systemd, it first reads the /etc/mpd.conf file.
- MPD reads the user variable in the configuration, and changes from root to this user.
- MPD then reads the rest of the configuration file and configures itself accordingly. Uses of
in the configuration file points to the home user’s directory, and not root’s directory.
Multi-MPD setup
Running an Icecast server
For a second MPD (e.g. with Icecast output to share music over the network) using the same music and playlist as the one above, simply copy the above configuration file and make a new file (e.g., /home/username/.mpd/config-icecast ), and only change the log_file , error_file , pid_file , and state_file parameters (e.g. mpd-icecast.log , mpd-icecast.error , and so on). Using the same directory paths for the music and playlist directories would ensure that this second MPD uses the same music collection as the first one, e.g. creating and editing a playlist under the first daemon would affect the second daemon as well. Users do not have to create the same playlists all over again for the second daemon. Call this second daemon the same way from
/.xinitrc above — but be sure to have a different port number, avoiding a conflict with the first MPD daemon.
Satellite setup
The method described in #Running an Icecast server works, but at least in theory could lead to issues with the database, when both MPD instances try to write to the same database file concurrently. MPD has a satellite mode where one instance can receive the database from an already running MPD instance.
In your config-icecast add this, where host and port reflect your primary MPD server:
Clients
A separate client is needed to control MPD. See a long list of clients at the mpd website. Popular options are:
Источник
Настройка музыкального сервера MPD.
Сейчас музыку можно слушать многими способами: скачать на телефон файлы, популярные стриминговые сервисы, в соцсетях и прочее.
Но не всегда есть нужная музыка или аудиокниги в сервисах или места не так много в памяти телефона, по этому можем использовать сервер на vpsville.ru для создания собственного музыкального потока.
Структура нашего сервиса
MPD (Music Player Daemon) + ympd -> клиенты
Для работы будет достаточно начальных тарифов Camp, Farm, Farm+ с ОС Debian8/9.
1. MPD есть в репозиториях
Вся конфигурация находится в 1 файле
2. Для работы web интерфейса ympd понадобятся следующие пакеты
Скачаем исходные тексты
Соберём исполняемый файл
3. В поставке с исходными текстами идёт файл для работы с ympd как с сервисом
Изменим параметры запуска ympd на требуемые нам
Сохраняем и запускаем
Теперь можно проверить что все сделано верно, подключившись к web интерфейсу через браузер http://(адреса_сервера):8989
4. Музыкальный сервер у нас есть, теперь нужно сделать так, что бы был удобный доступ к музыке на сервере. Есть 2 варианта:
1. Скачать файлы на сервер через sftp/ftp в папку /mnt/music
2. Подключить облачное хранилище и управлять файлами через удобный интерфейс и не занимать место на сервере.
Попробуем второй вариант
Ставим нужные пакеты
Для разового монтирования можно использовать команду
Вас попросит ввести логин и пароль, после введения Диск будет примотнирован в /mnt
Создадим папку music в /mnt
Теперь можем через браузер или приложение на компьютере положить несколько треков в данную папку и попробовать их прослушать.
Нажимаем «Brouse Database» и добавляем трек в плейлист 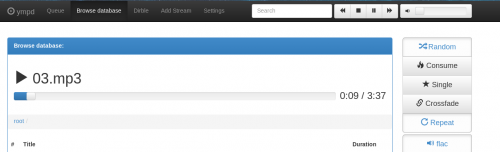
Но для наших целей требуется автоматическое монтирование во время загрузки, для чего воспользуемся простым скриптом
Вместо USERNAME указываем Ваш логин на Яндекс, вместо PASS Ваш пароль.
Сохраним его в файл /opt/autoDisk, сделаем файл исполняемым
и добавим в автозапуск через /etc/rc.local, добавив в него строку
Настройка завершена, можно добавлять любимую музыку и слушать.
Источник


