- How to Save and Exit in Nano Editor? [A Beginner’s Guide]
- How to Save and Exit Nano Save Nano Command: Ctrl+O will save the modifications you’ve made to the file. When you save the file, it will be generated if it does not already exist. Exit Nano Command: Ctrl+X will close nano. If any patches haven’t been saved yet into your system, you’ll be prompted to do so.
- Some Useful Nano Editor Commands
- Conclusion
- Ubuntu Documentation
- Introduction
- Installing Nano
- Using Nano
- Starting Nano
- Screen Layout
- Using The Mouse
- Using the Keyboard
- Opening, Saving, and Closing Files
- Opening Files
- Save and Save As
- Closing Files
- Editing Text
- Quitting Nano
- Resources
- Текстовый редактор Nano в Linux для новичков
- Что такое редактор Nano?
- Как использовать редактор Nano?
- Основные комбинации клавиш
- Сочетания клавиш для навигации
- Копирование вырезание и вставка
- Несколько файлов в Nano
How to Save and Exit in Nano Editor? [A Beginner’s Guide]
This tutorial is a guide for all the beginners who want to use save and exit commands in nano editor.

List of content you will read in this article:
Nano is the most fundamental, command-line-based text editor for Linux. It has all common text editor features, including highlighting syntaxes, multiple buffers, scanning and replacement with regular expression support, type corrections, and UTF-8 encoding. You can easily save and exit in the nano editor through the command-line options given in this tutorial.
How to Save and Exit Nano - Save Nano Command: Ctrl+O will save the modifications you’ve made to the file. When you save the file, it will be generated if it does not already exist.
- Exit Nano Command: Ctrl+X will close nano. If any patches haven’t been saved yet into your system, you’ll be prompted to do so.
You must have the write permissions on the file to save it. You must have written permission to the directory where the file would be generated while making a new file in the nano editor to save the file.
Some Useful Nano Editor Commands
Any command prefixed with a caret symbol (^) means to use the Ctrl key (e.g., ^G means to press the Ctrl+G keys at the same time).
Here we have listed the top nano editor command which you should know:
- ^G: nano help
- ^A: move to beginning of line in nano
- ^E: move to end of line in nano
- ^Y: move down a page — next page in nano
- ^V: move up a page — previous page in nano
- ^_: move to a specific line (^_^V moves to the top of the file, ^_^Y to the bottom)
- ^C: find out what line the cursor is currently on
- ^W: search or find some text in nano
- ^D: delete character currently under the cursor
- ^K: delete line in nano, nano remove line
- Also for remove or clear or delete some content or multiple lines you can select lines with your mouse and then use CTRL+K.
- ^O: save file nano (you will be prompted for a file to save to)
- ^X: exit nano (you will be prompted to save your file if you have not)
Conclusion
Using the command Ctrl+O and Ctrl+X, you can easily save nano file and exit a file in a nano editor. But be careful; you must have the write permission to do these for all the files and directories you are working on, and then only will you be able to make any changes in the nano editor. Hence in this way, we can save and exit in the nano editor using the command line.
Источник
Ubuntu Documentation
Introduction
GNU nano is a simple terminal-based text editor. Though not as powerful as Emacs or Vim, it is easy to learn and use. Nano is ideal for making small changes to existing configuration files or for writing short plain text files. It was originally created as a free replacement for the non-free Pico editor. Pico is the terminal-based editor used in the Pine email suite from the University of Washington.
Nano can be used in a terminal window or at the system console.
Basic use of nano is covered here. If you want to learn more advanced techniques such as the use of multiple buffers or syntax highlighting of code, see the the nano project’s documentation.
Installing Nano
Nano is part of the standard Ubuntu installation, and should be on your system already. If for some reason it’s not, use your favorite package manager to install nano.
Using Nano
Nano is a terminal-based command-line program. Although not complicated or difficult to use, it is different than a GUI-based text editor such as gedit. The two main features that differ are the short-cut key combinations and the use of a mouse.
Note
This discussion refers specifically to the use of nano in a terminal window. Using nano at the system console is almost identical, with the main difference being the use of the mouse.
Starting Nano
To start nano with an empty file, open a terminal window and at the command-line type «nano» (without the quotes). For example:
nano
To open an existing file for editing, type «nano filename» where filename is the name of the existing file. For example, to open the file that contains the list of most recently issued commands, make sure you are in your home directory, and at the command line type «nano .bash_history» as in the following example:
nano .bash_history
In the above example, if the file .bash_history does not exist in your current directory, nano will start a new blank file and use .bash_history as the name for it.
Caution
Line wrap is on by default. When line wrap is on, nano inserts end-of-line characters into your file when it wraps lines to fit the width of the terminal window. Only lines that you type or paste into the window are wrapped. Existing long lines are not wrapped until you add new text to the line or use the Ctrl-J key combination to justify the current paragraph.
If you are using nano to edit configuration files, you probably do not want line wrapping to be on. To start nano with line wrapping off, use the -w switch, as in the following example:
nano -w .bashrc
Screen Layout
Figure 1: Default nano screen layout

The default nano screen layout is as shown in Figure 1. The bottom two lines show the key combinations for common operations. The ^ symbol represents the Control key on your keyboard. For example, use the Ctrl-G key combination to display a basic introduction to nano and its default screen layout.
The screen fonts and background colours are determined by your terminal settings. And when you resize the terminal window, nano adjusts itself accordingly.
Long lines that are not wrapped to fit the window are indicated by the $ symbol at the extreme right edge of the terminal window. The $ symbol is not part of your file; it just tells you that the line of text is too long to be displayed in the terminal.
Using The Mouse
By default, mouse services are provided by the terminal window. The mouse works almost the same as in a GUI editor. You can highlight text, right-click to copy and paste, and use the middle mouse button for pasting text from the buffer. However, when you use the middle mouse button to paste text, the text is pasted at the current cursor location, not at the mouse pointer location. Other limitations exist. For example, you cannot use the mouse to cut or delete text, nor can you use the mouse to scroll through the file.
Nano has its own built-in mouse services, but they are limited. They provide only the ability to move the cursor to the point where you click, and to mark the beginning and end of a section of text. Use the Alt-M key combination to toggle between using the terminal’s mouse services and nano’s built-in mouse services.
Note
If you are using nano at the system console, you must have gpm installed and running before using the mouse. The gpm package is in the Universe repository.
Using the Keyboard
Typing at the keyboard will insert text at the current cursor location. The Page Up and Page Down keys, the Arrow keys, and the Insert key and Delete key all work as in most other text editors. If you are at a keyboard that does not have these keys, you can use alternative Ctrl-key combinations. They are listed in nano’s online help, accessible with the Ctrl-G key combination.
Copy, paste, and cut operations are available, but they do not use the same Ctrl-key sequences as in most GUI editors. See the Editing Text section for more information.
Opening, Saving, and Closing Files
You can open a file for editing when you start nano, as discussed in the Starting Nano section. This section shows you how to open a file when nano is already started.
Opening Files
Open a file with the Read File command, Ctrl-R. The Read File command inserts a file from disk at the current cursor location.
When prompted, type the name of the file you want to open, or use the Ctrl-T key combination to use nano’s built-in file browser to navigate to the file you want to open.
If a file is already open, nano will insert the new file into it at the current cursor location; it will not close the existing file, nor will it open a new screen for the new file.
Save and Save As
Save and Save As are both accomplished with the Write Out command, Ctrl-O.
When prompted, press enter to accept the existing file name. To save as another file name, type in the new name and press Enter, or use the Ctrl-T key combination to use nano’s built-in file browser.
Closing Files
Close a file with the Ctrl-X key combination. If the file you are working on has been modified since the last time you saved it, you will be prompted to save the file first. Type y to save the file, or n to exit nano without saving the file.
Closing a file also closes nano.
Editing Text
As is normal in most text editors, text that you type into nano is inserted at the current cursor position. The Delete and Backspace keys also work the same as in other editors.
Use the Alt-6 key combination to copy text to the «cut buffer». Similarly, use the Ctrl-K key combination to delete text (it is cut to the «cut buffer»). If no text is marked, these two commands copy or cut the entire line of text.
Use the Ctrl-U key combination to paste the text in the «cut buffer» into the file.
To cut or copy specific text, you must first mark the start and end points of the text you want to select. You can do this with the either keyboard or the mouse, but to use the mouse for marking you must first turn on nano’s built-in mouse services.
To use the keyboard to select text, move the cursor to the start of the text you want to select, press the Alt-A key combination to mark the start, then move the cursor to the end of the section you want to select.
To use the mouse to mark the start of a selection, first make sure that nano’s built-in mouse services are turned on. Use the Alt-M key combination to toggle between nano’s mouse and the terminal’s mouse. Click on the location where you want to mark the start of the selection, move to the end of the section you want to select, and click the mouse again. You might need to use the keyboard to scroll the screen up or down because nano does not support scrolling with the mouse.
Once you have marked the beginning and end of text, the Alt-6 and Ctrl-K key combinations can be used to copy or cut it, respectively.
Note
Text copied or cut into nano’s internal «cut buffer» can only be pasted back into the current nano session. The text is not available for pasting into other windows or programs.
If you are using nano in a terminal window you can use the mouse to copy and paste text to and from other windows on your desktop. You cannot use the mouse to cut or delete text.
Quitting Nano
To quit nano, use the Ctrl-X key combination. If the file you are working on has been modified since the last time you saved it, you will be prompted to save the file first. Type y to save the file, or n to exit nano without saving the file.
Resources
Basic Introduction to Emacs: EmacsHowto
Introduction to Vim: VimHowto
Using a terminal and the command line: HowToUseTheTerminal and CommandlineHowto
Nano (последним исправлял пользователь drkokandy 2017-08-17 22:14:14)
The material on this wiki is available under a free license, see Copyright / License for details
You can contribute to this wiki, see Wiki Guide for details
Источник
Текстовый редактор Nano в Linux для новичков
Несмотря на то что большинство действий в операционной системе Linux можно сделать через графический интерфейс, если вы хотите большого контроля над процессом и большей гибкости, вам придется прибегнуть к ручному редактированию конфигурационных файлов.
Так вы сможете точно настроить каждый параметр и будете знать, за что отвечает та или иная строка. Для работы с конфигурационными файлами можно использовать разные редакторы. Новички, чаще всего, используют Gedit, более опытные пользователи, которые уже привыкли к терминалу предпочитают редактор nano, а многие профессионалы хотят использовать только Vim.
Как использовать Vim мы уже рассматривали в одной из предыдущих статей, он очень гибкий, но за эту гибкость пришлось заплатить сложностью и вертикальной кривой обучения. В этой статье я хочу рассмотреть как использовать текстовый редактор Nano в операционной системе Linux. Это очень простой редактор и с ним справиться любой новичок. Но, в свою очередь, это будет отличным шагом в сторону освоения терминала.
Что такое редактор Nano?
Текстовый редактор Nano входит в набор программ GNU и является стандартным консольным редактором для многих дистрибутивов Linux. Разработка программы, как и многих других программ из набора GNU началась в девяностых годах.
В те времена существовала программа для отправки и приема электронной почты — Pine. Ее частью был текстовый редактор Pico, который можно было использовать для написания своих сообщений. Многим новичкам нравился Pico за его простоту и интуитивно понятный интерфейс. Но дистрибутивы Linux, в том числе Debian, не могли включить в свои репозитории закрытые бинарники для Pine и Pico.
Учитывая все это было принято решение создать редактор TIP или Tip Isn’t Pico. Но потом из-за конфликта названий с другой утилитой, редактор переименовали в nano.
Главное преимущество nano в простоте использования. Работать с ним так же просто, как с OpenOffice или Gedit. Поэтому работе с программой очень просто научиться. А теперь давайте перейдем к вопросу как использовать nano.
Как использовать редактор Nano?
В первую очередь нужно сказать, что nano — это консольный текстовый редактор, а это значит что его принято выполнять именно из терминала. Для этого применяется такой синтаксис:
$ nano опции /адрес/файла/файл
Использовать опции командной строки не обязательно достаточно только указать имя файла, но в некоторых случаях опции могут быть очень полезны. Рассмотрим их подробнее:
- +номер — указать строку в файле, с которой нужно начинать редактирование;
- -B — создавать резервную копию для файла при сохранении;
- -С — папка для резервной копии;
- -D — выводить текст жирным;
- -E — конвертировать табуляции в пробелы;
- -F — включить поддержку редактирования нескольких файлов;
- -H — сохранять историю поиска и замены;
- -I — не читать конфигурацию из файлов nanorc;
- -P — запоминать и восстанавливать позицию курсора во время последнего редактирования;
- -T — размер табуляции в пробелах;
- -m — включить поддержку мыши;
- -v — режим только для чтения, вы не можете сохранить файл.
Мы рассмотрели только самые главные опции программы, естественно, что на самом деле их намного больше, но для начала этих будет вполне достаточно. Дальше мы рассмотрим как работать с самой программой ее внешний вид и сочетания клавиш.
Чтобы открыть какой-либо файл, достаточно передать его в параметрах команде nano. Если такого файла не существует, будет создан новый. Например:
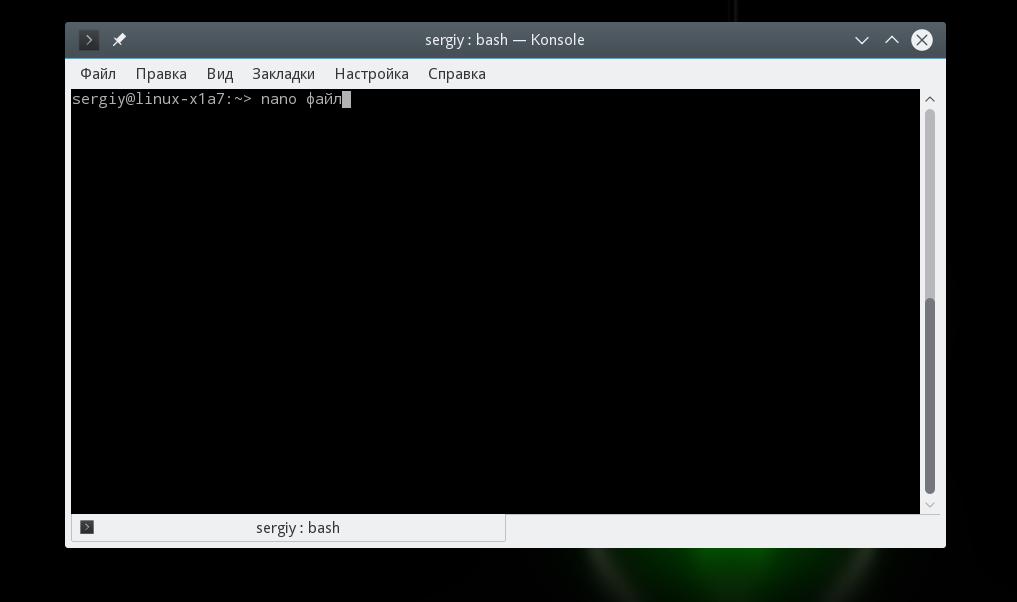
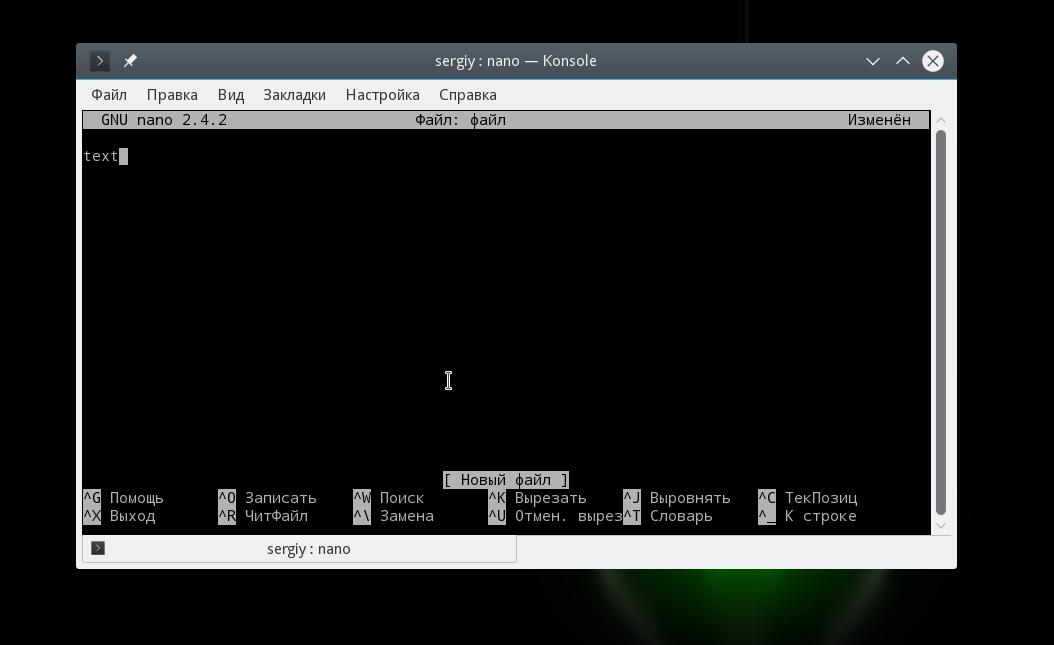
Главное окно программы выглядит очень просто, в верхней строке находится версия редактора и имя файла, а также уведомление был ли файл изменен. Дальше идет сам текст, а в самом низу опять имя файла и основные сочетания клавиш, которые вы можете использовать для работы с программой.
Для перемещения по тексту вы можете использовать мышку, стрелки на клавиатуре или специальные сочетания клавиш. В программе нет никакого меню, а все действия выполняются именно с помощью горячих клавиш. Возможно, некоторые из них будет не просто запомнить с первого раза,но после нескольких раз практики все получится. Тем более, что все самое необходимое отображается внизу экрана. Для активации того или иного действия достаточно нажать Ctrl и указанную букву. Клавиша Shift нигде не используется.
Основные комбинации клавиш
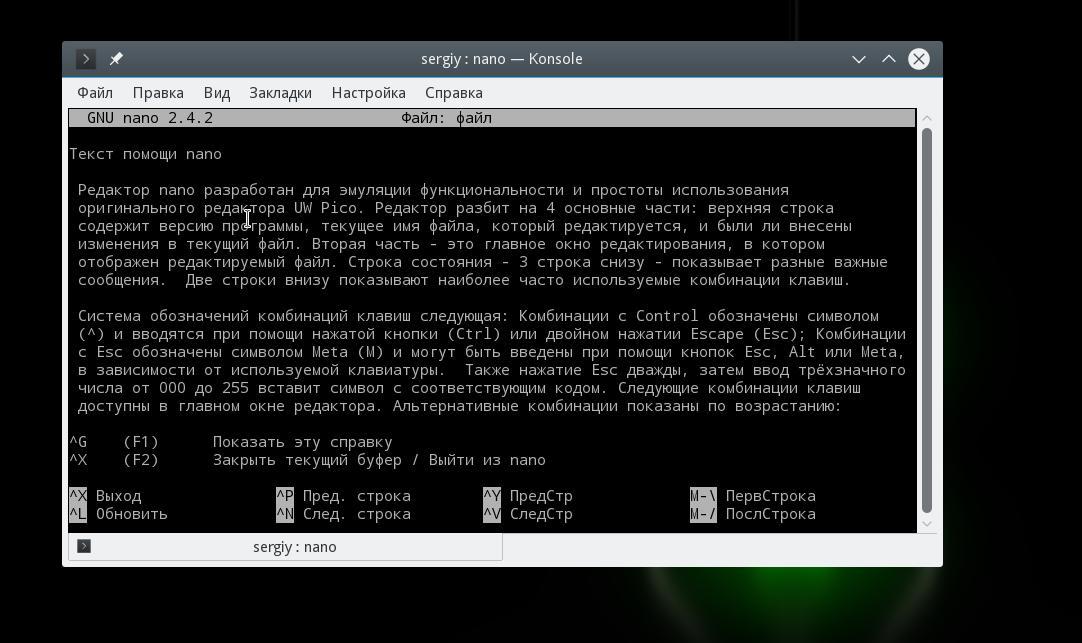
А теперь рассмотрим подробнее какие сочетания клавиш предлагает текстовый редактор nano linux. Чтобы открыть более подробную информацию о сочетаниях клавиш нажмите Ctrl+G:
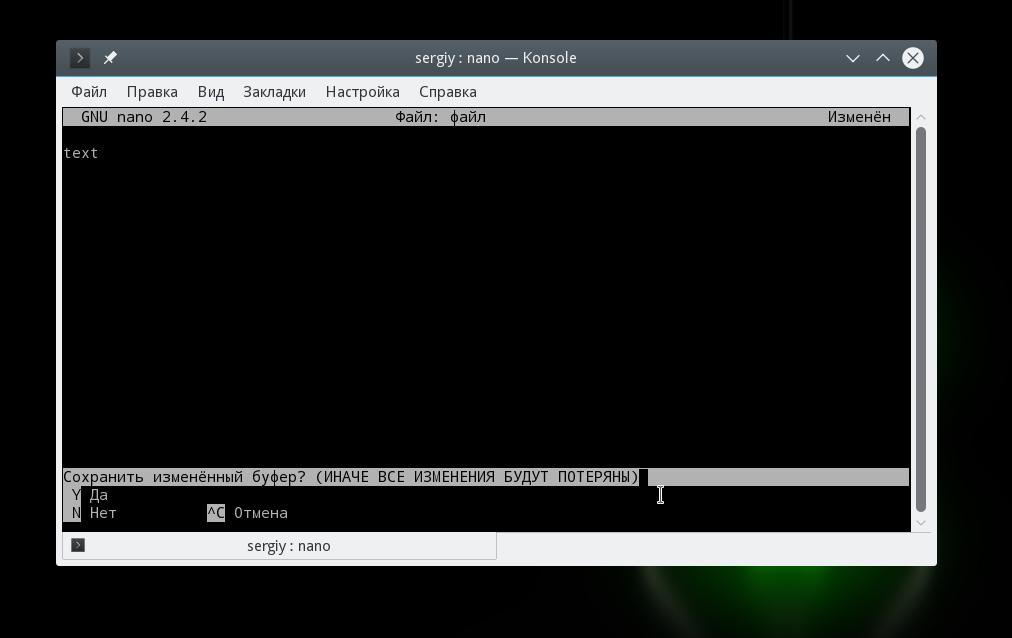
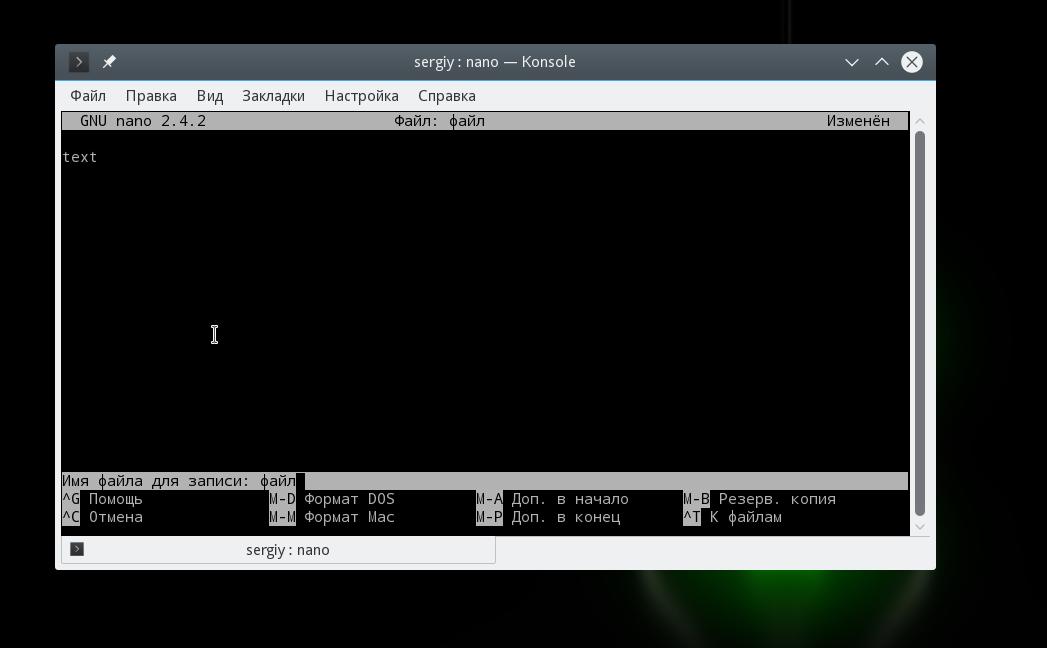
Когда завершите работу с редактором и сохраните изменения нажмите Ctrl+X для выхода, если файл не был сохранен, программа предложит это сделать:
Перед тем как закрывать программу, нужно сохранить изменения в файл на диске. Для этого используйте сочетание Ctrl+O. Если вы запустили nano без параметров, вам нужно будет ввести имя файла.
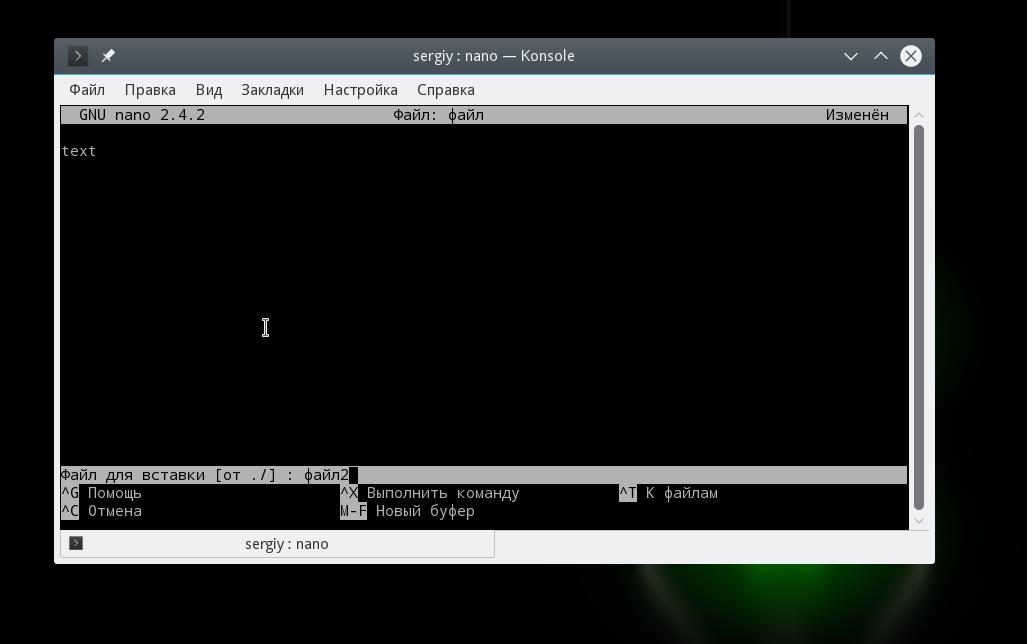
Вы можете вставить содержимое другого файла на позицию курсора, для этого нажмите Ctrl+R и введите имя целевого файла:
Чтобы отменить последнее действие нажмите Alt+U. А повторить последнее действие еще раз вы можете с помощью Alt+E. Для поиска по строке или регулярному выражению нажмите Ctrl+W, вы можете использовать стандартные регулярные выражения синтаксиса perl:

С помощью сочетания клавиш Alt+R вы можете использовать поиск и замену:

Мы рассмотрели основные комбинации клавиш, которые используются для управления функциями редактора. Возможно, они покажутся вам сложными, но для начала достаточно знать только Ctrl+O и Ctrl+X, все остальное придет потом.
Сочетания клавиш для навигации
Давайте теперь рассмотрим горячие клавиши для быстрого перемещения по тексту в редакторе nano. Конечно, вы всегда можете использовать уже привычные клавиши PageUP, PageDown, Home, End и клавиши со стрелками, но это не совсем удобно учитывая, что у nano есть свои сочетания. Хотя они не настолько практичны как у Vim, но вы все же можете их использовать.
Для перемещения курсора вперед или назад нажимайте Ctrl+F и Ctrl+B, а для перемещения вверх/вниз по одной строке применяйте Ctrl+P и Ctrl+N.
Для перемещения в начало строки используйте Ctrl+A, а в конец — Ctrl+E. Также существуют сочетания для перемещения по страницах, Ctrl+V перемещает на страницу вниз, а Ctrl+Y — на страницу вверх.
Но это еще не все. Вы можете перемещаться по словам с помощью Ctrl+Пробел и Alt+Пробел, а также нажать Ctrl+_ и ввести номер нужной строки, а через запятую даже символ.
Чтобы посмотреть где сейчас находится курсор, нажмите Ctrl+C.
Копирование вырезание и вставка
Вы можете копировать текст с помощью мышки, но это только если вы работаете в графическом интерфейсе. Но если вы используете программу в чистом терминале, такой вариант не подойдет. Для таких случаев у nano есть собственные инструменты выделения и копирования.
Чтобы выделить участок текста нажмите Ctrl+^ переместите курсор к концу нужного участка и опять нажмите это же сочетание клавиш. Весь текст между начальной и конечной точкой не включая позицию курсора будет выделен и вы можете его скопировать или вырезать.
Для копирования выделенного текста нажмите Alt+^, а чтобы его вырезать — Ctrl+K. Чтобы вставить вырезанный текст переместите курсор на нужную позицию и нажмите Ctrl+U.
Чтобы вырезать всю строку текста достаточно нажать Ctrl+K, иногда это очень удобно при редактировании файлов конфигурации.
Несколько файлов в Nano
Не все знают, но текстовый редактор nano linux поддерживает открытие нескольких файлов. Вы не можете открыть их на одном экране, но зато можете свободного переключаться между редактированием каждого из них.
Для этого передайте утилите при запуске несколько файлов:
nano файл1 файл2
А затем для перемещения между ними используйте сочетания клавиш Alt+> и Alt+ Выводы
В этой статье мы рассмотрели как использовать редактор nano linux. Несмотря на то, что он очень прост и рассчитан в первую очередь на новичков в Linux, здесь есть огромное количество возможностей, которые делают программу очень мощным редактором. Если у вас остались вопросы, спрашивайте в комментариях!
На завершение небольшое сравнение nano и vim:
Источник


