- 10 examples of Linux ss command to monitor network connections
- ss — socket statistics
- 1. List all connections
- 2. Filter out tcp,udp or unix connections
- 3. Do not resolve hostname
- 4. Show only listening sockets
- 5. Print process name and pid
- 6. Print summary statistics
- 7. Display timer information
- 8. Display only IPv4 or IPv6 socket connections
- 9. Filtering connections by tcp state
- 10. Filter connections by address and port number
- Summary
- 12 thoughts on “ 10 examples of Linux ss command to monitor network connections ”
- 12 ss Command Examples to Monitor Network Connections
- 1. Listing all Connections
- 2. Listing Listening and Non-listening Ports
- 3. Listing Listening Sockets
- 4. List all TCP Connections
- 5. List all Listening TCP Connections
- 6. List all UDP Connections
- 7. List all Listening UDP Connections
- 8. Display PID (Process IDs) of Sockets
- 9. Display Summary Statistics
- 10. Display IPv4 and IPv6 Socket Connections
- 11. Filter Connections by Port Number
- 12. Check Man Pages for ss Command
- If You Appreciate What We Do Here On TecMint, You Should Consider:
- Linux Show / Display Available Network Interfaces
- List Network Interfaces Using ip Command on Linux
- Linux show / display available network interfaces using nmcli
- Show a table of all network interfaces using netstat command in Linux
- Linux ip list interfaces using ifconfig command
- Утилита ss в Linux
- Общая информация
- Опции утилиты ss
- Примеры использования
- Мониторинг сетевых подключений
- Просмотр статистики статистики сетевых подключений
- Фильтрация по протоколу
- Фильтрация по состоянию соединения
- Фильтрация по адресу и номеру порта
- Выводы
10 examples of Linux ss command to monitor network connections
ss — socket statistics
In a previous tutorial we saw how to use the netstat command to get details about the network/socket connections. However the netstat command has long been deprecated and replaced by the ss command from the iproute suite of tools.
The ss command is capable of showing details about network connections with more information than the netstat command and it is faster. The netstat command reads various /proc files to gather information. However this approach is slower when there are lots of connections to display.
The ss command gets its information directly from kernel space. The options used with the ss commands are very similar to netstat making it an easy replacement.
So in this tutorial we are going to see few examples of how to use the ss command to check the network connections and socket statistics.
1. List all connections
The simplest command is to list out all connections.
We are piping the output to less so that the output is scrollable. The output will contain all tcp, udp and unix socket connection details.
2. Filter out tcp,udp or unix connections
To view only tcp or udp or unix connections use the t, u or x option.
By default the «t» option alone is going to report only those connections that are «established» or CONNECTED». It does not report the tcp sockets that are «LISTENING». Use the ‘-a’ option together with t, to report them all at once.
List all udp connections
Similarly use the x option to list out all unix socket connections.
3. Do not resolve hostname
To get the output faster, use the «n» option to prevent ss from resolving ip addresses to hostnames. But this will prevent resolution of port numbers as well.
4. Show only listening sockets
This will list out all the listening sockets. For example apache web server opens a socket connection on port 80 to listen for incoming connections.
The above command lists out all «listening» «tcp» connections. The n option disables hostname resolution of the ip addresses giving the output faster.
To list out all listening udp connections replace t by u
5. Print process name and pid
To print out the process name/pid which owns the connection use the p option
In the above output the last column contains the process name and pid. In this example dnsmasq is the process name and 1299 is the pid.
6. Print summary statistics
The s option prints out the statistics.
7. Display timer information
With the ‘-o’ option, the time information of each connection would be displayed. The timer information tells how long with
8. Display only IPv4 or IPv6 socket connections
To display only IPv4 socket connections use the ‘-f inet’ or ‘-4’ option.
To display only IPv6 connections use the ‘-f inet6’ or ‘-6’ option.
9. Filtering connections by tcp state
The ss command supports filters that can be use to display only specific connections. The filter expression should be suffixed after all options. The ss command accepts filter in the following format.
Now here are some examples of how to filter socket connections by socket states.
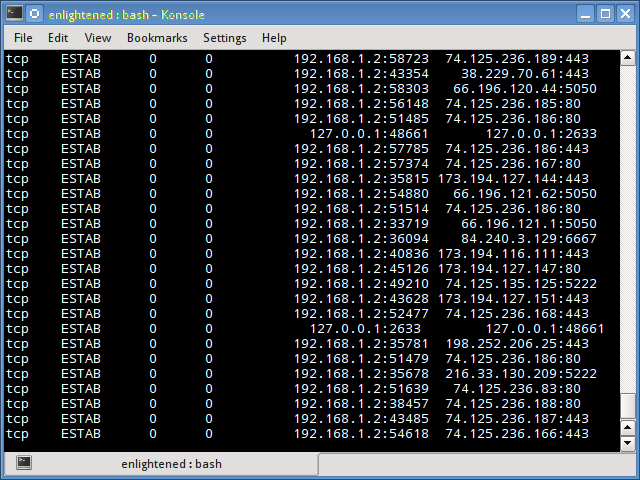
To display all Ipv4 tcp sockets that are in «connected» state.
Display sockets with state time-wait
The state can be either of the following
Note that many states like syn-sent, syn-recv would not show any sockets most of the time, since sockets remain in such states for a very short time. It would be ideal to use the watch command to detect such socket states in real time.
Here is an example
After running the above command, try opening some website in a browser or download something from some url. Immediately you should see socket connections appearing in the output, but for a very short while.
10. Filter connections by address and port number
Apart from tcp socket states, the ss command also supports filtering based on address and port number of the socket. The following examples demonstrate that.
Display all socket connections with source or destination port of ssh.
Sockets with destination port 443 or 80
The following syntax would also work
Ports can also be filtered with dport/sport options. Port numbers must be prefixed with a «:».
The above is same as > ss -nt dst :80
Some more examples of filtering
The following operators are supported when comparing port numbers
Summary
The above examples cover most of what the ss command supports. For more information check the man pages.
Documentation of the filter syntax can be found in the package iproute2-doc that can be installed on debian/ubuntu systems
The file /usr/share/doc/iproute2-doc/ss.html contains details about the ss command filter syntax.
A Tech Enthusiast, Blogger, Linux Fan and a Software Developer. Writes about Computer hardware, Linux and Open Source software and coding in Python, Php and Javascript. He can be reached at [email protected] .
12 thoughts on “ 10 examples of Linux ss command to monitor network connections ”
I’m tried to find ss.html anywhere in debian packages, but as you can see found nothing.
# apt-file search ss.html | grep -w ‘ss.html’
mednafen: /usr/share/doc/mednafen/ss.html
python-pycryptodome-doc: /usr/share/doc/python-pycryptodome-doc/html/src/protocol/ss.html
Thank you very mush for your article, very useful.
I was looking for an alternative between netstat and ss and I’ve found https://agmen.org/netsstat
Good script btw
Thank you! Very useful indeed.
This is very helpful.
Thanks for the examples. Noticed a few things.
Example 5 seems to have incorrect text. [1] The actual output shows dnsmasq is pid 1347 not 1299. [2]
Example 7 seems to have cutoff text. [3]
Example 9 has text saying the command shows all TCP “connected” states [4] however the command example below the text is only showing connections in the established state [5].
[1]
“In the above output the last column contains the process name and pid. In this example dnsmasq is the process name and 1299 is the pid.”
[2]
LISTEN 0 5 127.0.1.1:domain *:* users:((“dnsmasq”,1347,5))
[3]
“The timer information tells how long with ”
[4]
“To display all Ipv4 tcp sockets that are in “connected” state.”
[5]
$ ss -t4 state established
very useful for getting an overview. Thanks!
My experience is that on a RHEL 6 system, netstat -anp takes 0.161 seconds to run, while ss -np takes 6.7 seconds. If by faster you really mean 416 times slower, then I agree.
Источник
12 ss Command Examples to Monitor Network Connections
ss command is a tool that is used for displaying network socket related information on a Linux system. The tool displays more detailed information that the netstat command which is used for displaying active socket connections.
In this guide, we delve in and see how the ss command can be used to display varied socket connection information in Linux.
1. Listing all Connections
The basic ss command without any options simply lists all the connections regardless of the state they are in.
![]() List All Connections in Linux
List All Connections in Linux
2. Listing Listening and Non-listening Ports
You can retrieve a list of both listening and non-listening ports using the -a option as shown below.
![]() List All Ports in Linux
List All Ports in Linux
3. Listing Listening Sockets
To display listening sockets only, use the -l flag as shown.
![]() List Listening Sockets in Linux
List Listening Sockets in Linux
4. List all TCP Connections
To display all TCP connection, use the -t option as shown.
![]() List TCP Connections in Linux
List TCP Connections in Linux
5. List all Listening TCP Connections
To have a view of all the listening TCP socket connection use the -lt combination as shown.
![]() List Listening TCP Connections in Linux
List Listening TCP Connections in Linux
6. List all UDP Connections
To view all the UDP socket connections use the -ua option as shown.
![]() List UDP Socket Connections in Linux
List UDP Socket Connections in Linux
7. List all Listening UDP Connections
To list listening UDP connections use the -lu option.
![]() List Listening UDP Connections in Linux
List Listening UDP Connections in Linux
8. Display PID (Process IDs) of Sockets
To display the Process IDs related to socket connections, use the -p flag as shown.
![]() Find Process ID of Sockets in Linux
Find Process ID of Sockets in Linux
9. Display Summary Statistics
To list the summary statistics, use the -s option.
![]() Find Summary Statistics
Find Summary Statistics
10. Display IPv4 and IPv6 Socket Connections
If you are curious about the IPv4 socket connections use the -4 option.
![]() Find IPv4 Socket Connections in Linux
Find IPv4 Socket Connections in Linux
To display IPv6 connections, use the -6 option.
![]() Find IPv6 Socket Connections in Linux
Find IPv6 Socket Connections in Linux
11. Filter Connections by Port Number
ss command also lets you filter socket port number or address number. For example, to display all socket connections with a destination or source port of ssh run the command.
![]() Filter Connections by Port Number
Filter Connections by Port Number
Alternatively, you can run the command.
![]() Filter Connections by Service
Filter Connections by Service
12. Check Man Pages for ss Command
To get more insights into the ss command usage, check the man pages using the command.
![]() Find ss Command Usage and Options
Find ss Command Usage and Options
Those are some of the commonly used options that are used with ss command. The command is considered more superior to netstat command and provide detailed information about network connections.
If You Appreciate What We Do Here On TecMint, You Should Consider:
TecMint is the fastest growing and most trusted community site for any kind of Linux Articles, Guides and Books on the web. Millions of people visit TecMint! to search or browse the thousands of published articles available FREELY to all.
If you like what you are reading, please consider buying us a coffee ( or 2 ) as a token of appreciation.

We are thankful for your never ending support.
Источник
Linux Show / Display Available Network Interfaces
- ip command – It is used to show or manipulate routing, devices, policy routing and tunnels.
- netstat command – It is used to display network connections, routing tables, interface statistics, masquerade connections, and multicast memberships.
- ifconfig command – It is used to display or configure a network interface.
| Tutorial details | |
|---|---|
| Difficulty level | Easy |
| Root privileges | No |
| Requirements | None |
| Est. reading time | 4 minutes |
List Network Interfaces Using ip Command on Linux
Type the following ip command, enter:
$ ip link show
Here is what we see:
- lo – Loopback interface.
- eth0 – My first Ethernet network interface on Linux.
- wlan0 – Wireless network interface in Linux.
- ppp0 – Point to Point Protocol network interface which can be used by dial up modem, PPTP vpn connection, or 3G wireless USB modem.
- vboxnet0, vmnet1, vmnet8 – Virtual machine interface working in bridge mode or NAT mode on Linux.
Linux show / display available network interfaces using nmcli
One can list available devices and their status on Linux, run:
$ nmcli device status
OR
$ nmcli connection show
Linux list all network interfaces using nmcli and ip command
Show a table of all network interfaces using netstat command in Linux
Type the following command:
$ netstat -i
Sample outputs:
Linux ip list interfaces using ifconfig command
Type the following ifconfig command:
$ /sbin/ifconfig -a
Sample outputs:
Источник
Утилита ss в Linux
Иногда бывает необходимо посмотреть какие сетевые подключения Linux открыты, какие IP адреса используются или какие порты прослушиваются. Раньше для таких целей использовалась утилита netstat. Её, без сомнения, знают все системные администраторы и специалисты по безопасности. Но она больше не поставляется по умолчанию в новых дистрибутивах. Вместо неё используется новая утилита под названием ss.
Netstat сканирует директорию /proc для получения необходимой информации, но в новых версиях ядра была реализована специальная подсистема для мониторинга сети в Linux. Её и использует ss, с помощью этой утилиты вы можете получить больше информации о сетевых подключениях и работает она гораздо быстрее.
Как вы уже поняли в этой статье мы рассмотрим мониторинг сетевых подключений в Linux с помощью утилиты из пакета iproute — ss linux. Начнем, как обычно, с синтаксиса и основных опций.
Общая информация
Как уже было сказано работает утилита ss в Linux на основе подсистемы ядра. Синтаксис очень простой — сама команда и ее опции:
$ ss опции [ фильтр_состояния] [фильтр_адреса]
Для удобства вывод команды ss можно фильтровать с помощью grep:
$ ss опции | grep шаблон
Опции указывает различные параметры отображения и фильтрации информации. Фильтры по состоянию и адресу очень интересная вещь, они позволяют выполнять мониторинг сетевых подключений в Linux, только тех что нужно. Например, только открытых, закрытых или находящихся на этапе подключения. Подробнее мы рассмотрим это в конце статьи.
Опции утилиты ss
Для сетевых подключений в Linux с помощью утилиты ss можно использовать такие опции:
- -V — Version показать версию утилиты.
- -n — Numeric не определять имена служб.
- -r — Resolve определять сетевые имена адресов с помощью DNS.
- -a — All отобразить все сокеты (открытые соединения).
- -l — Listening показать только прослушиваемые сокеты.
- -o — Options показать информацию таймера.
- -e — Extended выводить расширенную информацию о сокете.
- -p — Processes, показать процессы, использующие сокет.
- -i — Internal, посмотреть внутреннюю информацию TCP.
- -s — Summary, статистика использования сокета.
- -D — экспортировать текущее состояние TCP сокетов в файл.
- -F — работать с информацией, взятой из файла.
Кроме того, можно вывести сокеты только нужного протокола:
- -4, —ipv4 — только сокеты протокола IP версии 4.
- -6 —ipv6 — только сокеты протокола IP версии 6.
- -0, —packet — только PACKET сокеты.
- -t, —tcp — TCP сокеты.
- -u, —udp — UDP сокеты.
- -d, —dhcp — DHCP сокеты.
- -r, —raw — RAW сокеты.
- -x, —unix — UNIX сокеты.
Для фильтрации протоколов можно использовать не только эти опции, но и универсальную опцию -f, передав ей в параметре название протокола. Здесь собраны самые основные опции, если вам нужно больше информации — смотрите справку команды.
Примеры использования
А теперь давайте рассмотрим примеры использования утилиты ss Linux. Возможно, из описания опций вы мало что поняли, но с примерами все встанет на свои места.
Мониторинг сетевых подключений
Сначала смотрим все сетевые подключения:

Посмотрим только TCP соединения:

Теперь только Unix:

Для отображения UDP сокетов используйте опцию u. По умолчанию будут показаны только подключенные соединения. Если хотите получить все, нужно использовать опцию a. Поскольку UDP, это протокол без постоянного соединения, то без опции -a мы ничего не увидим:

По умолчанию утилита не пытается определять имена хостов через dns, но можно ее попросить делать это опцией -r:

Обратная опция -n, не будет выполняться не только dns резолвинг, но и определение протоколов портов, зато мониторинг сети в Linux работать будет быстрее:

Теперь просмотрим только прослушиваемые tcp сокеты.

Здесь мы видим только имена служб, это не всегда удобно, указав опцию n, мы получим номера портов. Так же само можно посмотреть прослушиваемые udp сокеты:

Также мы можем попытаться узнать название и PID процесса, использующего сокет:

Просмотр статистики статистики сетевых подключений
Для просмотра статистики по использованию сетевых подключений наберите:

С помощью опции -о можно посмотреть информацию о таймере и состоянии подключения.

Фильтрация по протоколу
Мы можем отображать только нужный нам протокол. Например только ipv4:
sudo ss -tl -f inet4

Так же само можно отобразить только соединения ipv6:

Фильтрация по состоянию соединения
В синтаксисе команды мы описали два дополнительных параметра. Фильтрация состояния и фильтрация по адресу. Рассмотрим теперь как ими пользоваться. Сокет TCP может находиться в одном из нескольких состояний. Например, так утилита ss linux выведет только подключенные сокеты.
ss -t4 state established

Или сокеты в состоянии ожидания:
sudo ss -t4 state time-wait

В параметр state можно передать одно из следующих значений:
- established
- syn-sent
- syn-recv
- fin-wait-1
- fin-wait-2
- time-wait
- closed
- close-wait
- last-ack
- closing
- all — все состояния
- connected — все кроме прослушиваемых и закрытых
- synchronized — все кроме syn-sent
- bucket — time-wait и syn-recv
- big — все кроме bucket
Не все состояния подключений можно увидеть просто выполнив команду. Например, syn-sent и syn-recv вряд ли получиться словить, потому что соединения находятся в этом состоянии очень короткое время. Для их отображения удобно использовать команду watch:
watch -n 1 «ss -t4 state syn-sent»
После запуска команды откройте любой сайт в браузере. Вы увидите как появится одно или несколько соединений на несколько секунд.
Фильтрация по адресу и номеру порта
Кроме фильтрации по состоянию, tcp сокеты можно фильтровать по адресам или портам соединений.
Например, отберем все сетевые подключения linux с портом источником или приемником ssh, то есть все входящие и исходящие соединения ssh:
ss -at ‘( dport = :ssh or sport = :ssh )’

Или сокеты с портом назначения 80 или 443:
ss -nt ‘( dst :443 or dst :80 )’

Такой синтаксис тоже будет работать:
ss -nt dst :443 or dst :80
Еще несколько примеров фильтрации:
Фильтрация по адресу:
ss -nt dst 74.125.236.178
Фильтрация по адресу и подсети:
ss -nt dst 74.125.236.178/16
И по адресу и порту:
ss -nt dst 74.125.236.178:80
Если вы хотите фильтровать сетевые соединения по порту, перед портом ставьте двоеточие:
ss -nt dport = :80
Можно использовать такие операторы сравнения:
- = или ge — больше или ровно порту.
- == или eq — точное соответствие.
- != или ne — не равно.
- или lt — больше.
Выводы
Вот и всё. Основную информацию о том, как выполнять мониторинг сети в Linux с помощью утилиты ss рассмотрели. Если вам нужно больше информации и примеров смотрите документацию по утилитам набора iproute.
Источник


