- Собственные уведомления (notify) в Gnome
- Кукушка на bash своими руками
- Уведомления в Ubuntu
- Задачи по расписанию в linux
- Диалоги в скриптах linux
- В итоге, вот что получилось
- How To Send Desktop Notifications on Ubuntu Using notify-send
- 1. Simple Notification
- 2. Notification with an icon
- 3. Notification with custom icon
- 4. Show output of any command
- 5. Notify after completing a command execution
- If you enjoyed this article, you might also like..
- Delightly Linux
- Bash: Show Notifications from Scripts Using notify-send
- Notification Appearance
- Zenity
- notify-send
- Usage
- Timeout
- Add a Title
- Urgency
- More Text
- Newlines
- Variables
- Change the Icon
- Add a Link
- Show a Notification When a User Logs in Via SSH
- Modifying the Script
- Startup Script
- Conclusion
Собственные уведомления (notify) в Gnome
Речь пойдет об извещениях которые показываю практически все приложения от Rhythmbox до сетевых подключений. Хотелось иметь возможность показывать в таком виде собственные и поэтому я взял бубен и начал капать )
для начала понадобится установить пакет libnotify-bin, я под ubuntu запустил команду
sudo apt-get install libnotify-bin
после этого небольшой тест. Проверяем в консоле
если у вас появилась такое окошко значит можно двигаться дальше и разбираться с настройками

notify-send [OPTION. ] [BODY] — create a notification
-u, —urgency=LEVEL
Вариантов здесь не так много, low, normal, critical. Разница лишь в полоске которая появляется с левой стороны.
-t, —expire-time=TIME Specifies the timeout in milliseconds at which to expire the notification.
Здесь все понятно, указываем время в миллисекундах которе извещение будет висеть на экране.
-i, —icon=ICON[,ICON. ] Specifies an icon filename or stock icon to display.
С иконкой тоже все замечательно, Во первых можно прямо указать путь на любое изображение на диске. Другой вариант это открыть /usr/share/icons/hicolor/48×48/apps/ и выбрать там любую и указать ее название только без расширения notify-send -i pidgin test
-c, —category=TYPE[,TYPE. ] Specifies the notification category.
по идеи задание категории должно было дать результат но я поверьте его так и не заметил, поэтому пойдем дальше
-h, —hint=TYPE:NAME:VALUE Specifies basic extra data to pass. Valid types are int, double, string and byte.
хинты дают возможность большу возможность по настройке, например местоположение на экране где должно появится извещение -h int:x:500 -h int:y:500
теперь по тексту, принимаются 2 текста, первый идет в шапку, второй это тело с небольшими возможностями гипертекста
notify-send «Шапка» «жирный италик ссылка»
после того как разобрались с настройками сразу начинает зарождаться мысль, а куда это применить и первое это собственный органайзер. Все время говорят что надо отрываться от монитора каждые 45 минут, значит есть шанс это сделать. Шаг первый это написать небольшой скриптик
export DISPLAY=:0.0
PATH=/usr/bin/:/bin/
notify-send —urgency normal —expire-time=10000 -i typing-monitor -h int:x:500 -h int:y:500 «Пора сделать перерыв» «Глазам нужен отдых»
что здесь важно, это DISPLAY, крон его не видит в упор и поэтому команды хоть и будут выполнятся на экране ничего не появится.
сохраняем ставим на исполнение и проверяем
chmod a+x sh1.sh
./sh1.sh
результат понравился? тогда дело за настройкой крона
45 * * * * /home/rus/sh1.sh
Ну вот
за дополнительной информацией обращайтесь на http://www.galago-project.org/specs/notification/0.9/x211.html
Насчет DISPLAY=:0.0. Жестковбитый DISPLAY — не хорошо. Он время от времени может меняться, даже, если всего один пользователь за компьютером. Кроме того, если ты закрыл сессию и ушел, крон будет все равно работать и ошибки будут сыпаться тебе в почту.
Лучше определять его автоматом, например, с помощью вот такой вот функции:
# get_display [USER] — Returns $DISPLAY of USER.
# If first param is omitted, then $LOGNAME will be used.
get_display () <
who \
| grep $ <1:-$LOGNAME>\
| perl -ne ‘if ( m!\(\:(\d+)\)$! )
>
И в скрипте поправить вот так (в одной строчке нельзя, так как export сбивает $?):
DISPLAY=$(get_display) || exit
export DISPLAY
Источник
Кукушка на bash своими руками
Для организации моей работы удобно видеть или слышать уведомления о том, что прошел час, полчаса и т.д. Это нужно мне для ориентации во временном пространстве и правильного планирования своей работы.
Поскольку у меня стоит Ubuntu, то и статья будет про то, как сделать такие уведомления стандартными средствами Ubuntu. 
Итак, мне нужно:
- каждый час видеть и слышать уведомление о времени
- уведомление не должно отвлекать
- решение должно быть легким и экономным с точки зрения ресурсов
В процессе поиска перепробовал несколько приложений. Некоторые из них были неплохи, но без нужного мне функционала, некоторые — ужасно неудобны, а что-то — вообще не работало. Почти у всех программ сильно страдала надежность работы.
Нормального инструмента я так и не нашел, и поэтому решил реализовать его сам. Писать свою программу — долго, а потому проще сделать скрипт на коленках.
Уведомления в Ubuntu
Как известно, для уведомлений в Ubuntu применяется утилита notify-send. В последних версиях Ubuntu notify-send используется как основное средство уведомлений. Это действительно очень удобно, когда все сообщения показываются однообразно. Пользоваться ей так:
Запустив эту несложную команду в консоли, вы через некоторое время увидите уведомление с заголовком title и сообщением message. У меня это выглядит так:
Отлично, выводить сообщения мы уже умеем, осталось научиться показывать их по расписанию.
Задачи по расписанию в linux
Для задач по расписанию есть в linux отличное средство crontab
отрывается редактор, вбиваем в него строку:
Сохраняем, любуемся результатом. Если хочется поиграться, то можно поставить уведомления раз в минуту, тогда отладочная запись будет выглядеть как-то так:
Теперь через равные промежутки времени мы можем что-нибудь выводить пользователю:
Для пользователей, не умеющих настраивать crontab могу посоветовать online генератор. Например, такой.
Отмечу отдельно, что я не стал возиться с определением номера дисплея. Да, он может меняться, но за несколько месяцев работы у меня он не разу не поменялся, т.к. у меня все-таки десктоп, а скрипт все-таки сделан на коленке.
Поделюсь ещё одним рецептом. Пользоваться crontab -e не очень удобно, т.к. открывается редактор по умолчанию. Обычно это nano. По-моему он ужасен. Я обычно делаю так:
Открывается файл в удобном gedit, редактируется, сохраняется или не сохраняется. После закрытия окна gedit настройки попадают в crontab.
Или оформляем все это дело в скрипт и кладем, например, на рабочий стол:
Диалоги в скриптах linux
Теперь, частично проблема была решена. Но только частично, ведь я не всегда смотрю на экран монитора и могу пропустить сообщение. На помощь мне пришла утилита zenity. Она также уже была в системе. Пишем смело в crontab
или отладочная запись:
В итоге получилось что-то типа такого:
Какое-то время работать было удобно, но со временем окно-уведомление стало меня доставать. Этот факт заставил меня модернизировать свои крон-скрипты. В итоге я наткнулся на 3-ю полезную утилиту: ESpeak.
Она позволяет синтезировать речевые сообщения на разных языках.
Добавляем новую строчку в crontab:
или отладочная строка
В итоге, вот что получилось
Синтезатор речи по-русски говорил ужасно. Слушать было противно, и поэтому я переключился на английский и сделал ещё ряд доработок:
- заставил часовщика говорить ещё и время
- добавил напоминания о том, что нужно попить кофе.
Конечный функционал уведомлений меня полностью устроил. Мне не пришлось ничего ставить, все было легковесным и надежным.
Мой файл crontab сейчас выглядит так:
Я вынес скрипты в файл hours.sh из-за того, что crontab скрипт не поддерживает обработку машинописного обратного апострофа. Если же вы в crontab укажете машинописный обратный апостроф, то скрипт в указанное время не сработает.
Ну и под конец скрины того, как это выглядит у меня.
Каждый час выводится сообщение сколько времени:
Сообщение дублируется звуком. Если я рядом с компьютером, я его услышу. И два раза в день мне отправляется напоминание о том, что нужно все-таки передохнуть.
UPD: Доработал скрипт на основе советов и комментариев.
В итоге, получилась новая версия hours.sh:
Скрипт вполне сносно сообщает по-русски о времени.
Источник
How To Send Desktop Notifications on Ubuntu Using notify-send
notify-send command sends notification to the desktop. It is non intrusive. It does not ask user to press ok, and it does not take any control away from the user.
This article explains how to send various types of desktop notifications using notify-send program.
1. Simple Notification
notify-send can be used to send simple notification as shown below.
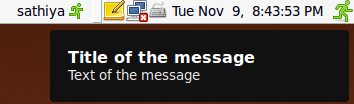
Fig: Simple desktop notification
2. Notification with an icon
notify-send can be used to send notification along with an icon using -i option.
notification-message-IM is a type of icon that can be used in the notify-send program.
To view all available notification icons, refer to the Notify send guidelines (under the section “How do I get these slick icons”).
Fig: Notification with IM icon
3. Notification with custom icon
You can use your own custom icon using the notify-send -i option as shown below.
Fig: Notification with your custom icon
4. Show output of any command
For example, you can display the last few lines of syslog as shown below.
In the same way, you can use any command (for example, date) and display its output as desktop notification using notify-send.
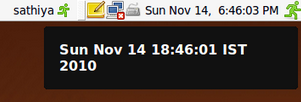
Fig: Notification displaying output of date command
5. Notify after completing a command execution
To notify only if the command execution succeeds, use &&.
To notify after a command (or shell-script, or background job) is completed, without worrying whether the commands succeeded or failed use ;.
This method is extremely helpful when you are executing a long running shell-script in the background and you would like to be notified with a little nice non-intrusive pop-up when the job is completed.
If you enjoyed this article, you might also like..
|
|

 |  |  |  |
of course, users have to install “libnotify-bin” first.
sudo apt-get install libnotify-bin
other than that great post! 🙂
what about incoming email notifiations?
nice 🙂
just placed two cron entries for lunch time and time to go home 🙂
it would be interesting to have a script that connects to a remote server by ssh and makes some check in the log files. if some key words are found, then to return a value and send me a notification.
for crontab to work, you must place this in front of the command:
DISPLAY=:0.0
In order to use this command libnotify-bin must be installed.
Very helpful, maybe you should add info about the package in which notify-send is included (libnotify-bin). In my Ubuntu 10.10 wasn’t installed by default.
Dear Ramesh Natarajan,
Cheers and best wishes for service intentioned blog. Keep it up.
Pleasant community feeling is inhibited amongst the open source software users. I am an addict of 73 years old with no background of computer technology.
Great stuff, and it’s not just for people who use Ubuntu – it works for me in FreeBSD as well. I think the first thing I’m going to do with this, is see if I can use it to notify me whenever someone talks to me on IRC, when I get new e-mail and so on 🙂
Btw, for other FreeBSD users:
# pkg_info -W /usr/local/bin/notify-send
/usr/local/bin/notify-send was installed by package libnotify-0.4.5_4
Hi, I can’t change the pop-up show time. The default value is 10, but the option “-t” does not works . Only if i set it with value “0” the pop-up change in a window with button for exit. I make a scripts that show me (with notify-send) if the caps lock is “on” or “off”. If i push caps lock two times quickly, i must attend 10 seconds for message “on” and 10 seconds for message “off”. How can I do to solve this problem?? thanks!
Thank you! This is so helpful to me right now.
Thanks. Very helpful article.
Do you have a way to execute notify-send with setting it’s parameters dynamically? Say within a shell script?
For example in below , I’d like to pass counter ‘v’ and command line argument ‘TITLE’ to notify-send…
TITLE=$1 //read 1st cmd-line argument from std input
for v in 1 2
do
notify-send ‘$v : ‘ ‘$”TITLE”‘
done
…and expect to send alerts as follows:
1:
2:
Источник
Delightly Linux
Bash: Show Notifications from Scripts Using notify-send

📅 October 25, 2020
Are you familiar with those notification popups that appear on the Linux desktop during certain events, such as a disconnected network or a completed download?
Well, did you know that you can cause these to appear with your own messages from a bash script? This can be useful when you want to be notified of an event, such as when a user logs into your system via SSH.
This article will show a few basics about how you can create your own notifications in Linux Mint 20.
Notification Appearance
Notifications are usually installed and enabled by default in Ubuntu-based distributions. Here, we will use Linux Mint 20. A notification depends upon the chosen theme, so its appearance might change. However, the notification contents will still appear.
 Default light theme in Linux Mint 20 causes notifications to appear on a light background.
  Dark theme shows a dark background.
  The chosen Desktop theme for the panel determines the notification theme. Change this to change the notification appearance.
Zenity
Zenity has a notification system using zenity –notification, but I have found this to be too limited.
 Zenity’s notification system produces simple notifications.
notify-send
A much better solution is notify-send, which is available in Linux Mint 20. If your distribution does not have a notification system, then you should be able to set it up by installing notify-osd from the repository.
You can display notifications in Linux Mint 20 without installing notify-osd. If you are using a different distribution, such as Ubuntu, the techniques mentioned here should apply to notify-osd too (though not 100% tested).
Usage
This displays a simple message in the notification area of your desktop with a default icon and a default timeout that causes the message to disappear.
 Let’s notify!
If you miss a notification or if you want to view past notifications, click the notification icon in the panel.
 Viewing missed notifications.
This allows you to view past notifications. You can click on a notification to make it disappear, but this will not make it appear in the notification history for viewing later.
Timeout
Normally, a notification disappears after five seconds, but this can be changed with the -t option.
The timeout is expressed in milliseconds, so 10 seconds is 10000 milliseconds. However, Ubuntu and Linux Mint ignore this timeout value. The message will disappear after five seconds regardless.
Add a Title
A message is fine, but let’s provide a title too. The first text argument specifies the title, and the second is the message.
 The title appears in bold, while the text appears in a normal font.
Urgency
How important is your message? There are three levels you can set the notification by using the -u option:
- low
- normal
- critical
 Low and Normal urgency levels use a blue icon and timeout. They will appear in the missed notifications list.
On the other hand, the critical urgency should be reserved for truly important messages that you do not want to miss. When set to critical, the notification does not automatically disappear after a timeout. You must click the message to remove it.
 Critical uses a red icon, and it is not added to the notification list.
More Text
We can display more than a simple message. How about command substitution?
 There is little limit on what text is allowed in a notification.
Make sure to include the double quotes or else it will not work.
Newlines
We can add newlines by using the \n escape sequence.
 The \n will insert a newline into the text string.
Variables
We can store text in a variable and pass the variable to notify-send for display.
 Using variables allow the message to change according to a script.
Change the Icon
So far, we have been using the default notification icons, but we can make any image appear using the -i option.
 A custom icon can be added.
Take note that no matter the icon’s size, it will be shown as a small icon in the upper left part in the notification.
Also, use absolute image paths when possible. Images using relative paths would not show the image. The home path alias
We can even display a user’s icon if one has been set. The icon is an image file stored in
/.face. Suppose we have a user account named sonic:
 This icon is obtained from the user’s .face image file stored in his home directory.
Add a Link
How about adding a link that opens a web page when clicked?
 Links can be included in notifications by using the URL.
Just add the URL starting with http. The text will be converted into a link.
Keep in mind that the link text will appear. We cannot use an HTML link like this:
 Notifications do not parse HTML.
Clicking the link opens the default browser to the given URL. This can be convenient should you need to provide easy access to a particular page as a result of a script decision, such as a specific kernel to download or if a page is updated.
Show a Notification When a User Logs in Via SSH
Let’s put some of this to real use. We want a notification to appear whenever a user successfully logs in via SSH. Only successful login messages are shown.
 The script detected that user knuckles logged in via SSH and displayed a notification.
First, write a script. Name it whatever you like and enable its execute permission. In this example, we will name it watchssh.sh.
Run this in a terminal for testing, and log in using a second terminal via ssh. The user knuckles must already exist on the system, and OpenSSH must be installed and listening for connections.
To log in using SSH as user knuckles:
 This shows that a user has logged into the system using SSH.
By default, we see the blue icon and the notification disappears after five seconds. If we want to force the notification to remain until clicked (we might have written the script to look for a certain user to log in), we can change the urgency to critical.
Suppose we have a user account named sonic, and sonic logs in using the Nemo file manager. The script will still detect the SSH login.
 A user can also log in graphically via SSH by specifying the SSH protocol and entering his username in the Nemo file manager.
  When urgency is set to critical, the red icon appears, and the notification remains on the desktop until it is clicked. This way, you do not miss the notification.
The script detects the SSH login whether the user logged in from a terminal or from a file manager. As long as the connection is SSH, it is recorded in the /var/log/auth.log file in Linux Mint 20.
The script uses tail to monitor auth.log for any changes. When a user successfully logs in with SSH, there will be a line added containing the word Accepted. grep looks for this line so the while loop will display it as a notification.
Experiment with SSH and view /var/log/auth.log to see what is recorded. Many different SSH events are logged, including failed logins. For simplicity, we are only displaying a notification for each successful login.
Modifying the Script
We can show the user’s icon for improved user recognition.
We need to add the tr -s’ ‘ in order to squeeze multiple space characters into one space character so cut -d’ ‘ -f9 can grab the correct username field. When the date changes from single to double digits, the number of spaces changes between the month and the day.
Now, when a user logs in, his icon (if it exists) will also appear in the notification.
 User sonic logged in using SSH.
The urgency was left at its default so the notification will disappear after the timeout. We can view other logins too. Suppose was also have the user accounts knuckles and tails. They logged in, but we missed them. We can view the logins from the notification list.
 “Who logged in while I was away?” The notification listing will show missed notifications.
Startup Script
So far, the script was running in a terminal, but we can add it to the list of Startup Applications so it runs in the background to monitor for SSH logins automatically.
 System Settings in Linux Mint 20. Add the SSH watch script so it will automatically run behind the scenes. Of course, this technique is dependent upon this specific user logging in first, which is what we want to happen.
Conclusion
Notifications are fun because they can integrate your script into the operating system, but use them sparingly unless you want to annoy your users.
Above all, experiment with various options to see what happens, and have fun!
 Advice to the wise.
Источник


