How to open, create, edit, and view a file in Linux
One thing GNU/Linux does as well as any other operating system is give you the tools you need to create and edit text files. Ask ten Linux users to name their favorite text editor, and you might get ten different answers. On this page, we cover a few of the many text editors available for Linux.
GUI text editors
This section discusses text editing applications for the Linux windowing system, X Windows, more commonly known as X11 or X.
If you are coming from Microsoft Windows, you are no doubt familiar with the classic Windows text editor, Notepad. Linux offers many similar programs, including NEdit, gedit, and geany. Each of these programs are free software, and they each provide roughly the same functionality. It’s up to you to decide which one feels best and has the best interface for you. All three of these programs support syntax highlighting, which helps with editing source code or documents written in a markup language such as HTML or CSS.
NEdit
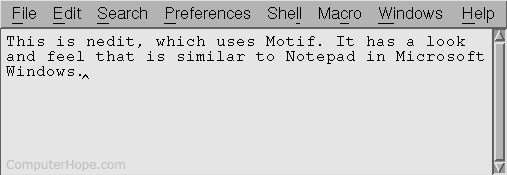
NEdit, which is short for the Nirvana Editor, is a straightforward text editor that is very similar to Notepad. It uses a Motif-style interface.
The NEdit homepage is located at https://sourceforge.net/projects/nedit/. If you are on a Debian or Ubuntu system, you can install NEdit with the following command:
For more information, see our NEdit information page.
Geany
Geany is a text editor that is a lot like Notepad++ for Windows. It provides a tabbed interface for working with multiple open files at once and has nifty features like displaying line numbers in the margin. It uses the GTK+ interface toolkit.
The Geany homepage is located at http://www.geany.org/. On Debian and Ubuntu systems, you can install Geany by running the command:
Gedit
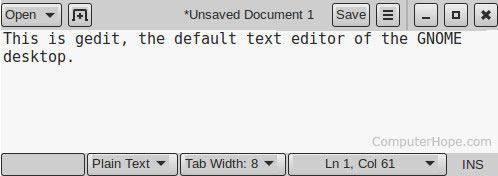
Gedit is the default text editor of the GNOME desktop environment. It’s a great, text editor that can be used on about any Linux system.
The Gedit homepage is located at https://wiki.gnome.org/Apps/Gedit. On Debian and Ubuntu systems, Gedit can be installed by running the following command:
Terminal-based text editors
If you are working from the Linux command line interface and you need a text editor, you have many options. Here are some of the most popular:
pico started out as the editor built into the text-based e-mail program pine, and it was eventually packaged as a stand-alone program for editing text files. («pico» is a scientific prefix for very small things.)
The modern version of pine is called alpine, but pico is still called pico. You can find more information about how to use it in our pico command documentation.
On Debian and Ubuntu Linux systems, you can install pico using the command:
nano is the GNU version of pico and is essentially the same program under a different name.
On Debian and Ubuntu Linux systems, nano can be installed with the command:
vim, which stands for «vi improved,» is a text editor used by millions of computing professionals all over the world. Its controls are a little confusing at first, but once you get the hang of them, vim makes executing complex editing tasks fast and easy. For more information, see our in-depth vim guide.
On Debian and Ubuntu Linux systems, vim can be installed using the command:
emacs
emacs is a complex, highly customizable text editor with a built-in interpreter for the Lisp programming language. It is used religiously by some computer programmers, especially those who write computer programs in Lisp dialects such as Scheme. For more information, see our emacs information page.
On Debian and Ubuntu Linux systems, emacs can be installed using the command:
Redirecting command output into a text file
When at the Linux command line, you sometimes want to create or make changes to a text file without actually running a text editor. Here are some commands you might find useful.
Creating an empty file with the touch command
To create an empty file, it’s common to use the command touch. The touch command updates the atime and mtime attributes of a file as if the contents of the file had been changed — without actually changing anything. If you touch a file that doesn’t exist, the system creates the file without putting any data inside.
The above command creates a new, empty file called myfile.txt if that file does not already exist.
Redirecting text into a file
Sometimes you need to stick the output of a command into a file. To accomplish this quickly and easily, you can use the > symbol to redirect the output to a file.
For instance, the echo command is used to «echo» text as output. By default, this goes to the standard output — the screen. So the command:
The above command prints that text on your screen and return you to the command prompt. However, you can use > to redirect this output to a file. For instance:
The above command puts the text «Example text» into the file myfile.txt. If myfile.txt does not exist, it is created. If it already exists, its contents will be overwritten, destroying the previous contents and replacing them.
Be careful when redirecting output to a file using >. It will overwrite the previous contents of the file if it already exists. There is no undo for this operation, so make sure you want to completely replace the file’s contents before you run the command.
Here’s an example using another command:
The above command executes ls with the -l option, which gives a detailed list of files in the current directory. The > operator redirects the output to the file directory.txt, instead of printing it to the screen. If directory.txt does not exist, it is created first. If it already exists, its contents will be replaced.
Redirecting to the end of a file
The redirect operator >> is similar to >, but instead of overwriting the file contents, it appends the new data to the end of the file. For instance, the command:
Источник
Unix/Linux — The vi Editor Tutorial
In this chapter, we will understand how the vi Editor works in Unix. There are many ways to edit files in Unix. Editing files using the screen-oriented text editor vi is one of the best ways. This editor enables you to edit lines in context with other lines in the file.
An improved version of the vi editor which is called the VIM has also been made available now. Here, VIM stands for Vi IMproved.
vi is generally considered the de facto standard in Unix editors because −
It’s usually available on all the flavors of Unix system.
Its implementations are very similar across the board.
It requires very few resources.
It is more user-friendly than other editors such as the ed or the ex.
You can use the vi editor to edit an existing file or to create a new file from scratch. You can also use this editor to just read a text file.
Starting the vi Editor
The following table lists out the basic commands to use the vi editor −
Sr.No.
Command & Description
1
Creates a new file if it already does not exist, otherwise opens an existing file.
Opens an existing file in the read-only mode.
Opens an existing file in the read-only mode.
Following is an example to create a new file testfile if it already does not exist in the current working directory −
The above command will generate the following output −
You will notice a tilde (
) on each line following the cursor. A tilde represents an unused line. If a line does not begin with a tilde and appears to be blank, there is a space, tab, newline, or some other non-viewable character present.
You now have one open file to start working on. Before proceeding further, let us understand a few important concepts.
Operation Modes
While working with the vi editor, we usually come across the following two modes −
Command mode − This mode enables you to perform administrative tasks such as saving the files, executing the commands, moving the cursor, cutting (yanking) and pasting the lines or words, as well as finding and replacing. In this mode, whatever you type is interpreted as a command.
Insert mode − This mode enables you to insert text into the file. Everything that’s typed in this mode is interpreted as input and placed in the file.
vi always starts in the command mode. To enter text, you must be in the insert mode for which simply type i. To come out of the insert mode, press the Esc key, which will take you back to the command mode.
Hint − If you are not sure which mode you are in, press the Esc key twice; this will take you to the command mode. You open a file using the vi editor. Start by typing some characters and then come to the command mode to understand the difference.
Getting Out of vi
The command to quit out of vi is :q. Once in the command mode, type colon, and ‘q’, followed by return. If your file has been modified in any way, the editor will warn you of this, and not let you quit. To ignore this message, the command to quit out of vi without saving is :q!. This lets you exit vi without saving any of the changes.
The command to save the contents of the editor is :w. You can combine the above command with the quit command, or use :wq and return.
The easiest way to save your changes and exit vi is with the ZZ command. When you are in the command mode, type ZZ. The ZZ command works the same way as the :wq command.
If you want to specify/state any particular name for the file, you can do so by specifying it after the :w. For example, if you wanted to save the file you were working on as another filename called filename2, you would type :w filename2 and return.
Moving within a File
To move around within a file without affecting your text, you must be in the command mode (press Esc twice). The following table lists out a few commands you can use to move around one character at a time −
Sr.No.
Command & Description
1
Moves the cursor up one line
Moves the cursor down one line
Moves the cursor to the left one character position
Moves the cursor to the right one character position
The following points need to be considered to move within a file −
vi is case-sensitive. You need to pay attention to capitalization when using the commands.
Most commands in vi can be prefaced by the number of times you want the action to occur. For example, 2j moves the cursor two lines down the cursor location.
There are many other ways to move within a file in vi. Remember that you must be in the command mode (press Esc twice). The following table lists out a few commands to move around the file −
Given below is the list of commands to move around the file.
Positions the cursor at the beginning of a line
Positions the cursor at the end of a line
Positions the cursor to the next word
Positions the cursor to the previous word
Positions the cursor to the beginning of the current sentence
Positions the cursor to the beginning of the next sentence
Moves to the end of the blank delimited word
Moves a paragraph back
Moves a paragraph forward
Moves a section back
Moves a section forward
Moves to the column n in the current line
Moves to the first line of the file
Moves to the last line of the file
Moves to the n th line of the file
Moves to the n th line of the file
Moves forward to c
Moves back to c
Moves to the top of the screen
Moves to the n th line from the top of the screen
Moves to the middle of the screen
Move to the bottom of the screen
Moves to the n th line from the bottom of the screen
Colon followed by a number would position the cursor on the line number represented by x
Control Commands
The following commands can be used with the Control Key to performs functions as given in the table below −
Given below is the list of control commands.
Moves forward 1/2 screen
Moves forward one full screen
Moves backward 1/2 screen
Moves backward one full screen
Moves the screen up one line
Moves the screen down one line
Moves the screen up 1/2 page
Moves the screen down 1/2 page
Moves the screen up one page
Moves the screen down one page
Redraws the screen
Editing Files
To edit the file, you need to be in the insert mode. There are many ways to enter the insert mode from the command mode −
Sr.No.
Command & Description
1
Inserts text before the current cursor location
Inserts text at the beginning of the current line
Inserts text after the current cursor location
Inserts text at the end of the current line
Creates a new line for text entry below the cursor location
Creates a new line for text entry above the cursor location
Deleting Characters
Here is a list of important commands, which can be used to delete characters and lines in an open file −
Sr.No.
Command & Description
1
Deletes the character under the cursor location
Deletes the character before the cursor location
Deletes from the current cursor location to the next word
Deletes from the current cursor position to the beginning of the line
Deletes from the current cursor position to the end of the line
Deletes from the cursor position to the end of the current line
Deletes the line the cursor is on
As mentioned above, most commands in vi can be prefaced by the number of times you want the action to occur. For example, 2x deletes two characters under the cursor location and 2dd deletes two lines the cursor is on.
It is recommended that the commands are practiced before we proceed further.
Change Commands
You also have the capability to change characters, words, or lines in vi without deleting them. Here are the relevant commands −
Sr.No.
Command & Description
1
Removes the contents of the line, leaving you in insert mode.
Changes the word the cursor is on from the cursor to the lowercase w end of the word.
Replaces the character under the cursor. vi returns to the command mode after the replacement is entered.
Overwrites multiple characters beginning with the character currently under the cursor. You must use Esc to stop the overwriting.
Replaces the current character with the character you type. Afterward, you are left in the insert mode.
Deletes the line the cursor is on and replaces it with the new text. After the new text is entered, vi remains in the insert mode.
Copy and Paste Commands
You can copy lines or words from one place and then you can paste them at another place using the following commands −
Sr.No.
Command & Description
1
Copies the current line.
Copies the current word from the character the lowercase w cursor is on, until the end of the word.
Puts the copied text after the cursor.
Puts the yanked text before the cursor.
Advanced Commands
There are some advanced commands that simplify day-to-day editing and allow for more efficient use of vi −
Given below is the list advanced commands.
Joins the current line with the next one. A count of j commands join many lines.
Shifts the current line to the right by one shift width.
Switches the case of the character under the cursor.
Press Ctrl and G keys at the same time to show the current filename and the status.
Restores the current line to the state it was in before the cursor entered the line.
This helps undo the last change that was done in the file. Typing ‘u’ again will re-do the change.
Joins the current line with the next one. A count joins that many lines.
Displays the current position in the file in % and the file name, the total number of file.
Renames the current file to filename.
Writes to file filename.
Opens another file with filename.
Changes the current working directory to dirname.
Toggles between two open files.
In case you open multiple files using vi, use :n to go to the next file in the series.
In case you open multiple files using vi, use :p to go to the previous file in the series.
In case you open multiple files using vi, use :N to go to the previous file in the series.
Reads file and inserts it after the current line.
Reads file and inserts it after the line n.
Word and Character Searching
The vi editor has two kinds of searches: string and character. For a string search, the / and ? commands are used. When you start these commands, the command just typed will be shown on the last line of the screen, where you type the particular string to look for.
These two commands differ only in the direction where the search takes place −
The / command searches forwards (downwards) in the file.
The ? command searches backwards (upwards) in the file.
The n and N commands repeat the previous search command in the same or the opposite direction, respectively. Some characters have special meanings. These characters must be preceded by a backslash (\) to be included as part of the search expression.
Sr.No.
Character &Description
1
Searches at the beginning of the line (Use at the beginning of a search expression).
Matches a single character.
Matches zero or more of the previous character.
End of the line (Use at the end of the search expression).
Starts a set of matching or non-matching expressions.