- Ошибка «Permission denied» в Linux
- Изменение прав в терминале
- Изменение прав в файловом менеджере
- В заключение
- Ошибка bash permission denied
- Ошибка bash permission denied
- Выводы
- How to resolve permission denied Linux error
- What is permission denied Linux error?
- Example of Permission denied Linux error
- How to resolve Permission denied Error
- Resolving Permission denied error related to script execution:
- Resolving permission denied Linux error while listing or writing to a file
- Resolving permission denied Linux error for specific user
- Download Free book
- Ubuntu says «bash: ./program Permission denied» [closed]
- 3 Answers 3
- How to resolve the «Permission Denied» error in Linux
Ошибка «Permission denied» в Linux
Все операционные системы семейства Linux имеют четко разграниченные права доступа. В своей домашней директории пользователь может делать все, что ему угодно, до тех пор, пока укладывается в отведенные рамки. Попытка выйти за них приводит к появлению ошибки «Permission Denied».
Изменение прав в терминале
Рассмотрим вариант, в котором необходимо прочесть текстовый документ, созданный другим пользователем. Файлы TXT в Linux можно просматривать непосредственно в терминале с помощью команды «cat».
- Заходим в каталог с интересующим нас документом. Набираем команду «cat filename», подставляя вместо «filename» имя нужного файла. На скриншоте показана ошибка «Permission Denied», выглядящая в русской локализации как «Отказано в доступе».

Получаем ошибку «Permission Denied» при попытке просмотреть содержимое файла
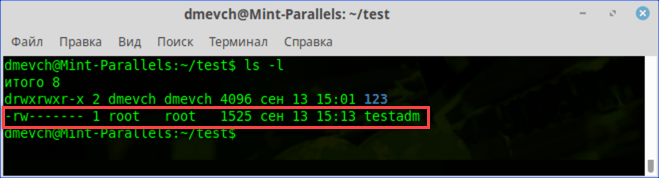
Проверяем права доступа к документу используя команду «ls -l»
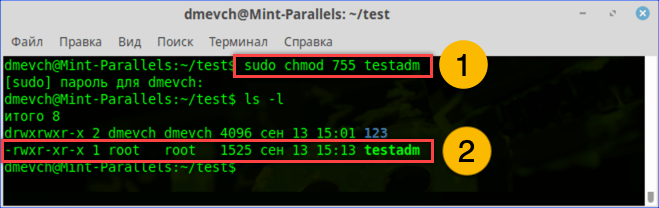
Используем команду «chmod» и административные права для получения доступа
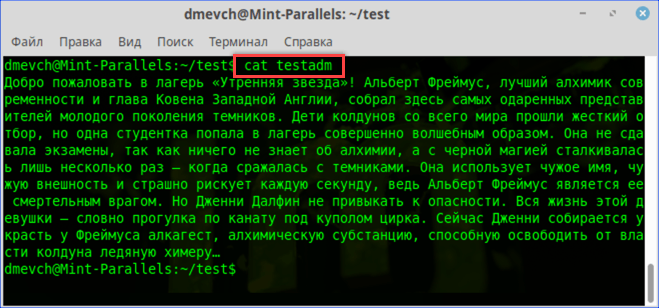
Просматриваем содержимое текстового документа командой «cat»
Изменение прав в файловом менеджере
Разберемся, как выполнить рассмотренную выше операцию в графическом интерфейсе, используя файловый менеджер из дистрибутива.
- Как видно на скриншоте, значок файла изначально имеет дополнительные символы, указывающие на то, что доступ у нему ограничен. При попытке посмотреть содержимое получаем графический вариант ошибки «Permission Denied».
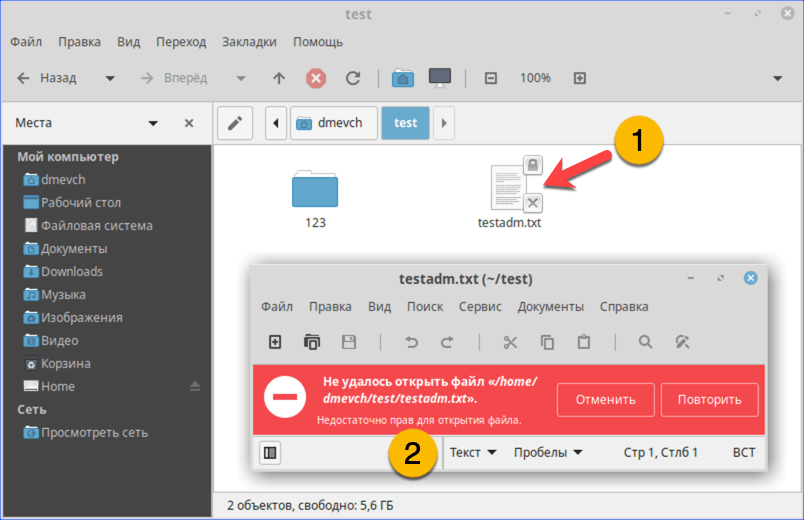
При попытке открыть текстовый документ получаем ошибку «Permission Denied»
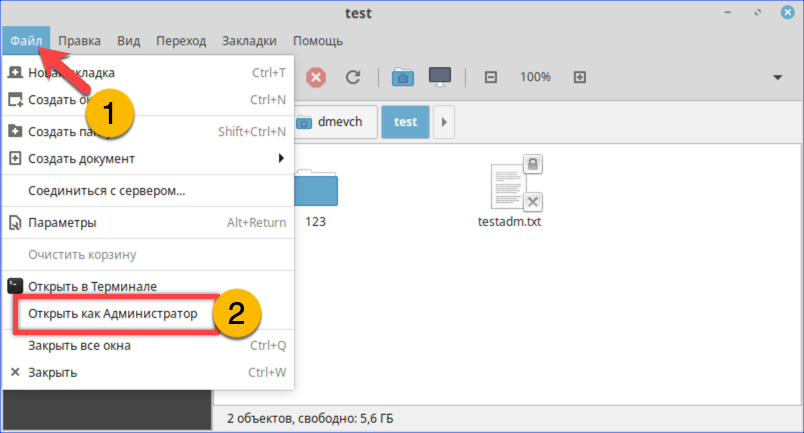
Открываем меню «Файл» и перезапускаем файловый менеджер от имени root
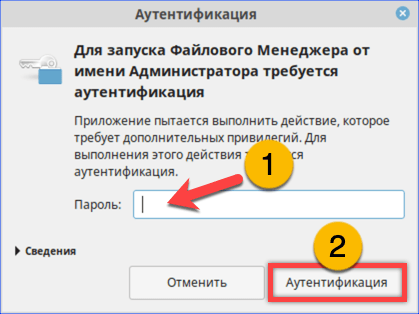
Набираем пароль root в окне аутентификации
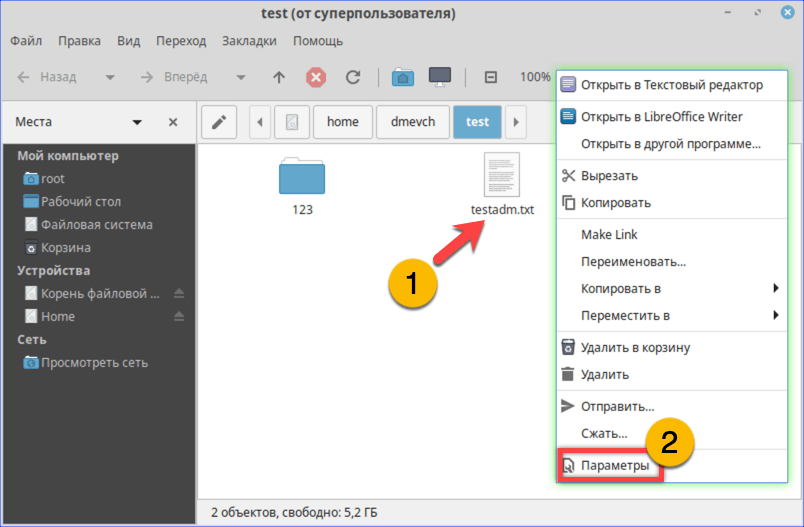
Открываем параметры файла с помощью контекстного меню
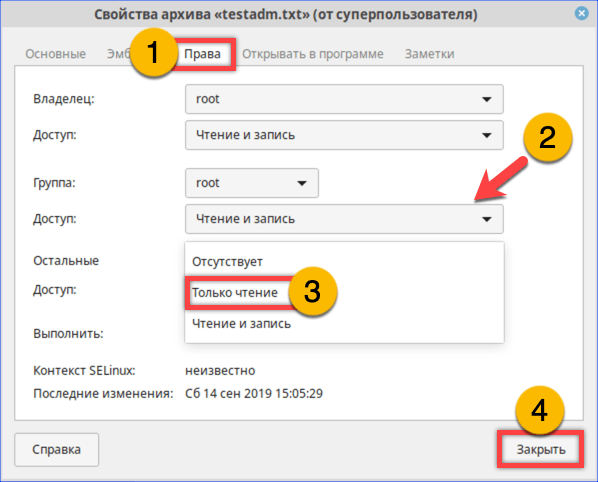
На вкладке «Права» разрешаем доступ для группы root и остальных пользователей
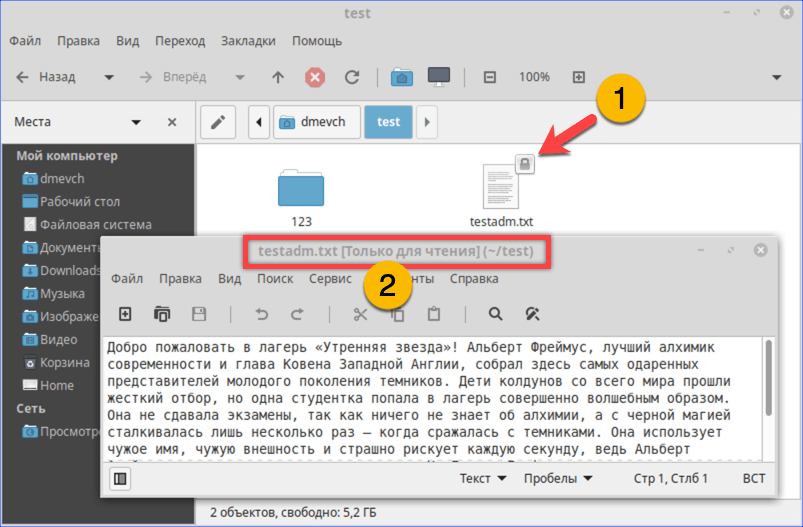
Открываем ранее недоступный файл в режиме чтения и изучаем содержимое
В заключение
Как видим, избавиться от ошибки Permission Denied достаточно просто. Решив изменить правда доступа к системным файлам, лишний раз убедитесь, что полностью уверены в своих действиях и понимаете последствия вносимых изменений.
Источник
Ошибка bash permission denied
Многие новички пытаются выполнить запись определенных значений в системные файлы с помощью операторов перенаправления ввода и вывода и получают ошибку bash permission denied. Эта ошибка выводится, даже если вы использовали sudo.
Казалось бы, sudo есть, значит права суперпользователя получены и все должно работать но тут все не так просто. В этой статье мы рассмотрим почему возникает ошибка bash permission denied и как ее обойти.
Ошибка bash permission denied
Допустим, вы выполняете команду:
sudo echo «nameserver 8.8.8.8» >> /etc/resolv.conf
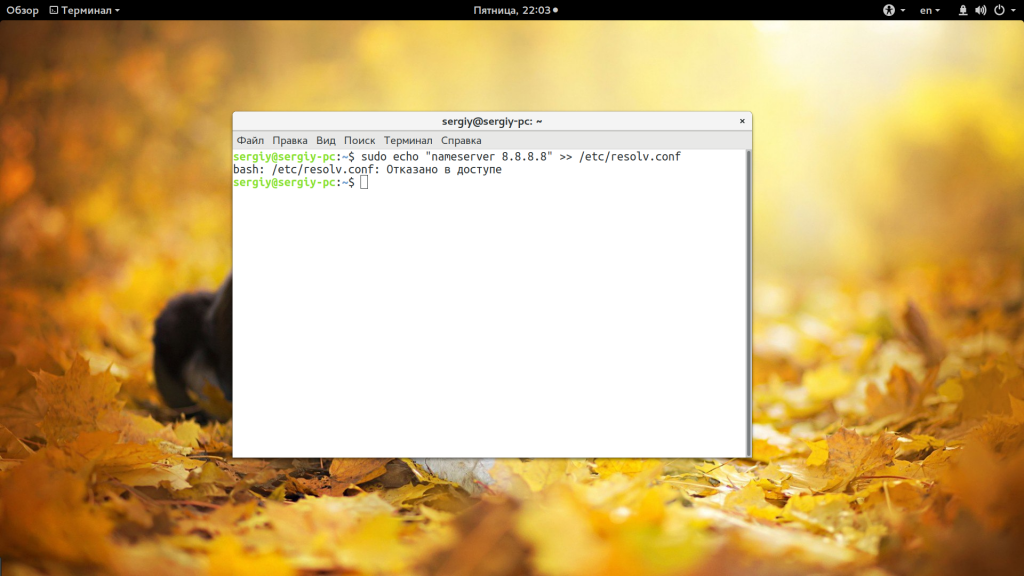
А в результате вместо записи строчки в /etc/resolv.conf получаете ошибку:
bash: /etc/resolv.conf permission denied
В русской локализации это будет отказано в доступе bash linux. Так происходит потому что вы запускаете с правами суперпользователя утилиту echo и она честно выводит вашу строку в стандартный вывод bash с правами суперпользователя. Но bash запущен от обычного пользователя, и когда интерпретатор bash пытается записать полученную строчку в системный файл, естественно, что вы получите ошибку.
Но существует несколько способов обойти это ограничение, вы можете, например, использовать команду tee, которая записывает стандартный вывод в файл или запустить саму оболочку от имени суперпользователя. Рассмотрим сначала вариант с tee:
echo ‘текст’ | sudo tee -a /путь/к/файлу
echo ‘nameserver 8.8.8.8’ | sudo tee -a /etc/resolv.conf

Это очень простое решение, но, кроме того, вы можете запустить оболочку bash с правами суперпользователя, чтобы дать ей доступ на запись:
sudo sh -c ‘echo текст >> /путь/к/файлу’
sudo bash -c ‘echo текст >> /путь/к/файлу’
sudo bash -c ‘echo nameserver 8.8.8.8 >> /etc/resolv.conf

Еще одно решение, призванное, упростить эту команду, добавить такой код в
sudoe() <
[[ «$#» -ne 2 ]] && echo «Usage: sudoe
» && return 1
echo «$1» | sudo tee —append «$2» > /dev/null
>
Дальше для вывода строки в файл выполняйте:
sudoe ‘текст’ >> /путь/к/файлу
sudoe «nameserver 8.8.8.8» > /etc/resolv.conf

Теперь все будет работать, как и ожидалось, и ошибка bash отказано в доступе не появится. Еще можно поменять права на файл, а потом уже выводить в него строку. Но это очень неправильное решение. И даже не потому, что это небезопасно, а больше потому что там намного больше действий.
Выводы
В этой небольшой статье мы разобрали почему возникает ошибка bash permission denied при использовании команды echo для системных файлов, а также несколько путей ее решения. Как видите, все достаточно просто. Надеюсь, эта информация была полезной для вас.
Источник
How to resolve permission denied Linux error
This article will teach you quickly what is permission denied Linux error. And also what ways you can avoid permission denied error in Linux.![]()
What is permission denied Linux error?
This error comes when you try to list files or try execute the file inside the directory where you don’t have sufficient permission. Since Linux operating system is very particular about its security aspect.
Example of Permission denied Linux error
Let’s say you are a normal user who is trying to list or trying change the directory inside the /root file-system. Since you do not have sufficient permissions system will respond with permission denied error message as below:
One way to avoid such error is to switch to root user using su – command. However this solution is not recommended since it will gain unnecessary access to all the root file system.
How to resolve Permission denied Error
Resolving Permission denied error related to script execution:
Let’s say you have created a shell script for performing any task. but when you try to execute the script you may end with below error due absence of permission denied error.
Now to avoid such case you need to add execute permission “x” to the file myshell.sh using chmod command as below:
In the last output you can see that there is “x” (execution) permission added after chmod command. So next time when you try to execute the shell script , it will execute without any error.
Resolving permission denied Linux error while listing or writing to a file
In this type of permission denied error you try to list or write the file in which you do not have sufficient permission to do so as below:
If you look at the permissions of the “myfolder” directory using ls -l command you will come to know about the permissions.
As per the permission given in above output only owner of the directory who is root can have all permission that is read, write and execute. So in such case you need to change the permission of the directory to read using below chmod command:
Now this time when normal user manmohan try to list directory he will not get the permission denied error.
In case you want to have write permission on this directory you need to specify w flag as well in chmod command as below:
Same is applicable to file level permission as well.
One more way is to changing the ownership of the directory using chown command. Since in our example we are getting error for user manmohan we will change ownership of the directory “myfolder” using below command.
Since manmohan user is now the owner of the directory he can able to do any operation on the directory. In case you want to recursive permission do not forget to add -r while chown command as below:
Resolving permission denied Linux error for specific user
In above method of changing the permission using chmod is not suitable as per my opinion. Because when you give permission to others, it will be open for all the users within the system. Which is wrong in terms of security perspective. To resolve this error specific to user you can implement it using access control list or ACL. Follow my article on Access control list ACL for the same.
Download Free book
Get your free copy of Linux command line Cheat Sheet.
Источник
Ubuntu says «bash: ./program Permission denied» [closed]
Want to improve this question? Update the question so it’s on-topic for Stack Overflow.
Closed last month .
I am running Ubuntu on computer 1 and computer 2. I compiled a C++ program on computer 1, and I can execute it from the terminal using ./program_name . It runs fine.
However, when I try to do this on computer 2, it says: bash: ./program_name: permission denied
What’s wrong and what can I do about it?

3 Answers 3
chmod u+x program_name . Then execute it.
If that does not work, copy the program from the USB device to a native volume on the system. Then chmod u+x program_name on the local copy and execute that.
Unix and Unix-like systems generally will not execute a program unless it is marked with permission to execute. The way you copied the file from one system to another (or mounted an external volume) may have turned off execute permission (as a safety feature). The command chmod u+x name adds permission for the user that owns the file to execute it.
That command only changes the permissions associated with the file; it does not change the security controls associated with the entire volume. If it is security controls on the volume that are interfering with execution (for example, a noexec option may be specified for a volume in the Unix fstab file, which says not to allow execute permission for files on the volume), then you can remount the volume with options to allow execution. However, copying the file to a local volume may be a quicker and easier solution.
Источник
How to resolve the «Permission Denied» error in Linux

While using Linux, you may encounter the error, “permission denied”. This error occurs when the user does not have the privileges to make edits to a file. Root has access to all files and folders and can make any edits. Other users, however, may not be allowed to make such edits.
Remember that only root or users with Sudo privileges can change permissions for files and folders.
The permissions can be changed using the chmod keyword. The syntax for the command is:
chmod flags permissions filename
- flags are the additional options users can set.
- permissions define if the user can read, write, or execute the file. They can be represented using symbolic or octal numbers.
- filename is the name of the file whose permissions are changed.
Here is an example where users can read, write, and execute a file; whereas, group and others can only read it.
Here, each letter has a meaning:
r gives read permissions
w gives write permissions
x gives execute permissions
The same command can be run using octal notation:
Here, each digit represents the sum of the permissions allowed:
4 gives read permissions
2 gives write permissions
1 gives execute permissions
0 gives no permissions
The sum of these permissions is used to represent each type of author.
Источник


