- Работаем с PostgreSQL через командную строку в Linux
- Установка PostgreSQL на Linux (Mint)
- PostgreSQL Подключение, Пользователи (Роли) и Базы Данных
- PostgreSQL создание новой роли и базы данных
- Включить удаленный PostgreSQL доступ для пользователей
- Полезные команды PostgreSQL
- Выбор shema psql в консоли:
- Sequences
- Подключение к базе данных PostgreSQL в Linux, Windows
- Подключитесь к PostgreSQL из командной строки
- Ubuntu Documentation
- Introduction
- Client Installation
- Installation
- Installing PostGIS, procedural languages, client interfaces, etc
- Administration
- Basic Server Setup
- Create database
- Install Server Instrumentation (for PgAdmin) for Postgresql 8.4 or 9.3
- Alternative Server Setup
- Using pgAdmin III GUI
- Managing the Server
- Managing users and rights
- restarting the server
- Further reading
- Troubleshooting
- fe_sendauth: no password supplied
- FATAL: role «myusername» does not exist
- FATAL: database «myusername» does not exist
- FATAL: Peer authentication failed for user «myusername»
- could not connect to server: No such file or directory
- External Links
- Official PostgreSQL downloads
- EnterpriseDB
- Turnkey Linux
Работаем с PostgreSQL через командную строку в Linux
Установка PostgreSQL на Linux (Mint)
Для подключения к базе данных PostgreSQL понадобится установленный PostgreSQL клиент:
Для установки PostgreSQL сервера:
Проверим, можем ли мы подключиться к базе данных PostgreSQL:
Вывод команды должен быть примерно таким:
PostgreSQL Подключение, Пользователи (Роли) и Базы Данных
Логин в только что установленный postgreSQL сервер нужно производить под именем пользователя postgres:
Для подключения к базе данных PostgreSQL можно использовать команду:
Если такая команда не просит ввести пароль пользователя, то можно еще добавить опцию -W.
После ввода пароля и успешного подключения к базе данных PostgreSQL, можно посылать SQL-запросы и psql-команды.
PostgreSQL создание новой роли и базы данных
Создать новую роль c именем admin (указывайте нужное имя):
Создание новой базы данных:
Дать права роли на базу данных:
Включить удаленный PostgreSQL доступ для пользователей
Нам нужно отредактировать файл /etc/postgresql/ /main/pg_hba.conf, задав опцию md5 вместо peer.
может быть 10, 11, 12 и т.д.
После этого сделать restart PostgreSQL:
Полезные команды PostgreSQL
Выйти из клиента PostgreSQL:
\q
Показать список баз данных PostgreSQL:
\l
Показать список таблиц:
\dt
Показать список пользователей (ролей):
\du
Показать структуру таблицы:
Переименовать базу данных:
Удалить базу данных:
Изменить текущую базу данных в PostgreSQL (вы не сможете переименовать или удалить текущую базу данных):
\connect db_name или более короткий alias: \c db_name
Удалить роль (пользователя):
Роль не будет удалена, если у нее есть привелегии — возникнет ошибка ERROR: role cannot be dropped because some objects depend on it .
Нужно удалить привелегии у роли, например если нужно удалить роль admin2, нужно выполнить последовательность комманд с Drop Owned:
Дать права пользователю/роли на логин ( role is not permitted to log in ):
Выбор shema psql в консоли:
Посмотреть список всех схем:
Подключиться к конкретной схеме:
Sequences
Получить имена всех созданных sequences:
Получить последнее значение sequence, которые будет присвоено новой вставляемой в таблицу записи:
Источник
Подключение к базе данных PostgreSQL в Linux, Windows
Подключитесь к PostgreSQL из командной строки
Запуск программы интерактивного терминала PostgreSQL, называемой psql, которая позволяет в интерактивном режиме вводить, редактировать и выполнять команды SQL. Во время установки postgres в вашей операционной системе он создает «начальную БД» и запускает домен сервера postgres. Обычно initdb создает таблицу с именем «postgres», принадлежащую пользователю «текущий пользователь, вошедший в систему»
В командной строке вашей операционной системы введите следующую команду.
Системы на основе Debian, такие как Ubuntu:
Подключиться / войти как root —
Системы на основе Redhat, такие как Centos / Fedora:
Подключиться / войти как root —
Windows:
В Windows текущий пользователь не имеет значения
Получив доступ к базе данных PostgreSQL, вы можете запускать SQL-запросы и многое другое. Вот некоторые распространенные команды PSQL
- Чтобы просмотреть справку по командам psql , введите / ?.
- Чтобы просмотреть справку по командам SQL, введите / h.
- Чтобы просмотреть информацию о текущем соединении с базой данных, введите / conninfo.
- Чтобы составить список таблиц базы данных и их соответствующих владельцев, введите / dt.
- Чтобы получить список всех таблиц, представлений и последовательностей в базе данных, введите / z.
- Чтобы выйти из программы psql , введите / q.
psql — это основанный на терминале интерфейс PostgreSQL. Это позволяет вводить запросы в интерактивном режиме, отправлять их в PostgreSQL и просматривать результаты запроса.
| вариант | Описание |
|---|---|
| -a —echo-все | Выведите все непустые строки ввода на стандартный вывод, когда они прочитаны. Это эквивалентно установке переменной ECHO для всех. |
| -А —no-Align | Переключение в режим невыровненного выхода. |
| -c команда —command = команда | Указывает, что psql должен выполнить одну командную строку, команду и затем выйти. Это полезно в сценариях оболочки. Файлы запуска (psqlrc и |
/ .psqlrc) игнорируются этой опцией.
—dbname = имя_бд
—echo-запросы
—echo скрытая
—field-сепаратор = сепаратор
—host = имя хоста
—html
—список
—log-файл = имя_файла
—no-Readline
—output = имя_файла
—port = порт
—pset = Назначение
—тихо
—record-сепаратор = сепаратор
—одна линия
—tuples только
—table-атр = table_options
—username = имя пользователя
—set = Назначение
—variable = Назначение
—версия
—no-пароль
—пароль
—expanded
—no-psqlrc
—field-сепаратор-ноль
—record-сепаратор-ноль
—single-транзакции
—Помогите
Подключение к базе данных PostgreSQL с помощью приложения с графическим интерфейсом pgAdmin
Вы также можете подключиться к базе данных PostgreSQL с помощью приложения pgAdmin GUI. Подключитесь к базе данных по адресу localhost: 5432, используя имя пользователя postgres и предоставленный пароль.
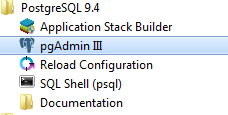
При нажатии на pgAdmin III появится следующий экран:
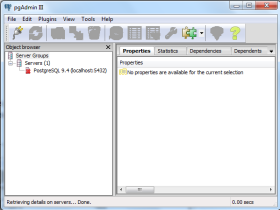
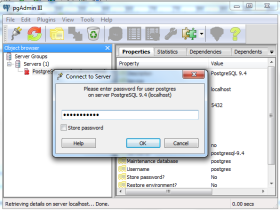
Теперь дважды щелкните PostgreSQL 9.4 в разделе «Группы серверов». pgAdmin попросит вас ввести пароль. Вы должны предоставить пароль для пользователя postgres для аутентификации.
В разделе «База данных» на этом разделе сервера найдите нужную базу данных и выполните запросы SQL:
Источник
Ubuntu Documentation
Introduction
PostgreSQL is a powerful object-relational database management system, provided under a flexible BSD-style license. [1] PostgreSQL contains many advanced features, is very fast and standards compliant.
PostgreSQL has bindings for many programming languages such as C, C++, Python, Java, PHP, Ruby. It can be used to power anything from simple web applications to massive databases with millions of records.
Client Installation
If you only wish to connect to an external PostgreSQL server, do not install the main PostgreSQL package, but install the PostgreSQL client package instead. To do this, use the following command
you then connect to the server with the following command
After you inserted the password you access PostgreSQL with line commands. You may for instance insert the following
You exit the connection with
Installation
To install the server locally use the command line and type:
This will install the latest version available in your Ubuntu release and the commonly used add-ons for it.
See «External Links» below for options for getting newer releases.
Installing PostGIS, procedural languages, client interfaces, etc
Additional packages contain procedural language runtimes, add-ons like PostGIS, language client interfaces like psycopg2 for Python, etc. You can get a listing with:
Administration
pgAdmin III is a handy GUI for PostgreSQL, it is essential to beginners. To install it, type at the command line:
You may also use the Synaptic package manager from the System>Administration menu to install these packages.
Basic Server Setup
To start off, we need to set the password of the PostgreSQL user (role) called «postgres»; we will not be able to access the server externally otherwise. As the local “postgres” Linux user, we are allowed to connect and manipulate the server using the psql command.
In a terminal, type:
this connects as a role with same name as the local user, i.e. «postgres», to the database called «postgres» (1st argument to psql).
Set a password for the «postgres» database role using the command:
and give your password when prompted. The password text will be hidden from the console for security purposes.
Type Control+D or \q to exit the posgreSQL prompt.
Create database
To create the first database, which we will call «mydb», simply type:
Install Server Instrumentation (for PgAdmin) for Postgresql 8.4 or 9.3
PgAdmin requires the installation of an add-on for full functionality. The «adminpack» addon, which it calls Server Instrumentation, is part of postgresql-contrib, so you must install that package if you haven’t already:
Then to activate the extension, for «»Postgresql 8.4″», run the adminpack.sql script, simply type:
For «Postgresql 9.3″+ install the adminpack «extension» in the «postgres» database:
Alternative Server Setup
If you don’t intend to connect to the database from other machines, this alternative setup may be simpler.
By default in Ubuntu, Postgresql is configured to use ‘ident sameuser’ authentication for any connections from the same machine. Check out the excellent Postgresql documentation for more information, but essentially this means that if your Ubuntu username is ‘foo’ and you add ‘foo’ as a Postgresql user then you can connect to the database without requiring a password.
Since the only user who can connect to a fresh install is the postgres user, here is how to create yourself a database account (which is in this case also a database superuser) with the same name as your login name and then create a password for the user:
Client programs, by default, connect to the local host using your Ubuntu login name and expect to find a database with that name too. So to make things REALLY easy, use your new superuser privileges granted above to create a database with the same name as your login name:
Connecting to your own database to try out some SQL should now be as easy as:
Creating additional database is just as easy, so for example, after running this:
You can go right ahead and tell Amarok to use postgresql to store its music catalog. The database name would be amarokdb, the username would be your own login name, and you don’t even need a password thanks to ‘ident sameuser’ so you can leave that blank.
Using pgAdmin III GUI
To get an idea of what PostgreSQL can do, you may start by firing up a graphical client. In a terminal type :
You will be presented with the pgAdmin III interface. Click on the «Add a connection to a server» button (top left). In the new dialog, enter the address 127.0.0.1 (Local host is default, so it can be left out.), a description of the server, the default database («mydb» in the example above), your username («postgres») and your password. One more step is required in order to allow pgAdmin III to connect to the server, and that is to edit pg_hba.conf file and change the authentication method from peer to md5 (will not work if you have not set the password):
and change the line
Now you should reload the server configuration changes and connect pgAdmin III to your PostgreSQL database server.
With this GUI you may start creating and managing databases, query the database, execute SQl etc.
Managing the Server
To learn more about managing PostgreSQL (but without the Ubuntu specifics) see the official PostgreSQL documentation
Managing users and rights
User management is discussed in detail in the client authentication chapter of the PostgreSQL documentation; the following is an introduction to get you started.
To manage users, you first have to edit /etc/postgresql/current/main/pg_hba.conf and modify the default configuration which is very locked down and secure. For example, if you want postgres to manage its own users (not linked with system users), you will add the following line:
Which means that on your local network (10.0.0.0/24 — replace with your own local network !), postgres users can connect through the network to the database providing a classical couple user / password.
Besides allowing a user to connect over the network to the to a database on the server, you must enable PostgreSQL to listen across different networks. To do that, open up /etc/postgresql/current/main/postgresql.conf in your favourite editor and alter the listen_addresses as below:
to listen on all network interfaces. See the docs for listen_addresses for other options.
To create a database with a user that have full rights on the database, use the following command:
The first command line creates the user with no database creation rights (-D) with no add user rights -A) and will prompt you for entering a password (-P). The second command line create the database ‘mydb with ‘myuser‘ as owner.
This little example will probably suit most of your needs. For more details, please refer to the corresponding man pages or the online documentation.
restarting the server
After configuring the networking / users you may need to reload the server, here is a suggested command to do so.
Some settings changes in postgresql.conf require a full restart, which will terminate active connections and abort uncommitted transactions:
Further reading
If you are not familiar with SQL you may want to look into this powerful language, although some simple uses of PostgreSQL may not require this knowledge (such as a simple Django project).
The PostgreSQL website contains a wealth of information on using this database. In particular, the tutorial is a useful starting point, but you can skip the installation step as you’ve already installed it using Ubuntu packages.
Troubleshooting
fe_sendauth: no password supplied
Your pg_hba.conf specifies that md5 authentication is to be used for this connection based on the origin host, connection method and the requested username/database, but your application didn’t supply a password.
Change the authentication mode or set a password for the user you’re connecting to and then specify that password in your application’s connection settings.
FATAL: role «myusername» does not exist
By default PostgreSQL connects to the PostgreSQL user with the same name as the current unix user. You have not created a PostgreSQL user by that name in your database.
Create a suitable user, or specify a different username to connect with. In the command line tools the -U flag does this.
FATAL: database «myusername» does not exist
A user named «myusername» exists, but there’s no database of the same name.
By default PostgreSQL connects to the database with the same name as the user you’re connecting as, but it doesn’t auto-create the database if it doesn’t exist.
Create the database, or specify a different database to connect to.
FATAL: Peer authentication failed for user «myusername»
You are connecting to localhost via a unix socket. A user named «myusername» exists, but your current unix user is not the same as that username. PostgreSQL is set to use «peer» authentication on unix sockets for this user/db combo so it requires your unix and postgresql usernames to match.
Connect from the unix user that matches the desired PostgreSQL user — perhaps with sudo -u theusername psql — or change pg_hba.conf to use a different authentication mode like «md5» for this username.
could not connect to server: No such file or directory
An error like this (possibly with a different unix socket path, depending on your install):
can mean a number of things:
* The server isn’t running;
* The server has a different unix_socket_directories to the default in your client’s libpq, either due to different compiled-in defaults or a mismatched setting;
* The server is listening on a different «port». PostgreSQL emulates TCP/IP ports on unix sockets by using the port number as the suffix for the socket file, e.g. 5432.
Eliminate these in turn.
First make sure the server is running. On Ubuntu, ps -u postgres -f will show you any processes running as user postgres — you want to see multiple ones named postgres.
Now make sure the server is listening where your client thinks it is. To find out your PostgreSQL server’s socket directory:
or on older PostgreSQL versions, unix_socket_directory as the parameter changed name. To show the server’s port (which applies for both TCP/IP and unix sockets):
If you can’t even connect with psql under unix user postgres you can check the socket dir with lsof:
In this case the first line is the socket location. This server has socket directory /tmp with port 5432.
If your client is looking in a different socket directory, you’re probably trying to connect over unix sockets to the default socket path and/or to the default port, and the libpq your client application is linked to has a different compiled-in unix socket path and/or port than your running PostgreSQL. Most likely your LD_LIBRARY_PATH or /etc/ld.so.conf has a different libpq before the one that came with your version of PostgreSQL. This doesn’t generally matter much, you can just override the socket directory.
To specify an alternative socket directory and/port port to connect to, specify the socket dir as the host parameter in your connection options, e.g. to connect as user bob to the server listening in /tmp on port 5433:
or in connection-string form:
The same works with any client that uses libpq (all the PostgreSQL client tools, plus e.g. psycopg2, the Pg gem in Ruby/Rails, PHP’s postgres and PDO, Perl’s DBB::Pg, etc). It does NOT work with non-libpq clients like PgJDBC, py-postgresql, etc, but most of these don’t support unix sockets at all. See the client documentation for non-libpq based clients.
[1] You do not have to pay in order to use PostgreSQL for any application, such as commercial closed source software. See http://www.postgresql.org/about/licence/.
External Links
Official PostgreSQL downloads
The PostgreSQL project provides an official list of download locations, including an Ubuntu software repository, at its download page. In particular, Ubuntu users can get newer PostgreSQL versions than those packaged in their Ubuntu release using apt-get via apt.postgresql.org.
For support and services around PostgreSQL see the services and support page.
EnterpriseDB
The PostgreSQL Linux downloads page contains a section on «Graphical installer» built by EnterpriseDB. You download the installer, change its properties to allow to run it as command (it has .run extension), and run it from command prompt as in «sudo whateveritwas.run».
You end up with
- configured DB server instance, which starts with your server
- pgAdmin III UI client application
Note that the installed software will not be integrated with Ubuntu software center. As a result, you will not receive any security updates from Ubuntu. However, the installed version will closely match the latest Ubuntu version.
Turnkey Linux
An Ubuntu-based PostgreSQL appliance is one of the easiest ways to get up and running with PostgreSQL on Ubuntu. It’s part of a family of pre-integrated TurnKey Linux Software Appliances based on Ubuntu 10.04.1 (Lucid LTS).
PostgreSQL (последним исправлял пользователь mikini 2015-08-28 13:16:48)
The material on this wiki is available under a free license, see Copyright / License for details
You can contribute to this wiki, see Wiki Guide for details
Источник


