- Буфер обмена Debian-Ubuntu через remmina rdp
- How To Copy Command Output To Linux Clipboard Directly
- A note about Linux / UNIX X Server CLIPBOARD
- xclip – Linux / UNIX Command line clipboard grabber
- Installing xclip under Debian / Ubuntu Linux To copy command output to clipboard
- How to xclip under Red hat / CentOS / RHEL / Fedora Linux
- How do I use the xclip command for clipboard copy and paste?
- Буфер обмена в Linux (копирование и вставка)
- Буфер копирования
- Буфер выбора (первичный буфер)
- Копирование и вставка в терминале
- Brainiarc7 / xclip-copy-to-clipboard.md
- This comment has been minimized.
- zehpatricio commented Sep 14, 2018
- This comment has been minimized.
- dagolinuxoid commented Oct 24, 2018
- This comment has been minimized.
- richarddewit commented Jan 14, 2019 •
- Cannot Copy and Paste via RDP (Remote Desktop) Clipboard
- Cannot Copy and Paste via RDP
- RDP Clipboard Stops Working in Remote Desktop Session
- Allow/Prevent Copy and Paste via RDP Clipboard on Windows
- Client-Side Settings
- Conclusion
- Related posts:
- PREVENT YOUR SERVER FROM CRASHING!
Буфер обмена Debian-Ubuntu через remmina rdp
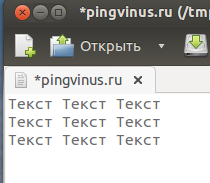
Суть проблемы: не работает буфер обмена. Описание: Установлен Debian7.8.0, установлены пакеты Remmina Remote Desktop. Подключаюсь по протоколу RDP к Ubuntu 14.04.2. В параметрах подключения галочка «Disable clipboard sync» снята. Буфер работает один раз: если при первом подключении скопировать текст на Debian и попробовать вставить на Ubuntu — работает. Второй скопированный фрагмент текста уже не вставляется. Если скопировать текст в debian и скопировать текст в ubuntu — вставляются только скопированный текст debian в debian и ubuntu в ubuntu, т.е. между ними не получается. Последние предложенные обновления установлены.

Второй скопированный фрагмент текста уже не вставляется.
Вставляется повторно первый фрагмент или ничего не происходит? И каким хоткеем пользуешься?
Есть следующие важные уточнения по моему вопросу:
— Если перезагрузил обе системы и скопировал первый фрагмент текста только в ubuntu, а в debian ничего не копировал, то вставляется первый фрагмент.
— Если скопировал второй фрагмент текста в ubuntu, а в debian также ничего не копировал, то вставляется второй фрагмент.
Обратная ситуация (из debian в ubuntu) не работает — не вставляется ни первый, ни последующие фрагменты.
— Если после этого (или изначально) скопировать фрагмент в debian, то взаимный буферный обмен прекращается. Т.е. буфер есть, но для каждой системы он свой.
В обеих системах папки usr/share/hotkeys нет. Дополнительно хоткей не устанавливал.
В обеих системах папки usr/share/hotkeys нет. Дополнительно хоткей не устанавливал.
Ctrl+C \ Ctrl+V используешь или Ctrl+Shift \ Ctrl + Insert используешь (я это имел ввиду)?
Вообще гуглится много проблем с remmina + clipboard, попробуй погуглить по своей версии, попробуй другие rdp-клиенты, в конце концов если rdp не критичен можешь перейти на vnc.
Ctrl+C \ Ctrl+V использую. Написал сюда, так как не могу найти ответ. Или подсказку — чего может быть не хватает или что «допилить». Пока я вижу решение одно — переустанавливать версии remmina — rdp важен.
Проблема оказывается не только с remmina, но и с xfreerdp и rdesktop. При этом в строке запуска прописал команды на clipboard. В чем может быть дело — читаю все посты подряд по данной теме — не могу найти решение.
Источник
How To Copy Command Output To Linux Clipboard Directly
H ow do I copy the output of a command to the Linux Gnome clipboard? How can I send files directly to X Windows clipboard from a shell prompt? What is the best way to insert command line output or files contains into the clipboard under Linux?
We can copy command line output to X Windows clipboard directly using the xclip command. You can read from a standard input device such as a keyboard. However, one can use files and pipes too. We can feed this data as an X selection for pasting into any X applications such as GIMP, gedit, OpenOffice, Firefox or an email client. You can also print the current X selection to standard out (screen or printer) from a shell prompt. Let us see how to use the xclip command/xsel command as a copy command for the clipboard.
| Tutorial details | |
|---|---|
| Difficulty level | Easy |
| Root privileges | Yes |
| Requirements | xclip and xsel utilities on Linux |
| Est. reading time | 6 minutes |
A note about Linux / UNIX X Server CLIPBOARD
There are 3 clipboards maintained by the X server as follows:
- PRIMARY: The PRIMARY selection is conventionally used to implement copying and pasting via the middle mouse button. xclip command use this by default. So you need to hit middle button to paste data.
- SECONDARY: This is less frequently used by X application. You need to use XA_SECONDARY constant to select this clipboard.
- CLIPBOARD: Same as SECONDARY, use XA_CLIPBOARD constant to select clipboard.
xclip – Linux / UNIX Command line clipboard grabber
You can install xclip using any one of the following method:
Installing xclip under Debian / Ubuntu Linux To copy command output to clipboard
Type the following apt command/apt-get command at shell prompt:
$ sudo apt-get install xclip
How to xclip under Red hat / CentOS / RHEL / Fedora Linux
Type the following dnf command/yum command at shell prompt (make sure 3rd party EPEL repos are activated):
# yum install xclip
How do I use the xclip command for clipboard copy and paste?
Let us copy the output of the following command to the Linux clipboard. The syntax is:
command | xclip
command | xclip -i
To paste selection to standard out or pipe, use the following command again:
xclip -o
xclip -o | myapp1 -arg1
Источник
Буфер обмена в Linux (копирование и вставка)
 Хочу рассказать о некоторых особенностях буфера обмена в Linux. О буфере копирования и про буфер выбора (первичный буфер), а также про копирование и вставку текста в терминале.
Буфер копирования
Стандартно для копирования и вставки объектов в Linux используются сочетания клавиш Ctrl+C и Ctrl+V. При копировании текст (или любой другой объект) в таком случае попадает в обычный буфер копирования. Затем вы можете вставить этот текст в другом месте.
Буфер выбора (первичный буфер)
В Linux существует еще буфер выбора или первичный буфер. Текст, который вы выделяете в любой программе, автоматически попадает в буфер обмена! Это удобно, выделил текст, открыл другое окно и вставил этот кусок текста. Есть некоторые исключения, но они незначительны. Например, у меня в Ubuntu это не работает, если программа использует JVM (Java Virtual Machine).
Кстати, именно этим объясняется следующие поведение. Вы выделили текст в программе, затем открыли другую программу и выделили какой-нибудь текст в ней. После этого, выделение текста в первой программе автоматически снимется, а текст который вы выделили последним, попадет в буфер выбора.
Копирование и вставка в терминале
В терминале для копирования и вставки не работают стандартные сочетания Ctrl+V, Ctrl+C. Это связано с тем, что исторически Ctrl+C это сочетание клавиш для прерывания текущего процесса. Поэтому, для копирования и вставки при работе в терминале используются сочетания Ctrl+Insert и Shift+Insert соответственно. В Gnome терминале и, наверное, во многих других также работают сочетания Shift+Ctrl+C и Shift+Ctrl+V. Они же указаны в главном меню программы в разделе Правка.
Также в терминале работают сочетания клавиш Ctrl+U, чтобы вырезать текст; и Ctrl+Y для вставки текста. Сочетание Ctrl+U работает особенным образом — в буфер копируется вся текущая строка, введенная в терминале, независимо от того, выбрали вы какой-нибудь текст мышкой или нет, а сама строка пропадает с экрана.
Источник
Brainiarc7 / xclip-copy-to-clipboard.md
Using xclip to copy terminal content to the clip board:
Say you want to pipe shell output to your clipboard on Linux. How would you do it? First, choose the clipboard destination, either the Mouse clip or the system clipboard.
For the mouse clipboard, pipe straight to xclip:
For the system clip board, pipe to xclip and select clip directly:
See the man file of xclip here.
This comment has been minimized.
Copy link Quote reply
zehpatricio commented Sep 14, 2018
This comment has been minimized.
Copy link Quote reply
dagolinuxoid commented Oct 24, 2018
I often forget the command — it’s a useful one. As an alternative cat filename | xclip -se c
This comment has been minimized.
Copy link Quote reply
richarddewit commented Jan 14, 2019 •
The exact parameters for xclip don’t really matter, as long as they unambiguously resemble -selection and clipboard , so xclip -sel clip or xclip -se c can all be used, but not xclip -s clipb as -s also resembles -silent .
So the shortest possible command is xclip -se c .
From the manual:
Options can be abbreviated as long as they remain unambiguous. For example, it is possible to use -d or -disp instead of -display. However, -v couldn’t be used because it is ambiguous (it could be short for -verbose or -version), so it would be interpreted as a filename.
Note that only the first character of the selection specified with the -selection option is important. This means that «p», «sec» and «clip» would have the same effect as using «primary», «secondary» or «clipboard» respectively.
Источник
Cannot Copy and Paste via RDP (Remote Desktop) Clipboard
by Nicky Mathew | Apr 3, 2021
Cannot Copy and Paste via RDP? We can help you.
We cannot copy/paste a text or file between our computer and a remote host if we actively use remote connections to workstations, Windows servers, or RDS farms using the RDP protocol.
As part of our Server Management Services, we assist our customers with
Today, let us see how to resolve this error.
Cannot Copy and Paste via RDP
Sometimes the clipboard does not work in a Remote Desktop session if we actively use remote connections to workstations, Windows servers, or RDS farms using the RDP protocol.
We may come across two scenarios:
- It does not allow copying files/data using RDP on a remote server
- rdpclip.exe process crashes in the current user session
RDP Clipboard Stops Working in Remote Desktop Session
If we come across the clipboard issue, the best option is to end the current RDP session correctly (logoff) and reconnect.
However, it is not always convenient since we have to reopen everything again.
Fortunately, there is a way to restore the correct clipboard operation in an RDP session without logging off.
Rdpclip.exe is responsible for clipboard operation between our local computer and the Remote Desktop host.
A separate rdpclip.exe process starts for each remote user session when they connect to the Remote Desktop.
Using the Task Manager, we can kill the rdpclip.exe process and run it manually (Task Manager -> File -> Start new task -> rdpclip -> Enter).
Usually, it helps to restore the remote clipboard operation quickly. Ensure that copy/paste (Ctrl+C/Ctrl+V) is working in the RDP session.
In addition, in order to copy data via the RDP clipboard, the following conditions must be met:
First, we must enable the remote clipboard in the settings of the RDP client we use to connect to a remote computer.
Then we must allow to copy and paste data using the clipboard on the RDP/RDS host.
Allow/Prevent Copy and Paste via RDP Clipboard on Windows
We can enable or disable the use of the RDP clipboard using Group Policy or Registry settings.
Windows Server 2016
Windows Server 2012
Windows Server 2008
We can disable the RDP clipboard between a computer and a remote host as follows:
If we use RDS hosts running on Windows Server, we can disable the clipboard and the local drives redirection:
- Remote Desktop Services -> Collections -> Tasks -> Edit Properties -> Client Settings.
- Uncheck Clipboard and Drives options in the Enable redirecting for the following section.
If we want to deny copying to/from an RDP session for users only, but not the administrators, we can change the NTFS permissions on the executable C:\windows\system32\rdpclip.exe.
To do it, uncheck Read/Execute permissions for the built-in Users group in the file’s security properties and remove the group from the list.
Client-Side Settings
- Right-click on the RDP icon that we use to connect, then select “Edit“.
- Then select the “Local Resources” tab.
- Check the “Clipboard” option. To allow file copying and pasting, select “More…”
If we just need the ability to copy and paste text and not files, stop here and click “OK“. - Otherwise, select the “Drives” option. Click “OK“, then “OK” again.
[Need help with the procedures? We can help you]
Conclusion
In short, we saw how to Allow/Prevent Copy and Paste via RDP Clipboard on Windows
Related posts:
PREVENT YOUR SERVER FROM CRASHING!
Never again lose customers to poor server speed! Let us help you.
Our server experts will monitor & maintain your server 24/7 so that it remains lightning fast and secure.
Источник


