- 2 полезных инструмента для поиска и удаления повторяющихся файлов в Linux
- Rdfind – находит дубликаты файлов в Linux
- How to Find Duplicate Files in Linux and Remove Them
- FSlint: GUI tool to find and remove duplicate files
- FDUPES: CLI tool to find and remove duplicate files
- Installation on Debian / Ubuntu
- Installation on Fedora
- Final Words
- About Ambarish Kumar
- How to Find and Remove Duplicate Files on Linux
- 1) FSlint
- Installation
- Run fslint
- 2) Fdupes
- Install fdupes
- Search for duplicates files
- Search duplicate file recursively and display the size
- Delete the duplicated files
- Conclusion
2 полезных инструмента для поиска и удаления повторяющихся файлов в Linux
Организация домашнего каталога или даже системы может быть особенно сложной, если у вас есть привычка скачивать всевозможные материалы из Интернета.
Часто вы можете обнаружить, что вы загрузили один и тот же mp3, pdf, epub (и все другие расширения файлов) и скопировали его в разные каталоги.
Это может привести к тому, что ваши каталоги будут загромождать всевозможные бесполезные дублированные файлы.
В этом учебном пособии вы узнаете, как находить и удалять дубликаты файлов в Linux, используя инструменты rdfind и fdupes командной строки.
Обратите внимание: всегда будьте осторожны с тем, что вы удаляете в своей системе, поскольку это может привести к нежелательной потере данных. Если вы используете новый инструмент, сначала попробуйте его в тестовом каталоге, где удаление файлов не будет проблемой.
Rdfind – находит дубликаты файлов в Linux
Это бесплатный инструмент, используемый для поиска дубликатов файлов через или в нескольких каталогах.
Он использует контрольную сумму и поиск дубликатов на основе файла содержит не только имена.
Rdfind использует алгоритм для классификации файлов и определяет, какой из дубликатов является исходным файлом, и рассматривает остальные как дубликаты.
- Если A было обнаружено при сканировании входного аргумента раньше B, A более ранжировано.
- Если A было найдено ниже B, то A более ранжировано.
- Если A было найдено раньше, чем B, то A более ранжировано.
Последнее правило используется, особенно в тех случаях, когда два файла находятся в одном каталоге.
Чтобы установить rdfind в Linux, используйте следующую команду в соответствии с вашим дистрибутивом Linux.
Чтобы запустить rdfind в каталоге, просто введите rdfind и целевой каталог. Вот пример:
Как вы можете видеть, rdfind сохранит результаты в файле с именем results.txt, который находится в том же каталоге, откуда вы запускали программу.
Файл содержит все повторяющиеся файлы, найденные rdfind.
Вы можете просмотреть файл и удалить дубликаты файлов вручную, если хотите.
Другое дело, что вы можете использовать опцию -dryrun, которая будет предоставлять список дубликатов без каких-либо действий:
Когда вы найдете дубликаты, вы можете заменить их c hardlinks.
И если вы хотите удалить дубликаты, вы можете запустить:
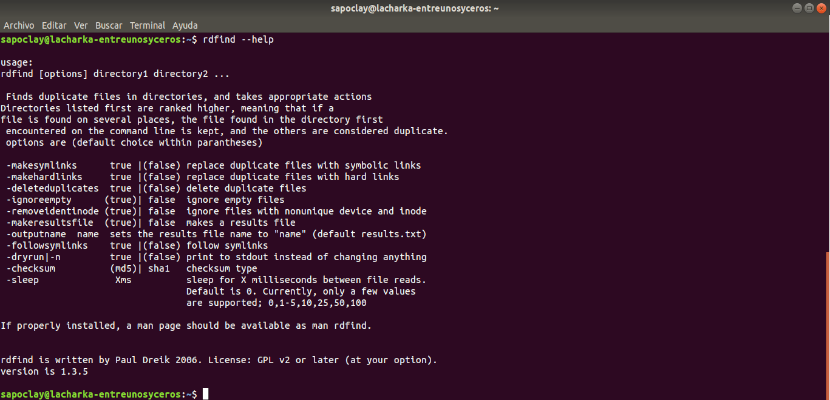
Чтобы проверить другие полезные параметры rdfind, вы можете использовать руководство rdfind.
Источник
How to Find Duplicate Files in Linux and Remove Them
Last updated August 31, 2017 By Ambarish Kumar 34 Comments

Brief: FSlint is a great GUI tool to find duplicate files in Linux and remove them. FDUPES also find the files with same name in Linux but in the command line way.
If you have this habit of downloading everything from the web like me, you will end up having multiple duplicate files. Most often, I can find the same songs or a bunch of images in different directories or end up backing up some files at two different places. It’s a pain locating these duplicate files manually and deleting them to recover the disk space.
If you want to save yourself from this pain, there are various Linux applications that will help you in locating these duplicate files and removing them. In this article, we will cover how you can find and remove these files in Ubuntu.
Note: You should know what you are doing. If you are using a new tool, it’s always better to try it in a virtual directory structure to figure out what it does before taking it to root or home folder. Also, it’s always better to backup your Linux system!
FSlint: GUI tool to find and remove duplicate files
FSlint helps you search and remove duplicate files, empty directories or files with incorrect names. It has a command-line as well as GUI mode with a set of tools to perform a variety of tasks.
To install FSlint, type the below command in Terminal.
Open FSlint from the Dash search.
FSlint includes a number of options to choose from. There are options to find duplicate files, installed packages, bad names, name clashes, temp files, empty directories etc. Choose the Search Path and the task which you want to perform from the left panel and click on Find to locate the files. Once done, you can select the files you want to remove and Delete it.
You can click on any file directory from the search result to open it if you are not sure and want to double check it before deleting it.
You can select Advanced search parameters where you can define rules to exclude certain file types or exclude directories which you don’t want to search.
FDUPES: CLI tool to find and remove duplicate files
FDUPES is a command line utility to find and remove duplicate files in Linux. It can list out the duplicate files in a particular folder or recursively within a folder. It asks which file to preserve before deletion and the noprompt option lets you delete all the duplicate files keeping the first one without asking you.
Installation on Debian / Ubuntu
Installation on Fedora
Once installed, you can search duplicate files using the below command:
For recursively searching within a folder, use -r option
This will only list the duplicate files and do not delete them by itself. You can manually delete the duplicate files or use -d option to delete them.
This won’t delete anything on its own but will display all the duplicate files and gives you an option to either delete files one by one or select a range to delete it. If you want to delete all files without asking and preserving the first one, you can use the noprompt -N option.
FDUPES: finding and removing duplicate files
In the above screenshot, you can see the -d command showing all the duplicate files within the folder and asking you to select the file which you want to preserve.
Final Words
There are many other ways and tools to find and delete duplicate files in Linux. Personally, I prefer the FDUPES command line tool; it’s simple and takes no resources.
How do you deal with the finding and removing duplicate files in your Linux system? Do tell us in the comment section.
Like what you read? Please share it with others.
Filed Under: Tutorial Tagged With: How To
About Ambarish Kumar
DevOps Engineer by profession, believes in «Human Knowledge belongs to the world»!
Have a look at the tool rmlint, it is such a gem!
I have tried rdfind and fdupes extensively. Although I found them to be useful and robust, they were limited by considering files as being duplicates based mainly on their content. Without possible consideration of the name of the file. Then I discovered rmlint recently, and it offers this as an optional argument. And so much more! Very flexible and user-friendly. Different output formats, even duplicate folders … Just what I needed. Plus GUI.
I have separate hard drives that have many of the same songs. I would like to eliminate from one drive the songs that exist on both w/o doing it manually. Can rmlint identify the dupes between drives and eliminate them from only one drive?
From my experience thus far, this should definitely work. So that on drive_E the duplicate songs are eliminated, and on drive_K they are kept, be sure to specify them on the command line like …”Drive_E // Drive_K …” where the drive after the double slash signifies the preferred/tagged ‘original’ having priority.
For example, a composition of a terminal/bash command which I found useful:
rmlint –type=”f” –addoutput=csv:rmlint.csv MapOnDrive_E // MapOnDrive_K | tee output.txt
where:
–type=”f” specifies files only (not other ‘lint’ like broken symlinks, empty files, (empty) dirs etc.);
–addoutput=csv:rmlint.csv produces an extra .csv (spreadsheet) file named rmlint.csv with the names of the candidates to be removed. This is optional, but I like it;
| tee output.txt generates an extra .txt output file, in addition to the screen output. Also optional, and handy;
Perhaps superfluous to say: don’t worry that this command will delete anything, it does only a “dry-run” providing you with all the means to run the “real thing” next.
Try it out first with a small sample set, eg with both intended directories on another drive, in order to finetune things for your particular use-case. And glance through the options, given by the manpage for rmlint (man rmlint). It is also possible to filter/search for certain filenames/extensions.
The same should work through the GUI version of rmlint, but I have not yet used that.
What changes in the command string you provided that makes it work for real?
Not so easy to answer, as your configuration undoubtedly differs from mine. And this comment box is not that suited to code nor screen-shots. I noticed that the double dashes of the rmlint option ‘–types=’ had been replaced by a single dash, after submitting my reply! Therefore it remains essential to consult the man page, tutorial, and have some confidence with the command line in order to experiment a little.
More to the point: I realize I made a bad typo in the hurry … I wrongly listed the main option as ‘–type=”f”‘, but that should have been ‘–types=”df”‘. Sorry.
In order to simulate your particular scenario, I have used two USB sticks, named ‘USB_E’ (eliminate) and ‘USB_K’ (keep). On each I created a directory named ‘Songs’. In ‘USB_E/Songs’ I placed a set of 4 audio files: Song1.wav, Song2.wav, Song1.mp3, Song2.mp3. In ‘USB_K/Songs’ I placed an overlapping set of 4 audio files Song2.wav, Song3.wav, Song2.mp3, Song3.mp3. Thus, the dupes between these folders are: Song2.wav and Song2.mp3.
For this scenario, my basic commands to eliminate the dupes from the external ‘USB_E’, while keeping them on the external ‘USB_K’ are:
$ cd /home/paul/Tmp [enter]
$ rmlint –types=”df” “/media/paul/USB_E/Songs” // “/media/paul/USB_K/Songs” [enter]
Note the double dashes before ‘types=’, and the use of quotation marks around the paths should these contain spaces. “/media/paul” Is where my external drives are attached, as indicated in the file manager.
After running these commands, rmlint will show in its screen output exactly which files are the duplicates, and which of these it intends to keep, and which it intends to remove. Then, in order to actually carry out the job, run the executable script ‘rmlint.sh’ which rmlint has generated in the current working directory. Run this script as follows:
$ ./rmlint.sh [enter]
The script gives some brief info first, you can still easily abort at this stage. In order to proceed, just type any string key (e.g. a single ‘c’) followed by [enter] at the keyboard. After execution, the script will be removed automatically.
Checking the outcome, ‘USB_E/Songs’ now contains only Song1.wav and Song1.mp3, whereas ‘USB_K/Songs’ still contains Song2.wav, Song3.wav, Song2.mp3, Song3.mp3.
That’s it. It sounds more complicated than it is, really.
rmlint Has a lot of options for finetuning, most of which I have not explored myself. Hope this will now work in your case. Good luck!
I was going to go with rdfind, but your recommendation to rmlint is a wonderful alternative, I found it very useful, very well documented for what I required and easily available on the package manager.
Thanks!
Nice to read. To be fair, I find rdfind also very practical, and slightly prefer it over fdupes, but for some extra options/flexibility rmlint is hard to beat.
And I realized that often simple deduplication can be achieved using a GUI file comparison program (like Meld or Double Commander) by manually selecting the duplicates and then click Delete.
Yeah, I know, but in my case, where I just assumed I had good manual control over my repeated files and they’re a ton, rmlint was a very good one, that separation about letting me know what’s repeated and also building the script just in case I want to use it is a new perspective that I liked a lot for the bulky part.
Hi from Tübingen,S.Germany…………
When i try to install FSLINT :-
sudo apt-get install fslint
Reading package lists… Done
Building dependency tree
Reading state information… Done
Package fslint is not available, but is referred to by another package.
This may mean that the package is missing, has been obsoleted, or
is only available from another source
E: Package ‘fslint’ has no installation candidate
Источник
How to Find and Remove Duplicate Files on Linux
Hi all, today we’re gonna learn how to find and remove duplicate files on you Linux PC or Server. So, here’s tools that you may use anyone of them according to your needs and comfort.
Whether you’re using Linux on your desktop or a server, there are good tools that will scan your system for duplicate files and help you remove them to free up space. Solid graphical and command-line interfaces are both available. Duplicate files are an unnecessary waste of disk space. After all, if you really need the same file in two different locations you could always set up a symbolic link or hard link, storing the data in only one location on disk.
1) FSlint
FSlint is available in various Linux distributions binary repository, including Ubuntu, Debian, Fedora, and Red Hat. Just fire up your package manager and install the “fslint” package. This utility provides a convenient graphical interface by default and it also includes command-line versions of its various functions.
Don’t let that scare you away from using FSlint’s convenient graphical interface, though. By default, it opens with the Duplicates pane selected and your home directory as the default search path.
Installation
To install fslint, as I am running ubuntu, here is the default command:
But here are installation commands for other linux distributions:
For Other Distro:
Run fslint
To run fslint in GUI version run fslint-gui in Ubuntu, run command (Alt+F2) or terminal:
By default, it opens with the Duplicates pane selected and your home directory as the default search path. All you have to do is click the Find button and FSlint will find a list of duplicate files in directories under your home folder.

Use the buttons to delete any files you want to remove, and double-click them to preview them.
Finally, you are done. Hurray, we have successfully removed duplicate files from your system.
Note that the command-line utilities aren’t in your path by default, so you can’t run them like typical commands. On Ubuntu, you’ll find them under /usr/share/fslint/fslint. So, if you wanted to run the entire fslint scan on a single directory, here are the commands you’d run on Ubuntu:
This command won’t actually delete anything. It will just print a list of duplicate files — you’re on your own for the rest.

2) Fdupes
FDUPES is a program for identifying or deleting duplicate files residing within specified directories written by Adrian Lopez. You can look the GitHub project.
Install fdupes
To install fdupes, do as below:
On Centos 7:
On Ubuntu 16.04:
Search for duplicates files
fdupes command searches duplicates in a folder indicated. The syntax is as below
Let us create some duplicates files. We will create a folder and 10 files with the same content
Let’s check the result
We see that all our file exist. Now we can search for duplicate files as below
You can see that we have all the 10 duplicates files listed above.
Search duplicate file recursively and display the size
You have seen that the result above doesn’ show the duplicated files created earlier in labor/package directory. To search duplicated files into a directory and its sub-directories, we use the option -r and you can see the size of each duplicates files with -S parameter as below
With the result you can understand that the duplicates files have the same size so the same content.
It is possible to omit the first file when researching for duplicated files
Delete the duplicated files
To delete duplicated files, we use the -d parameter. fdupes will ask which files to preserve
We can check the result as below.
You can see that we have preserved drago8 and pack2 files
Conclusion
We have seen how to delete duplicated files on Linux both graphically and command line. You can use one the tools depending on your needs. It is important to check the duplicated file in order to save space on your server.
Источник


