- How to Fix/Repair Badblocks in Linux
- About Smartmontools
- smartctl command
- Fix badblocks
- Step 1:
- Step 2:
- Step 3:
- Step 4:
- Step 5:
- Smart Error on Ext2/ext3
- Unassigned sectors
- BadBlock on ReiserFS
- Get the block size of filesystem
- Get the block number
- More information about the block
- Find the affected file
- Run badblock -n to provoke reallocation
- Use dd command to write zeroes on the particular area
- Badblock Repair LVM
- Conclusion
- More Articles You May Like
- 7 Comments. add one
- Проверка диска на битые секторы в Linux
- Проверка диска на битые секторы Linux
- Выводы
How to Fix/Repair Badblocks in Linux

The badblocks in a storage device are the portions of the device that are not readable for some reason. These badblocks can be recovered if we are able to reach the exact location of that block.
The SMART technology built into many storage devices (such as many ATA-3, later ATA, IDE and SCSI-3 hard drives) monitors the reliability of hard drive and can predict drive failures. The SMART stands for Self-Monitoring, Analysis and Reporting Technology.
This tutorial describes the actions that can be taken when smartmontools detect and report some badblocks on hard disk running linux.
About Smartmontools
The smartmontools package provides two utilities: smartrd and smartctl.
smartd is the deamon that polls the ATA and SCSI devices every 30 minutes (this value can be changed) and logs the SMART errors and changes in SMART attributes using SYSLOG interface.
The smartctl performs SMART tasks and can be used to print SMART self-tests and error logs among other tasks such as support for polling TapeAlert messages from SCSI tape drives. The usage of this command will be clear as we proceed through this article. This article proceeds through some examples of disk failure for different types of filesystem.
smartctl command
The smartctl command reports a badblock at Logical Block Address LBA = 0x016561e9 which in decimal number system is 23421417.
The LBA counts sectors in units of 512 bytes starting at zero. The value of «Current_Pending_Sector» attribute in «smartctl -A» command confirms the bad sector.
Fix badblocks
Step 1:
Locate the partition on which the bad block resides. The fdisk command can be used to view the sectors of the hard disk partitions.
Here we can see that the LBA 23421417 lies in the third partition, i.e. /dev/hda3. The offset value of the sector is 23421417 — 5269320 = 18152097 sectors in the partition /dev/hda3.
Now we need to check the type of filesystem of the partition. This can be checked from /etc/fstab file.
Step 2:
Now we need to find the block size of the filesystem using tune2fs command
This reports the block size to be 4096 bytes.
Step 3:
Find the filesystem block that contains this problematic LBA. We use the following formula:
b = File System block number
B = File system block size in bytes
L = LBA of bad sector
S = Starting sector of partition as shown by fdisk -lu
and (int) denotes the integer part.
For our example, L=23421417, S=5269320, and B=4096.
b = (int)18152097*512/4096 = (int)2269012.125
Step 4:
Use debugfs to locate the inode stored in this block, and hence the file that is stored at that location.
Here, in this case, the block is not in use. So the rest of this step can be skipped and we can jump directly to next step. Otherwise, if the block is in use, as reported by the following output:
In this case, the problematic file is: /data/S1/R/H/714197568-714203359/H-R-714202192-16.gwf
In case of ext3 filesystem, this block can be the part of journal itself. The inode will be very small and debugfs will not be able to report any filename.
In this case, we can remove the journal with tune2fs command:
Now, we repeat the step 4, and if the problem is not reported anymore, we can rebuild the journal:
Step 5:
This step will destroy the data on that block by writing zeroes on it. The bad block will be recovered but the data of the file will be lost. If you are sure, you can proceed with the following step:
Now we can again check the «smartctl -A» output to verify that everything is back to normal.
Here you can see that the value of «Current_Pending_Sector» is zero.
Smart Error on Ext2/ext3
This email from smartd shows the first sign of trouble. As talked about in the previous example, we run «smartctl -a /dev/hda» to confirm the problem:
The LBA reported is 0x021d9f44 (base 16) = 35495748 (base 10)
Here, 3 sectors are unreadable. Using the following bash script, we can check the sectors around that area.
35495734
1+0 records in
1+0 records out
35495735
dd: reading `/dev/hda’: Input/output error
0+0 records in
0+0 records out
35495751
dd: reading `/dev/hda’: Input/output error
0+0 records in
0+0 records out
35495752
1+0 records in
1+0 records out
This shows that 17 sectors 35495735-35495751 are unreadable.
The filesystem blocks that contain this area are:
L=35495735 to 35495751
S=5269320
B=4096
so b=3778301 to 3778303
To identify files at these locations, we run debugfs:
We can use md5sum to confirm our file:
So, we force the disk to reallocate the bad blocks:
Now we can check if the bad block are creating no trouble with the value of «Current_Pending_Sector» attribute (smartctl -A command):
Unassigned sectors
In the above examples, we have not considered the case when the bad blocks are not assigned to any file. This will be clear when we run debugfs command to find the file corresponding to a particular block. If this is the case, then we can first create a file that is large enough to fill the remaining filesystem (again, dd command is the rescue).
This command will run until there is no space left on the filesystem. And now we can proceed through rest of the steps.
BadBlock on ReiserFS
In this example, the filesystem used is ReiserFS. So, some of the commands used will be different from the above case.
The SMART error log indicates the bad block address to be 58656333. The partition table indicates that the block is in a partition with ReiserFS filesystem, starting at block address 54781650.
Get the block size of filesystem
Get the block number
More information about the block
The problem has occurred looks like a hardware problem.
Here, we see that reading the block fails. But we now know from this output that it is unused block.
At this point, we can try to write the bad block and see if the drive remaps the bad block. If it cannot remap the block, use badblock option (-B) with reiserfs utils to handle this block correctly.
bread: Cannot read the block (484335): (Input/output error).
At least we have the correct bad block.
Find the affected file
Run badblock -n to provoke reallocation
If everything happens as expected, debugreiserfs -1 484335 /dev/hda3 reports no errors. Otherwise:
Use dd command to write zeroes on the particular area
Badblock Repair LVM
This example considers the badblock to be on an LVM volume:
An error is reported and the bad block is found to be at LBA 37383668 with the following command:
sfdisk can help to find the physical partition of the bad block:
The bad block is in /dev/hdb3 partition, which is an LVM based partition. The offset of this block is: (37383668 — 1188810) = 36194858
The physical partition used by LVM is divided into PE (Physical Extent). The ‘pvdisplay’ command gives the size of PE of the LVM partition:
# part=/dev/hdb3 ; pvdisplay -c $part | awk -F: ‘
4096
To get its size in LBA block size (512 bytes or 0.5 KB), we multiply this number by 2 : 4096 * 2 = 8192 blocks for each PE.
Now we search the PE in which the bad block is residing: physical partition’s bad block number / sizeof(PE)
36194858 / 8192 = 4418.3176
Now we need to find the logical partition corresponding to PE number 4418.
Hence, the PE 4418 is in /dev/WDC80Go/ext1 logical partition.
Size of logical block of filesystem on /dev/WDC80Go/ext1 is
The logical partition starts on PE 3072:
(# PE’s start of partition * sizeof(PE)) + parttion offset[pe_start] = (3072 * 8192) + 384 = 25166208
There are 512 blocks of physical partition, so the bad block number is:
(36194858 — 25166208) / (sizeof(fs block) / 512) = 11028650 / (4096 / 512) = 1378581.25
You can verify if this is the actual bad block with dd command:
If the command issues some error, then the calculation for the bad block is correct. Otherwise, recheck the calculations to find the correct block. Once you have found the correct block, resolve the issue with dd command as explained in all above examples:
Conclusion
All the examples given in this article concentrate on finding the correct bad block and the partition. Once you have found the bad block, all you need to do is to run dd command to write zeroes on the block. The different examples provide the methods of finding the bad block location in different filesystems and in different scenarios.
More Articles You May Like
7 Comments. add one
Thanks for the page
I’m having problems trying to find the partition offset with fdisk on my gpt partitioned disks.
For disks that have been partitioned with gpt, I have to use gdisk right?
trying to use fdisk as above, gave me confusion
gdisk reports like this on my gpt partitioned disk
$ gdisk -l /dev/sda
GPT fdisk (gdisk) version 0.8.1
Partition table scan:
MBR: protective
BSD: not present
APM: not present
GPT: present
Found valid GPT with protective MBR; using GPT.
Disk /dev/sda: 7814037168 sectors, 3.6 TiB
Logical sector size: 512 bytes
Disk identifier (GUID): 58CF1ED7-6886-401C-B98A-08F60893C58A
Partition table holds up to 128 entries
First usable sector is 34, last usable sector is 7814037134
Partitions will be aligned on 8-sector boundaries
Total free space is 1739 sectors (869.5 KiB)
Number Start (sector) End (sector) Size Code Name
1 2048 102402047 48.8 GiB 8300
2 102402048 204802047 48.8 GiB 8300
3 204802048 307202047 48.8 GiB 8300
4 307202048 409602047 48.8 GiB 8300
5 409602048 512002047 48.8 GiB 8300
6 512002048 4608002047 1.9 TiB 8300
7 4608002048 7199637503 1.2 TiB 8300
8 7199637504 7814035455 293.0 GiB 8200
9 34 1987 977.0 KiB EF02
I have similar problem. Do you have any update how to calculate the right position on GPT?
This article was immensely helpful. Thank you.
The script below finds bad sectors, puts them into a text file, then test if text file size is different than zero, so e2fsck will mark bad sectors (these sectors will not be used by operating system)
#!/bin/sh
minsize=0
target=»/tmp/bad-blocks.txt»
for disc in `fdisk -l | grep ‘^/’ | awk ‘< print $1 >‘`; do
badblocks -v $disc > «$target»
tam=$(du -k «$target» | cut -f 1)
if [ $tam -eq $minsize ]; then
echo «no badblocks on $disc»
else
echo «badblock(s) found(s) on $disc»
e2fsck -l «$target» «$disc»
fi
done
It looks like dd command must have bs parameter equal to physical block size, not logical one. Otherwise writing fails with I/O error and HDD does not reallocate anything.
Thank you for that detailed information! It is very valuable for me.
However, I cannot use tune2fs, because my damage filesystem is ntfs-type (instead of ext2/3/4).
Can you recommend me a simmilar tool for that case?
Would steps be simmilar for a ntfs filesystem?
Thank you in advance. 🙂
This happened to me on the block holding /etc/hosts no less, rendering my system unusable!
Booting from USB and following your instructions I managed to clean it, then wrote a new basic hosts file and got things running again.
Phew! I had not had such a tough time since the early years of Linux!
Источник
Проверка диска на битые секторы в Linux
Одно из самых важных устройств компьютера — это жесткий диск, именно на нём хранится операционная система и вся ваша информация. Единица хранения информации на жестком диске — сектор или блок. Это одна ячейка в которую записывается определённое количество информации, обычно это 512 или 1024 байт.
Битые сектора, это повреждённые ячейки, которые больше не работают по каким либо причинам. Но файловая система всё ещё может пытаться записать в них данные. Прочитать данные из таких секторов очень сложно, поэтому вы можете их потерять. Новые диски SSD уже не подвержены этой проблеме, потому что там существует специальный контроллер, следящий за работоспособностью ячеек и перемещающий данные из нерабочих в рабочие. Однако традиционные жесткие диски используются всё ещё очень часто. В этой статье мы рассмотрим как проверить диск на битые секторы Linux.
Проверка диска на битые секторы Linux
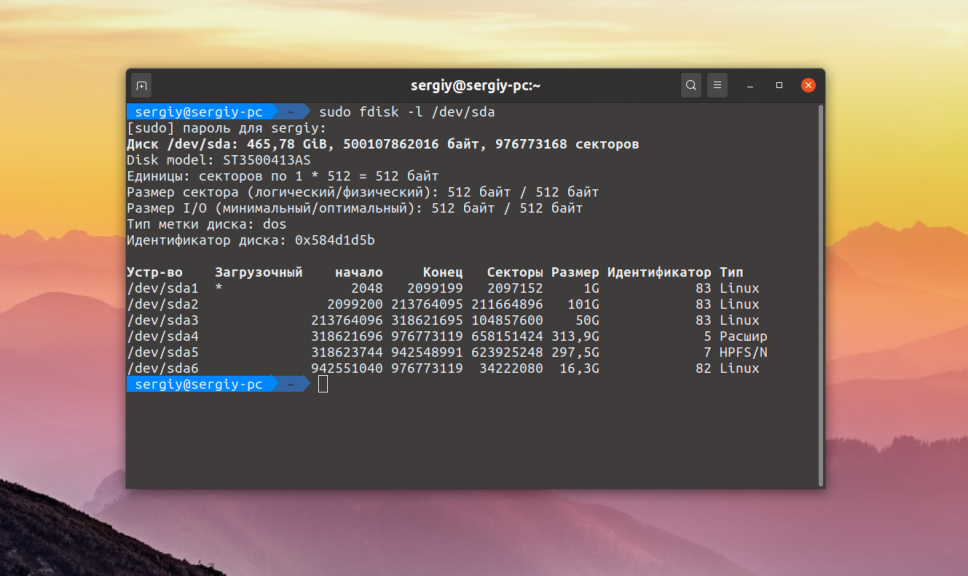
Для поиска битых секторов можно использовать утилиту badblocks. Если вам надо проверить корневой или домашний раздел диска, то лучше загрузится в LiveCD, чтобы файловая система не была смонтирована. Все остальные разделы можно сканировать в вашей установленной системе. Вам может понадобиться посмотреть какие разделы есть на диске. Для этого можно воспользоваться командой fdisk:
sudo fdisk -l /dev/sda1
Или если вы предпочитаете использовать графический интерфейс, это можно сделать с помощью утилиты Gparted. Просто выберите нужный диск в выпадающем списке:
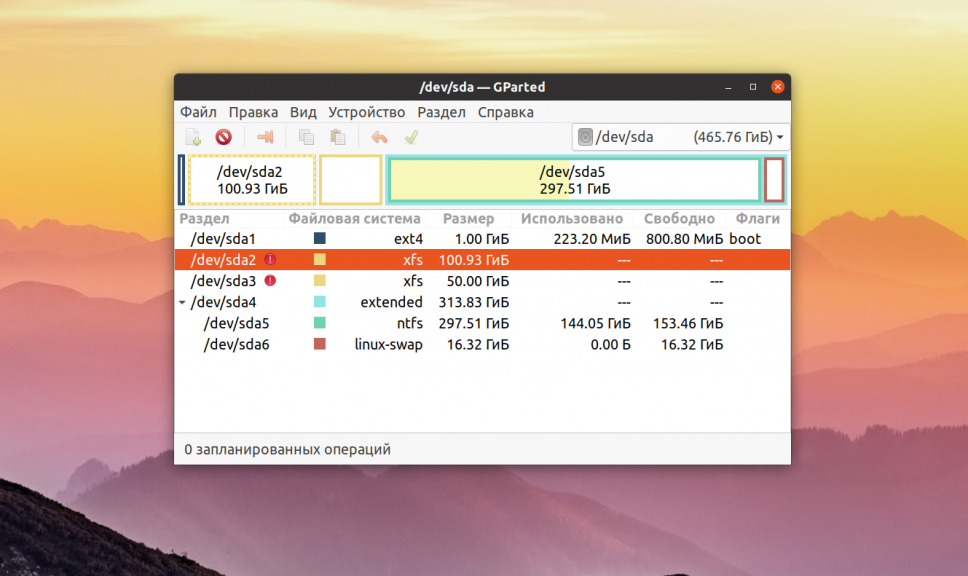
В этом примере я хочу проверить раздел /dev/sda2 с файловой системой XFS. Как я уже говорил, для этого используется команда badblocks. Синтаксис у неё довольно простой:
$ sudo badblocks опции /dev/имя_раздела_диска
Давайте рассмотрим опции программы, которые вам могут понадобится:
- -e — позволяет указать количество битых блоков, после достижения которого дальше продолжать тест не надо;
- -f — по умолчанию утилита пропускает тест с помощью чтения/записи если файловая система смонтирована чтобы её не повредить, эта опция позволяет всё таки выполнять эти тесты даже для смонтированных систем;
- -i — позволяет передать список ранее найденных битых секторов, чтобы не проверять их снова;
- -n — использовать безопасный тест чтения и записи, во время этого теста данные не стираются;
- -o — записать обнаруженные битые блоки в указанный файл;
- -p — количество проверок, по умолчанию только одна;
- -s — показывать прогресс сканирования раздела;
- -v — максимально подробный режим;
- -w — позволяет выполнить тест с помощью записи, на каждый блок записывается определённая последовательность байт, что стирает данные, которые хранились там раньше.
Таким образом, для обычной проверки используйте такую команду:
sudo badblocks -v /dev/sda2 -o
Это безопасно и её можно выполнять на файловой системе с данными, она ничего не повредит. В принципе, её даже можно выполнять на смонтированной файловой системе, хотя этого делать не рекомендуется. Если файловая система размонтирована, можно выполнить тест с записью с помощью опции -n:
sudo badblocks -vn /dev/sda2 -o
После завершения проверки, если были обнаружены битые блоки, надо сообщить о них файловой системе, чтобы она не пыталась писать туда данные. Для этого используйте утилиту fsck и опцию -l:
Если на разделе используется файловая система семейства Ext, например Ext4, то для поиска битых блоков и автоматической регистрации их в файловой системе можно использовать команду e2fsck. Например:
sudo e2fsck -cfpv /dev/sda1
Параметр -с позволяет искать битые блоки и добавлять их в список, -f — проверяет файловую систему, -p — восстанавливает повреждённые данные, а -v выводит всё максимально подробно.
Выводы
В этой статье мы рассмотрели как выполняется проверка диска на битые секторы Linux, чтобы вовремя предусмотреть возможные сбои и не потерять данные. Но на битых секторах проблемы с диском не заканчиваются. Там есть множество параметров стабильности работы, которые можно отслеживать с помощью таблицы SMART. Читайте об этом в статье Проверка диска в Linux.
Источник


