- Как записать GIF с экрана в Linux Mint
- Для чего может потребоваться анимированный скриншот в формате GIF
- Как сделать запись экрана и сохранить в GIF в Linux Mint
- Установка Peek в Linux Mint
- Запись GIF с экрана с помощью программы Peek
- Настройки программы Peek
- Best GIF Recorder Tools for Linux
- Best GIF Recorders for Linux [GUI]
- 1. Peek
- Installation on Ubuntu
- 2. Gifine
- Installation on Ubuntu
- 3. SilentCast
- Installation on Ubuntu
- Best GIF Recorders for Linux [CLI]
- 4. Byzanz
- Installation on Ubuntu
- Linux screen record gif
- Установка
- Установка Peek в Ubuntu Linux
- 9 Best Screen Recorders For Linux
- Best Screen Recorders for Linux
- 1. Kazam
- How To Record Screencast GIFs On Linux
- Install Peek
- Ubuntu
- Debian
- Arch Linux
- Fedora
- Flatpak
- Using Peak
- Record other formats
- Editing GIFs
Как записать GIF с экрана в Linux Mint
Приветствую всех посетителей сайта Info-Comp.ru! В одном из прошлых материалов я рассказывал о том, как можно сделать запись экрана компьютера и сохранить ее в GIF анимацию и тем самым получить анимированное изображение происходящего на экране монитора, иными словами анимированный скриншот. Однако рассматриваемый там способ предназначался для операционной системы Windows, поэтому сегодня я покажу, как можно записать GIF с экрана компьютера в операционной системе Linux Mint.
GIF – формат анимированного изображения, напоминающего короткий видеоролик.
Для чего может потребоваться анимированный скриншот в формате GIF
Если у Вас возникла необходимость объяснить знакомому или родственнику, что нужно сделать на компьютере, например, как изменить настройки той или иной программы или как устранить какую-нибудь проблему, Вы можете сделать запись экрана компьютера и сохранить ее в GIF, и тем самым Вы получите целую мини видео-инструкцию, которая будет иметь размер обычного изображения. Это изображение Вы очень легко сможете отослать знакомому и более наглядно объяснить ему, что необходимо сделать.
Лично мне это требуется для написания различных инструкций, статей, обзоров для своего сайта, чтобы наглядно демонстрировать то, что происходит у меня на компьютере или что конкретно необходимо сделать в той или иной инструкции.
Дело в том, что обычные скриншоты иногда могут не передать пользователю все происходящее в тот или иной момент времени, а записывать отдельное видео для какой-то небольшой детали или нюанса как-то не очень разумно. Поэтому такой скриншот в форме GIF просто незаменим в подобных ситуациях, так как он очень наглядно демонстрирует все то, что необходимо сделать.
Как сделать запись экрана и сохранить в GIF в Linux Mint
Чтобы сделать запись экрана компьютера и сохранить в GIF формат, необходимо использовать специальную программу, в Linux для этих целей есть несколько программ, одной из самых популярных является программа Peek.
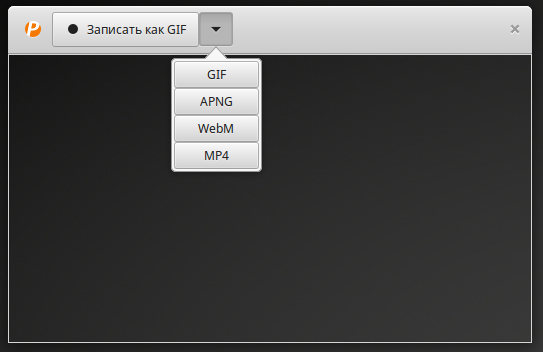
Peek – небольшое приложение для создания коротких скринкастов, которое создает анимацию в формате GIF, APNG, WebM или MP4.
Установка Peek в Linux Mint
Программа Peek в состав дистрибутива Linux Mint не входит, поэтому сначала необходимо установить данную программу.
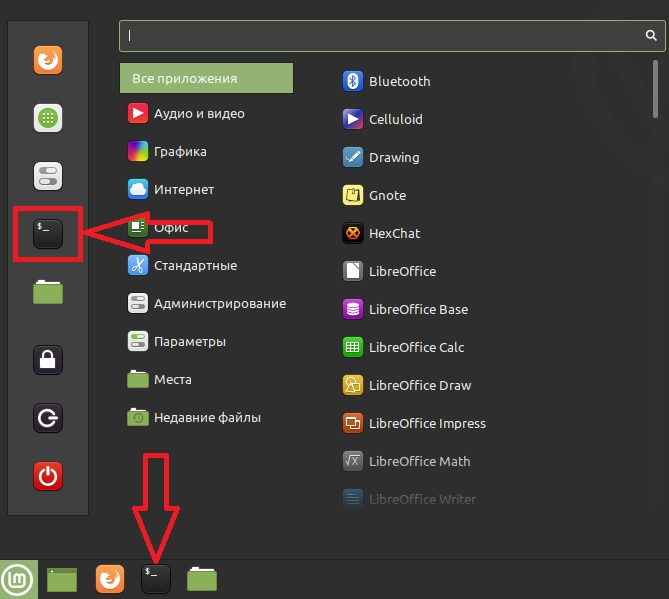
Для этого запускаем терминал Linux любым удобным для Вас способом, например, используя ярлык на панели или из меню Mint.
Затем выполняем следующие команды.
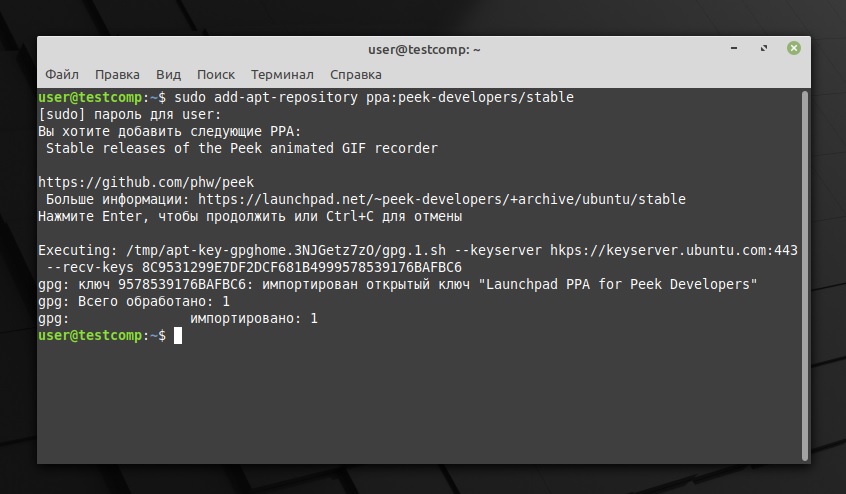
Подключение PPA репозитория
В процессе выполнения команды необходимо будет ввести свой пароль от системы.
Обновление списка пакетов в системе
Установка пакета peek
В процессе установки у Вас спросят: «Хотите продолжить?», вводим «y», т.е. отвечаем Да.
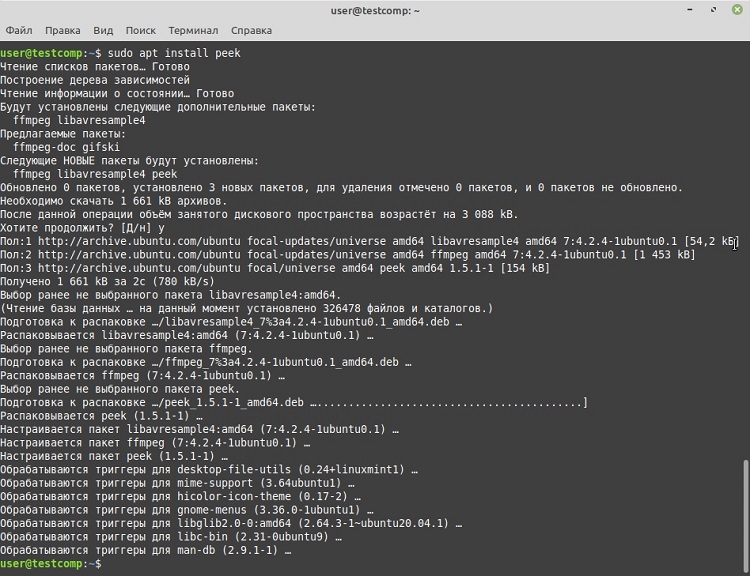
На этом все, установка программы peek завершена, терминал можно закрыть.
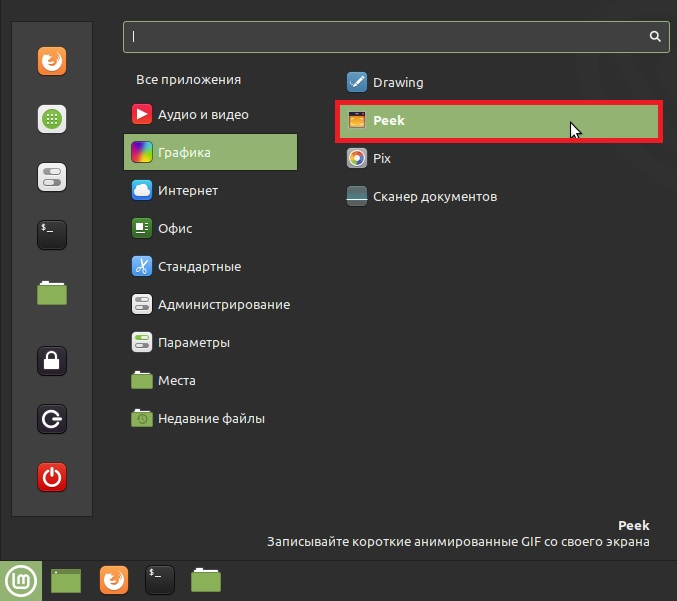
В меню в разделе «Графика» появится ярлык для запуска данной программы.
На заметку! Начинающим пользователям Linux рекомендую почитать книгу «Linux для обычных пользователей» – в ней максимально простым языком рассказывается про основы Linux и как пользоваться этой операционной системой без командной строки.
Запись GIF с экрана с помощью программы Peek
Чтобы сделать запись с экрана и сохранить в GIF с помощью программы Peek, необходимо запустить эту программу. Это можно сделать из меню «Mint -> Графика -> Peek».
Затем необходимо установить размер захвата экрана и нажать кнопку «Записать как GIF».

Для остановки записи необходимо нажать кнопку «Стоп».
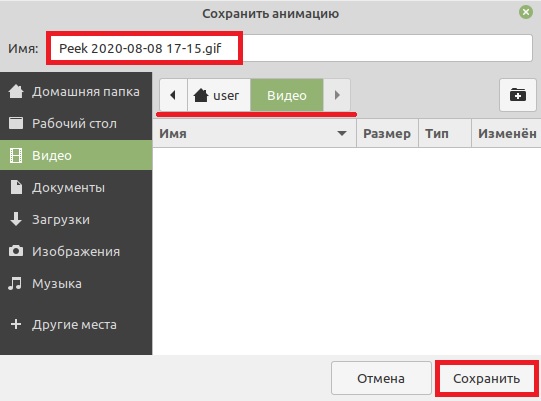
После этого программа предложит Вам сохранить GIF файл, Вы можете задать файлу свое название, а также указать каталог, в который необходимо сохранить файл, по умолчанию предлагается каталог «Видео» в домашней директории.
Для сохранения нажимаем кнопку «Сохранить».
Таким образом мы можем очень легко делать анимированные скриншоты в формате GIF в Linux Mint.
Настройки программы Peek
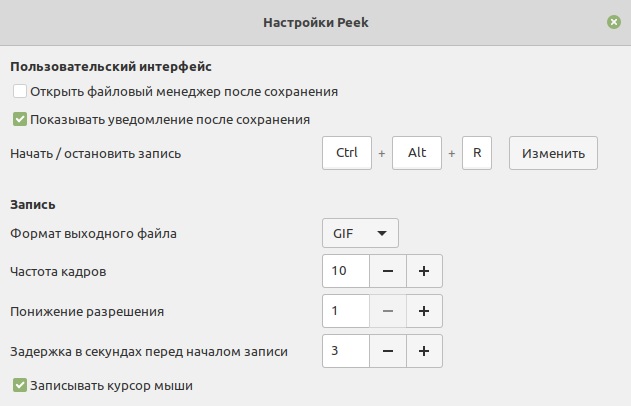
Как было отмечено, Peek – это небольшая программа, предназначенная исключительно для создания коротких скринкастов, поэтому у нее совсем мало настроек, что на самом деле неплохо, так как это делает программу очень простой и легкой.
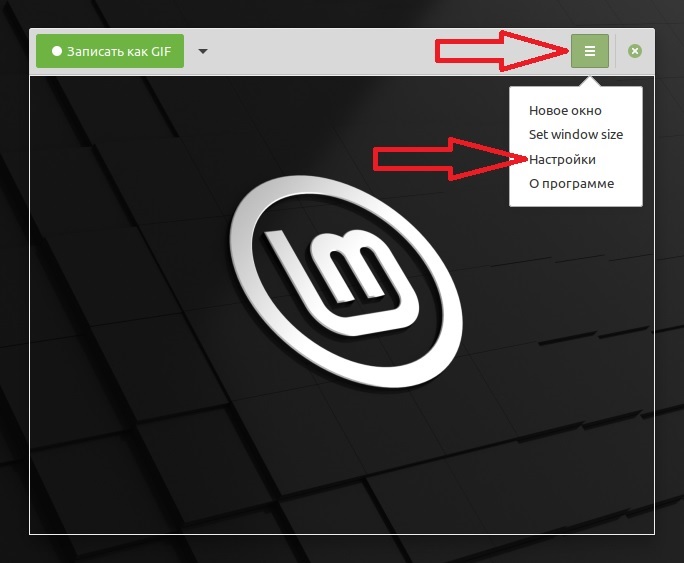
Чтобы открыть окно настроек, зайдите в «Меню -> Настройки».
Вы можете настроить формат записи, который будет использоваться по умолчанию, сочетание клавиш для старта и остановки записи, задержку в секундах перед началом записи и несколько других параметров.
На сегодня это все, надеюсь, материал был Вам полезен, пока!
Источник
Best GIF Recorder Tools for Linux
Last updated January 1, 2020 By Munif Tanjim 16 Comments
Brief: We list the best Linux GIF recorders for Linux in this article and show you how to use these tools to record your screen as GIF in Linux.
When we talk of screen recording tools for Linux, most of us think about video recording. But, for those who don’t know, there also is another way to record your desktop session, that is animated GIF recording.
Now, (Graphics Interchange Format) GIF is a file format that is hugely popular because of its animation support. And it is widely used all over the internet.
Here we are going to see the best GIF screen recorder tools for Linux. They are separated into GUI and CLI sections for convenience.
Best GIF Recorders for Linux [GUI]

Since I use Ubuntu, I have included the installation steps for Ubuntu based Linux distributions. I am sure that Fedora, SUSE and Arch Linux users can find the installation way from their official web pages.
1. Peek
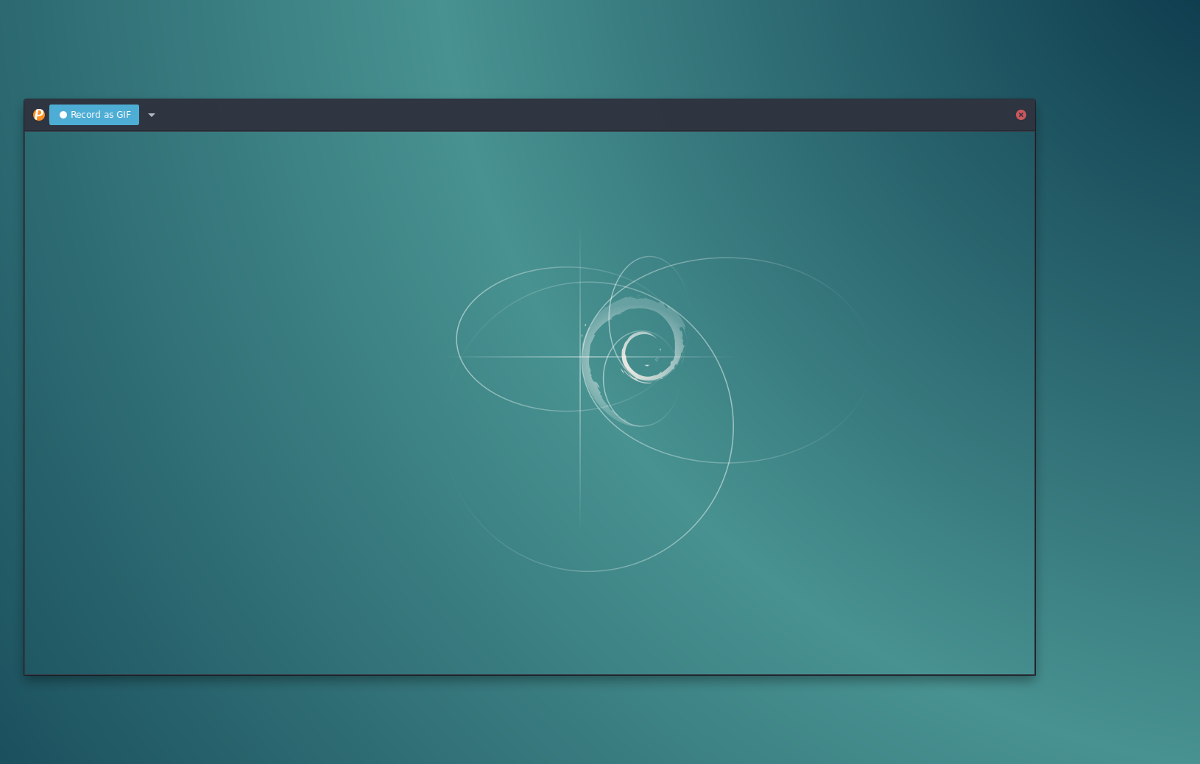
Peek has the most straightforward and intuitive user interface among the GUI GIF recorders. It’s slick in design and simple to use.
Peek User Interface
Pros
- Customizable frame-rate.
- Delay timer support.
- Polished user interface.
Cons
- Limited feature-set.
- No native support for Wayland display server protocol.
Installation on Ubuntu
Peek has its own official PPA. For installing, use the following commands:
And you are ready to go.
2. Gifine
Gifine is a tool for recording and editing GIF animations. It offers many advanced features but has a bit of rough user interface.
Gifine User Interface
Pros
- Built-in editing and trimming support
Cons
- Not so nice and polished user interface as the alternatives.
Installation on Ubuntu
Installing Gifine is not so end-user friendly. First, you have to install various dependencies of Gifine and it’s installer luarocks. And then install Gifine via luarocks. Carefully enter the following commands in a terminal window for installing Gifine on Ubuntu:
Now, you can run Gifine with the command gifine .
3. SilentCast
SilentCast is a very lightweight tool for recording GIF. It might not feel very user-friendly while using, but it does its job quite well.
SilentCast User Interface
Pros
- Lightweight and minimal
Cons
- Not so friendly user-experience
Installation on Ubuntu
You will have to compile SilentCast from source for installing. Enter the following commands to fetch the source, compile and then install it:
That’s all. Now you can start and stop your recording session with the command silentcast .
Best GIF Recorders for Linux [CLI]
4. Byzanz
Byzanz is a simple tool to record a running X desktop as animated GIF. It is part of the GNOME project.
Byzanz CLI Help
Pros
- Super lightweight
- Works flawlessly
Cons
- Being a CLI tool, you have to enter each options manually (meaning, no drag & select screen area for recording)
Installation on Ubuntu
Installing Byzanz on Ubuntu is just one command away:
Now, you can record GIFs using the byzanz-record command.
N.B.: There was also another CLI tool named Kgif on the initial list I made. But sadly, I couldn’t get it to work properly on my system. If you are interested you can give it a try too.
That’s all for today. Which Linux gif recorder do you like the most? Do you know about another one? Let us know what you think in the comment section below. 🙂
Like what you read? Please share it with others.
Источник
Linux screen record gif
Peek — простая программа для записи коротких скринкастов с экрана. Сохраняет результат в анимированные GIF файлы, MP4 и др.
Программа Peek (полное название Peek GIF recorder) предназначена для записи коротких скринкастов с рабочего стола. Это основная задача программы. Peek не «комбайн» для создания профессиональных видео-скринкастов, это небольшая утилита, которая заточена под одну функцию — создать скринкаст выбранной области экрана и сохранить результат без лишних хлопот.
Работать с Peek очень просто, интерфейс выполнен максимально понятно. Пользователю достаточно выбрать область экрана, которую необходимо записать, и нажать кнопку Record. Причем область выбирается интересным способом: не простым выделением мышкой нужной области, а перетаскиванием окна программы, которое представляет собой прозрачный прямоугольник, и изменением размеров этого окна. То есть вы располагаете само окно над той областью, которую хотите записать. Перемещать окно во время записи нельзя.
Результат записи можно сохранить в следующие форматы:
- Анимированный GIF файл
- APNG (Animated Portable Network Graphics)
- WebM
- MP4
Настроек у Peek не очень много, все они размещаются на одном окне, среди них: записывать курсор мыши, выбрать формат выходного файла, установить частоту кадров, степень сжатия (понижение разрешения), задержку в секундах перед началом записи, настроить сочетание клавиш для старта или остановки записи.
Установка
Установка Peek в Ubuntu Linux
Для установки программы в Ubuntu Linux можно использовать официальный PPA-репозиторий. Для установки выполните в терминале последовательно следующие команды:
Запустить программу можно через главное меню в разделе Графика или через командную строку, выполнив:
Источник
9 Best Screen Recorders For Linux
Last updated May 7, 2020 By Munif Tanjim 88 Comments
Brief: In this article, we’ll list the best screen recorders for Linux. This list also includes software that lets you record your Linux desktop as a gif .
Often we need to record our desktop screen for various purposes, like broadcasting gaming sessions online, making video tutorials, etc. Today, we’re going to present some screen recording applications for Linux.
In this list, you will find options to
- Record screen as a video
- Recording screen as gif as well
All the software mentioned here is free and open-source (FOSS). You could actually call it a list of free screen recorders, in fact.

Before we see the list of the best screen recorders, I would like to mention asciinema. It’s a desktop tool that lets you record your terminal session and upload it to its website. You can grab the URL and send it to friends. The best thing is that the commands in the recorded terminal session can be copied. That will help a lot if you used a lot of commands – there’s no need to enter them manually.
So, if you just wanted to record your terminal screen, asciinema should do a fine job.
Note: The list below is in no particular order of ranking. I’ve mostly mentioned installation instructions for Ubuntu but this doesn’t make it a list of Ubuntu screen recorders – most of the applications mentioned are available in the official repositories of other distributions.
Best Screen Recorders for Linux
1. Kazam
Kazam is a minimal and nifty tool for screencasting. It includes screenshot support too. Kazam is most suitable for beginners and for getting the task done quickly without getting too caught up in different options.
Источник
How To Record Screencast GIFs On Linux
Mar 19, 2018
Comment
Looking to record GIFs on Linux? With the Peek recording tool, users can easily capture their screen and encode it directly to the GIF image format. Before using this tool, you’ll need to install it on your Linux PC. There are many different ways to install this software on Linux. Go through and select the instructions that pertain to your specific operating system.
SPOILER ALERT: Scroll down and watch the video tutorial at the end of this article.
Install Peek
Ubuntu
Peek isn’t available in the traditional software sources for Ubuntu. As a result, users won’t be able to see it in the Ubuntu software store right away. To fix this, just add the official Peek PPA. Open up a terminal, and enter these commands.
After adding the PPA to the system, you’ll need to refresh Ubuntu’s software sources.
With the software sources up to date, use this command to install the software. Alternatively, open up the Ubuntu software center, search for “Peek” and install it.
Debian
Using Peek on Debian means making your own installable Deb package. To do this, start out by installing all of the required dependencies to the system.
Note: you may need to repeat this process each time an update to the source code is available.
Everything needed to build Peek as a Debian package is now on your PC. Use the commands below to start making the app.
Following these steps correctly should generate an installable Deb package. Install it on your Debian PC with:
Arch Linux
Peek is readily available on Arch Linux via the AUR. To get the latest version, grab the PKGBUILD with Git.
Now that you’ve got the package built use makepkg to generate an installable Arch package. Be sure to use the makepkg command with -si to ensure that all required dependencies are installed. Also, using these flags during build process makes installing the package more accessible. You won’t need to specify the exact package, as makepkg -si will automatically install it.
Fedora
Grab Peek for Fedora, by following these steps. First, enable the RPM Fusion Free software repository.
Note: Change X with your version of Fedora.
Then, enable the Peek Copr repository.
Lastly, install the software on Fedora using the DNF package manager.
Flatpak
If you’re looking to use the Peak GIF recording tool, but don’t see an option to install it on your operating system, consider using the Flatpak version. Much like the packaged versions of this tool, it still has access to recording everything on the X desktop. To install it, be sure that you’ve already got the latest version of Flatpak on your Linux PC, and enabled. Don’t have Flatpak? Check out our guide here!
When everything is up and running, install the Peek Flatpak.
Run Peek by browsing for it in your applications, or with the following command:
Using Peak
To record a GIF with Peek, open it up. When it’s open, use the mouse to scale the Peek app window to fit the part of the screen you’d like to record. From here, click the “record” button. Peek will instantly start recording the item on your screen in the GIF format. When you’re finished recording, click the “stop” button. Upon pressing stop, you’ll be prompted to save your new GIF somewhere. Use the file-browse dialog to find where you’d like to save.
Record other formats
Peek’s main draw is to record screen activity on the Linux desktop as an animated GIF file. That said, if you need to record a quick video, it is possible. Officially, in addition to GIF, the software supports APNG, WebM, and MP4. To record in any of these formats, click the arrow button next to “record as GIF” and select your preferred format.
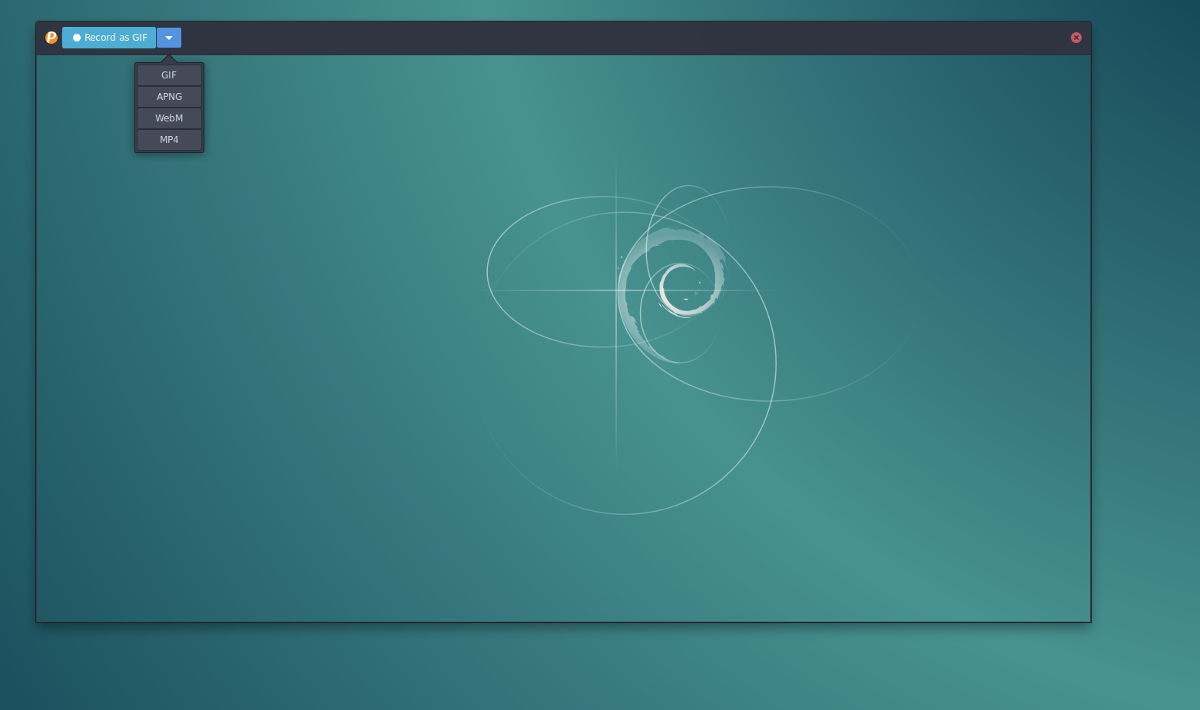
Note: to record in MP4 and other formats, you’ll need to have FFPMEG, as well as Gstreamer, installed. Get both of these tools by opening up your operating system’s package management tool, and search for “gstreamer” and “FFmpeg”.
Editing GIFs
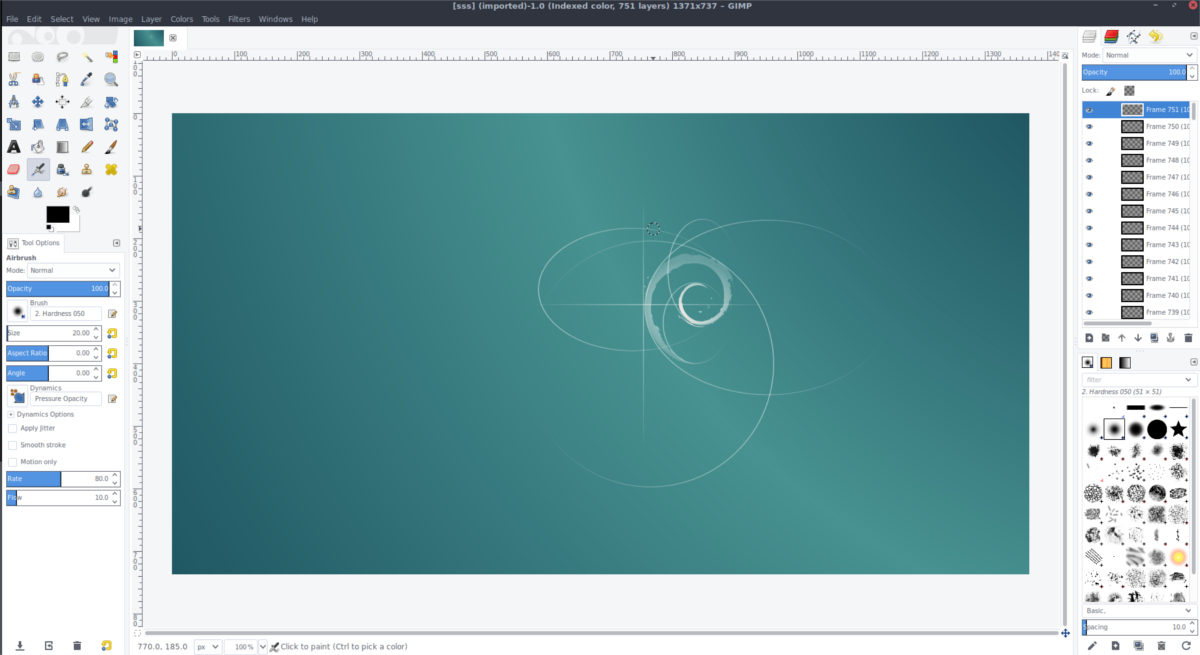
Need to edit the GIF image files you’ve recorded? Consider installing the GIMP image editing tool. You can easily import recorded GIFs, and edit each frame as an individual layer. The GIMP image tool is perfect for editing these types of images. To install the Gimp image editor, open your software center, and search for “gimp”. Alternatively, head over to their website and click the download button to get it running on your favorite Linux distribution.
Источник


