Запуск python скрипта в Linux
Python — очень популярный язык программирования для написания различных системных скриптов в Linux. В Windows, там где не хватает возможностей командной оболочки используется PowerShell. В Linux же, когда возможностей Bash не хватает используется язык Python.
На этом языке написано огромное количество системных программ, среди них пакетный менеджер apt, видеоредактор OpenShot, а также множество скриптов, которые вы можете установить с помощью утилиты pip. В этой небольшой статье мы рассмотрим как запустить Python скрипт в Linux с помощью терминала различными способами.
Запуск python скрипта в Linux
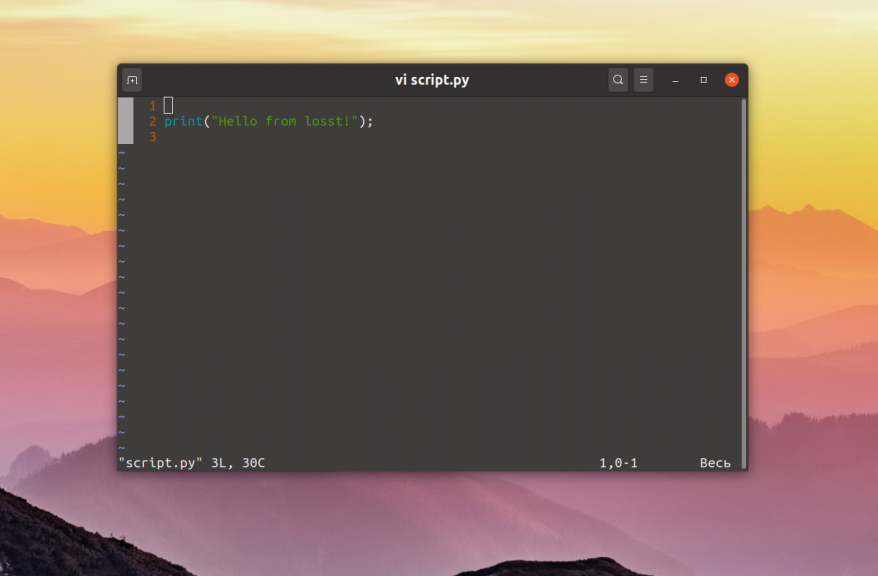
Для примера нам понадобится Python скрипт. Чтобы не брать какой-либо из существующих скриптов, давайте напишем свой:
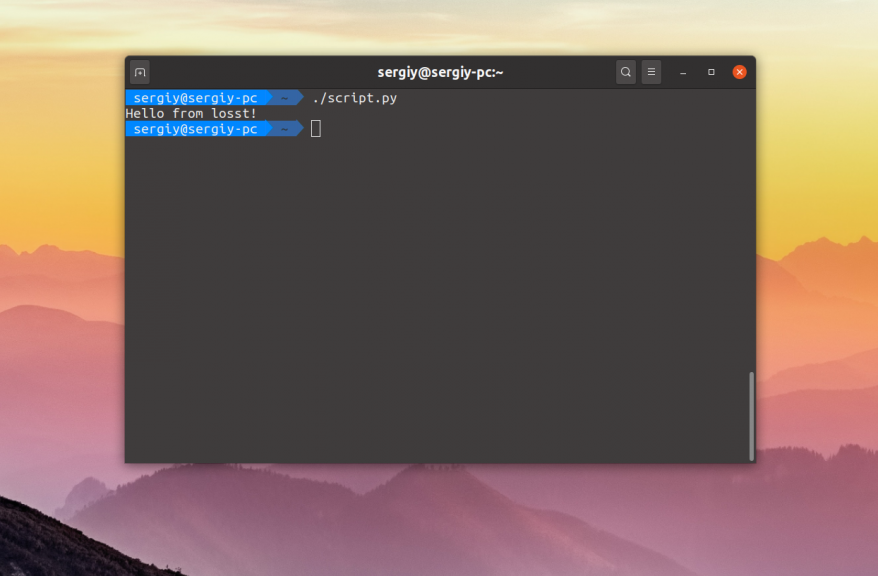
print(«Hello from losst!»)
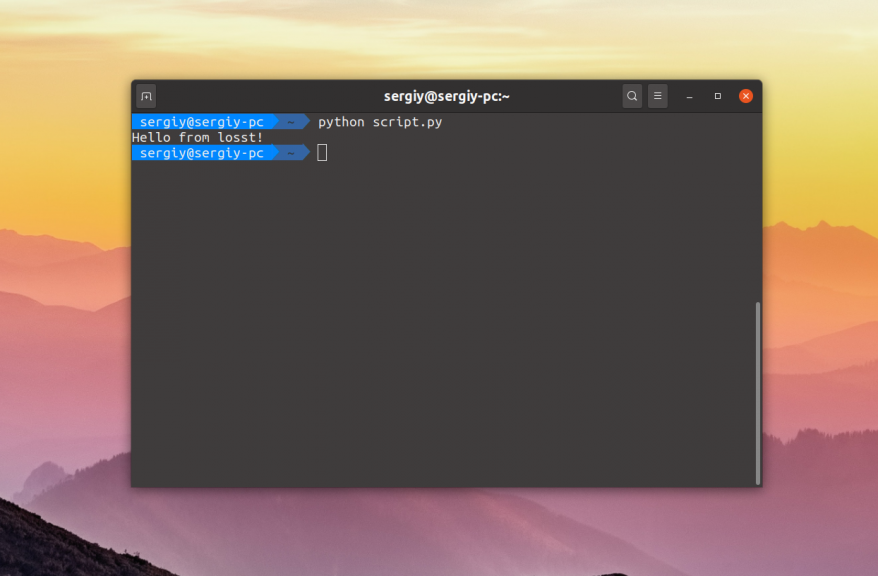
Для того чтобы запустить скрипт необходимо передать его интерпретатору Python. Для этого просто откройте терминал с помощью сочетания клавиш Ctrl + Alt + T, перейдите в папку со скриптом и выполните:
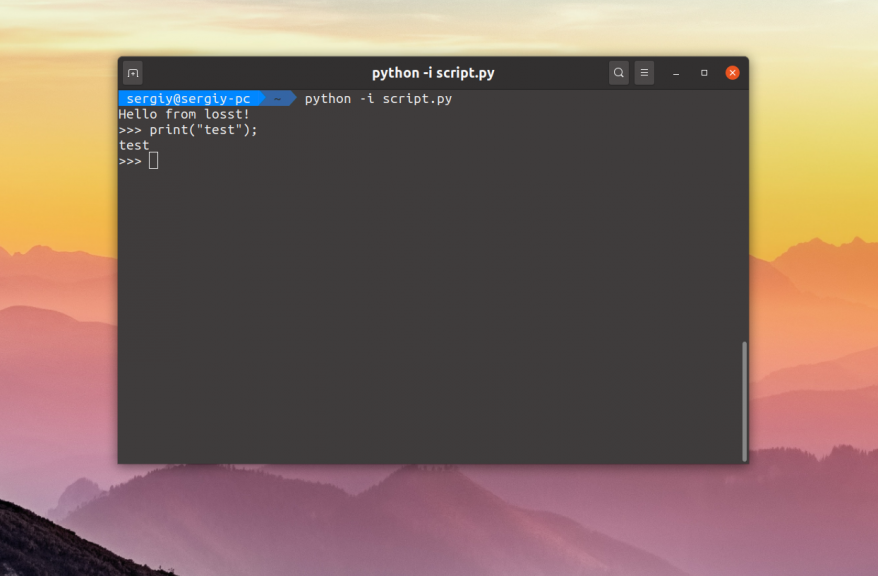
Если вы хотите, чтобы после выполнения скрипта открылась консоль, в которой можно интерактивно выполнять команды языка Python используйте опцию -i:
python -i script.py
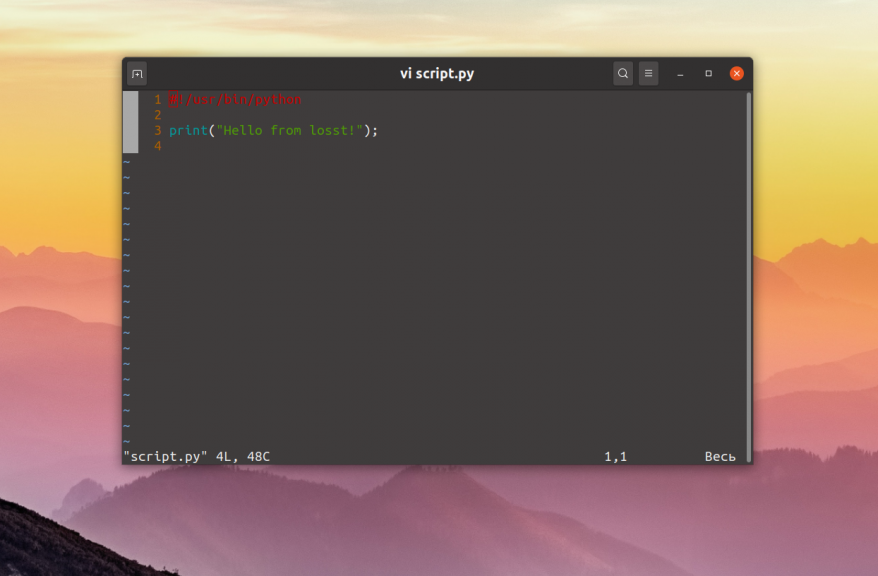
Но как вы могли заметить, при запуске apt или openshot не надо писать слово python. Это намного удобнее. Давайте разберемся как это реализовать. Если вы не хотите указывать интерпретатор в командной строке, его надо указать в самом скрипте. Для этого следует в начало скрипта добавить такую строчку:
Сохраните изменения, а затем сделайте файл скрипта исполняемым с помощью такой команды:
chmod ugo+x script.py
После этого можно запустить скрипт Python просто обращаясь к его файлу:
Если убрать расширение .py и переместить скрипт в каталог, находящийся в переменной PATH, например /usr/bin/, то его можно будет выполнять вот так:
Как видите, запуск команды python Linux выполняется довольно просто и для этого даже есть несколько способов. А каким способом пользуетесь вы? Напишите в комментариях!
Источник
Разработка надёжных Python-скриптов
Python — это язык программирования, который отлично подходит для разработки самостоятельных скриптов. Для того чтобы добиться с помощью подобного скрипта желаемого результата, нужно написать несколько десятков или сотен строк кода. А после того, как дело сделано, можно просто забыть о написанном коде и перейти к решению следующей задачи.
Если, скажем, через полгода после того, как был написан некий «одноразовый» скрипт, кто-то спросит его автора о том, почему этот скрипт даёт сбои, об этом может не знать и автор скрипта. Происходит подобное из-за того, что к такому скрипту не была написана документация, из-за использования параметров, жёстко заданных в коде, из-за того, что скрипт ничего не логирует в ходе работы, и из-за отсутствия тестов, которые позволили бы быстро понять причину проблемы.
При этом надо отметить, что превратить скрипт, написанный на скорую руку, в нечто гораздо более качественное, не так уж и сложно. А именно, такой скрипт довольно легко превратить в надёжный и понятный код, которым удобно пользоваться, в код, который просто поддерживать как его автору, так и другим программистам.
Автор материала, перевод которого мы сегодня публикуем, собирается продемонстрировать подобное «превращение» на примере классической задачи «Fizz Buzz Test». Эта задача заключается в том, чтобы вывести список чисел от 1 до 100, заменив некоторые из них особыми строками. Так, если число кратно 3 — вместо него нужно вывести строку Fizz , если число кратно 5 — строку Buzz , а если соблюдаются оба этих условия — FizzBuzz .
Исходный код
Вот исходный код Python-скрипта, который позволяет решить задачу:
Поговорим о том, как его улучшить.
Документация
Я считаю, что полезно писать документацию до написания кода. Это упрощает работу и помогает не затягивать создание документации до бесконечности. Документацию к скрипту можно поместить в его верхнюю часть. Например, она может выглядеть так:
В первой строке даётся краткое описание цели скрипта. В оставшихся абзацах содержатся дополнительные сведения о том, что именно делает скрипт.
Аргументы командной строки
Следующей задачей по улучшению скрипта станет замена значений, жёстко заданных в коде, на документированные значения, передаваемые скрипту через аргументы командной строки. Реализовать это можно с использованием модуля argparse. В нашем примере мы предлагаем пользователю указать диапазон чисел и указать значения для «fizz» и «buzz», используемые при проверке чисел из указанного диапазона.
Эти изменения приносят скрипту огромную пользу. А именно, параметры теперь надлежащим образом документированы, выяснить их предназначение можно с помощью флага —help . Более того, по соответствующей команде выводится и документация, которую мы написали в предыдущем разделе:
Модуль argparse — это весьма мощный инструмент. Если вы с ним не знакомы — вам полезно будет просмотреть документацию по нему. Мне, в частности, нравятся его возможности по определению подкоманд и групп аргументов.
Логирование
Если оснастить скрипт возможностями по выводу некоей информации в ходе его выполнения — это окажется приятным дополнением к его функционалу. Для этой цели хорошо подходит модуль logging. Для начала опишем объект, реализующий логирование:
Затем сделаем так, чтобы подробностью сведений, выводимых при логировании, можно было бы управлять. Так, команда logger.debug() должна выводить что-то только в том случае, если скрипт запускают с ключом —debug . Если же скрипт запускают с ключом —silent — скрипт не должен выводить ничего кроме сообщений об исключениях. Для реализации этих возможностей добавим в parse_args() следующий код:
Добавим в код проекта следующую функцию для настройки логирования:
Основной код скрипта при этом изменится так:
Если скрипт планируется запускать без прямого участия пользователя, например, с помощью crontab , можно сделать так, чтобы его вывод поступал бы в syslog :
В нашем небольшом скрипте неоправданно большим кажется подобный объём кода, нужный только для того, чтобы воспользоваться командой logger.debug() . Но в реальных скриптах этот код уже таким не покажется и на первый план выйдет польза от него, заключающаяся в том, что с его помощью пользователи смогут узнавать о ходе решения задачи.
Тесты
Модульные тесты — это полезнейшее средство для проверки того, ведёт ли себя приложения так, как нужно. В скриптах модульные тесты используют нечасто, но их включение в скрипты значительно улучшает надёжность кода. Преобразуем код, находящийся внутри цикла, в функцию, и опишем несколько интерактивных примеров её использования в её документации:
Проверить правильность работы функции можно с помощью pytest :
Для того чтобы всё это заработало, нужно, чтобы после имени скрипта шло бы расширение .py . Мне не нравится добавлять расширения к именам скриптов: язык — это лишь техническая деталь, которую не нужно демонстрировать пользователю. Однако возникает такое ощущение, что оснащение имени скрипта расширением — это самый простой способ позволить системам для запуска тестов, вроде pytest , находить тесты, включённые в код.
В случае возникновения ошибки pytest выведет сообщение, указывающее на расположение соответствующего кода и на суть проблемы:
Модульные тесты можно писать и в виде обычного кода. Представим, что нам нужно протестировать следующую функцию:
В конце скрипта добавим следующие модульные тесты, использующие возможности pytest по использованию параметризованных тестовых функций:
Обратите внимание на то, что, так как код скрипта завершается вызовом sys.exit() , при его обычном вызове тесты выполняться не будут. Благодаря этому pytest для запуска скрипта не нужен.
Тестовая функция будет вызвана по одному разу для каждой группы параметров. Сущность args используется в качестве входных данных для функции parse_args() . Благодаря этому механизму мы получаем то, что нужно передать функции main() . Сущность expected сравнивается с тем, что выдаёт main() . Вот что сообщит нам pytest в том случае, если всё работает так, как ожидается:
Если произойдёт ошибка — pytest даст полезные сведения о том, что случилось:
В эти выходные данные включён и вывод команды logger.debug() . Это — ещё одна веская причина для использования в скриптах механизмов логирования. Если вы хотите узнать подробности о замечательных возможностях pytest — взгляните на этот материал.
Итоги
Сделать Python-скрипты надёжнее можно, выполнив следующие четыре шага:
- Оснастить скрипт документацией, размещаемой в верхней части файла.
- Использовать модуль argparse для документирования параметров, с которыми можно вызывать скрипт.
- Использовать модуль logging для вывода сведений о процессе работы скрипта.
- Написать модульные тесты.
Вот полный код рассмотренного здесь примера. Вы можете использовать его в качестве шаблона для собственных скриптов.
Вокруг этого материала развернулись интересные обсуждения — найти их можно здесь и здесь. Аудитория, как кажется, хорошо восприняла рекомендации по документации и по аргументам командной строки, а вот то, что касается логирования и тестов, показалось некоторым читателям «пальбой из пушки по воробьям». Вот материал, который был написан в ответ на данную статью.
Уважаемые читатели! Планируете ли вы применять рекомендации по написанию Python-скриптов, данные в этой публикации?
Источник
Python3 Scripting (Part 1?)
DevynCJohnson
Guest
Aloha! Many Linux users know at least some shell scripting due to its importance. However, many users are not aware of the importance of Python scripting in Linux. True, shell scripting is more important than Python scripting, but Python is a very useful scripting tool in Linux. This is a general tutorial for Python3. If I see that this tutorial gets at least 5,000 views in one week from posting, I receive many emails/posts requesting that I write a whole series, and/or you click «Contact Us» on the very bottom of this page and comment on how much you love this or all of my articles (remember to mention my name) and want more tutorials about Python3, then I will write a complete (or near complete) Python scripting guide on this website.
NOTE: This tutorial (or series) will discuss Python3 not Python version 2. Version 2 and 3 are very similar. However, they differ in some areas such as available modules and syntax structure. I will solely focus on Python3. The terms “Python3” and “Python” will be used interchangeably.
Python3 is a very powerful scripting language. It is almost as simple as shell scripting, but yet as powerful as C/C++ (or nearly so). Python can be compiled to bytecode or converted to C/C++ and then compiled. Python is very popular especially among Open Source Software fans. The plain text or compiled (bytecode) scripts are read by the Python interpreter and then executed. The script must have the executable bit set (set the permissions to allow the script to execute).
To start writing a script, make a file with a name and end the filename with «.py», if you wish. It is not required that you do so. However, if you are making a script that you place in the system’s PATH and wish to use the script in Unix shells like a command, do not add the extension. Otherwise, to use the command, the user would be typing «COMMAND.py» instead of «COMMAND».
Open the empty file in your preferred text editor or IDE. On the first line, type
This is called a hashpling. It allows the system to identify the file as a Python script and tells the system what interpreter to use for execution. Specifically, the hashpling tells the system to use «env» to find the Python3 interpreter. Some developers use this hashpling (incorrect; do not use) —
However, if the interpreter is not installed here, then the script will not work. Also, do not specify specific Python3 versions as seen below unless you have a valid reason for doing so.
On the second line, type
This is not required, but is recommended by the PEP standards. This line declares the encoding for the script to be UTF-8. In your text editor or IDE, the options or document settings should allow you to set the file encoding to UTF-8. Adding this line will not set the encoding for your file unless you are using a very fancy IDE.
Figure 1: Example of an IDE. This particular IDE is Geany. The code seen is the core source code of Nova (one of the four Betabots).
On the following lines, many developers include general information about the script like what it does, who made it, and such. The most important line among these comments is the license information. When making these comments (characters that the interpreter/compiler ignore), place a «#» at the beginning of the line like below —
If your script is licensed under the GPL license or some other license (like Apache or BSD), you must include the required license statement required by the license of your choice. By the way, if you are wondering how to license your work under GPLv2 or GPLv3, you just paste the appropriate license statement in your script that you legitimately own or have the right to license. Also, read about the license you wish to use. Their are special licenses for library files, .so/.dll files, applications, documentation, etc.
NOTE TO FANS: If you would like to read an article about the different license and why they would be chosen and other various information, post/email me stating an interest in such an article. If I feel there are enough people wanting such an article, then I will write it and then post it on Linux.org. It may be a 2-5 weeks before you would see it though.
Comments have other uses in programming. They can be used to give a message to future/current developers, make notes, temporarily disable certain lines of code, or explain the use of certain code.
Once you are ready for the actual code writing, you may start by writing a function. A function is a set of code that performs a particular task. Functions can be used as commands. When a function is defined, the name of the function can be used to execute that set of commands. In Python3, start the line with «def» meaning «define». Then include the function’s name followed by two parenthesis «()» and a colon «:» which states the function’s code follows.
NOTE: Be careful what you name a function. For example, Python has a «print()» command, so do not name a function «print()».
Yes, the code may look advanced, but I hope to soon explain everything clearly in possible future tutorials. Notice the comment that provides a note. This lets you know the function is used like the «cat» command in Unix shells. In the script, the function will be called by typing «cat(FILE_NAME)» and all of the commands listed in the function’s definition will be executed as if you typed all of that later in the script. Generally, functions are used for repetitive tasks and/or to organize the code. Functions save time since now to open a file, you only need to type «cat(OPEN_FILE)» instead of the complete function. In the function, you may be wondering about the «openfile» in parenthesis. This is a variable that equals the text placed in parenthesis when the function is called — «cat(‘./file’)». So, here, the file «./file» will be opened and the contents will be used (not removed). In the function’s definition, the variable «openfile» is used in the function since it contains the name of the file to open. I will discuss functions more in possible future tutorials.
Variables store data. For example, when a file is opened with our function, we will save the file’s contents to a variable. Notice below that the file’s name is the function’s parameter. The single quotes are used to declare that this is a string. If the name of a file and its path are stored in a variable and the variable is used as a parameter, then do not put quotes around the variable’s name. Otherwise, Python’s interpreter will think the parameter is the string «SOMEFILE» rather than the variable’s contents «./other/file.txt».
In many Python manuals and tutorials, objects are mentioned. In Python, an object may be a variable, function, class, or some other group of data with its own memory address. For example, the cat() function I made above is an object, the variable created in the function (lines), and the variable created in the parameter (openfile) are all three objects.
In Python, commands have a few different structures as seen and explained below. Notice that all commands have parenthesis even if no parameters exist for the command.
print() — The print command is very simple. Place a variable or a string (in single quotes) within the parenthesis.
».join() — The join command takes an string or a variable and joins all of the separate units together separate by the character or object in the single quotes. The example below demonstrates what I am saying.
math.pi() — This command «pi()» is part of the «math» library. To use «math.pi()», you must import the math library (discussed next). «math.pi()» acts like a variable rather then a command. This command does not perform an action. Rather, it supplies the value of pi.
To use commands from a library, the library must be imported. Many of you may wonder why all of the libraries are not already imported. This is for performance and memory usage reasons. Some libraries are very large. Importing many large libraries can consume a lot of memory and reduce start-up time. The easiest way to import a library is by typing «import LIB_NAME», so to import the math module, we would type «import math». If there is only one command you want from a library, then you can import the single command this way
Otherwise, using the regular «import math» would make such code look like this
You could also import like this
Combining these ideas works as seen below
All of the above import examples work to provide the «cos()» command. However, when using the «from» command, the other math commands cannot be used, but memory is saved. Be careful about how you import. By this, I mean, do not try «from math import cos as print» because that will cause conflicts with Python’s native «print()» command. You may be wondering how a developer would know of such an accidentally conflict. Over time, developers know Python well. As for newbies, your IDE or debugging tools may help. Also, testing your code often can help. If all else fails, look it up on the Internet.
Python is case-sensitive, so the variable «DATA», «data», and «Data» are all three different valid variables. Generally, developers write variables in one case and function names in another, but this is personal preference. It is best to choose what case-form to use to variables. For instance, when writing a large program, a developer will not want to have a constant problem of wondering whether the variable is “DATA” or “Data”. Make a standard for your project especially if it is a team project.
A class can best be explained as a function of functions. Classes can be used to sort functions into groups. So, all functions that pertain to the graphics of a program could be placed in a «graphics» class or what ever you wish to name it. So, the function that defines the help window would be called by typing «graphics.helpwin()».
Notice that in the function and class examples that the code is indented. This is required in Python3. All code belonging to a class, function, loops, and other constructs are indented. Python does not have statements that indicate where a function, class, or loop end. As a result, the indentation is used. After a function is defined, the next line will be indented less by one tab or space. If a void-line/newline/empty-line is after a construct, do not use any indents on the line, but still remember to use less indentation on the following lines with text. Whether you use spaces or tabs for indentation, that is your choice. However, you can only choose one and that must be used throughout the script. Space and tab indentations cannot be mixed and matched within a script or on the same line. The PEP standards recommend spaces, but some developers prefer using tabs. Again, it is your choice. However, some debugging tools may inform/warn you about the tabs although there is no valid error.
Here is a sample script used in Novabot (an SI project lead by this author). This is not the complete script. The point of this sample is to help you understand the indentation concept. The ellipses show that code was cut out at that point. Notice that the indentation does not apply to comments since the interpreter ignores them.
Источник
