- 3 CLI Image Viewers To Display Images In The Terminal
- 1. Display Images In the Terminal Using FIM
- Install FIM
- FIM Usage
- 2. Display Images In the Terminal Using Viu
- Install Viu
- Viu usage
- 3. Display Images In the Terminal Using Lsix
- How Do I Display an Image in a Linux Terminal?
- How to display images in terminal through FIM
- How to display images in terminal using ImageMagick
- How to view images from Linux terminal
- 1) Viewing images from terminal using display command
- 1.a) How to Install ImageMagick?
- 1.b) Viewing images with display command
- 2) How to display images from the terminal using fim command
- 2.a) Installing fim in Ubuntu/Debain
- 2.b) Viewing images with fim
- Closing Notes
3 CLI Image Viewers To Display Images In The Terminal
There are plenty of GUI applications available to view images in Linux. But I haven’t used any CLI applications yet which displays pictures in the Terminal itself. To my luck, I found 3 CLI image viewers to display images in Terminal itself. These applications could be useful for those who wants to use CLI alternatives for GUI apps and who live in Terminal mostly.
1. Display Images In the Terminal Using FIM
FIM stands for Fbi IMproved. For those who don’t know, Fbi is a linux framebuffer imageviewer. It uses the system’s framebuffer to display images directly from the command line. By default, it displays bmp, gif, jpeg, PhotoCD, png, ppm, tiff, and xwd from the Terminal itself. For other formats, it will try to use ImageMagick’s convert. The FIM utility draw my attention, because it is very lightweight compared to most GUI picture viewer applications.
FIM is based on Fbi and it is a highly customizable and scriptable image viewer targeted at the users who are comfortable with software like the Vim text editor or the Mutt mail user agent. It displays the images in full screen and the images can be controlled (such as resize, flip, zoom) using keyboard shortcuts. Unlike fbi, the FIM utility is universal. It can open many file formats and it can display pictures in the following video modes:
- Graphically, with the Linux framebuffer device.
- Graphically, under X/Xorg, using the SDL library.
- Graphically, under X/Xorg, using the Imlib2 library.
- Rendered as ASCII Art in any textual console, using the AAlib library.
FIM is completely free and open source.
Install FIM
The FIM image viewer is available in the default repositories of DEB-based systems such as Ubuntu, Linux Mint. So, you can install fbi using command:
If it is not available in the default repositories of your Linux distribution, you can download, compile and install from source as described in the section titled «Download and build instructions» in official documentation page.
FIM Usage
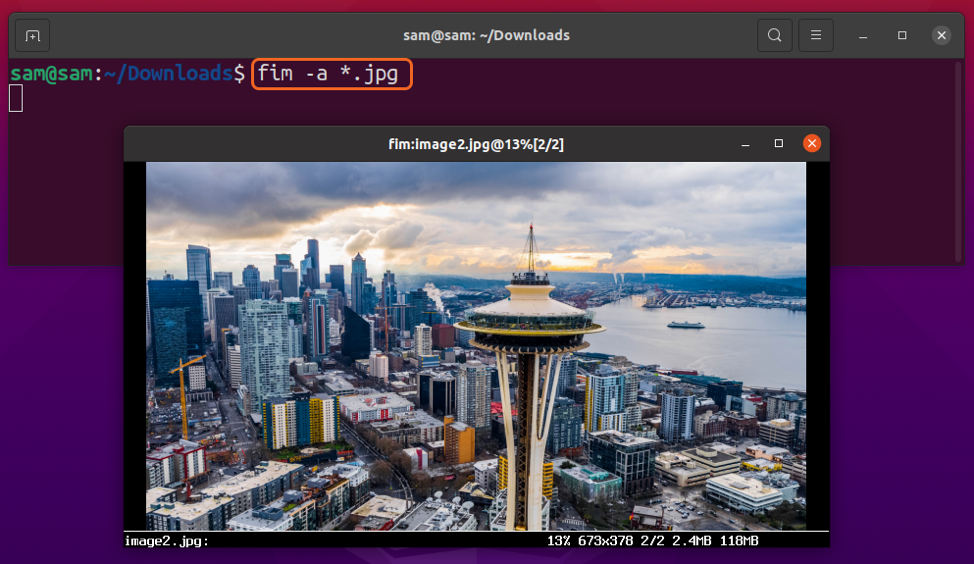
Once installed, you can display an image with «auto zoom» option using command:
Here is the sample output from my Ubuntu box.
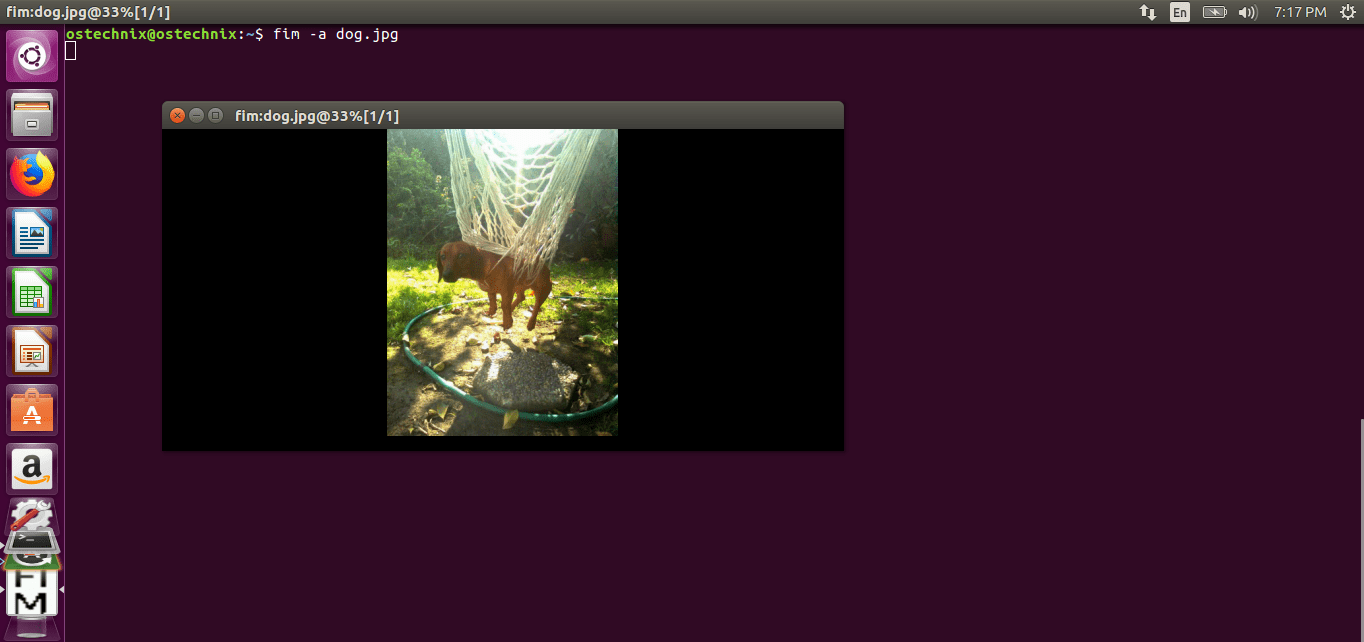
Display Images In the Terminal Using Fim
As you can see in the above screenshot, FIM didn’t use any external GUI picture viewers. Instead, it uses our system’s framebuffer to display the image.
If you have multiple .jpg files in the current directory, you could use wildcard to open all of them as shown below.
To open all images in a directory, for example Pictures, run:
We can also open the images recursively in a folder and its sub-folder and then sorting the list like below.
To render the image in ASCII format, you can use -t flag.
To quit Fim, press ESC or q.
Keyboard shortcuts
You can use various keyboard shortcuts to manage the images. For example, to load next image and previous images, press PgUp/PgDown keys. Ton Zoom in or out, use +/- keys. Here is the common keys used to control images in FIM.
- PageUp/Down : Prev/Next image
- +/- : Zoom in/out
- a : Autoscale
- w : Fit to width
- h : Fit to height
- j/k : Pan down/up
- f/m : flip/mirror
- r/R : Rotate (Clock wise and ant-clock wise)
- ESC/q : Quit
For complete details, refer man pages.
2. Display Images In the Terminal Using Viu
Viu is yet another command line application to view images from the Terminal. It is free, open source CLI image viewer written using Rust programming language. Using Viu we can;
- Display popular type of image, including .jpg, .png, igif etc.
- Display images in custom dimensions.
- Display images directly from the image hosting platforms, for example giphy.
Install Viu
Since Viu is written in Rust, we can install it using Cargo package manager. After installing Rust in your Linux box, run the following command to install Viu.
On Arch Linux and its derivatives, It can be installed from AUR using any AUR helper programs like Yay.
Viu is also available as per-compiled binary. Download the latest binary from the releases page. As of writing this, the latest version was 0.2.1.
After downloading the Viu binary file, make it executable:
And, move it to your path, for example /usr/local/bin.
Viu usage
Viu usage is trivial. Just type viu followed by the image path and hit ENTER key.
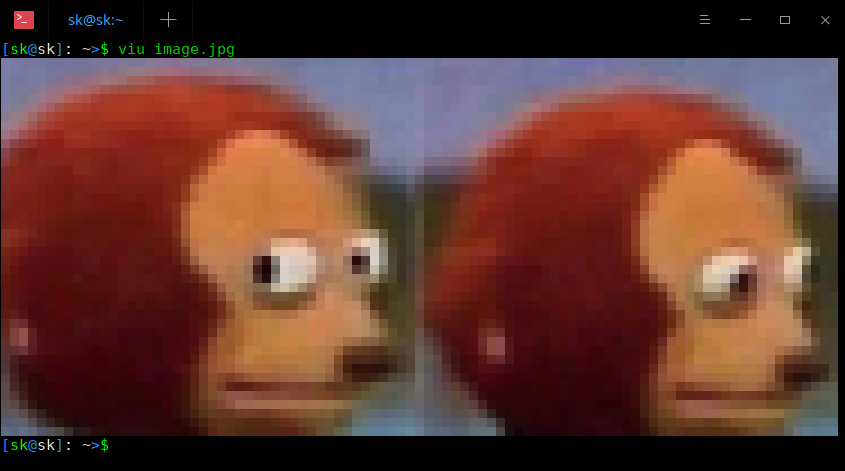
Display Images In the Terminal Using Viu
You can even display custom dimension image using -h (Height) or -w (Width) flags like below.
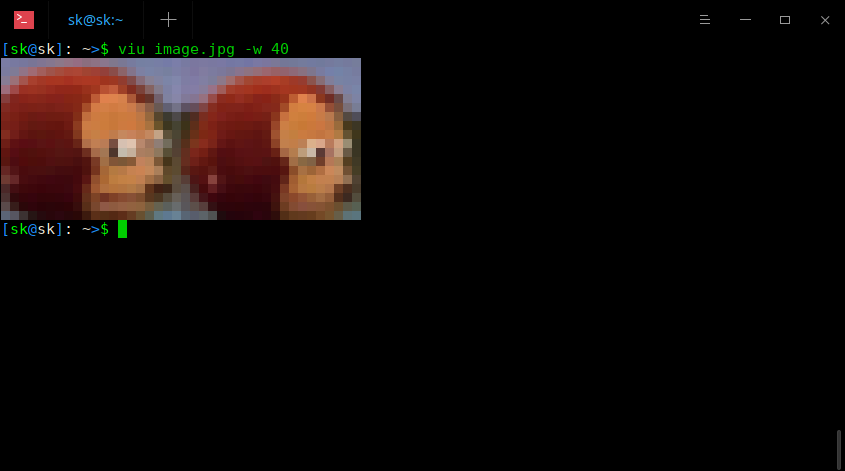
Display custom size image using Viu
To display multiple images one after another in a folder, use wildcard characters like below.
Like I already mentioned, Viu is capable of displaying different format images. For example, the following command will display the gif image using Viu:
Display animated images
To exit, just press CTRL+C.
It is also possible to display the image hosting sites, for example Giphy, in Terminal like below.
For more details about Viu, refer the help section by typing the command:
3. Display Images In the Terminal Using Lsix
Unlike the previous two image viewers, Lsix will only display thumbnails in Terminal. It is like ‘ls’ command in Unix-like systems, but for images only. Lsix is a simple BASH script to view thumbnail images in Terminal using Sixel graphics. For more details about this script, please click the following link.
And, that’s all for now. If you use/know any other CLI image viewers, please mention them in the comment section below. I will check and update the guide.
Источник
How Do I Display an Image in a Linux Terminal?
There are various GUI-based applications in Linux distributions to view images, but many Linux users prefer to work with the terminal. This guide is going to mention few techniques to display images in the terminal. These methods would be quite helpful for those who are searching for CLI (Command Line Interface) based applications to view images. So, let’s begin:
How to display images in terminal through FIM
The first method to view pictures in the terminal is FIM, an open-source, highly customizable image viewer application. FIM represents Fbi IMproved, and Fbi is “frame buffer image viewer” in Linux. FIM is lightweight compared to many GUI-based applications and comes with various shortcut keys to control images. Common file formats FIM supports are jpeg, png, gif, ppm, tiff, and xwd. To install it, use the commands mentioned below:
For Ubuntu and Debian based distros, FIM can be installed using:
The syntax to display image in terminal is:
Now, to display the image in the terminal, use:

To display all the images of the same extension, use:
The keyboard shortcuts to control image are listed below:
- Image Navigation : PageUp & PageDown or “Enter”
- Zoom : +\-
- Autoscale: a
- Fitting width and height: w\h
- Flip: f
- Mirror: m
- Rotate (clockwise) : r
- Rotate (anti-clockwise) : R
- To quit FIM, press the “Esc” or “q” key.
How to display images in terminal using ImageMagick
Most Linux users are aware of the “ImageMagic” utility. It is a lightweight application to manipulate images of hundreds of formats, including jpeg, png, gif, pdf, svg, etc. It can even convert the images from one format to another.
But many of us don’t know that there is a command associated with this app called the “display” command. Using the “display” command, you can view the image in the terminal. To install it, use the below-mentioned commands:
Источник
How to view images from Linux terminal
Linux has many GUI applications for viewing images. But have you ever tried a CLI application to view them or do you know if one exists?
Fortunately, while working with the ImageMagick tool I stumbled upon a command to view an image from the terminal.
The command name is “display”, which is part of the ImageMagick tool. This is a great tool that allows NIX users to view images from the terminal.
Also, I got another great tool called FIM for this purpose. We will show you how to install and use it to view images from the Linux terminal.
These commands use the system’s framebuffer to display images directly from the command line.
1) Viewing images from terminal using display command
ImageMagick is a free and open source, feature-rich, command-line based image manipulation tool. It is used to create, edit, compose, or convert bitmap images.
It can read and write images in a variety of formats (over 200) including PNG, JPEG, GIF, PDF, SVG, etc.
It can resize, mirror, rotate, transform images, adjust image colors, apply various special effects, etc. It also supports batch process, which allow you to process several images at once.
1.a) How to Install ImageMagick?
The ImageMagick package is included in the official repository of most Linux distributions. Use the distribution package manager to install it.
Make a note: Make sure you already have “Development Tools” installed on your Linux system as a prerequisite for this.
For RHEL/CentOS 6/7 systems, use the yum command to install ImageMagick:
For RHEL/CentOS 8 and Fedora systems, use the dnf command to install ImageMagick:
For Debian/Ubuntu systems, use the apt command or apt-get command to install ImageMagick:
For openSUSE systems, use the zypper command to install ImageMagick:
1.b) Viewing images with display command
To view any image file, run the ‘display’ command as follows. You can close the image by pressing the «Esc/q» button.

If you want to open an image with the specified size of the window, use the «-geometry» flag:
You can also input position information of the image with the ‘display’ command. The below command opens your image ‘800’ pixels from the top and ‘800’ pixels from the top left corner of your desktop:
If you want to ‘resize’ the image with the display command, use the following format.
Alternatively, you can use ‘%’ to resize the image:
2) How to display images from the terminal using fim command
FIM is a lightweight global image viewer designed specifically for Linux. But it is not limited to Linux and can be configured to run on other OS such as MS-Windows.
It is highly customizable and scriptable image viewer for users who are familiar with software’s like the VIM text editor.
It displays the image in full screen and can be easily controlled using the keyboard shortcuts. It’s a lightweight tool as it only depends on a few libraries.
It can open many file formats and can display images in the following video modes:
- Graphically, with the Linux framebuffer device
- Graphically, under X/Xorg, using the SDL library
- Graphically, under X/Xorg, using the Imlib2 library
- Rendered as ASCII Art in any textual console, using the AAlib library
The right video mode gets auto-detected or selected at runtime, and may be opted in/out before build at configure time, if desired. FIM stands for Fbi IMproved, which is the fork of the Fbi Image viewer.
2.a) Installing fim in Ubuntu/Debain
FIM can be easily installed on Debian/Ubuntu based systems as the package is available in the distribution official repository. For other distributions, you may need to compile it from the source.
2.b) Viewing images with fim
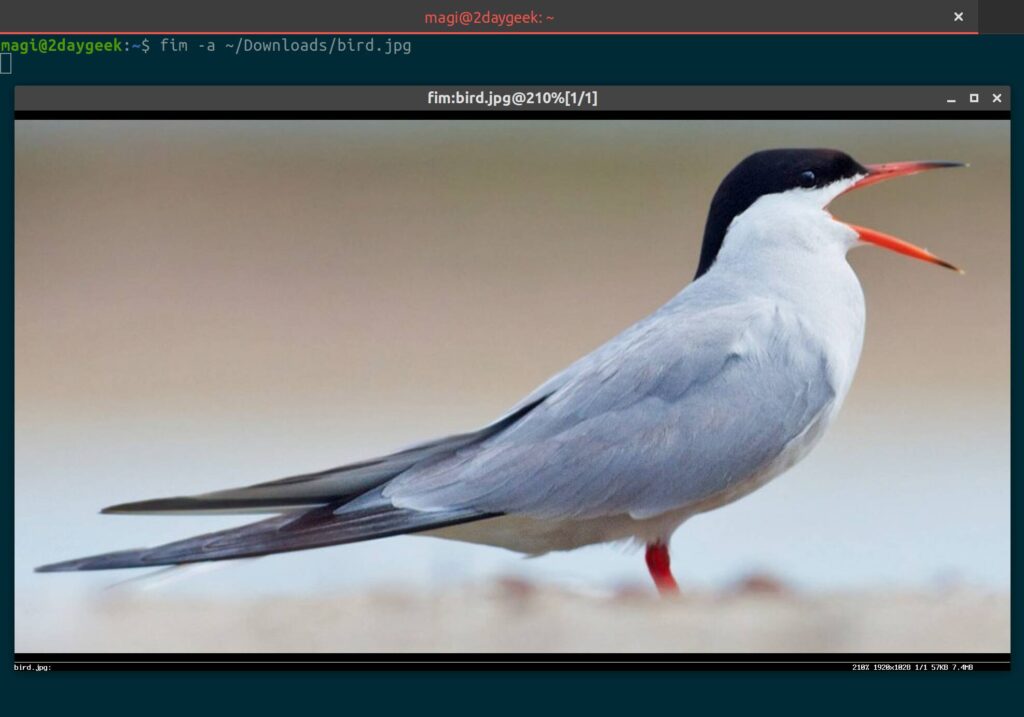
Once installed, you can display an image using the following command:
You can automatically zoom an image using the «-a» option:
If you want to open multiple image files in the current directory, use the wildcard to open them all. Use the “Pageup/Down” keyboard shortcuts to move to the next or previous image:
To view the image in ASCII format, you can use the “-t” flag:
The below keyboard shortcuts allow you to control the images:
- PageUp/Down : Prev/Next image
- +/- : Zoom in/out
- a : Autoscale
- w : Fit to width
- ESC/q : Quit
Closing Notes
In this article, we have explained various CLI commands that can be used to view images on a Linux terminal.
If you have any questions or feedback, feel free to comment below and we will get back to you as soon as we can. Happy Learning!
Источник


