- Linux user installing browser
- About
- How to install Command Line Browser in Linux
- To install Command Line Browser in Linux
- Links
- Links2
- Elinks
- Netrik
- InDevices.ru
- 5 сверхлёгких веб-браузеров для Linux
- от admin
- GNOME Web
- NetSurf
- QupZilla
- Браузер выдры
- How to Easily Install Tor Browser in Ubuntu and Other Linux
- Installing Tor browser in Ubuntu and other Debian based distributions
- Uninstall Tor browser
- Removing Tor browser
- A few tips for using the Tor Browser
- 1. Check if you are properly connected to the Tor Network
- 2. Avoid using the browser maximized
- 3. Choose your security level
- 4. Change a few browsing habits
- 5. Stay away from illegal sites
- 6. Understand Tor Circuits
- 7. Use Onion services
Linux user installing browser
linux-browser-installer is a Bourne shell script to install Linux versions of the Chrome, Brave or Vivaldi browsers under FreeBSD into a Linux (Ubuntu Focal) chroot. They allow you to use web services like Netflix, Prime Video, or Spotify which require Widevine. The script is based on the excellent Howto by @patovm04.
If not defined otherwise, Ubuntu Focal ( $ubuntu_version ) is installed under /compat/ubuntu ( $chroot_path ). A modified version of FreeBSD’s linux rc-script ( rc.d/ubuntu ) is used to start the linuxulator, and to mount the chroot’s filesystems.
FreeBSD 12.2-RELEASE or 13-CURRENT
You can’t run different Linux chroots at the same time. If you want to run CentOS-based applications under /compat/linux , you have to set sysctl compat.linux.emul_path=/compat/linux , and start the linux rc-script ( service linux onestart ). Depending on which chroot you intend to use by default, set either (not both) linux_enable=»YES» or ubuntu_enable=»YES» in /etc/rc.conf .
Install Chrome, Brave or Vivaldi browser
If the chroot is not existing yet, it will be created first.
Run /usr/local/bin/linux-chrome , /usr/local/bin/linux-brave or /usr/local/bin/linux-vivaldi to start your installed browser.
Deinstall Chrome, Brave or Vivaldi browser
This command deinstalls the browser, and removes its wrapper scripts from /usr/local/bin and $chroot_path/bin along with its desktop file.
Upgrade software installed in the chroot
Before deleting the entire chroot under $chroot_path , this command unmounts all the chroot’s filesystems, deletes the rc script, and removes its variable(s) from /etc/rc.conf .
Note: Symlinks to files outside the chroot will not work when chroot ‘ing.
This command updates the symlinks from $prefix/share/icons to $chroot_path/usr/share/icons . Use this after installing new icons to make them available to applications in the chroot.
This command updates the symlinks from $prefix/share/themes to $chroot_path/usr/share/themes . Use this after installing new themes to make them available to applications in the chroot.
Delete working files from current directory
About
Script to install Linux browsers under a Linux chroot on FreeBSD
Источник
How to install Command Line Browser in Linux
To install Command Line Browser in Linux
Web browser is used to surf the internet, mostly we are using the GUI based browsers. Operating systems like Linux supports browsers in command line mode also. Installation of command line browsers is explained in this manual.
Links
To install Links
Utilise the following command to install Links package .
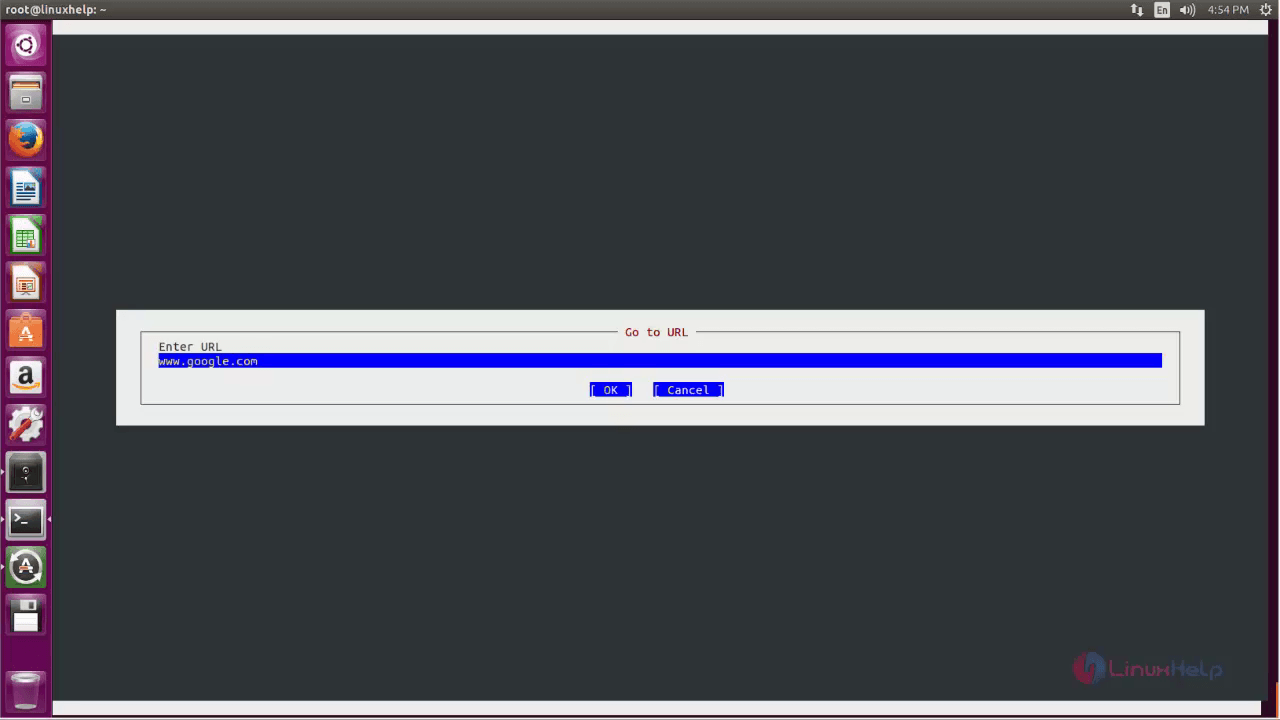
To Launch Links
Run the following command to open the links.
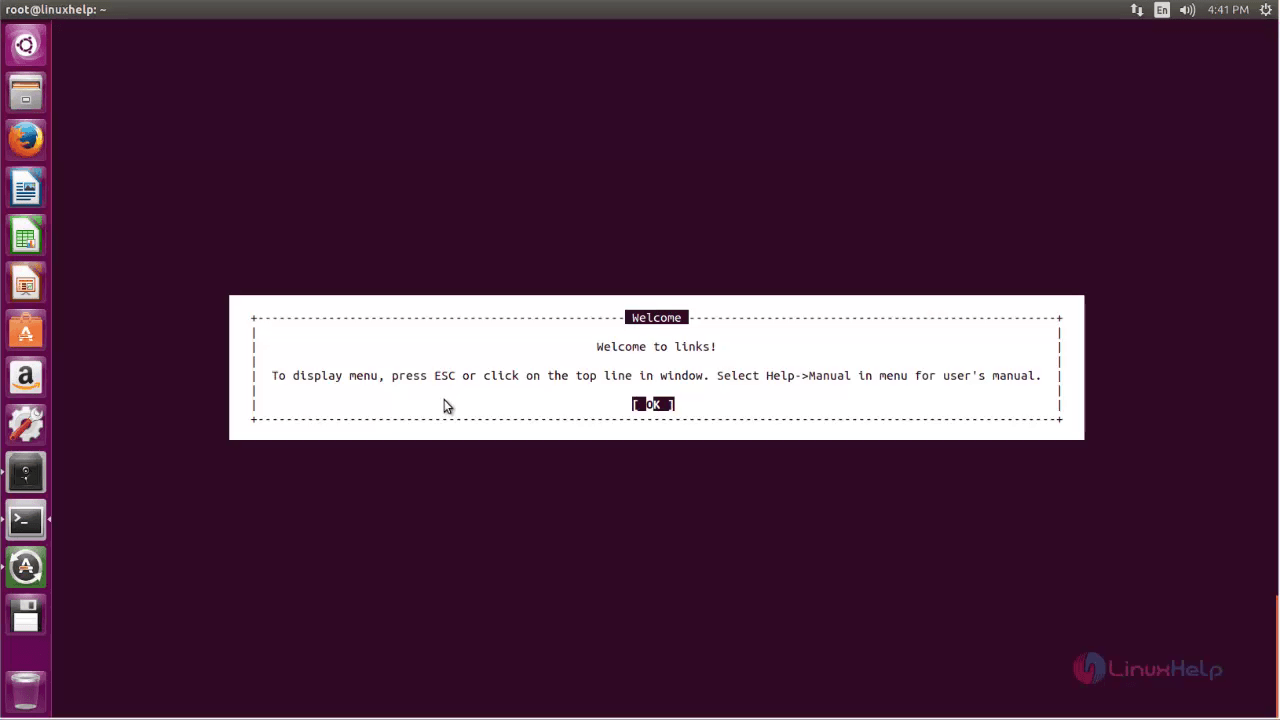
Press “ Esc ” Choose File -> Go to URL . 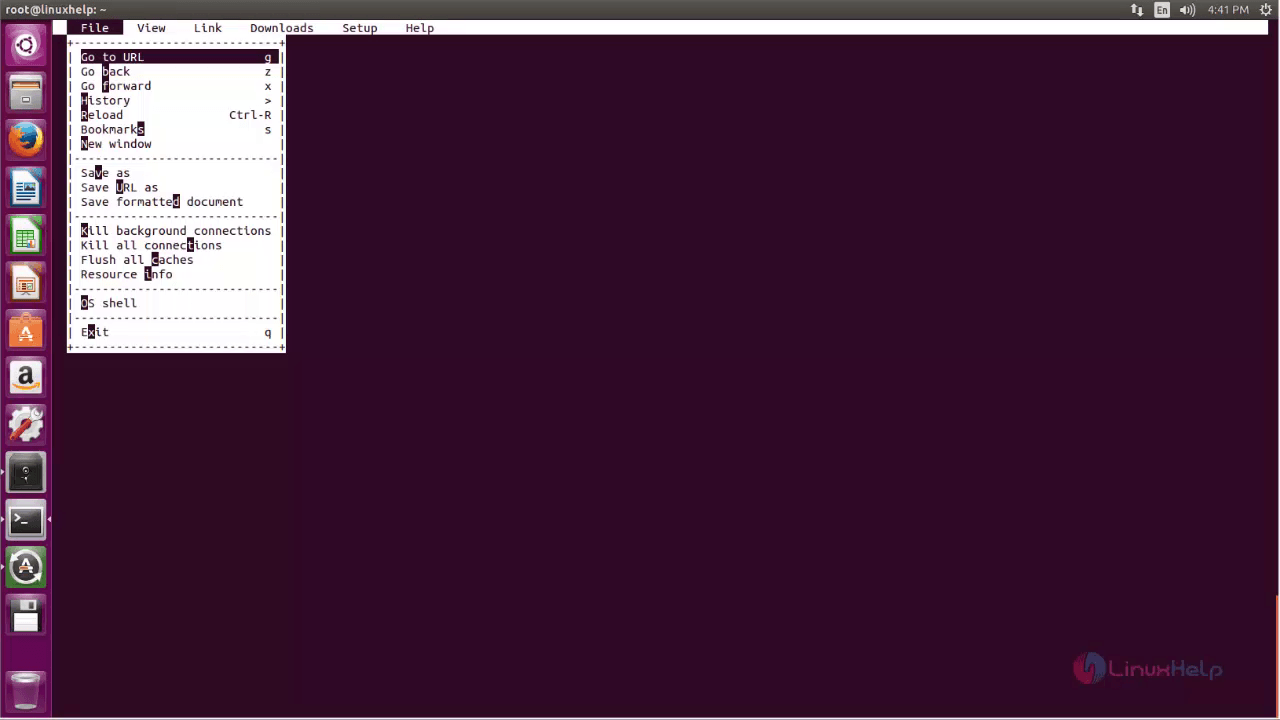
Type the URL . 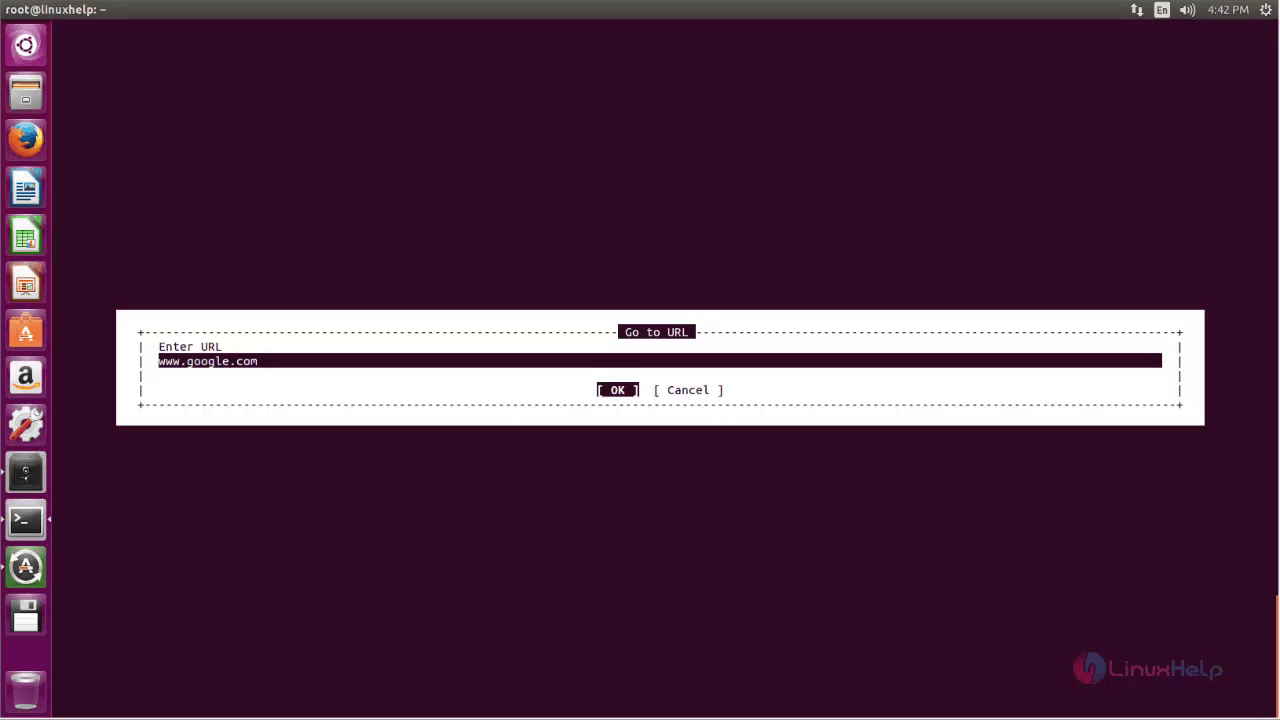
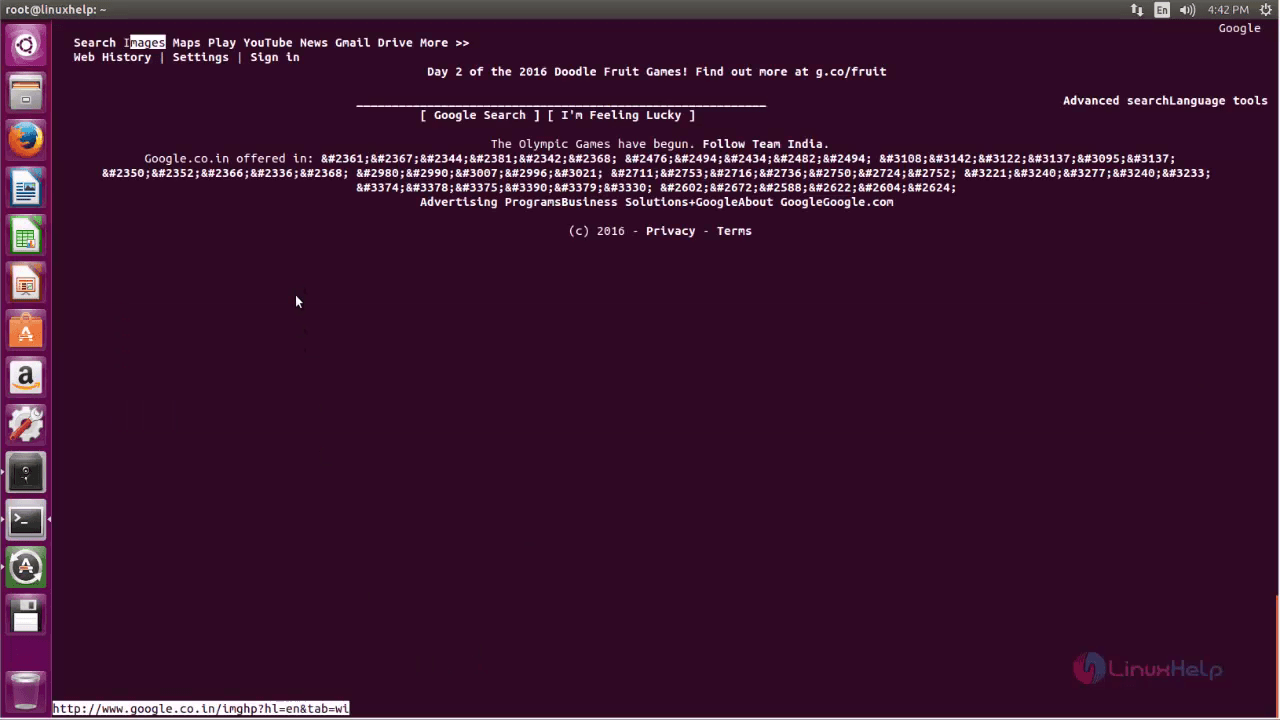
Press “ q ” to quit 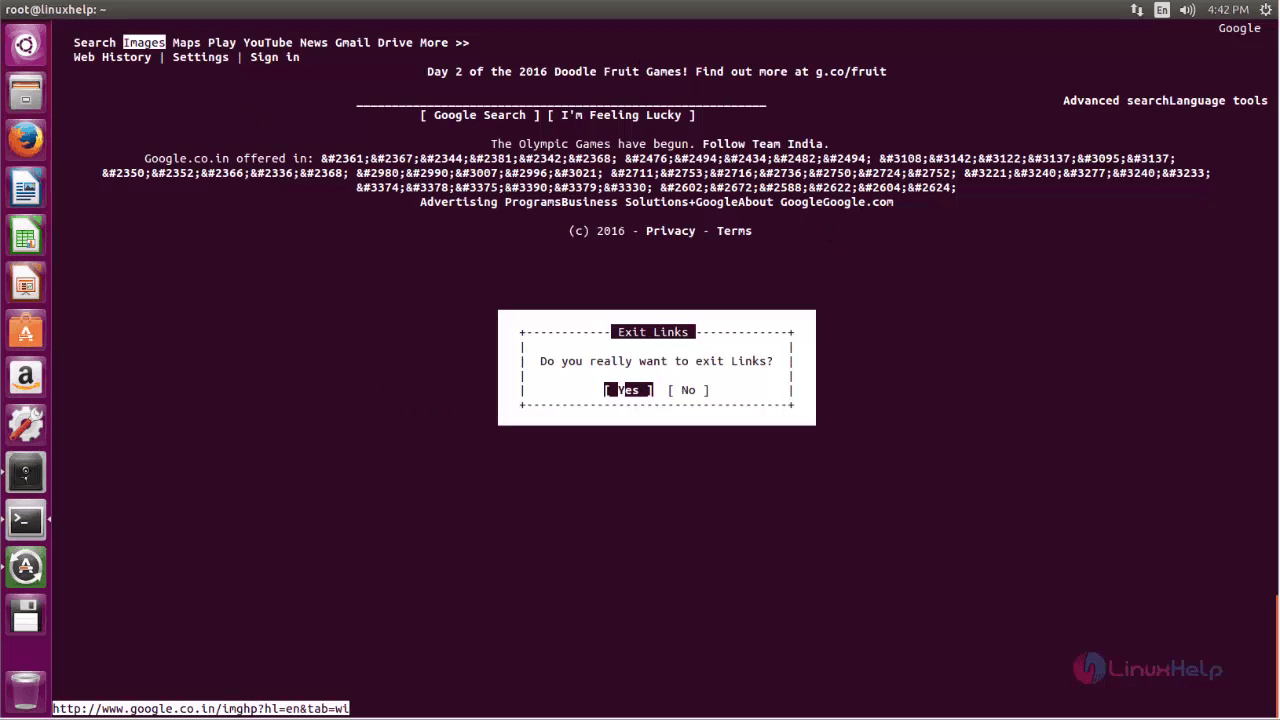
Links2
To install Links2
Utilise the below command to install Links2 package.
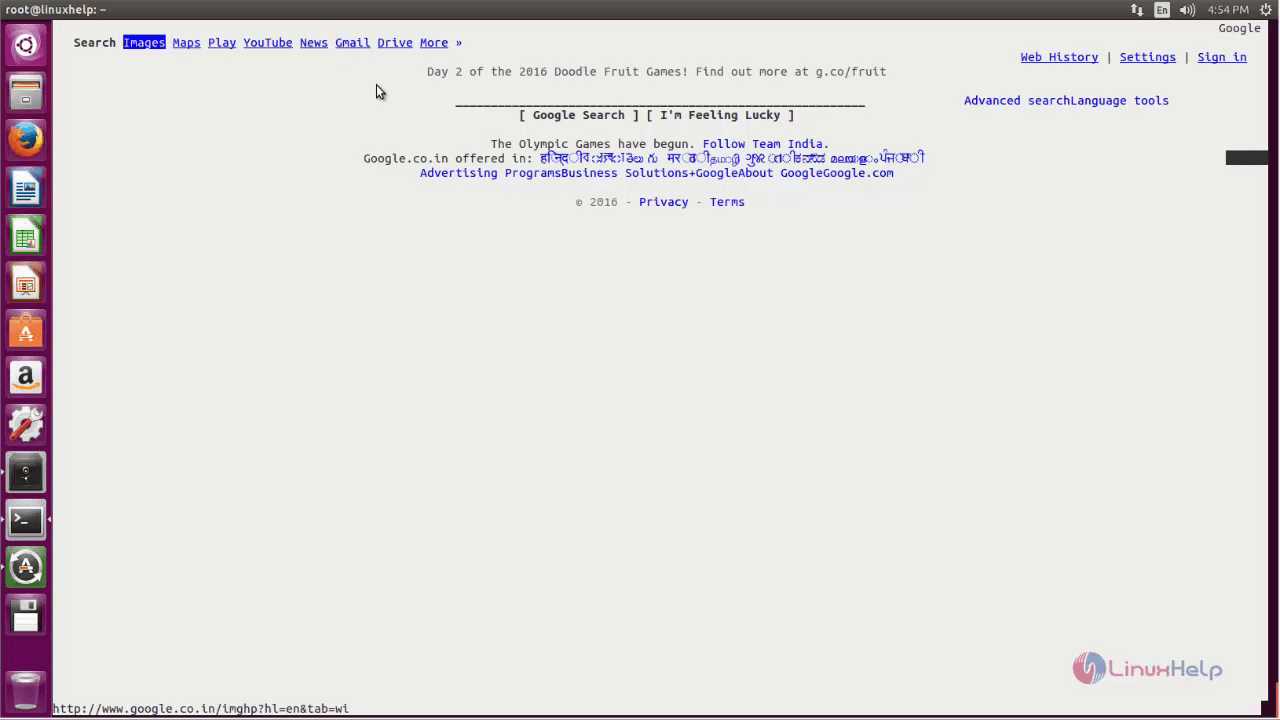
To Launch Links2
Run the following command to open the Links2 browser.

Press “ Esc ” Choose File -> Go to URL . 
Type the URL . 

Press “ q ” to quit 
To install Lynx
Utilise the following command to install Lynx package.
To Launch Lynx
Run the following command to open lynx
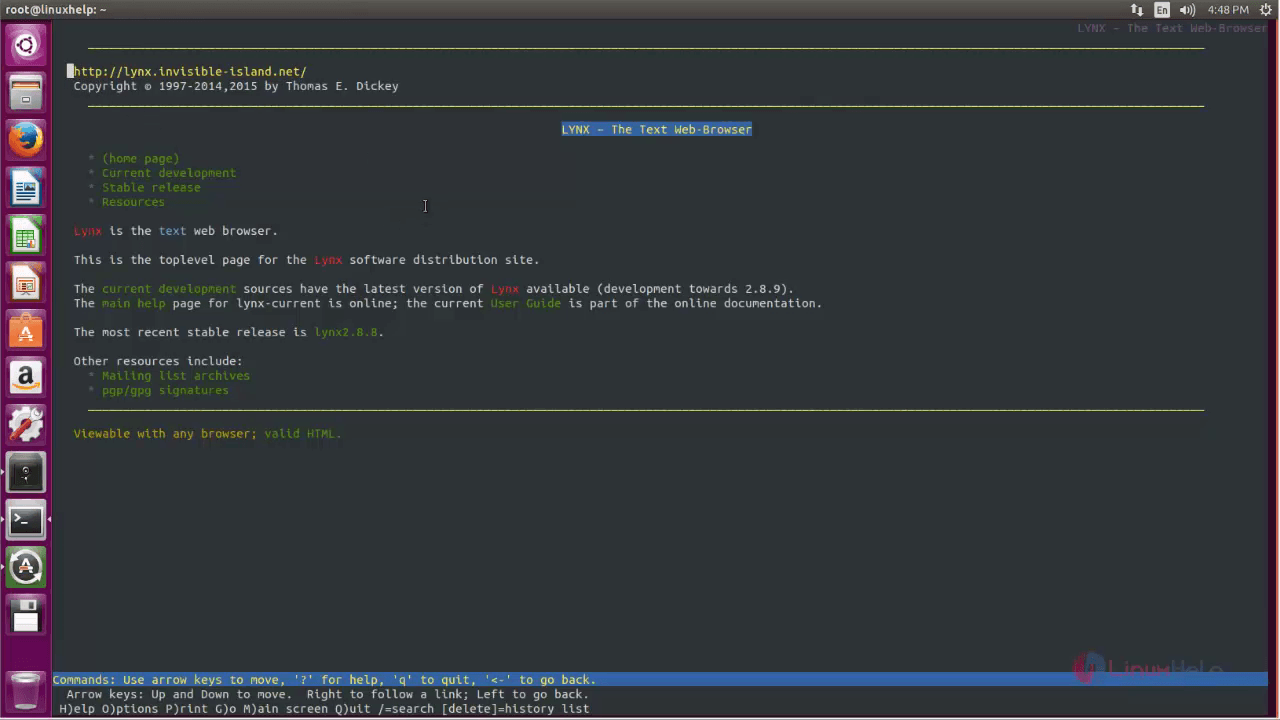
Press “ G ” to go to the URL. 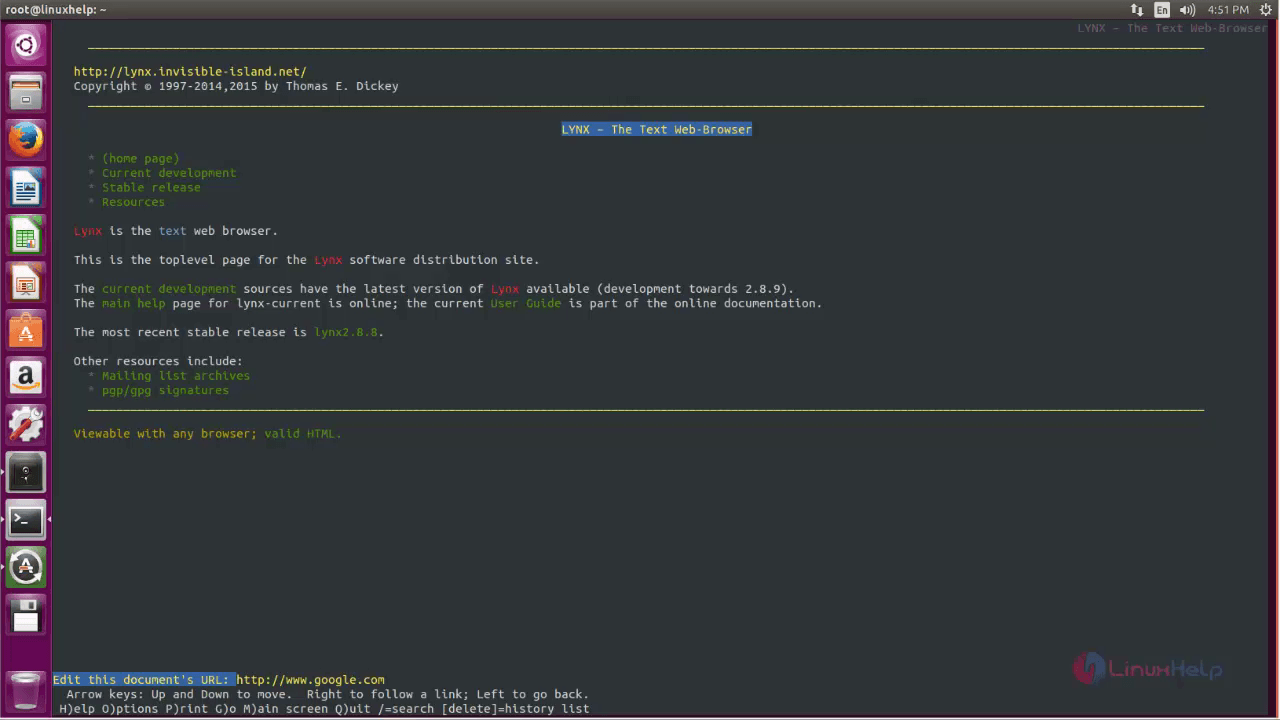
Elinks
To install Elinks
Utilise the following command to install Elinks.
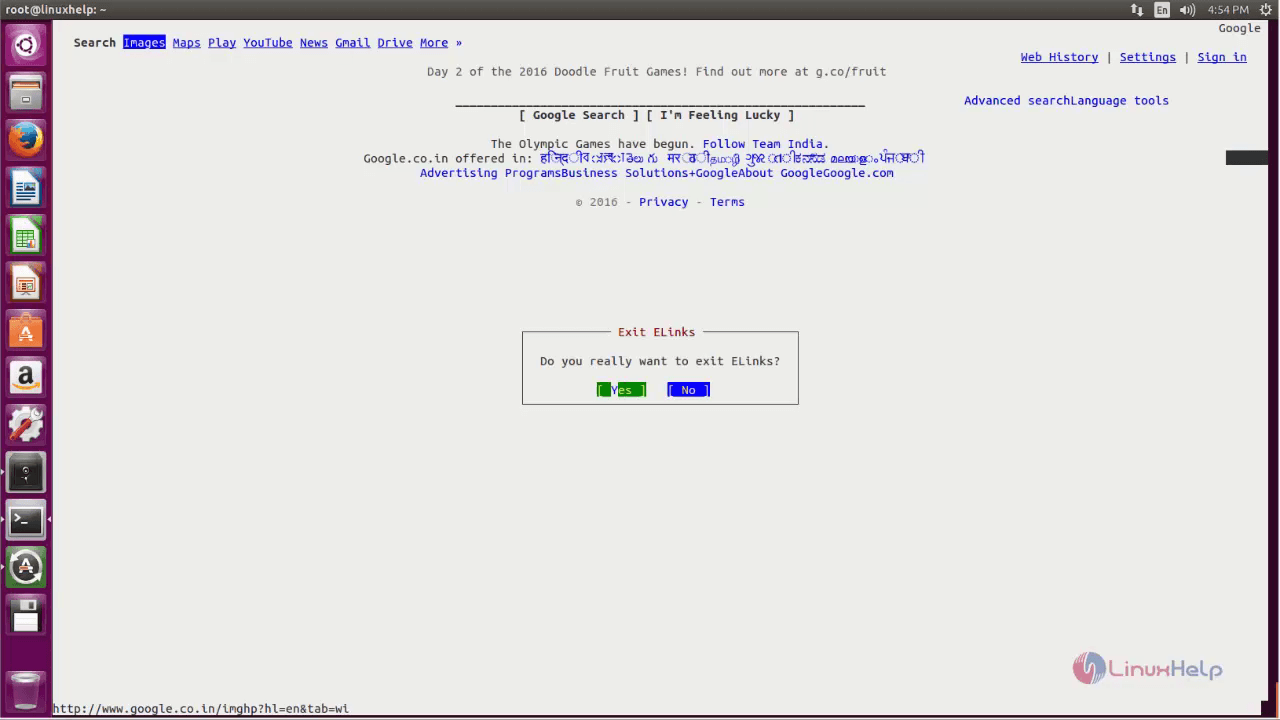
To Launch Elinks
Run the following command to open elinks browser.
To install W3m
Utilise the below command to install W3m package.
To Launch W3m
Run the below command to open W3m.
Netrik
To install Netrik
Utilise the following command to install netrik package.
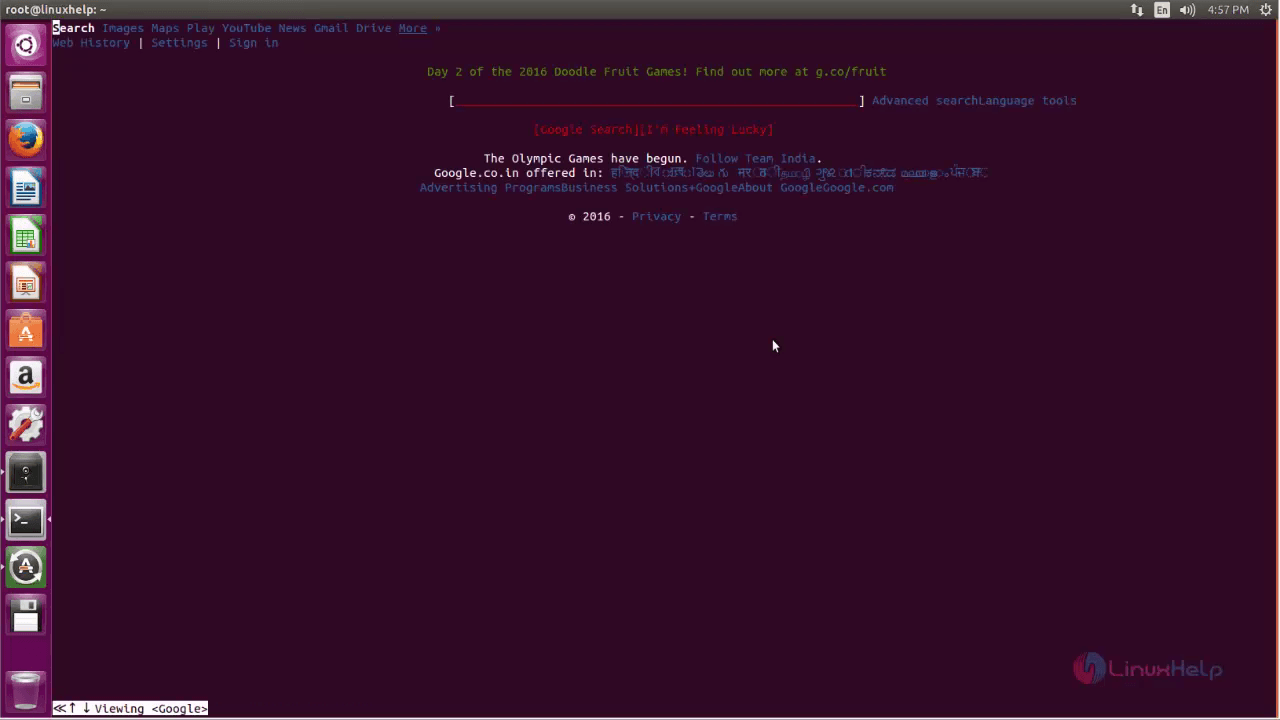
To Launch netrik
Run the following command to open the netrik.
Источник
InDevices.ru
InDevices.ru — новейшие разработки в области устройств, роботы, обзор гаджетов
5 сверхлёгких веб-браузеров для Linux
от admin
Есть так много причин, чтобы наслаждаться десктопом Linux. Одна из причин, по которой я так его люблю, — это почти неограниченное количество вариантов, которые можно найти практически на всех мыслимых уровнях. От взаимодействия с операционной системой (через интерфейс рабочего стола), до работы демонов, у вас есть множество вариантов.
То же самое касается веб — браузеров. Вы можете использовать что угодно из выбранного с открытым исходным кодом, такого как Firefox и Chromium , или из закрытых источников индустрии, таких как Vivaldi и Chrome . Эти опции являются полноценными браузерами со всеми возможными звонками и свистками, которые вам когда — либо понадобятся. Для некоторых эти многофункциональные браузеры идеально подходят для повседневных нужд.
Однако есть те, кто предпочитает использовать веб — браузер без излишеств. На самом деле, есть много причин, по которым вы можете предпочесть минимальный браузер стандартному. Для некоторых речь идет о безопасности браузера, в то время как другие рассматривают веб-браузер как однофункциональный инструмент (в отличие от универсального приложения). Третьи могут работать на маломощных машинах, которые не могут удовлетворить требования, скажем, Firefox или Chrome. Независимо от причины, Linux дайт вам такую возможность.
Давайте рассмотрим пять сверхлёгких браузеров, которые можно установить в Linux. Я продемонстрирую эти браузеры на платформе Elementary OS, но каждый из этих браузеров доступен практически для каждого дистрибутива в известной версии Linuxverse. Давайте погрузимся в.
GNOME Web
GNOME Web (кодовое название Epiphany, что означает «обычно внезапное проявление или восприятие существенной природы или значения чего-либо» ) является веб — браузером по умолчанию для Elementary OS, но его можно установить из стандартных репозиториев. (Обратите внимание, однако, что рекомендуемая установка Epiphany осуществляется через Flatpak или Snap). Если вы решили установить через стандартный менеджер пакетов, введите команду sudo apt-get install epiphany-browser для успешной установки.
Epiphany использует механизм рендеринга WebKit, который используется в браузере Apple Safari. Соединяя этот движок рендеринга с тем фактом, что Epiphany имеет очень мало возможностей для раздувания, вы получите очень высокую скорость рендеринга страниц. Разработчики Epiphany следуют строгому соблюдению следующих принципов:
- Простота — функция раздувания и беспорядок в пользовательском интерфейсе считаются злом.
- Соответствие стандартам. Никакие нестандартные функции не будут представлены в кодовой базе.
- Свобода программного обеспечения — Epiphany всегда будет выпущен по лицензии, которая уважает свободу.
- Интерфейс для человека — Epiphany следует Руководству по интерфейсу пользователя GNOME
Целевая аудитория. Нетехнические пользователи являются основной целевой аудиторией (которая помогает определить типы включаемых функций).
Веб-манифест GNOME гласит: Веб — браузер — это не просто приложение: это способ мышления, способ взглянуть на мир. Принципы Epiphany — это простота, соответствие стандартам и свобода программного обеспечения.
NetSurf
NetSurf минимальный веб — браузер открывает почти всё быстрее , чем вы заканчиваете нажимать на кнопку мыши. Netsurf использует свой собственный механизм компоновки и рендеринга (полностью разработанный с нуля), который поражает.
Хотя вы можете столкнуться с тем, что Netsurf страдает от проблем с отображением на некоторых сайтах, следует понимать, что анализатор Hubbub HTML работает со спецификацией HTML5, находящейся в процессе разработки, поэтому время от времени всплывают проблемы. Чтобы облегчить эти проблемы при рендеринге, Netsurf включает в себя поддержку HTTPS, миниатюру веб-страниц, завершение URL, масштабирование, закладки, полноэкранный режим, шорты клавиатуры и никаких особых требований к инструментарию GUI. Этот последний факт важен, особенно когда вы переключаетесь с одного рабочего стола на другой.
Для тех, кто интересуется требованиями к Netsurf, браузер может работать на компьютере с такой же медленной скоростью, как компьютер ARM 6 с частотой 30 МГц и 16 МБ ОЗУ. Это впечатляет, по сегодняшним меркам. Больше информации об этом браузере на сайте
QupZilla
Если вы ищете минимальный браузер, который использует Qt Framework и механизм рендеринга QtWebKit, QupZilla может быть именно тем, что вы ищете. QupZilla включает в себя все стандартные функции и функции, которые вы ожидаете от веб — браузера, такие как закладки, история, боковая панель, вкладки, RSS-каналы, блокировка рекламы, флэш-блокировка и управление сертификатами CA. Даже с этими функциями QupZilla все еще остается очень быстрым и легким веб-браузером. Другие функции включают в себя: быстрый запуск, домашняя страница быстрого набора, встроенный инструмент для создания скриншотов, темы браузера и многое другое.
Одна особенность, которая должна понравиться среднестатистическим пользователям, заключается в том, что QupZilla имеет более стандартные инструменты настройки, чем во многих облегченных браузерах.). Так что, если выход за пределы линий не является вашим стилем, но вы все еще хотите что-то более легкое, QupZilla — это браузер для вас.
Браузер выдры
Otter Browser — это бесплатная попытка с открытым исходным кодом воссоздать предложения с закрытым исходным кодом, найденные в Opera Browser. Браузер Otter использует движок рендеринга WebKit и имеет интерфейс, который должен быть немедленно знаком любому пользователю. Хотя и легкий, браузер Otter включает в себя полноценные функции, такие как:
- Менеджер паролей
- Менеджер дополнений
- Блокировка контента
- Проверка орфографии
- Настраиваемый графический интерфейс
- Завершение URL
- Быстрый набор
- Закладки и различные связанные функции
- эвенты мыши
- Пользовательские таблицы стилей
- Встроенный инструмент для заметок
Браузер Otter можно запустить практически из любого дистрибутива Linux из AppImage , поэтому установка не требуется. Просто скачайте файл AppImage, дайте файлу права на исполняемый файл (с помощью команды chmod u + x otter-browser — *. AppImage ), а затем запустите приложение с помощью команды ./ otter-browser * .AppImage .
Браузер Otter отлично справляется с рендерингом веб — сайтов и может с легкостью работать как минимальный браузер
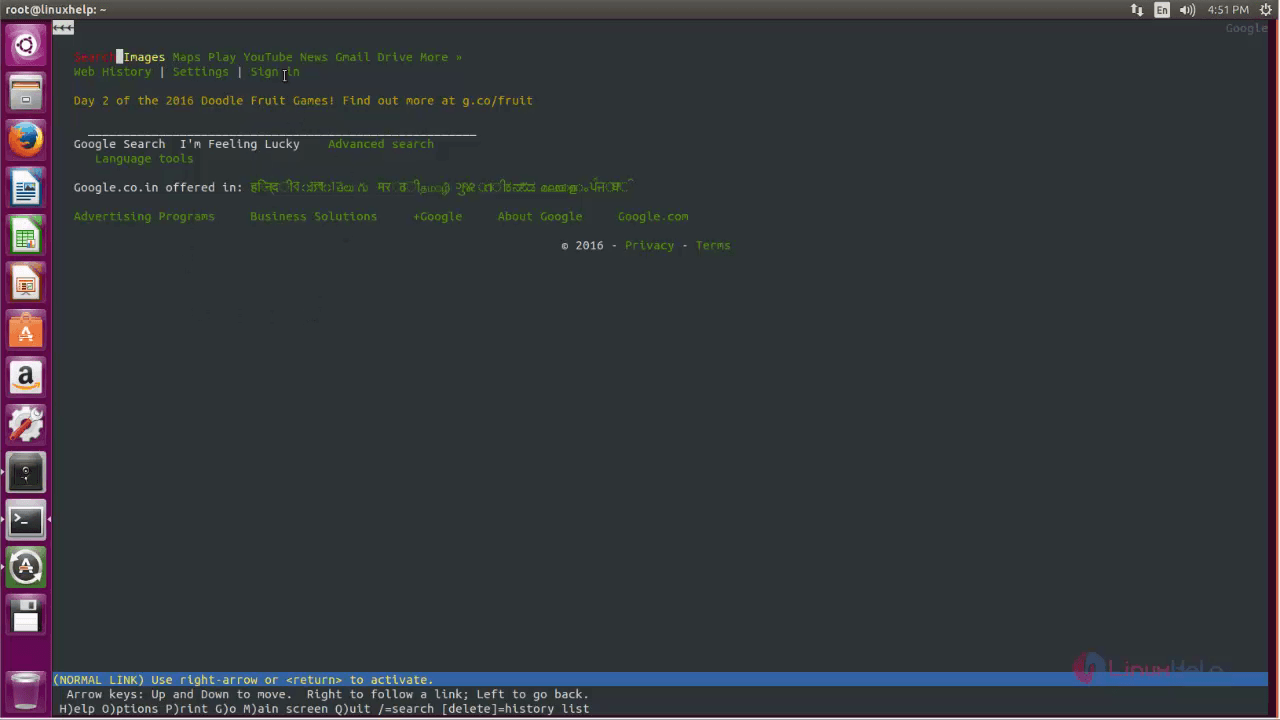
Давайте поговорим о действительно минимальном браузере. Когда я впервые начал использовать Linux в далеком 97 году, одним из веб-браузеров, к которому я часто обращался, был текстовый вариант приложения под названием Lynx . Неудивительно, что Lynx все еще существует и доступен для установки из стандартных репозиториев. Как и следовало ожидать, Lynx работает из окна терминала и не отображает красивые картинки или рендеринг в виде расширенных функций. Из-за того, насколько скромен этот веб-браузер, он не рекомендуется для всех. Но если у вас есть веб-сервер без графического интерфейса, и вам необходимо иметь возможность читать случайные веб-сайты, Lynx может стать настоящим спасателем.
Я также нашел Lynx неоценимым инструментом при устранении неполадок в определенных аспектах веб-сайта (или если какая-то функция на веб — сайте мешает мне просматривать контент в обычном браузере). Еще одна хорошая причина , чтобы использовать Lynx, когда вы только хотите просмотреть содержание (а не посторонние элементы).
Существует намного больше минимальных браузеров, чем описано здесь. Но представленный здесь список поможет вам начать путь минимализма. Один (или более) из этих браузеров наверняка удовлетворят вашу потребность, независимо от того, используете ли вы его на маломощном компьютере или нет.
Источник
How to Easily Install Tor Browser in Ubuntu and Other Linux
Last updated January 12, 2021 By Community 64 Comments
This tutorial shows you how to install Tor browser in Ubuntu Linux. You’ll also learn a few tips around effectively using the Tor Browser.
Privacy is one of the most discussed topic these days. From the NSA spying on citizens and governments alike to the Facebook data scandals. Privacy-concerned people are trying to find ways to protect their privacy.
For those concerned about agencies spying on their network, the Tor Project provides some of the best solutions to protect their privacy. The Tor Protocol is one of the most popular tools created by the Tor Project.
Tor Project has its own Tor browser which is based on Firefox and configured to protect users’ privacy and anonymity by using Tor and Vidalia tools that come bundled with it.
Let’s see how can you install and use Tor browser.
Installing Tor browser in Ubuntu and other Debian based distributions
The Tor browser launcher has made things a lot simpler to install the Tor browser in Linux. It does everything for you automatically, you just have to install it and run it. So, you should prefer using it to get started.
No matter what Linux distribution you have, the recommended method of installing the latest Tor Browser launcher is using Flatpak.
If you have a software store that supports Flatpak (like Pop!_Shop on Pop!_OS), you can easily search for “Tor Browser launcher” and get it installed.
In case you prefer the terminal, you should first set up Flatpak if you haven’t and then type in the following commands:
To run the launcher, type in:
When you run the launcher, it will download the tor browser as shown in the screenshot below. All you have to do is follow the on-screen instructions to continue connecting to Tor and launching the browser.

The Tor browser launcher has been included in the Universe repository of Ubuntu so you can easily use the apt command to install it.
If you are using Ubuntu, make sure that you have the Universe repository enabled.
Once you have that, you can install the Tor browser launcher:
Note that this is not the browser itself. It’s just the installer. So, to run the launcher, you need to simply type in:
The Tor browser launcher can be downloaded and run in any Linux distribution. You can find the files and instructions on its download page.
All you have to do is to download the file, extract it, go to the extracted folder and run the launcher. Rest of the steps will be the same what I have shown below.
If you didn’t run the launcher yet, you should have the following two entries in your application menu — Tor Browser and Tor Browser Launcher Settings. Click the Tor Browser Launcher Icon to start the launcher.
Troubleshoot: It’s possible that you’ll see a “SIGNATURE VERIFICATION FAILED” error if you’ve installed it using APT (version 0.3.2). Click on the next section to expand and fix for this problem.
When the download finally finishes, you may see this “SIGNATURE VERIFICATION FAILED”. The error code is GENERIC_VERIFY_FAIL.

To fix this, you need to refresh the outdated GPG key bundled in the Tor launcher with a new one from Ubuntu’s keyserver.
You can simply click “Start” to try again and that should fix it. If that still hasn’t fixed the issue, you may use the command below to do that:
Normally, it should show that the key has been refreshed:
Now you need to click on Tor browser again to restart the download and installation. It should be quicker than before.
After the download is done, you will probably see a window as shown in the screenshot below. And show a connection screen. Click on connect to start the browser and connect to the network.
Once it is up and running, you’ll be greeted with the homescreen of the browser.
Tor browser is now successfully installed and you can browse the internet anonymously and privately now.
This is an old method and should only be used in Ubuntu 16.04 or lower versions if the torbrowser-launcher package is not available.
Thanks to Webupd8, we have a PPA that we can use to install Tor browser in Ubuntu and other Ubuntu based Linux OSes easily (if you are not comfortable installing from source code). Open a terminal (Ctrl+Alt+T) and use the following commands:
The above PPA should also be valid for Ubuntu 12.04 and other Linux distributions based on it.
Uninstall Tor browser
If you want to uninstall Tor browser, use the following command:
Removing Tor browser
If you are not happy with the Tor browser (installed via APT), you can remove it using the command below:
If you installed it using Flatpak via software center, you can easily uninstall it from there. If you installed it from terminal, type in the following command:
A few tips for using the Tor Browser
Now that you have installed the Tor browser, let me tell you a few tips about using it. It’s up to you if you want to use some or all of these tips.
1. Check if you are properly connected to the Tor Network
Go to the Tor network check page to see if your browser is properly connected to the network.
2. Avoid using the browser maximized
Maximizing the browser allows websites to access device info such as screen size and resolution. If you’re concerned about this, do not maximize the browser. The tor browser even shows you a warning if you do it.
3. Choose your security level
By default, Tor Browser chooses the standard security level. However, you can select ‘Safer’ and ‘Safest’ levels. You can learn more about the levels here. To access this menu, click the onion below the tabs and select Security Settings.
4. Change a few browsing habits
Try to use search engines that do not track you. A few examples are DuckDuckGo or Disconnect.me. Tor even sets DuckDuckGo as the default search engine. Also avoid installing browser extensions as they may track you.
5. Stay away from illegal sites
As Tor is a hidden network so you may come across a few sites that are illegal or promote shady/illegal activities. Try to stay away from these kind of websites.
6. Understand Tor Circuits
Unlike a traditional VPN, Tor doesn’t just relay your connection through a single location. Instead, your data is relayed and transferred through a number of locations. This is called a Tor Circuit. You can view your current circuit by pressing the lock icon on the left of your address bar.
7. Use Onion services
Instead of using normal websites, you can use Onion services which are part of the Tor network. Some websites are available in this form. They use a .onion address. A few of them are
Beware of the shady and illegal ones, most of them are available only as a .onion service.
You can read more Tor browsing tips in details here.
Do you like using Tor?
I hope this article helped you in installing Tor browser on Ubuntu and other Linux distributions and thus enabling you to protect your privacy.
Speaking of privacy, VPNs are another popular tool for protecting privacy. Switzerland-based privacy company ProtonMail provides an excellent secure and private VPN service, ProtonVPN (affiliate link). You can get their service as well, if you are interested.
What other privacy-related tools do you use?
Источник


