- Ubuntu Documentation
- Introduction
- Installing prerequisites
- Creating ports
- Checking file names
- Using socat
- Using lsof
- External Links
- Виртуальный последовательный порт для Linux
- /dev/blog
- 25 июн. 2013 г.
- Проброс последовательного порта по сети в Linux (serial over ip)
- Ссылки
- Входные данные
- Способ 1: socat
- Способ 2: RFC 2217
- Сервер
- Клиент
- TTYredirector
- Способ 3: Serial to Ethernet Converter
- Linux virtual serial port
- Accessing virtual serial ports in Linux using Serial Device Server
Ubuntu Documentation
Introduction
Virtual serial ports are commonly used in development of programs using serial connection as well as debugging existing applications — to check what kind of data is transmitted over a serial connection.
The idea of virtual serial port is to create two virtual serial ports linked with a null modem cable, attaching one end to tested application and the other end to (usually) serial terminal (e.g. Cutecom).
Installing prerequisites
To create a pair of ports you will need a utility called «socat». It is located in «universe» repository, so you should be able to find it in Synaptic. Alternatively install using
Creating ports
After installing socat you have to execute following command:
That should create and link the virtual port pair for as long as socat is running.
If you are like me and want a little more feedback on what is happening instead of a command line that is hanging, use verbose mode instead:
You can put the -d argument up to four times, increasing the information fed back to you each time.
Checking file names
Using socat
The easiest way to tell which file names are assigned to these virtual ports is to tell socat to print information about opened pseudo terminals during initialization using following options (verbose mode):
Your applicantion should connect to these files.
Using lsof
Another way is to list socat’s open files:
You should notice file /dev/ptmx, that is pseudo terminal multiplexer and directly below each entry should be listed /dev/pts/X file, which are the ends of created pair.
External Links
VirtualSerialPort (последним исправлял пользователь janisozaur 2010-10-28 11:21:26)
The material on this wiki is available under a free license, see Copyright / License for details
You can contribute to this wiki, see Wiki Guide for details
Источник
Виртуальный последовательный порт для Linux
Мне нужно протестировать приложение последовательного порта в Linux, однако моя тестовая машина имеет только один последовательный порт.
Есть ли способ добавить виртуальный последовательный порт в Linux и протестировать мое приложение, эмулируя устройство через оболочку или скрипт?
Примечание: я не могу переназначить порт, он жестко запрограммирован на ttys2, и мне нужно протестировать приложение, как оно написано.
Для этого вы можете использовать pty («псевдотелетайп», где последовательный порт является «настоящим телетайпом»). С одного конца откройте /dev/ptyp5 , а затем прикрепите свою программу к /dev/ttyp5 ; ttyp5 будет действовать так же, как последовательный порт, но будет отправлять / получать все, что он делает, через / dev / ptyp5.
Если вам действительно нужно, чтобы он разговаривал с файлом с именем /dev/ttys2 , просто уберите старый /dev/ttys2 и создайте символическую ссылку с ptyp5 на ttys2 .
Конечно, вы можете использовать другое число, кроме ptyp5 . Возможно, выберите один с большим числом, чтобы избежать дублирования, поскольку все ваши терминалы входа также будут использовать ptys.
В Википедии есть дополнительная информация о ptys: http://en.wikipedia.org/wiki/Pseudo_terminal
Дополняя ответ @ slonik.
Вы можете протестировать socat для создания виртуального последовательного порта, выполнив следующую процедуру (проверено на Ubuntu 12.04):
Откройте терминал (назовем его Terminal 0) и запустите его:
Приведенный выше код возвращает:
Откройте другой терминал и напишите (Терминал 1):
имя порта этой команды может быть изменено в зависимости от компьютера. это зависит от предыдущего вывода.
вы должны использовать номер, доступный в выделенной области.
Откройте другой терминал и напишите (Терминал 2):
Теперь вернитесь в Терминал 1, и вы увидите строку «Тест».
Для этого используйте socat:
Также существует tty0tty http://sourceforge.net/projects/tty0tty/, который является настоящим эмулятором нуль-модема для Linux.
Это простой модуль ядра — небольшой исходный файл. Я не знаю, почему он получил отрицательные отзывы на sourceforge, но мне он подходит. Самое лучшее в нем то, что он также эмулирует аппаратные контакты (RTC / CTS DSR / DTR). Он даже реализует команды TIOCMGET / TIOCMSET и TIOCMIWAIT iotcl!
В недавнем ядре вы можете получить ошибки компиляции. Это легко исправить. Просто вставьте несколько строк вверху источника module / tty0tty.c (после включений):
Когда модуль загружен, он создает 4 пары последовательных портов. Устройства: от / dev / tnt0 до / dev / tnt7, где tnt0 подключен к tnt1, tnt2 подключен к tnt3 и т. Д. Вам может потребоваться исправить права доступа к файлам, чтобы иметь возможность использовать устройства.
Думаю, я немного поторопился со своим энтузиазмом. Хотя драйвер выглядит многообещающе, он кажется нестабильным. Я не знаю наверняка, но думаю, что это разбило машину в офисе, над которым я работал из дома. Я не могу проверить, пока не вернусь в офис в понедельник.
Во-вторых, TIOCMIWAIT не работает. Код, кажется, скопирован из какого-то примера кода «крошечного терминала». Обработка TIOCMIWAIT кажется на месте, но она никогда не просыпается, потому что соответствующий вызов wake_up_interruptible () отсутствует.
Авария в офисе действительно произошла по вине водителя. Отсутствовала инициализация, и полностью непроверенный код TIOCMIWAIT вызвал сбой машины.
Вчера и сегодня потратил на переписывание драйвера. Было много проблем, но теперь у меня все хорошо. По-прежнему отсутствует код для аппаратного управления потоком данных, управляемого драйвером, но он мне не нужен, потому что я сам буду управлять контактами, используя TIOCMGET / TIOCMSET / TIOCMIWAIT из кода пользовательского режима.
Если кому-то интересна моя версия кода, напишите мне, и я отправлю его вам.
Источник
/dev/blog
25 июн. 2013 г.
Проброс последовательного порта по сети в Linux (serial over ip)
Ссылки
Входные данные
Способ 1: socat
Самый простой способ – использовать socat. С его помощью можно соединить последовательное устройство и сокет.
На server создаем сокет на tcp-порту 12345, привязанный к /dev/ttyS0 :
На client создаем виртуальный терминал в /dev/pts/N и привязываем его к сокету server:12345 :
При такой схеме передаются данные, но не управляющая информация. Настройка виртуального терминала на хосте client никак не отражается на реальном терминале на хосте server. Это значит, что приложения, которые используют ioctl(2) или termios(3) , не будут работать так, как ожидается.
Способ 2: RFC 2217
Сервер
- ser2net
ser2net реализует телнет-сервер RFC 2217.
Запускаем на хосте server на порту 23:
ser2net можно также запускать в режиме демона или с помощью inetd .
- sredird
sredird – другая реализация сервера RFC 2217. Он лучше совместим с клиентом cyclades-serial-client .
Запускаем на хосте server на порту 23 с помощью netcat:
sredird можно также запускать с помощью inetd .
- sercd
sercd – еще одна реализация. Он основан на sredird .
Клиент
- telnet
После запуска сервера к удаленному терминалу можно подключиться по телнет:
- ckermit
Вместо telnet можно использовать C-Kermit, который поддерживает RFC 2217:
С ним помимо телнет будут также доступны команды для конфигурирования порта.
- cyclades-serial-client
cyclades-serial-client – клиент для сервера RFC 2217. Он работает с помощью трюка с LD_PRELOAD .
Для каждого удаленного терминала создается:
- Виртуальный терминал /dev/pts/N .
- Символическая ссылка на него /dev/NAME .
- Локальный сокет /dev/NAME.control .
Затем пользователь с помощью LD_PRELOAD может заставить приложение, использующее терминал /dev/NAME , перенаправлять вызовы ioctl(2) и tcsetattr(3) в сокет /dev/NAME.control , откуда они будут прочитаны демоном cyclades-ser-cli и отправлены в удаленный терминал.
Настраиваем конфиг клиента /etc/cyclades-devices (без этого не будет работать трюк с LD_PRELOAD ):
Запускаем демон, обслуживающий виртуальный терминал:
Можно также запускать демон с помощью cyclades-serial-client .
Проверяем передачу данных:
Cообщение hello должен получить тот, кто подключен к порту /dev/ttyS0 на хосте server .
Проверяем настройку baud rate :
На хосте server у терминала /dev/ttyS0 должно обновиться значение:
У меня этот клиент работает с сервером sredird , но не работает с ser2net .Другие проблемы:
- Не все параметры ioctl() реализованы.
- Подход с использованием LD_PRELOAD для ioctl() и tcgetattr() работает не для всех приложений. У меня так и не заработала команда setserial(8) .
- Network Virtual Terminal
nvtty – это драйвер ядра, реализующий виртуальный терминал, перенаправляющий все запросы удаленному серверу RFC 2217. Патч основан на cyclades-serial-client .And this is still something that should be done in userspace if necessary
by fixing up the tty layer to support pty/tty pair modem lines and
termios change reporting, or some kind of generic vt that can also
expose all the config other net protocols might need.TTYredirector
Способ 3: Serial to Ethernet Converter
Serial to Ethernet Converter – устройство, преобразующее RS-232 (и/или другие протоколы) в Ethernet и обратно.
Есть как минимум два производителя, поставляющие вместе со своими преобразователями драйвер для Linux, который создает виртуальный COM-порт и перенаправляет все запросы к нему в сеть:
- Tibbo VSPDL (Virtual Serial Port Driver for LINUX)
- Perle TruePort
Источник
Linux virtual serial port
Virtual Serial Port driver for Linux
This kernel module allows userspace programs to create virtual serial ports under /dev/ttyV#.
This is somewhat similar to the regular pseudo-tty interface, but vtty also emulates characteristics such as baud rate & modem line state. This allows users to create a fully-functional serial port driver completely in userspace.
- forward a serial port over the network. There are several Linux implementations of a RFC2217 server. VTTY allows you to write a RFC2217 client exposing a native-looking serial port to other software.
- quickly prototype a driver for an USB-to-serial converter using VTTY & libusb
- split one physical serial port in two, allowing two apps to access it without conflict (for example gdb & minicom, or esptool & minicom)
The module creates a /dev/vtmx «master» device, which is used to create the virtual serial ports in a manner similar to the pseudo-tty master device /dev/ptmx. Opening the /dev/vtmx device causes a /dev/ttyV# device to be allocated. The index of the virtual port can be obtained by issuing a VTMX_GET_VTTY_NUM (equal to TIOCGPTN) ioctl on the vtmx file descriptor.
Any writes on the vtmx file descriptor will appear as incoming data on the virtual TTY, subject to the regular in-kernel processing (line disciplines, echoing, and so on). Reading from vtmx will return data in a «packetized» format, inspired by the obscure pseudo-tty «packet» mode. On each successful read() call, the first byte returned will indicate the type of packet returned.
Currently supported packet formats:
- TAG_UART_RX (0), followed by the «serial port» data coming in from the virtual TTY (processed by the kernel as usual)
- TAG_SET_TERMIOS (1), followed by a ‘struct termios2’ structure representing the serial port configuration requested on the virtual TTY (TCSETS/TCSETS2)
- TAG_SET_MODEM (2), followed by a 32-bit integer representing the modem line state requested on the virtual TTY (TIOCMSET/TIOCMBIC/TIOCMBIS)
- TAG_BREAK_CTL (3), followed by a 32-bit integer representing the requested «break» state. A «break» state is a special condition on the serial port, during which the «low» signal state is sent for a period longer than the byte duration. A positive number indicates the duration of the requested break state (in milliseconds). Negative numbers indicate a request to set the break state indefinitely. Zero terminates the break state.
The master side can also use the VTMX_SET_MODEM_LINES ioctl (equal to TIOCMSET) to manipulate the modem line state of the virtual serial port. Only the «input» lines (such as CTS) can be changed this way. If the master process needs to change the «output» lines (such as RTS), it needs to open the ttyV# device and issue the regular tty ioctls there.
The test/ directory contains testing/example apps demonstrating the use of the interface.
Comparison with PTY
Most of the functionality of VTTY is inspired by and follows the PTY interfaces. Most notable differences include:
The «master» side of the pseudo-tty is a tty. I’m not really sure why and what would be the reason to (for example) configure the line discipline on the master side. After all, it’s only used to read & write some bytes. In VTTY, the master side is a simple character device.
PTY does not inform the master of the «termios» settings on the slave
PTY does not support setting modem lines on the slave
VTTY reads on the master side return the data prefixed with a «tag» byte. This is similar to the (rarely used) «packet» mode of the pseudo-ttys.
PTY supports locking/unlocking access to the pseudo-tty using TIOCSPTLCK. This is not supported in VTTY
Any kinds of flow control were not tested. I assume that XON/XOFF will not work.
The module is mostly stable, but I wouldn’t recommend running it on any «important» systems. I wouldn’t be surprised if there were some subtle locking bugs remaining (the linux tty layer is. complex).
Also see FIXME/TODO markers in the source code.
Some tty ioctls are not supported (notably TIOCMIWAIT & TIOCGICOUNT).
tty0tty emulates pairs of serial ports, connected in a null-modem fashion. The modem status lines are properly emulated, but the «termios» settings are not.
Источник
Accessing virtual serial ports in Linux using Serial Device Server
Contrary to popular belief, serial port technology from the IT Stone-ages is still alive and kicking.
In the industrial IoT area, serial communication has been proven to be reliable, simple and trustworthy. So if you enter a regular plant, sooner or later you will find some thirty year old device which is still talking serial.
The protocol on serial ports can be a very simple, human readable output. You see this a lot with devices which are/were connected to a (matrix) printer. Each measurement (like the weight from a scale) was printed on one line. You still read these simple lines deviced by carriage return/line feed.
But output can also be more elaborate like NMEA, Telegram or even more exotic formats.
If we are looking at the RS-232 protocol, there is an important physical limitation: the cable length. The communication becomes less reliable when the length of the cable is increased. It’s possible to compensate with eg. a lower baudrate or better quality of cable. The rule of thumb is a maximum of 50 feet/15 meters but I recommend up to 13/feet/3 meters.
Is it possible to bypass this limitation? Yes, this enters the virtual serial port.
With this solution, the physical cable is plugged in into a so-called Device Server or Device Gateway. This gateway is then connected to the same IP network as your target device is (eg. an industrial PC). On this industrial PC, virtual port drivers are loaded which mimic the physical ports on the gateway. The network and gateway becomes transparent for the RS-232 protocol.
So the maximum length of a serial cable can be extended dramatically with the reach of the local IP network.
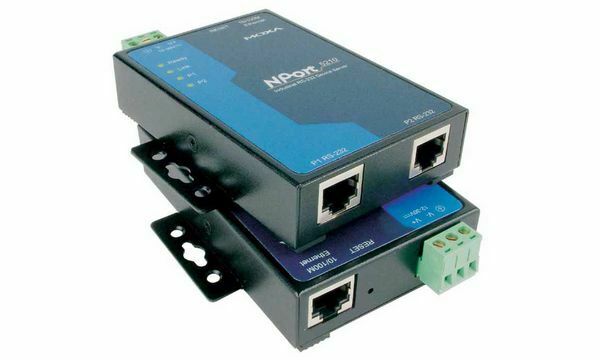
Let’s check out how this works with a Moxa NPort 5210A Serial Device Server.
This is an older model but it still works fine. It has two serial ports supporting RS-232. Having two ports is very convenient to test the solution as we will see later on.

Disclaimer: I bought this device from a second-hand hardware site. But I’m happy to review a newer device if you have a spare one 🙂
Serial ports for Windows
This Moxa NPort passes the data from and to its physical ports to virtual ‘RealCOM’ ports on your target. So we need a couple of things to set up. First we need to download two tools from the Moxa site:
A. Device Search utility
Your Moxa has no correct IP address for your local network yet. This tool scans the network for NPort devices. After logging in, you can set a correct (fixed) IP address for your moxa. Your target device will reach out to your Moxa so this address is vital. Check out if you can ping the Nport from your Industrial PC.
B. NPort Administrator
Once the IP address is available, this second tool can install the RealCOM serial port drivers for you:
Serial sort for Linux
The shiny GUI Administrator tool for Windows is not available for Linux.
Note: I have not found a ‘Device Search utility’ for Linux. But you can use the Windows version just for giving the NPort a fixed IP address.
Now in Linux, we will add RealTTY serial port support for the Moxa NPort using command line tooling. For this, we need to download the Linux drivers, install them in Linux and attach the drivers to the Moxa NPort.
At the same Moxa site, drivers are available. The following scripts installs the drivers and creates virtual serial ports:
Now you can check the existence of the new virtual serial ports:
You will see the new serial ports. Notice the automatic elevated rights:
Testing the ports
As I mentioned, my NPort has two serial ports. So I assembled my own null modem. This is a cable for special RS232 communication, it crosses the read and write lines and does a self-confirmation of the handshake.
It’s perfect for doing a read and write action with just one step:
Now I’m able to send a message over port ttyr01 and retrieve it on port ttyr02.
First I set up a terminal which listens to incoming data for port ttyr02:
Then I send a message to port ttr01:
This is what I see when I send the message:
The prompt is returned. The message is picked up by the serial port ttyr01.
Let’s check out the second port:
So the message is received!
We can send a few more messages:
Each message arrives at the other side:
Notice, while sending the messages, the read and write indication lights on the Moxa (indicated P1 and P2) are flashing. This means data is flowing through our Moxa!
Be careful with apt-get update, apt-get upgrade
There is one downside to installing drivers this way. The Moxa Nport virtual serial port driver does not survive an apt-get upgrade. After performing an upgrade, the driver is ‘corrupted’ thus the ports are inaccessible. An uninstall/reinstall of the driver helps but it feels like some band aid.
If this happens, I suggest:
1. Delete the NPORT related tty* ports
2. Run ‘sudo ./mxaddsvr [NPort IP Address] 2’ again
Conclusion
If your sensors or devices with serial ports are places at a large distance from your Industrial PC, a Serial Device Server or Gateway is the perfect solution for your range needs.
The same goes for Industrial PCs which lack the availability of physical Serial ports.
Источник