- Ubuntu Documentation
- Introduction
- 1. Choosing a Webcam
- 2. Testing Your Webcam Using Cheese
- 3. Webcam Software
- 3.1. Configuring Webcam Software
- 3.2. VLC
- 3.2.1. Using the GUI
- 3.2.2. Using the Command Line
- 3.3. FFmpeg
- 3.3.1. Recording Video
- 3.4. MPlayer
- 3.4.1. Recording Video
- 3.5. MEncoder
- 3.5.1. Recording Video
- 3.6. Skype
- 3.7. streamer
- 4. Identifying Your Webcam
- 5. Driver installation
- 6. See Also
- 7. External Links
- Программный захват с вебкамеры
Ubuntu Documentation

Style Cleanup Required
This article does not follow the style standards in the Wiki Guide. More info.
Needs Updating
This article needs updating to include the latest versions of Ubuntu. More info.
Introduction
This document describes how to choose, setup and use a webcam in Ubuntu. If you are reading this page, you are probably in either/both of the following situations:
- Looking for information on which webcam to buy.
- Trying to setup and use your existing webcam.
Please note that this document is intended for the current release: Ubuntu 10.10 (Maverick Meerkat).
1. Choosing a Webcam
Webcam support in Linux is mainly provided by the Linux UVC Project’s UVC driver. This aims to provide a universal driver in the same way that a generic driver handles USB storage devices (memory sticks, hard drives etc). However, other drivers also exist that may allow more devices to be used. When looking to purchase a webcam for use with Ubuntu, you should look for a UVC compatible camera. The Linux-UVC project has a good list of UVC compatible webcams.
2. Testing Your Webcam Using Cheese
Ubuntu aims to provide ‘out-of-the-box’ or ‘just-works’ functionality for webcams. This means that you should be able to plug-in your webcam and use it straight away: no driver disks or installation. To test whether or not your webcam works in this way, install Cheese, a GNOME program for capturing video and stills from a webcam. It can also apply some special effects. Cheese is included in the Main repositories since Ubuntu 8.04 LTS (Hardy Heron). It uses the gstreamer library, which utlilizes the video4linux2 API.
Download and install Cheese using the following steps:
- Open a terminal window.
- Type in the following command:
- Run Cheese. Cheese should automatically detect your webcam and display live video stream.
To record video or take a snapshot, click either on photo or video and select Take a Photo or Start recording.
- If Cheese doesn’t display the output from your webcam, test that the problem is not with Cheese before trying anything else by using one of the programs in the next section.
If Cheese displays a garbled picture or one with poor colour/brightness/contrast, go to the Ubuntu wiki Webcam Troubleshooting page for steps to resolve this.
3. Webcam Software
This is a list of software that allows you to do a simple ‘plug-in-and-go’ test with your webcam. You should try one of these programs if Cheese didn’t display anything at all to make sure that Cheese is not causing the problem.
Empathy has been the default VoIP/Video Chat application since Ubuntu 9.10 (Karmic Koala), and can be used to establish whether or not your webcam is working.
3.1. Configuring Webcam Software
In some cases your media player (VLC, mplayer, amongst others) will need to know the video and audio device files for your webcam. Before you plug in your webcam, try the following two commands at a console:
Make a note of the devices appearing. Now plug in your webcam, allow the system a few seconds to register the device, and run the two commands again. The new appearances should belong to your webcam (for instance, /dev/video0 and /dev/audio2). If nothing new appears, you may need to switch your webcam on. For a built-in webcam, you may have a function key to do so.
3.2. VLC
3.2.1. Using the GUI
In VLC, choose ‘Open capture device’ from the file menu and enter the video and audio device files (see above) in video device name and audio device name, respectively. If you just want a ‘mirror’ (to see what the webcam is showing), click ‘OK’ and you’re done. If you wish to record, tick off ‘Stream/save’ in the ‘Advanced options’ section. Click the settings button right next to it. Tick ‘File’ off under ‘Outputs’ and enter a filename. Encapsulation method can be left at the default (MPEG TS). Under ‘Transcoding options’, tick ‘Audio codec’ and ‘Video codec’. These can also safely be left the defaults (obviously greater compression results in lower file sizes, so experiment). Click ‘OK’ in the Settings screen and once again in the main webcam screen (Video4linux). If you want to have more control, you can access several settings, including resolution, by clicking the Advanced options button.
3.2.2. Using the Command Line
A simple test of just the video from your webcam can be done as follows. This assumes the webcam is installed as ‘/dev/video0’.
If you wish to be able to quickly start a video session with your webcam, the resulting vlc command is printed in the Customize line at the bottom. You simply need to prepend ‘vlc’, e.g.
The recording instructions will similarly need to be appended. Copy the contents of the ‘Stream Output MRL’ box under ‘Settings’ and change «:sout=» to «—sout » and append it to your vlc command:, e.g.
To simple take a few snapshots, open the webcam without recording and choose ‘Snapshot’ under the ‘Video’ menu.
3.3. FFmpeg
FFmpeg is a cross-platform audio/video recording, conversion and streaming application.
3.3.1. Recording Video
- To record both video and audio using FFmpeg, first make sure it is installed:
- Run ffmpeg with arguments such as these:
With recent versions of Ubuntu (>= 12.10) you should use avconv instead of ffmpeg command:
3.4. MPlayer
MPlayer is capable of displaying a webcam video stream,
3.4.1. Recording Video
To record video from the command line:
- Open a terminal window and type the following:
This example assumes that your webcam device is at /dev/video0
The resolution (width=. & height=. ) should be chosen to match the output of your device.
3.5. MEncoder
The companion to MPlayer, MEncoder can record from a webcam to video files.
3.5.1. Recording Video
- Recording AVI, without audio:
- Recording AVI, with audio:
- Type ‘man mencoder’ for more info on the audio options.
/dev/dsp1 refers to the webcam USB Audio device.
/dev/dsp refers to the sound card.
You may need to install these programs with
Camera Monitor from chaos infinito shows a tray icon that lets you know when your webcam is on. It has been in the Universe repository since Ubuntu 10.10 (Maverick Meerkat) and is released under the GPL.
luvcview is a good program you can use to test that the camera is working. It has been in the Universe repository since Ubuntu 8.04 LTS (Hardy Heron). If it doesn’t work, you may need to update the UVC driver (see Manual install instructions below).
guvcview is based on luvcview and has a graphical user interface. It has been in the Universe repositories since Ubuntu 9.10 (Karmic Koala).
Camorama (not updated since 2007), xawtv, aMSN, and Kopete can all be used to test and use your webcam. They have been in the Universe repositories since Ubuntu 6.06 LTS (Dapper Drake) apart from Kopete, which is in the main repositories.
3.6. Skype
See the dedicated Skype and SkypeWebCams pages.
3.7. streamer
The streamer package provides a very simple command line interface for taking pictures:
The package can be installed as follows:
4. Identifying Your Webcam
Although webcams may look quite different from one another, they often share similar or identical major components. This means that drivers may work for many different makes and models with little or no modification.
To definitively identify your webcam, the following information will be of use:
- Make and Model Name/Number.
Any version or revision information. This is often printed on the device or its packaging and will read something similar to REV 01 or VER. 2.2. This information can be particularly useful.
The output of the lsusb. Type lsusb -v into a terminal window.
- This program prints information about the devices connected to the USB bus. If you scroll through it, you should find some information about your webcam.
Type lsusb -n into a terminal window. This version of the command lists the device’s USB ID; a number that is unique to every device.
5. Driver installation
Linux Webcam drivers are provided by several different projects. Although the Linux UVC project covers many devices, support for others is provided elsewhere. This section aims to help you install your webcam’s drivers if they have not been automatically installed by Ubuntu.
If the drivers for your webcam haven’t been loaded automatically by Ubuntu, you may have to install them manually.
ov51x — The Ubuntu wiki page is here.
ov51x-jpeg — This is a hacked driver by http://www.rastageeks.org/ and more info is available here.
Suported Hardware — A list of webcams supported by the rastageeks driver.
6. See Also
UVC — The Ubuntu wiki page for the Universal Video Class.
7. External Links
The Linux TV Project Homepage — This is the project responsible for the video4linux drivers for webcams and tv capture/tuner devices.
The linuxtv.org V4L-DVB Wiki Webcam Page — This page contains lots of information about webcam support in Linux.
The UVC Homepage — The home of the Universal Video Class for Linux project. This project aims to provide a universal driver for Linux webcams.
FFmpeg — This project develops the cross-platform recording, conversion and streaming solution for audio and video.
Webcam (последним исправлял пользователь ckimes 2017-08-23 23:00:23)
The material on this wiki is available under a free license, see Copyright / License for details
You can contribute to this wiki, see Wiki Guide for details
Источник
Программный захват с вебкамеры
 Недавно мне потребовалось получать данные с вебкамеры для автоматической их обработки. Перебрав несколько программок, обнаружил, что ни одна из них не позволяет рулить камерой программно — только формы да кнопки, в лучшем случае есть планировщик записи, но для этого приходится постоянно держать программу запущенной. Плюс не кросплатформенно, привязка к конкретному ПО в проекте. Решение — задействовать любимый язык программирования.
Итак, есть у нас вебкамера и Питон. Прежде всего, нельзя не похвалить камеру, которую я приобрел в dealextreme: малютка размером с половину спичечного коробка, работает в Винде и Линуксе без установки стороннего ПО (проверял в Вин 7 и Минт 13, включил — и поехали), приемлемое качество и цена. При работе камера не выдает себя горящими индикаторами или другими эффектами. Малые размеры способствуют незаметной ее установке. 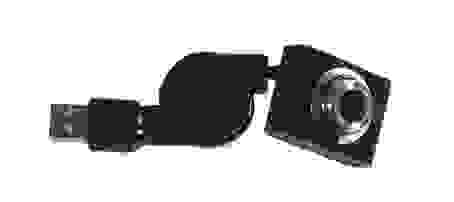
Поскольку я работаю как в Винде, так и в Линуксе, решение должно удовлетворять обоим ОС. Поможет библиотека компьютерного зрения OpenCV и ее биндинг для Питона. Альтернативным решением может быть video4linux. Но, во-первых, мне было интересно освоить OpenCV, а во-вторых, про использование v4l уже была отличная хабрастатья.
Установим библиотеки numpy и opencv. Пользователи Линукса открывают терминал и пишут:
Те, кто под Виндой, идут сюда и выкачивают дистрибутивы numpy и opencv под нужную версию Питона.
Для Винды есть альтернативный способ установки. Достаточно скачать официальный дистрибутив библиотеки. В архиве обнаруживаем /build/python/2.x/cv2.pyd. Кидаем его в site-packages. Там же создаем файл cv.py с содержимым:
Все готово. Тестовый импорт:
Мы будем использовать часть библиотеки под названием higui. Начинаем эксперименты. Пробный шар — получение кадра и запись его в файл:
Функция CaptureFromCAM создает объект, с которого будет происходить захват. 0 — это индекс устройства, он может быть больше нуля, если камер несколько. Значение -1 несет смысл «любая доступная камера».
Теперь можно запустить сбор кадров в цикле. Будет замечательно, если кадры будут попутно отображаться в отдельном окне:
Функция NamedWindow создает и отображает окно, в которые выводится в цикле каждый кадр. Обработчик WaitKey задает задержку в миллисекундах для обработки событий окна, например, нажатия клавиши или вывода изображения. Если его опустить, окно не будет отображать кадры (и, возможно, вообще не появится).
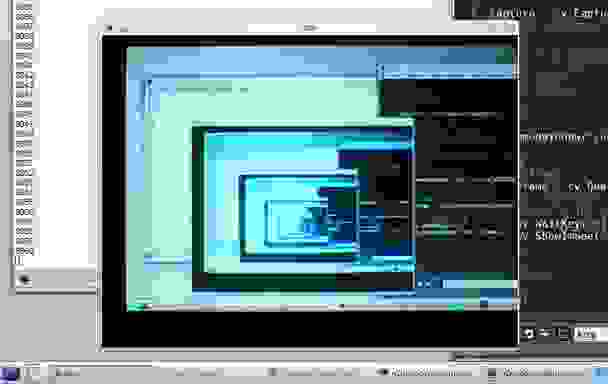
Захват кадров в действии. Камера смотрит в монитор, поэтому возникает рекурсия — декстоп, внутри которого десктоп, внутри которого.
Сбор множества кадров полезен, когда требуется вставлять между снимками временную паузу, например, 1 кадр каждую минуту. Достаточно подставить в цикл time.sleep(60).
Если же требуется непрерывная съемка, нужно записывать кадры в видеопоток.
На первый взгляд, здесь тоже все очевидно: функция CreateVideoWriter создает поток, в который пишутся кадры. Достаточно прервать цикл, чтобы получить готовый видеофайл. Однако, следует разобраться с входными параметрами.
fourcc — это кодек, целое число, результат отображения четырехсимвольного имени кодека в числовой индекс. Например, CV_FOURCC(‘P’,’I’,’M,’1′) — это сжатие MPEG-1. В Винде можно передать -1 для выбора кодека интерактивно в диалоговом окне или 0 для записи без сжатия (размер файла получится ого-го!). Хабраюзер Elsedar подсказывает, где можно посмотреть полный список кодеков: www.fourcc.org/codecs.php
fps — частота кадров в секунду. Параметр напрямую зависит от модели вашей камеры. На это месте реальное положение дел пошло вразрез с документацией. Полагается, что параметры записи должны устанавливаться не на глазок, а точным образом, для чего служит функция GetCaptureProperty. Она может получить параметры девайса для корректной инициализации захвата. Но если высота и ширина кадра извлекаются без проблем, то получение fps:
возвращает -1, что не удовлетворит функцию CreateVideoWriter, поэтому частота подбирается эмпирически. Как правило, у большинства камер она колеблется от 14 до 16 кадров в секунду. Если выставить 25, то полученный файл будет напоминать немое кино 20-х годов.
Последний параметр frame_size — пара целых чисел высоты и ширины кадра. Чтобы использовать параметры камеры, инициализируйте их следующим образом:
Теперь можно затронуть тему цветокоррекции. Если выходные кадры вас не устраивают, вполне разумно подкорректировать параметры захвата, чем пакетно перегонять горы джипегов или часы видео. Для установки параметров есть функция SetCaptureProperty. Заполнять несколько свойств удобно перебором словаря:
Параметры яркости, контраста и насыщенности задаются в диапазоне от 1 до 100. Их комбинация может значительно улучшить качество съемки в затемненных помещениях.

Кадр с параметрами по умолчанию

Яркость, контраст и насыщенность равны 50 пунктам

Яркость 50, контраст 70, насыщенность 0
Бывает так, что кадры с камеры нужно обрабатывать библиотекой PIL. Чтобы конвертировать их из формата cv в PIL, не обязательно сохранять их на диск, достаточно выполнить код:
И в обратную сторону:
В итоге мы имеем программный доступ к камере, можем снимать кадры и слать их по почте, делать какой-то анализ, писать видео. Решение кросплатформенно. Думаю, несложно организовать стримминг. Тут, кстати, сама собой напрашивается программка с GUI-интерфейсом на wx, например.
1) Библиотека OpenCV
2) Документация по биндингу к Питону
3) Раздел «highgui»
Источник


