- Setting WildFly Home Directory
- Recent Posts
- WildFly books
- Privacy Overview
- 🤲 Установка сервера приложений WildFly (JBoss) в Ubuntu 18.04 / Debian 10/9
- Шаг 1: Установите Java
- Шаг 2: Скачать WildFly
- Шаг 3. Настройка Systemd для WildFly
- Шаг 4: Добавить пользователей WildFly
- Шаг 5: Доступ к консоли администратора WildFly
- Доступ к консоли администратора WildFly из веб-интерфейса
- Install and Configure Wildfly (JBoss) on Ubuntu 18.04 LTS
- Install Wildfly
- Step 1: Open the Terminal
- Step 2: Update repository index
- Step 3: Install the OpenJDK package from APT
- Step 4: Create a user and group for WildFly
- Step 5: Download the Wildfly Installation file
- Step 6: Extract the WildFly tar.gz file to /opt folder
- Step 7: Create a symbolic link to point to the WildFly installation directory
- Step 8: Give access to WildFly group and user
- Step 9: Configure Wildfly to be run as a service
- Step 10: Start the WildFly service
- Configure WildFly
- Step 1: Allow traffic on port 8080
- Step 2: Create a WildFly Administrator
- Step 3: Verify the successful setup of WindFly
- How to Open the Administrative console through the web interface?
- How to Open the Administrative Console CLI
- Karim Buzdar
Setting WildFly Home Directory
WildFly HOME Directory is determined by the variable JBOSS_HOME.
Therefore, in order to set it on a Linux Machine you need to:
For Microsoft Windows, from the Windows Start Menu, select Settings, select Control Panel, select System, select Advanced, then select Environment Variables. Click New. In the Variable Name field, enter JBOSS_HOME. In the Variable Value field, enter the path to WildFly. Click OK to commit your entries, then click OK twice more to close the Environment Variables and System Properties windows, respectively.
Please notice that if you are trying to boot WildFly using a script (e.g. standalone.sh) which is not in the JBOSS_HOME a warning will be displayed:
Recent Posts
WildFly books
Privacy Overview
Necessary cookies are absolutely essential for the website to function properly. These cookies ensure basic functionalities and security features of the website, anonymously.
| Cookie | Duration | Description |
|---|---|---|
| cookielawinfo-checkbox-analytics | 11 months | This cookie is set by GDPR Cookie Consent plugin. The cookie is used to store the user consent for the cookies in the category «Analytics». |
| cookielawinfo-checkbox-functional | 11 months | The cookie is set by GDPR cookie consent to record the user consent for the cookies in the category «Functional». |
| cookielawinfo-checkbox-necessary | 11 months | This cookie is set by GDPR Cookie Consent plugin. The cookies is used to store the user consent for the cookies in the category «Necessary». |
| cookielawinfo-checkbox-others | 11 months | This cookie is set by GDPR Cookie Consent plugin. The cookie is used to store the user consent for the cookies in the category «Other. |
| cookielawinfo-checkbox-performance | 11 months | This cookie is set by GDPR Cookie Consent plugin. The cookie is used to store the user consent for the cookies in the category «Performance». |
| viewed_cookie_policy | 11 months | The cookie is set by the GDPR Cookie Consent plugin and is used to store whether or not user has consented to the use of cookies. It does not store any personal data. |
Functional cookies help to perform certain functionalities like sharing the content of the website on social media platforms, collect feedbacks, and other third-party features.
Performance cookies are used to understand and analyze the key performance indexes of the website which helps in delivering a better user experience for the visitors.
Analytical cookies are used to understand how visitors interact with the website. These cookies help provide information on metrics the number of visitors, bounce rate, traffic source, etc.
Advertisement cookies are used to provide visitors with relevant ads and marketing campaigns. These cookies track visitors across websites and collect information to provide customized ads.
Other uncategorized cookies are those that are being analyzed and have not been classified into a category as yet.
Источник
🤲 Установка сервера приложений WildFly (JBoss) в Ubuntu 18.04 / Debian 10/9

Это руководство проведет вас через установку WildFly (JBoss) в Ubuntu 18.04 / Debian 9 / Debian 10. WildFly, ранее известный как JBoss, является сервером приложений, написанным на Java и разработанным Red Hat.
WildFly Application Server – это исключительно быстрая, легкая и мощная реализация спецификаций платформы Java Enterprise Edition 8.
На момент написания этой статьи WildFly 16 был последним выпуском в серии предложений серверов приложений с открытым исходным кодом JBoss.
В этой статье представлен краткий обзор о том, как загрузить и установить WildFly 16 в Ubuntu 18.04 / Debian 10/9 для разработки приложений.
Шаг 1: Установите Java
WildFly написан на Java, и его необходимо установить в качестве предварительного условия.
Существует два варианта установки Java в Ubuntu / Debian.
- Установить OpenJDK
- Установить Java SE Development Kit
Самый простой способ получить Java – это установить OpenJDK в вашей системе Ubuntu / Debian, выполнив следующие команды.
Версия Java по умолчанию, установленная из вышеуказанной команды: Java 10+.
Это поддерживается в WildFly.
Шаг 2: Скачать WildFly
Перед загрузкой файла проверьте страницу загрузок WildFly на наличие последних выпусков.
Здесь мы будем загружать WildFly 16.0.0.Final.
Как только файл загружен, распакуйте его.
Переместите полученную папку в /opt/wildfly.
Шаг 3. Настройка Systemd для WildFly
Давайте теперь создадим системного пользователя и группу, которые будут запускать сервис WildFly.
Создайте каталог конфигураций WildFly.
Скопируйте системный сервис WildFly, файл конфигурации и шаблоны стартовых скриптов из каталога /opt/wildfly/docs/contrib/scripts/systemd/.
Установите права на /opt/wildfly.
Перезагрузите системный сервис.
Запустите и активируйте сервис WildFly:
Подтвердите состояние сервера приложений WildFly.
Служба должна привязываться к порту 8080.
Шаг 4: Добавить пользователей WildFly
По умолчанию WildFly 16 теперь распространяется с включенной защитой для интерфейсов управления.
Нам нужно создать пользователя, который сможет получить доступ к консоли администрирования WildFly или удаленно использовать CLI.
Скрипт предназначен для управления пользователями.
Запустите его, выполнив команду:
Вам будет предложено выбрать тип пользователя для добавления.
Поскольку это первый пользователь, мы должны сделать его администратором. Так что выбирайте a
Укажите желаемое имя пользователя:
Установите пароль для пользователя:
Нажмите ввод и согласитесь с последующими запросами, чтобы завершить создание пользователя.
Обратите внимание, что:
- Информация о пользователе хранится по адресу: /opt/wildfly/domain/configuration/mgmt-users.properties
- Информация о группе хранится по адресу: /opt/wildfly/standalone/configuration/mgmt-groups.properties
Шаг 5: Доступ к консоли администратора WildFly
Чтобы иметь возможность запускать скрипты WildFly из текущей сессии оболочки, добавьте /opt/wildfly/bin/ в вашу переменную $PATH.
Теперь проведите тестирование, подключившись к консоли администратора WildFly из CLI с помощью команды jboss-cli.sh.
Доступ к консоли администратора WildFly из веб-интерфейса
По умолчанию консоль доступна по локальному IP-адресу через порт 9990.
Мы можем запустить его на другом IP-адресе, доступном снаружи локального сервера.
Отредактируйте /opt/wildfly/bin/launch.sh, чтобы он выглядел так:
ы добавили -bmanagement = 0.0.0.0, чтобы запустить строку скрипта.
Это связывает интерфейс «management» со всеми доступными IP-адресами.
Перезапустите сервис wildfly
Откройте браузер и URL-адрес http://serverip:9990, чтобы получить доступ к веб-консоли WildFly.
Используйте имя пользователя, созданное ранее, и пароль для аутентификации.
Консоль WildFly будет выглядеть следующим образом
Источник
Install and Configure Wildfly (JBoss) on Ubuntu 18.04 LTS
WildFly, formerly known as JBoss, is a free, open-source, and cross-platform application server which is now developed by Red Hat. WildFly is written in Java and helps you in building great applications. With its pluggable subsystems, you can configure the application as and when you need. In this article, we will explain how a Ubuntu administrator can install and configure Wildfly for local and remote access.
We have run the commands and procedures mentioned in this article on a Ubuntu 18.04 LTS system.
Install Wildfly
A Ubuntu administrator can install a stable WildFly application server using the following steps carefully:
Step 1: Open the Terminal
We will be using the Ubuntu command line, the Terminal, in order to install and configure WildFly. You can open the Terminal application either through the Application Launcher search or the Ctrl+alt+T shortcut.
Step 2: Update repository index
In order to install the latest available version of software from the Internet repositories, your local repository index needs to be in line with them. Run the following command as sudo in order to update your local repository index:

Step 3: Install the OpenJDK package from APT
Please run the following command as sudo in order to install OpenJDK from the APT repositories:
Please note that only an authorized user can add, remove and configure software on Ubuntu.

The system might ask you the password for sudo and also provide you with a Y/n option to continue the installation. Enter Y and then hit Enter.
Step 4: Create a user and group for WildFly
As a preliminary step, you need to create a user and group that will later be used to run the WildFly service.
Run the following command to create a new group:
 Advertisement
Run the following command to add a user who will be authorized to run the service from /opt/wildfly

Tip: You will need to use some long commands during the installation of WildFly. Instead of typing a command, you can copy it from here and paste in the Terminal by using the Ctrl+Shift+V, or by using the Paste option from the right-click menu.
Step 5: Download the Wildfly Installation file
We will be now downloading the tar.gz for WildFly from the official JBoss website.
First, let us create a variable to define the version number of WildFly that we would like to download.
I want to download version 16.0.0.Final now. This variable can be used in all the commands where you need to specify the WildFly version.
Run the following command to download the tar.gz file to a the /tmp folder of your Ubuntu.
Step 6: Extract the WildFly tar.gz file to /opt folder
The WildFly software will be installed once you extract the downloaded .tar.gz file. Run the following command as sudo in order to extract the file to the /opt folder.

Step 7: Create a symbolic link to point to the WildFly installation directory
Run the following command to create a symbolic link by the name of wildfly. This link will point to the WildFly installation directory.

Step 8: Give access to WildFly group and user
The WildFly user and group need ownership over the WildFly installation directory so that they can access and run WildFly.
Run the following command to do so:

Step 9: Configure Wildfly to be run as a service
Please follow these steps carefully so that you can configure WildFly to be run as a Systemd service:
1. Create a directory where we will copy the wildfly.conf file. This file is a part of the WildFly package that you downloaded and installed.
2. Copy the wildfly.conf file from the package files to the newly created directory through the following command:

3. Open the configuration file in the Nano editor through the following command:
You can, of course, use any of your favorite text editors too.
This is how the file looks like:

This file, for now, includes the basic configuration for a standalone system. We will later explain how to edit this file for customized configurations such as while trying to access the administrative console remotely.
4. Next, copy the launch.sh script from the WildFly package to the /opt/wildfly/bin/ folder:
Also, make the script executable through the following command:

5. The last file to copy is the wildfly.service unit file to your system’s services folder /etc/systemd/system

6. Finally, you have to inform your system that you have added a new unit file. This can be done by reloading the systemctl daemon:

You are now ready to run the WildFly service as an administrator.
Step 10: Start the WildFly service
Now the WildFly service can be run like any other service recognized by Ubuntu.
Run the following command as sudo to start the service:
You can verify if all is working well by checking the status of the service as follows:

The Active status, as highlighted, above verifies that the service is up and running.
Another thing that will help you as a regular WildFly user is to enable the WildFly service at boot:
Configure WildFly
Now that we have installed WildFly and made it run as a service, it is time to make some configurations. These basically include:
- Adjusting your firewall
- Creating a secure WildFly administrator
- Verifying the successful setup
- Accessing the WildFly administrative console, locally and remotely
Please follow these steps one-by-one so that you use the WildFly portal reliably.
Step 1: Allow traffic on port 8080
Ubuntu systems are by default protected by the UFW firewall. If you want that your WildFly server can be accessed remotely, you need to allow traffic on port 8080.
Run the following command to do so:

Step 2: Create a WildFly Administrator
In this step, we will be creating and configuring a WildFly user. This user will be a management user/administrator for the web based administrative console and the CLI that can be used remotely.
Run the following command to run the add-user script from the WildFly directory:
The procedure following here is pretty much self-explanatory, but we will guide you nonetheless.
The script will first ask you if you want to create a management user or an application user:

Simply hit Enter to specify that you want to create a management user.
The script will then prompt you to add details about the new user. This includes adding a username of the new admin and specifying and then re-entering the password as follows:

In the above image, you can see that I created a user named “admin-wildfly”.
The next prompt will ask you if the user should be able to use the console remotely.

Enter y and the script will verify the user creation through the following message:

This user can now perform administrative functions on WildFly.
Step 3: Verify the successful setup of WindFly
Let us now verify if our WindFly server is up and running. Open your browser and enter the following URL:
I am testing the setup on my localhost:

If you see something similar to what is shows above, we can assure you that your WildFly instance is up and running.
How to Open the Administrative console through the web interface?
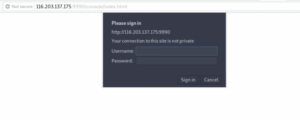
Enter the following URL in your browser in order to open the administrative console through the local system:

Specify the User Name and Password of the management user you created in Step 2 of ‘Configure WildFly”. The console will open as follows when you click the OK button:

Managing the Administrative console remotely
In order access the Administrative Console remotely, you need to make small configurations to three WildFly files.
1. Open the wildfly.conf file through the following command:
Add the following lines to the end of the file:
This is how the file should look like:

Quit the file through Ctrl+X and then save the changes by hitting y and then Enter.
2. Open the launch .sh script file through the following command:

Change the highlighted lines to the following:
Quit the file through Ctrl+X and then save the changes by hitting y and then Enter.
After that, restart the WildFly service through the following command:
3. Finally, edit the wildfly.service file through the following command:

Replace the highlighted line with the following:
Since we have changed the service unit file, let us notify the system through the following command:
Also, restart the WildFly service through the following command:

You can now access the console by entering the following URL on a remote machine:
Please ensure that port 9990 is open for traffic on your firewall.
How to Open the Administrative Console CLI
Open your Ubuntu Terminal and switch to the /opt/wildfly/bin folder from where we will be running the CLI script:
Then, enter the following command to run the WildFly Administrative Console CLI script:

You are now is the “[[email protected]:9990 /] console.
Enter “help” to see what all you can do here.

I will check the version number by entering the “version” command:

You have successfully installed and configured WildFly on your system. You also know how to configure WildFly and your system so that you can access the Administrative console remotely.
Karim Buzdar
About the Author: Karim Buzdar holds a degree in telecommunication engineering and holds several sysadmin certifications. As an IT engineer and technical author, he writes for various web sites. You can reach Karim on LinkedIn
Источник


