- X11vnc
- Contents
- Setting up x11vnc
- Installation
- Starting
- Setting X authority
- Setting a password
- Running constantly
- Accessing
- SSH Tunnel
- Troubleshooting
- Screensaver problem
- IPv6 port different from IPv4 port
- Copying and Pasting
- Session closes unexpectedly
- Tips and tricks
- Run x11vnc «system-wide» in (GDM and GNOME Shell)
- Run x11vnc «system-wide» in (SDDM and Plasma)
- Change x11vnc password in each boot
- Настройка удаленного рабочего стола (VNC, x11vnc)
X11vnc
x11vnc is a VNC server, it allows one to view remotely and interact with real X displays (i.e. a display corresponding to a physical monitor, keyboard, and mouse) with any VNC viewer. While it is not developed any longer by its original author Karl Runge, LibVNC and the GitHub community have taken over the development.
x11vnc does not create an extra display (or X desktop) for remote control. Instead, it shows in real time the existing X11 display, unlike Xvnc, part of TigerVNC, which is an alternatives VNC server available in the official repositories.
Also note that x11vnc is not shipped with a client viewer. Any VNC viewer should do the job and be compatible with the x11vnc server while not necessarily using all its functionalities. TigerVNC’s vncviewer is a recommended client.
Contents
Setting up x11vnc
Installation
Install x11vnc from the official repositories.
Starting
First, start X either by startx or through a display manager. You may need to set up X to run headless too.
Then, run the following command, all available options are explained in x11vnc(1) .
Another option is to place the x11vnc command line in a script which is called at login, for example:
Setting X authority
You may set an X authority file for the VNC server. This is accomplished by using the -auth argument followed by the appropriate file, which will depend on how your X server was started. Generally, assigning an X authority file requires running x11vnc as root.
Start X
If that fails, you may have to run instead (as root):
Where user is the username of the user who is running the X server.
Running from xinetd
X11vnc can be run using a xinetd service, which only starts X11vnc once a user connects.
Create an xinetd service entry for x11vnc, for example:
After reloading xinetd.service , X11vnc will start once a client connects to port 5900.
Systemd
To run x11vnc when system boots, create the override with systemctl edit x11vnc.service . The content should be like the following
Replace the second ExecStart with the command you run interactively. Run systemctl enable x11vnc.service if you need.
Newer versions of GDM uses /run/user. Example for user 120 (gdm), used for login screen.
or see Troubleshooting section below
Lightdm
Running from the bash:
SDDM uses an unpredictable UUID for the auth file [1] therefore one needs to:
Embedding this into a systemd .service file will require a trick to evaluate the find command as shown here [2].
Setting a password
uses the password found in
/.vnc/passwd , where the password is obscured with a fixed key in a VNC compatible format, or alternatively in
/.vnc/passwdfile , where the first line of the file contains the password. If none of these files can be located, it prompts the user for a password which is saved in
/.vnc/passwd and is used right away.
The VNC viewer should then prompt for a password when connecting.
Running constantly
By default, x11vnc will accept the first VNC session and shutdown when the session disconnects. In order to avoid that, start x11vnc with either the -many or the -forever argument, like this:
It is also possible to use the following command :
this will restart the server once the session is finished
Accessing
Get a VNC client on another computer, and type in the IP address of the computer running x11vnc. Hit connect, and you should be set.
If you are attempting to access a VNC server / computer (running x11vnc) from outside of its network then you will need to ensure that it has port 5900 forwarded.
SSH Tunnel
You need to have SSH installed and configured.
Use the -localhost flag with x11vnc for it to bind to the local interface. Once that is done, you can use SSH to tunnel the port; then, connect to VNC through SSH.
(You will likely have to provide passwords/passphrases to login from your current location into your remote_host Unix account; we assume you have a login account on remote_host and it is running the SSH server)
And then in another terminal window on your current machine run the command:
Troubleshooting
1. You can check your ip address and make sure port 5900 is forwarded by visiting this [dead link 2020-04-03 ⓘ] website.
 The factual accuracy of this article or section is disputed.
2. Tested only on GNOME + GDM
If you cannot start the tunnel, and get error like XOpenDisplay(«:0») failed, Check if you have a
/.Xauthority directory. If that does not exist, You can create one easily (Actually a symlink to actual one) by running command given below as normal user NOT ROOT OR USING Sudo as below:
then try above tunneling example and it should work fine. Further if you want this to be automatically done each time Xorg is restarted, create the xprofile file & make is executable as below
3. GNOME 3 and x11vnc
If you are using GNOME 3 and x11vnc and you get the following errors
Try running x11vnc like
Please update if this works / not works for any other display manager or desktop environment.
Screensaver problem
If screensaver starts every 1-2 second, start x11vnc with -nodpms key.
IPv6 port different from IPv4 port
The default behavior for the command:
is for the server to listen to TCP port 5908 and TCP6 port 5900. For the server to listen to the same TCP6 port, also use the -rfbportv6 option to force the IPv6 listening port. For example:
Copying and Pasting
If copying and pasting does not work as expected, particularly if pasting to the remote side is not working or clipboard behaviour is not as expected, try adding -xkb :
Although the documentation does not indicate -xkb specifically for clipboard problems, it resolved an issue where vim complained that there was nothing in the * register.
Session closes unexpectedly
x11vnc enables the X Damage extension by default, which significantly reduces the load when the screen is not changing much and detects changed areas more quickly. This extension is known to cause issues[4][5][6][7], and it may cause the session to close unexpectedly with caught XIO error messages appearing at the log. This issue can be circumvented by using the -noxdamage option.
Tips and tricks
![]() This article or section needs language, wiki syntax or style improvements. See Help:Style for reference.
This article or section needs language, wiki syntax or style improvements. See Help:Style for reference.![]()
Run x11vnc «system-wide» in (GDM and GNOME Shell)
Perform the following steps to run x11vnc in GDM to log in and then run x11vnc in a GNOME shell user session for a «system-wide» x11vnc:
First we need to create a systemd service to launch an x11vnc server in GDM:
This will start an x11vnc server protected by the password stored at user_home/.vnc/passwd that shows GDM to any connected VNC client, however as you may notice, if you click on any of the users, as soon as you log in, all the VNC clients will show a black screen. To fix this, we need to create another systemd service that will start another x11vnc server in the GNOME Shell session as soon as you log in:
Now, you need to keep the following in mind:
- As you may notice in the ExecStart part of the systemd service, the command that executes can be separated in two tasks: first it stops x11vnc-gdm.service (killing the GDM x11vnc server) and then it starts the x11vnc server for the user in the GNOME shell session. This is done because if you keep running the GDM x11vnc server in the background, the new x11vnc server for the user will use the next available port, and you would need to change your client connection settings to connect either to the GDM x11vnc server or for your user-specific x11vnc server. A setup like this is useful because the GDM x11vnc server stops as soon as you log in into your account.
- You need to create a service like this for each user that you want to have this functionality. (Do not forget to replace your_user and user_home with your actual username.)
- You may need to change the -display :X part of the command to match your system settings. You can view your current display by running echo $DISPLAY . Use the resulting output to match the systemd service.
Now, as you might notice, x11vnc-gnome-shell.service is executed as your (probably) unprivileged user. This presents a problem if we want to stop the x11vnc-gdm.service , so we need to allow the user to stop the GDM service. This can be accomplished using sudo, but we need to allow the execution of only that specific command without a password. This can be done as follows:
Execute visudo(8) as root:
At the end of the file, add the following line and save your changes:
Now you simply need to enable x11vnc-gdm.service and x11vnc-gnome-shell-your_user.service . When you restart your computer, both of them will start running and you can connect to your GDM and GNOME Shell using VNC.
Run x11vnc «system-wide» in (SDDM and Plasma)
To run x11vnc when the system boots into SDDM (if the aforementioned methods do not work for you), just edit x11vnc.service as follows:
Remember to change your_user in the path, or use the preferred auth method. Disable the old x11vnc.service and reload the systemd manager configuration. Reenable the x11vnc.service unit afterwards.
Change x11vnc password in each boot
A setup like this could be useful if you need to share your desktop with several people that you do not trust and if you do not want to manually change the password every time. Such a setup would generate boot-unique passwords, so if you share your password with someone, you only need to reboot your computer (or re-run the systemd service) to change the password.
The new generated password will be stored as plain text in
/.vnc/autovncpass , so it can be accessed with
To accomplish this, perform the following steps:
First install the expect package.
Then, create the following script anywhere in your home directory:
Now we need to create a systemd unit file that will execute the script at boot time:
Finally, start/enable the service to change the password. You can access the current password with
Источник
Настройка удаленного рабочего стола (VNC, x11vnc)
С линуксом жизнь становится интересней, я бы даже сказал экспериментальней!
Меня потянуло на эксперименты с ssh, и то, что я получил в итоге — доступ с работы к домашнему компу — мне очень понравилось! Еще бы — классно управлять домашним компом, обновлять его и т.п. С девушкой даже с помощью festival разговаривал)))
Однако, захотелось пойти дальше, интересно, можно ли настроить удаленный доступ к рабочему столу, как позволяет это RAdmin в Windows? Можно конечно! Надо только настроить))
Покопался в интернете, нашел несколько статей про VNC — Virtual Network Computing, решил такое счастье сделать и у себя!
Для этого сначала необходимо было поставить несколько утилит:
sudo aptitude install vnc4-common vnc4server xvnc4viewer
Эти утилиты необходимы непосредственно для того, чтобы запускать удаленный сервер (vnc4server) и подключаться к нему с удаленного клиента (xvnc4viewer).
Установили! Теперь дело остается за малым: сначала нужно запустить vnc-сервер, а потом подключиться к нему.
Для запуска удаленного сервера, нужно в консоли набрать
Если это первый запуск vncserver в системе с этой учётной записью пользователя, тогда вы должны ввести пароль, который клиенты будут использовать при подключении, после чего запустится сервер, который будет доступен на порту 5901. Кстати, при запуске сервера в консоль выведется номер дисплея (виртуального), на котором он будет доступен, отсчет ведется с 1 (так как 0 — текущий дисплей). Пример запуска:
$ vncserver
New ‘Voyageur:1 (igor)’ desktop is Voyageur:1
Starting applications specified in /home/igor/.vnc/xstartup
Log file is /home/igor/.vnc/Voyageur:1.log
Здесь строчка New ‘Voyageur:1 (igor)’ desktop is Voyageur:1 как раз говорит о том, что у меня компе запустился сервер на дисплее 1, доступен он на порту 5901.
Если vncserver запустить еще раз, то загрузится новый терминальный сервер :2 на порту 5902 и т.д.
Теперь попробуем зайти на этот сервер с удаленной машины. Для этого необходимо в консоли удаленного клиента ввести команду:
В этой команде __hostname__ — это доменное имя или ip машины, на которой запущен удаленный сервер. Далее необходимо будет ввести пароль и в результате появится приблизительно вот такое окно:
Немного не то я ожидал увидеть если честно)) Начал разбираться, и оказалось, что vncserver запускает лишь новую сессию, а не подключается к текущей, именно для этого и нужны виртуальные дисплеи. А в этой сессии запущены twm (Tab Window Manager for the X Window System) и xterm.
Между прочим это все добро запускается из скрипта
/.vnc/xtartup, который можно редактировать, удаляя ненужные и добавляя свои строчки запуска необходимых приложений. В самом верху скрипта есть небольшой комментарий:
# Uncomment the following two lines for normal desktop:
# unset SESSION_MANAGER
# exec /etc/X11/xinit/xinitrc
То есть, чтобы получить нормальный рабочий стол, нужно раскомментировать 2 строчки. Я их раскомментировал, но ничего хорошего из этого у меня не вышло.
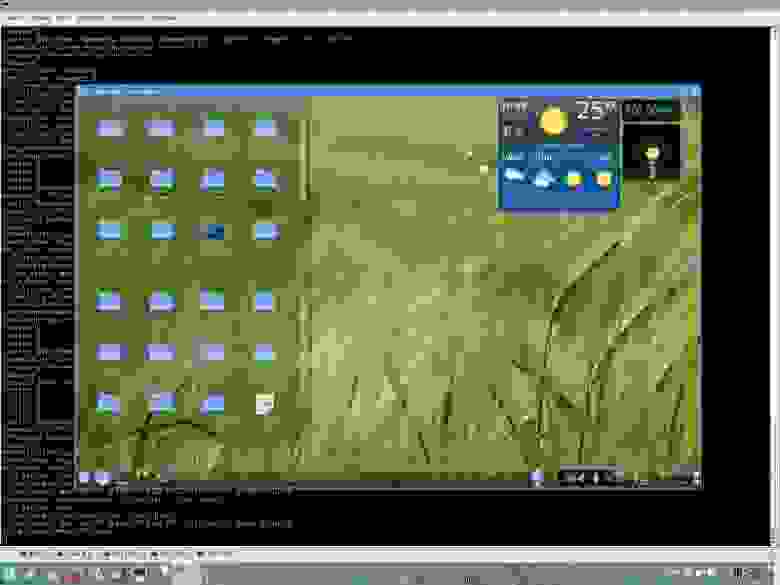
Посмотрел я на этот twm, и решил, что с этим убожеством работать нельзя. Я установил fluxbox (занимает всего 6 Мб) и в скрипте xstartup заменил строчку
В итоге у меня получилось вот так:

Нормально для работы. Но не айс! Оперу можно запустить, еще некоторые приложения, но далеко не все (приложения kde выламываются)! Пробовал я вместо fluxbox’a запустить kde, но не пошло… Играет приветствие входа в систему, но вылетает окно с крахом плазмы и все, черный экран, занавес…
В итоге я получил удаленный доступ, но не такой как хотел! Мне-то хотелось иметь доступ к текущему рабочему столу, а не к мифическому дисплею 1, на котором загружается fluxbox, но не kde.
Что делать? Надо копать еще.
Я поискал в репозиториях пакеты, в названии которых присутствует «vnc», список оказался не очень большой, я начал читать комментарии к утилитам и библиотекам… В самом конце списка я увидел такую строчку:
p xvnc4viewer — Virtual network computing client software for X
Очень похоже на то, что мне нужно!
Я установил x11vnc. man у этой утилиты знатный, несколько тысяч строк)) После небольшого его изучения я более менее разобрался с процедурой запуска и назначением утилиты.
Итак, x11vnc является фактически удаленным сервером (как и vncserver), но позволяет получать доступ к уже существующей X-сессии!
На машине, к которой необходимо подключиться:
Эта команда позволит позаимствовать пароль для подключения к серверу из файла
/.vnc/passwd (тут лежит пароль, который был задан при первом запуске vncserver). Далее непосредственно запустим x11vnc:
x11vnc -usepw -display :0
Опция -usepw задействует использования пароля при подключении к серверу, -display :0 — запускает сервер на нулевом дисплее (так, где открыта текущая X-сессия).
Теперь мы с удаленной машины можем подключиться к текущей X-сессии, выполнив
При закрытии окна удаленного рабочего стола, завершается и работа x11vnc (на сервере)
Таким образом, я получил то, что хотел))))
Напоследок приведу несколько опций для утилит vncserver, x11vnc и vncviewer, облегчающих траффик и жизнь))
vncserver:
- -kill :n — завершает работу терминального сервера на дисплее n (порту 590n), если он раньше был запущен
- -geometry 800×600 — устанавливает размер создаваемого рабочего стола (по умолчанию 1024×768)
- -depth depth — устанавливает глубину цвета в битах, по умолчанию 16 бит, можно изменить на 8, 15, 24
- Для запуска VNC-сервера с определенным номером (дисплеем) используется команда vncserver :n
x11vnc:
- -q — уменьшает вывод отладочной информации в stderr
- -forever — данная опция не завершает работу x11vnc-сервера, когда первый клиент отключается, а ждет следующих подключений
vncviewer:
- -geometry 800×600 — устанавливает размер окна, в котором будет отображаться удаленный рабочий стол. Если указанный размер меньше размера удаленного стола, то появятся полосы прокрутки
- -compressionlevel n — устанавливает уровень сжатия данных. Значение n варьируется от 0 до 9, 9 — наилучшее сжатие (качество, соответственно, хуже)
- -quality m — влияет на качество картинки. m варьируется от 0 до 9, 0 — наихудшее качество изображения (меньше траффик)
- -depth depth — если X-сервер поддерживает различные значения глубины цвета, то можно попытаться подобратьоптимальное значение (в битах)
- -viewonly — опция, позволяющая подключившемуся пользователю только наблюдать за тем, что происходит на удаленной машине, средства управления (мышь, клавиатура) недоступны
P.S. Кстати, если нужно, чтобы x11vnc запускался автоматически, то для этого его нужно добавить в автозагрузку: в Настройках системы выбрать пункт Автозагрузка (на второй вкладке), там добавить скрипт
x11vnc -usepw -display :0 -q -forever &
и указать, что он должен запускаться до старта KDE!
Источник


