- Windows 10 update history
- Updates for Windows 10, version 1903 and Windows Server, version 1903
- Current status of Windows 10, version 1903 and Windows Server, version 1903
- Notes and messages
- General
- End of servicing
- Troubleshooting
- How to Get a List of Installed Windows 10 Updates
- How to see the update history with the Settings app
- How to see the update history via the Control Panel
- See your update history with Command Prompt and SystemInfo
- How to see use PowerShell to get a list of installed updates
- 4 Ways To View And Save List Of Updates Installed On Windows 10
- Using Windows Update History
- Using Command-line options – DISM/SystemInfo
- SystemInfo
- Using PowerShell
- Using WinUpdatesList
- Continue Reading:
- 2 thoughts on “ 4 Ways To View And Save List Of Updates Installed On Windows 10 ”
- How to Check if a Windows Update (KB) is Installed on your Computer?
- Find if a Windows Update KB has been applied
- How to Check if a Windows Update (KB) is Installed on your Computer
- Method 1: Check the Windows Update history
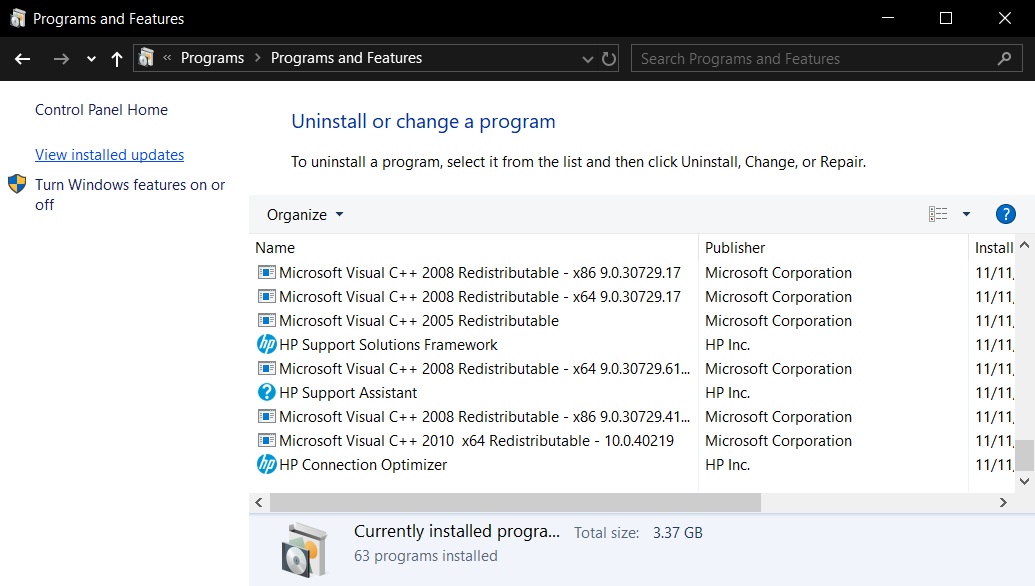
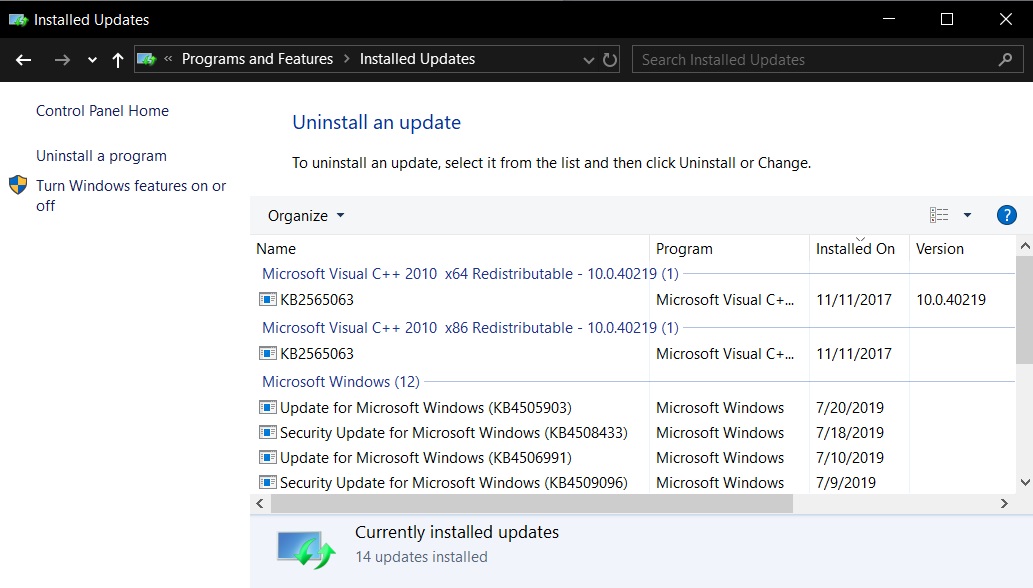
- Method 2: View installed updates in Programs and Features Control Panel
- Method 3: Using DISM command
- Method 4: Run the KB update installer (.msu) file again.
- Method 5: Using WinUpdatesList or WinUpdatesView utility from NirSoft
- WinUpdatesView (Windows Updates History Viewer)
- Method 6: Using WMI command-line
- Method 7: Check the Windows Update CBS Registry Entries
- Determine the install date & time of an update using registry
Windows 10 update history
Windows 10, version 1903 and Windows Server, version 1903
Updates for Windows 10, version 1903 and Windows Server, version 1903
Windows 10 is a service, which means it gets better through periodic software updates.
The great news is you usually don’t have to do anything! If you have enabled automatic updates, new updates will automatically download and install whenever they’re available, so you don’t have to think about it.
On the left side of this page, you’ll find a list of all the updates released for this version of Windows. You can also find more information about releases and any known issues. Installing the most recent update ensures that you also get any previous updates you might have missed, including any important security fixes.
Current status of Windows 10, version 1903 and Windows Server, version 1903
For the most up-to-date information about Known Issues for Windows and Windows Server, please go to the Windows release health dashboard.
Notes and messages
General
IMPORTANT Release notes are changing! To learn about the new URL, metadata updates, and more, see What’s next for Windows release notes.
IMPORTANT Starting in July 2020, we will resume non-security releases for Windows 10 and Windows Server, version 1809 and later. There is no change to the cumulative monthly security updates (also referred to as the «B» release or Update Tuesday release). For more information, see the blog post Resuming optional Windows 10 and Windows Server non-security monthly updates.
IMPORTANT Starting in July 2020, all Windows Updates will disable the RemoteFX vGPU feature because of a security vulnerability. For more information about the vulnerability, seeCVE-2020-1036 and KB4570006. After you install this update, attempts to start virtual machines (VM) that have RemoteFX vGPU enabled will fail, and messages such as the following will appear:
If you re-enable RemoteFX vGPU, a message similar to the following will appear:
“The virtual machine cannot be started because all the RemoteFX-capable GPUs are disabled in Hyper-V Manager.”
“The virtual machine cannot be started because the server has insufficient GPU resources.”
«We no longer support the RemoteFX 3D video adapter. If you are still using this adapter, you may become vulnerable to security risk. Learn more (https://go.microsoft.com/fwlink/?linkid=2131976)”
What’s new for Windows 10, version 1909 and Windows 10, version 1903 release notes
Windows 10, versions 1903 and 1909 share a common core operating system and an identical set of system files. As a result, the new features in Windows 10, version 1909 were included in the recent monthly quality update for Windows 10, version 1903 (released October 8, 2019), but are currently in a dormant state. These new features will remain dormant until they are turned on using an enablement package, which is a small, quick-to-install “master switch” that simply activates the Windows 10, version 1909 features.
To reflect this change, the release notes for Windows 10, version 1903 and Windows 10, version 1909 will share an update history page. Each release page will contain a list of addressed issues for both 1903 and 1909 versions. Note that the 1909 version will always contain the fixes for 1903; however, 1903 will not contain the fixes for 1909. This page will provide you with the build numbers for both 1909 and 1903 versions so that it will be easier for support to assist you if you encounter issues.
For more details about the enablement package and how to get the feature update, see the Windows 10, version 1909 delivery options blog.
End of servicing
IMPORTANT Windows 10, version 1903 will reach end of servicing on December 8, 2020. To continue receiving security and quality updates, Microsoft recommends that you update to the latest version of Windows 10. If you want to update to Windows 10, version 1909, you must use the Enablement Package KB4517245(EKB). Using the EKB makes updating faster and easier and requires a single restart. For more information, see Windows 10, version 1909 delivery options.
Troubleshooting
If you have questions or need help activating or troubleshooting Windows, see our help topics below:
For information about how to update, see Update Windows 10.
If you have questions about manually installing or removing an update, see Windows Update: FAQ.
Getting an error message when updating? See Troubleshoot problems updating Windows 10.
If you need to activate Windows, see Activation in Windows 10. If you’re having trouble with activation, see Get help with Windows activation errors.
To get the latest major update to Windows 10, see Get the Windows 10 October 2018 Update.
How to Get a List of Installed Windows 10 Updates
Mayank Parmar
Windows 10 cumulative updates are released at least twice every month, and the updates include both security and non-security fixes. The monthly updates are downloaded and installed automatically in the background to provide quality improvements and important security fixes. Updates to servicing stack, security components are also installed without user’s consent.
Installing Windows 10 updates isn’t always an easy thing to do and the process can often fail or end up breaking your PC. That’s why it’s useful to be able to see what updates are installed in the event you are trying to diagnose a problem or to make sure you are up to date.
In this Windows 10 guide, we will provide different ways that you can use to get a a list of installed Windows 10 updates.
How to see the update history with the Settings app
You can verify the list of installed updates with Windows 10’s Settings. To check if a specific update is applied, follow these steps:
- Open Start menu.
- Go to Settings.
- Navigate to Update & Security > Windows Update.
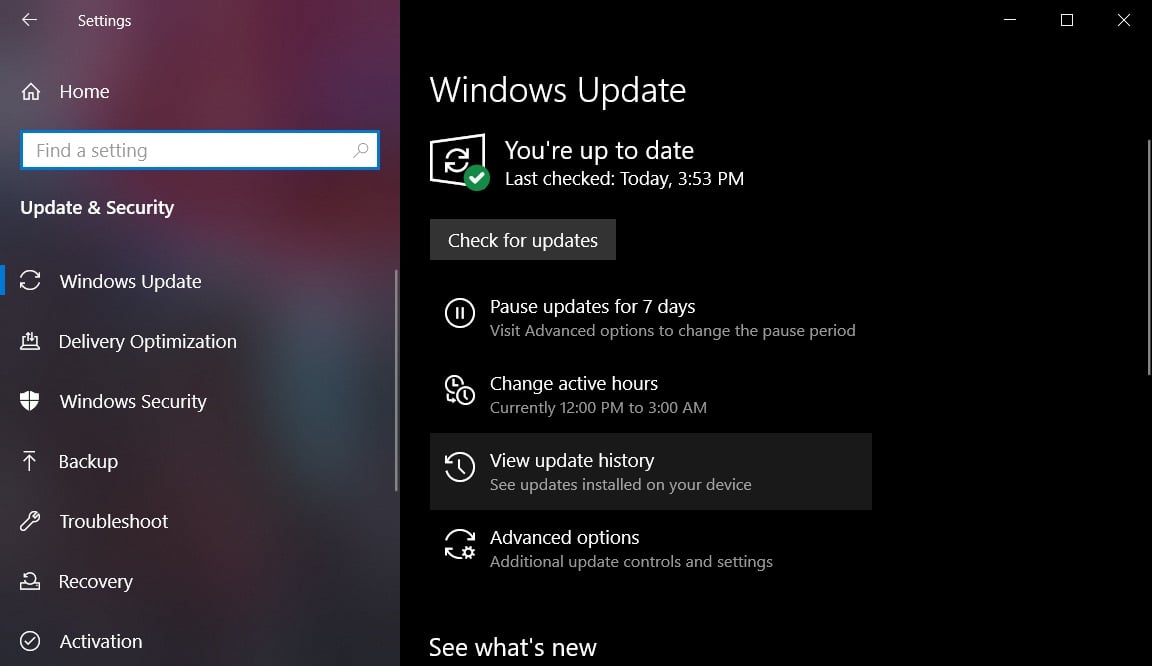
Click on ‘View update history‘.
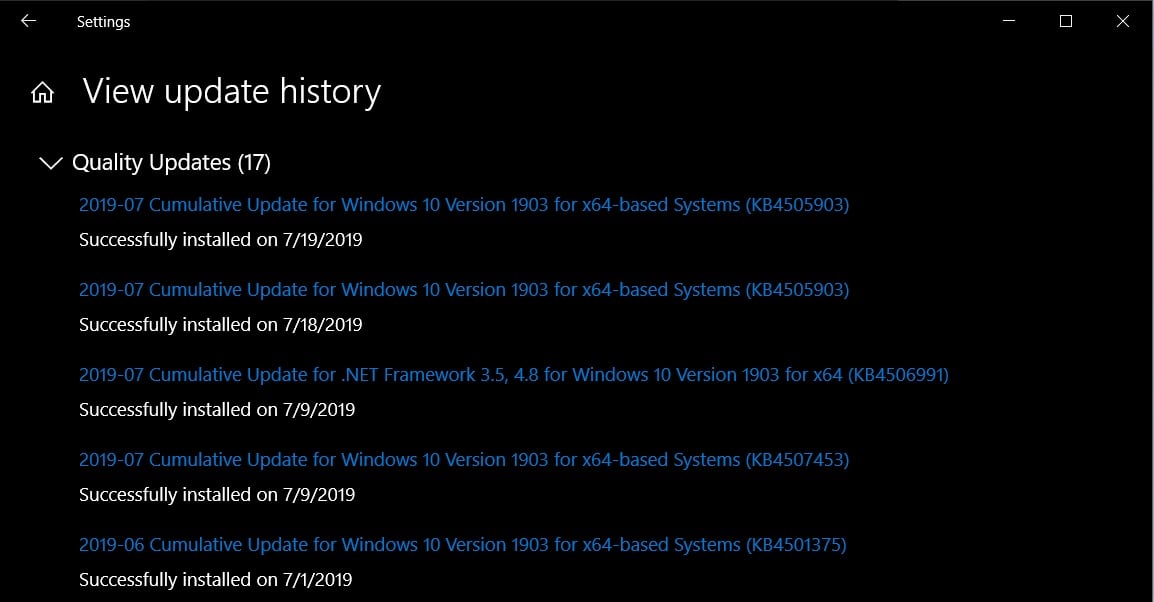
In the Windows Update History page, you will now see a list of updates and when they were installed.
How to see the update history via the Control Panel
Other updates such as Windows 10 Servicing Stack, Intel Microcodes and Visual Studio patches won’t be listed on Windows Update page. As a result, you have to head over to the Control Panel to find the list of additional updates.
- Open Start menu/Cortana.
- Search for Control Panel.
In Control Panel, navigate to Programs > Programs and Features.
Click on ‘View Installed Updates‘ to see the full list of additional updates.
See your update history with Command Prompt and SystemInfo
You can also view the update history via the command prompt and the systeminfo command. This is useful if you wish to get a list of updates via a batch file.
- Open Search/Cortana.
- Search for ‘cmd‘.
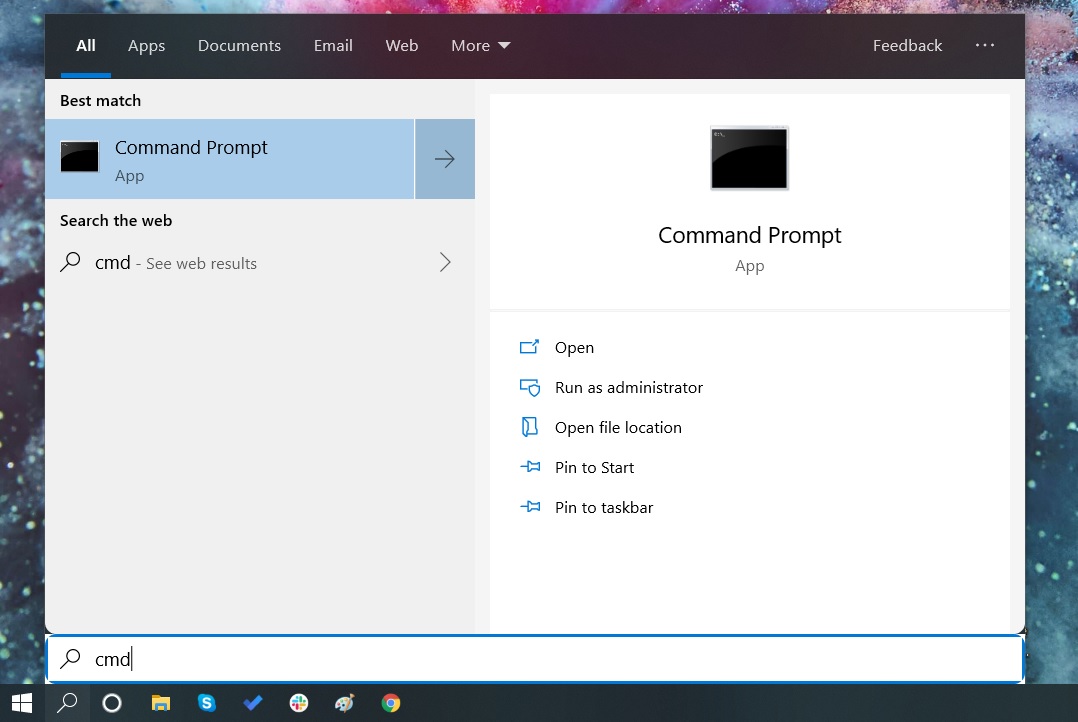
Open a command prompt with admin privileges.

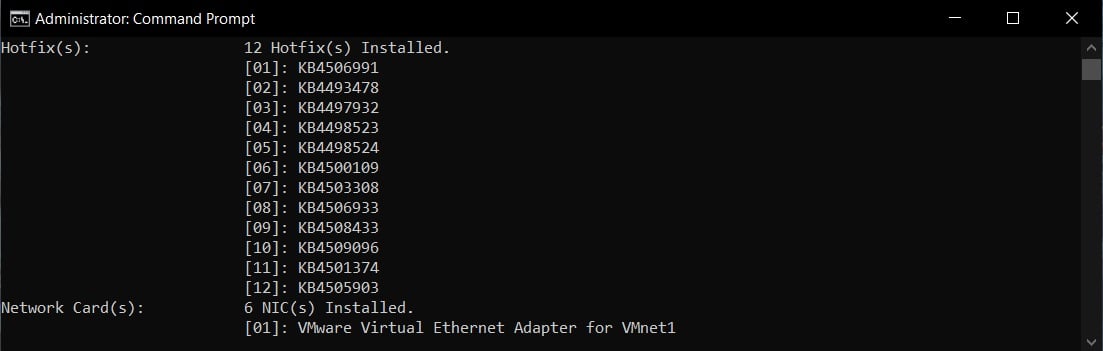
Type systeminfo.exe and press Enter.
How to see use PowerShell to get a list of installed updates
Finally, you can use PowerShell to get a list of updates and to query for specific ones. This method is extremely useful for system administrators who may want to query what computers have a particular update installed.
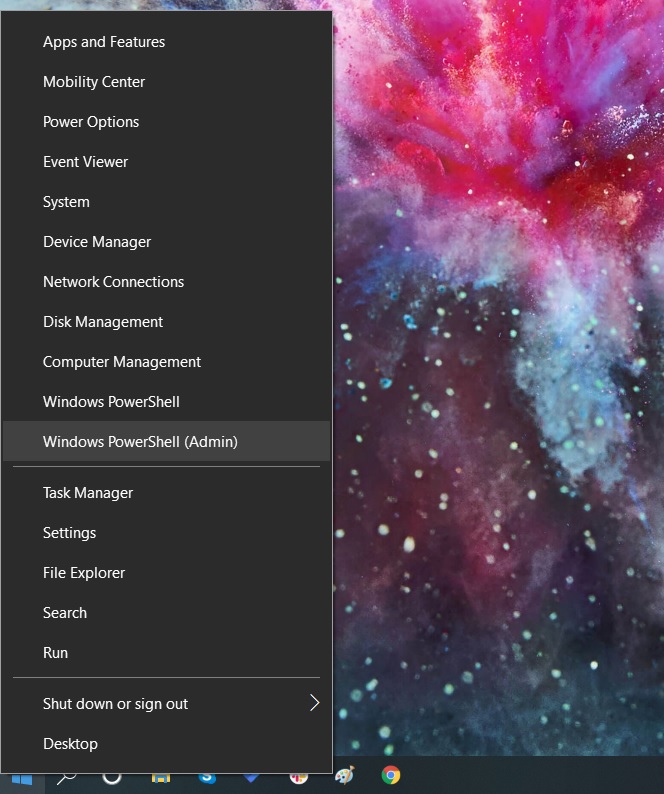
- Right-click Start menu icon.
It is also possible to check if a particular update is installed by using the KB number as an argument. For example, the command Get-Hotfix KB4505903 will check if the KB4497932 is installed.
4 Ways To View And Save List Of Updates Installed On Windows 10
Normally, Windows Update does not require any administration. Microsoft is making it much like a set it and forget it tool. But some applications require specific hotfixes and updates installed on your computer before they can run. For example, some applications require a specific version of .NET Framework, Visual C++ redistributable or Java, etc. And some apps require hotfixes instead of add-ons.
In this article, we will discuss how to view a list of all the Windows updates installed on your computer, whether they are feature updates, hotfixes or quality updates. There are several ways of doing this. We will discuss some ways of viewing and saving the list of installed updates in Windows 10. Each method has its own advantages. You can use whichever is suitable for your specific requirement. If you are a network administrator, you should pay attention to the command-line and PowerShell methods as these can be used to extract data from remote computers as well.
So let’s start with the visual option first.
Using Windows Update History
- Go to Windows Settings (Windows key + i)
- Go to Update & Security
- Select Windows Update from the left-hand menu and click on View update history link on the right-hand side.
View update history in Windows 10
This will show you all the updates installed on your Windows 10 computer. The updates are categorized into the following categories:
- Quality updates
- Driver updates
- Definition updates
- Other updates
The only caveat in using this method is you can’t search for a specific update. You will have to go through the list of updates manually.
Using Command-line options – DISM/SystemInfo
There are two commands which can be used to extract Windows updates information from the system. Let’s discuss them one by one.
Run the following command to get all information about each hotfix installed on your computer.
wmic qfe list full
You can also format the output as a table so that it is easy to read and comprehend.
wmic qfe list full /format:table
If full information is not required, you can use the following command to get the summary:
wmic qfe list brief
And if you want to find a specific hotfix, run the following command:
wmic qfe list brief | find “KB4495667”
To save the complete output in a file, run the following command:
wmic qfe list full /format:table > C:\Users\Usman\Desktop\WindowsUpdatesReport.html WMIC command to list installed Windows updates
SystemInfo
If you only want a list of KnowledgeBase updates numbers, then you can use the systeminfo command.
- Open Command Prompt
- Run the following command
systeminfo | find “KB”
systeminfo hotfixes installed
Using PowerShell
Getting the same information which we got from command-line is easier in PowerShell.
- Open PowerShell with administrative privileges
- Run the following command:
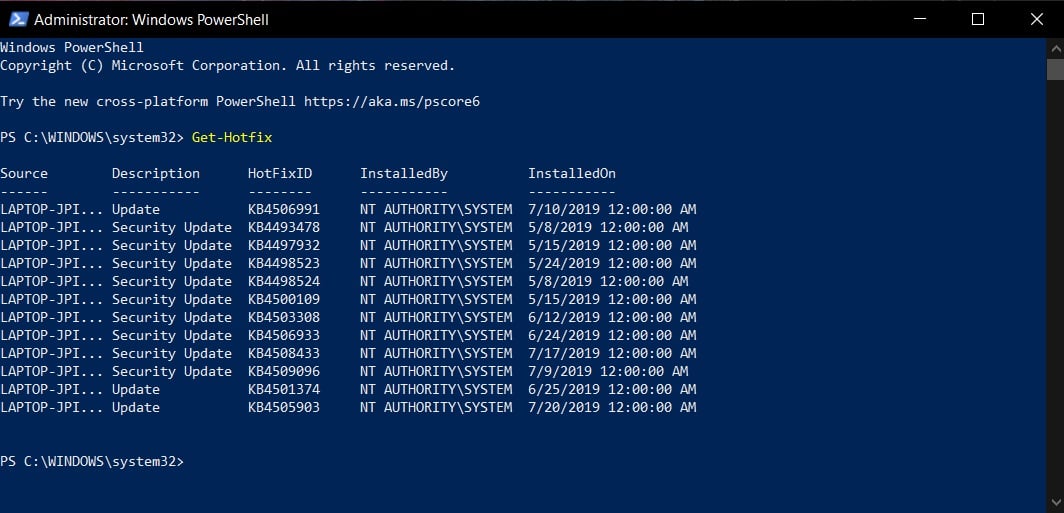
Get-Hotfix - This will list down all the hotfixes installed on the computer and also show the installation date of each hotfix.
PowerShell get hotfix
Using WinUpdatesList
WinUpdatesList is a third-party software which can be used for the same purpose. Since it is a portable tool, it can be run from a network location. The biggest advantage of using WinUpdatesList is that it will list down every update possible from Windows Updates, hotfixes, Windows Defender definition updates, .NET Framework updates, driver updates, etc. You can also save the update as CSV file. It will give you a lot of information about each update like its name, installation date, installed by (if you are on a domain network), update type, link to the hotfix page online, uninstall command (if available), last modified, etc.
I hope these methods will be informative for you and it will become easier for you to view and save the list of all the installed updates and hotfixes in Windows 10 and even earlier versions of Windows including Windows Server. Which method do you prefer for your specific need and why? Your comments below will be highly appreciated.
Continue Reading:
Usman Khurshid is a seasoned IT Pro with over 15 years of experience in the IT industry. He has experience in everything from IT support, helpdesk, sysadmin, network admin, and cloud computing. He is also certified in Microsoft Technologies (MCTS and MCSA) and also Cisco Certified Professional in Routing and Switching. Reach him at Twitter @usmank11
2 thoughts on “ 4 Ways To View And Save List Of Updates Installed On Windows 10 ”
Hey, iTechtics I reviewed your article it seems nice. I like it. Cheers from Techforpc site.
How to Check if a Windows Update (KB) is Installed on your Computer?
The Windows Update channel delivers all necessary updates suitable for your system. Most of the time, manual intervention is not required for installing updates. In some cases, especially during manual installation of an update using standalone installer, you may need to first check if a specific update (a prerequisite update) is installed on your system.
This article explains how to check if a specific Windows Update ( KBnnnnnn ) is installed in your computer or not.
Find if a Windows Update KB has been applied
How to Check if a Windows Update (KB) is Installed on your Computer
There are at least seven different methods to determine if an update is installed in the system.
Method 1: Check the Windows Update history
The modern Settings app has an option to view Windows update history. Here’s how to view it.
- Open Settings and click Update & Security
- Click View update history. The update history page shows the list of updates installed on your computer.
- Scroll through the list and find the specific update ( KBnnnnnn ) you’re looking for.
Editor’s note: The update history page may fail to show some updates. In my computer, the update the Servicing Stack Update (SSU) KB4470788 was not listed in the update history page even though the update was installed a few months back.
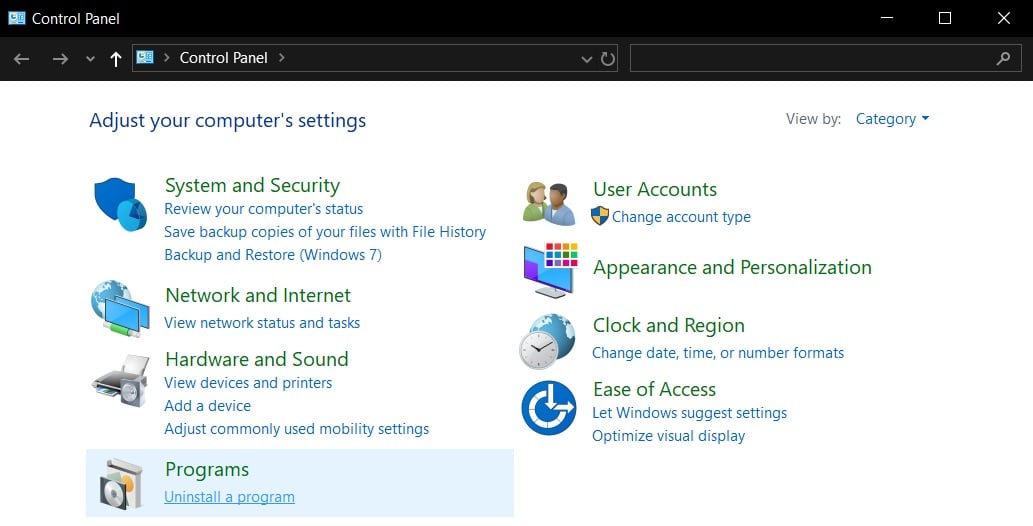
Method 2: View installed updates in Programs and Features Control Panel
Using the “Programs and Features” applet in the Control Panel, you can find the list of installed updates.
- Right-click Start, click Run.
- Type appwiz.cpl and click OK. This opens the Programs and Features in the classic Control Panel.
- Click View installed updates link in the left side. This shows you the list of updates along with the installation date column.
Note: In the classic Programs and Features applet, the Servicing Stack Update (SSU) KB4470788 is listed, and the install date showing up as Dec 07, 2018 . It appears that the “View update history” option in the modern Settings app and “Programs and Features” are using two different sources for finding the update history.
Method 3: Using DISM command
The built-in DISM tool can list out the installed Windows Update CBS packages. Follow these steps:
- Open an administrator Command Prompt window.
- Type the following command and press ENTER :
The output is redirected to clipboard (using | clip operator).
Note: The update Install Time shown by DISM may be in GMT.
Method 4: Run the KB update installer (.msu) file again.
Running the KB setup .msu again will tell you if the update has been already installed. Here is how to obtain the standalone installer from Microsoft Update Catalog and run the .msu setup file. Note that this method works for Windows update standalone installers .msu only. That is, this method doesn’t apply if you have the .cab version.
- Visit the Windows Update Catalog
- Download the update package ( .msu ) by mentioning the KB number.
- Double-click the .msu file to run the setup. The Windows Update Standalone Installer (WUSA) searches for updates on your computer and determines if the update is already installed or not.
If it’s already installed, it shows the message saying “(KBnnnnnn) is already installed on this computer.”
Method 5: Using WinUpdatesList or WinUpdatesView utility from NirSoft
The WinUpdatesList utility ( wul.exe ) from Nirsoft displays the list of all Windows updates, including Service Packs and Hotfixes installed on your local computer. You can copy the list of updates to the clipboard, or save it to text/HTML/XML file in a single click. The following fields are shown for each update listed. We’ve covered WinUpdatesList in the article How to Print Your Windows Update History By Exporting to Text or HTML File?.
Note: The WinUpdatesList utility, however, did not list the Servicing Stack Update KB4470788 on my computer. Hope this tool works well in your case.
WinUpdatesView (Windows Updates History Viewer)
WinUpdatesView is a simple tool from Nirsoft that displays the history of Windows updates on your system. WinUpdatesView can load the Windows updates history from your local system, using API, and it can also read and parse the Windows updates database file ( DataStore.edb ) from an external drive or from a remote computer on your network.
Method 6: Using WMI command-line
From an admin Command Prompt, run:
It shows the list of updates installed along with the date of installation and other details.
Or Export to HTML file, using this syntax:
Or to list a specific update, run:
Alternately, you can run the command Get-Hotfix from a PowerShell window to get the same results.
You can sort the table by the InstalledOn column in descending order by running this command:
PowerShell’s Get-HotFix cmdlet also uses the WMI’s Win32_QuickFixEngineering (QFE) class as the WMIC CLI tool above. The output is exactly the same.
The systeminfo command from a Command Prompt window also lists the hotfixes installed. It again uses the WMI QFE class to query the list of hotfixes.
Method 7: Check the Windows Update CBS Registry Entries
For each update installed, a corresponding Component Based Servicing package registry entry is created. Using the Registry Editor, you can check whether a Windows update has been installed on your computer.
- Start the Registry Editor ( regedit.exe )
- Go to the following registry key:
- Use the Find option under the Edit menu, and search for the key having the text 4470788 (to find KB4470788 related entries.)
If the key exists, you’re taken to the branch. In my case, as the update was already installed, the Find option led me to this key:
In the right-pane, check the value data for “CurrentState”. If the value data reads 0x00000070 (112) , it means that the update was successfully installed.
Here is the list of possible CurrentState registry values and their meaning:
| Applicable/Current State | Hex | Dec |
|---|---|---|
| Absent | 0 | 0 |
| Uninstall Pending | 0x5 | 5 |
| Resolving | 0x10 | 16 |
| Resolved | 0x20 | 32 |
| Staging | 0x30 | 48 |
| Staged | 0x40 | 64 |
| Superseded | 0x50 | 80 |
| Install Pending | 0x60 | 96 |
| Partially Installed | 0x65 | 101 |
| Installed | 0x70 | 112 |
| Permanent | 0x80 | 128 |
Determine the install date & time of an update using registry
Each CBS Package key has two values namely InstallTimeLow & InstallTimeHigh . These keys, when decoded will show you the date and time the update was installed. However, we have a shortcut way to find the exact installation date and time the update was installed on your computer.
The trick is to export the Package branch to a .txt file (instead of .reg format) and read the timestamp mentioned in the file. We’ll find the installation date and time of update KB4470788 in this example.
- In the Registry Editor, select the following ( KB4470788 ) key:
- Right-click on the package key and click Export.
- In this example, we’ll export the Package_1_for_KB4470788
17763.164.1.1 branch.
The last write time denotes the date and time the registry entry was created.
As you can see, the last write time in this example matches with the date and time we determined in Method 2 using “Programs and Features”.
That’s it! Hope this article helped you check if a specific Windows Update (KBnnnnnn) has been applied to your system or not.


