- kali ошибка «не удается смонтировать установочный компакт-диск»
- Load installer components from installation media kali linux
- System Requirements
- Installation Prerequisites
- Preparing for the Installation
- Kali Linux Installation Procedure
- Language
- Network
- User Accounts
- Clock
- Encrypted LVM
- Proxy Information
- Metapackages
- Boot Information
- Reboot
- Post Installation
- Can’t install Kali Linux from USB, fails to find CD-ROM drive
- 6 Answers 6
kali ошибка «не удается смонтировать установочный компакт-диск»
Я знаю, что моя проблема не оригинальна, но удовлетворяющего решения на просторах сети я так и не смог найти. Я новичок в данной теме и, почитав форумы, свое знакомство с линуксом я решил начать с Kali 2016.2. С компа на Windows 10 64 бит я с помощью Universal USB Installer создал загрузочную флешку (флешка 4gb nfts). Live версия отлично работала и запускалась, но вот когда я решил установить oc, то после выбора страны языка и раскладки я получил вот такую ошибку: «не удается смонтировать установочный компакт-диск». Можно было повторить процесс или вернуться в меню. Пробовал высовывать и вставлять обратно флешку а затем повторять процесс, но это результата не дало. Я пытался прописать параметры для установки, чтобы установщик определил мою флешку как cd-rom, но не вышло. Махинации с командной строкой и командами, которые я нашел в интернете результата тоже не дали. Также пробовал перезаписывать, форматируя флешку в fat 32, пробовал перезаписывать с помощью Ultraiso и при буте у меня появилась вот такая надпись: » Failed to load Idlinux.c32. Boot failed: please change disks and press a key to continue» Dvd-roma в компьютере нет. Как я и сказал, решения в интернете я так и не нашел. Буду благодарен, если вы мне поможете, подробнее расписав, как мне решить эту проблему.
Попробуйте записать образ с помощью rufus. PS Kali — не самый удачный дистр для начинающих. Посмотрите в сторону Ubuntu.

Уже советованный руфус умеет писать в «сыром» режиме (режим dd, гугли ‘man dd’). Еще можешь попробовать:
Спасибо, руфус помог, при установке когда установщик попросил источник для драйверов, я вытащил и вставил флешку м установка продолжилась. Вот только появилась новая проблема. После установки я не могу войти в учетную запись. Root:root и root:toor не работает,не работает и :root,toor при установке мне пароль изменять не предлагали, что делать?

Установщик надо полагать заимствован из Debian и должен запрашивать пароль суперпользователя вот так. Либо предлагается вариант отключить вход суперпользователя, создать обычного, назначить ему пароль, который будет использоваться для sudo — команды, наделяющей запускаемое приложение правами суперпользователя. Может, пароля и нет вовсе?
я вытащил и вставил флешку м установка продолжилась
Возможно флешка или юсб чудные, бывает.
ри установке мне пароль изменять не предлагали
Вот примерная инструкция, вот картинка с запросом пароля при установке. Такого не было? Пустой пароль не подходит? (графика может чуть-чуть измениться, но сам установщик тот же)
Загрузиться с установочной флешки в live режим (пароль если будет нужен тут root:toor). После загрузки примонтировать корневой раздел установленной на жесткий диск кали, чрутьнуться туда и задать пароль руту:
mount /dev/sdX /mnt — тут sdX корневой раздел с кали, например sdb2
chroot /mnt — изменяется корневой католог
passwd root — установка пароль руту, при вводе не отображается, печатается на «ощупь».
Источник
Load installer components from installation media kali linux
Installing Kali Linux (single boot) on your computer is an easy process. This guide will cover the basic install (which can be done on bare metal or guest VM), with the option of encrypting the partition. At times, you may have sensitive data you would prefer to encrypt using Full Disk Encryption (FDE). During the setup process you can initiate an LVM encrypted install on either Hard Disk or USB drives.
First, you’ll need compatible computer hardware. Kali Linux is supported on amd64 (x86_64/64-Bit) and i386 (x86/32-Bit) platforms. Where possible, we would recommend using the amd64 images. The hardware requirements are minimal as listed in the section below, although better hardware will naturally provide better performance. You should be able to use Kali Linux on newer hardware with UEFI and older systems with BIOS.
Our i386 images, by default use a PAE kernel, so you can run them on systems with over 4 GB of RAM.
In our example, we will be installing Kali Linux in a fresh guest VM, without any existing operating systems pre-installed. We will explain other possible scenarios throughout the guide.
System Requirements
The installation requirements for Kali Linux will vary depending on what you would like to install and your setup. For system requirements:
- On the low end, you can set up Kali Linux as a basic Secure Shell (SSH) server with no desktop, using as little as 128 MB of RAM (512 MB recommended) and 2 GB of disk space.
- On the higher end, if you opt to install the default Xfce4 desktop and the kali-linux-default metapackage, you should really aim for at least 2 GB of RAM and 20 GB of disk space.
- When using resource-intensive applications, such as Burp Suite, they recommend at least 8 GB of RAM(and even more if it large web application!) or using simultaneous programs at the same time.
Installation Prerequisites
This guide will make also the following assumptions when installing Kali Linux:
- Using the amd64 installer image.
- CD/DVD drive / USB boot support.
- Single disk to install to.
- Connected to a network (with DHCP & DNS enabled) which has outbound Internet access.
We will be wiping any existing data on the hard disk, so please backup any important information on the device to an external media.
Preparing for the Installation
Download Kali Linux (We recommend the image marked Installer).
Burn The Kali Linux ISO to DVD or image Kali Linux Live to USB drive. (If you cannot, check out the Kali Linux Network Install).
Backup any important information on the device to an external media.
Ensure that your computer is set to boot from CD/DVD/USB in your BIOS/UEFI.
Kali Linux Installation Procedure
- To start your installation, boot with your chosen installation medium. You should be greeted with the Kali Linux Boot screen. Choose either Graphical install or Install (Text-Mode). In this example, we chose the Graphical install.
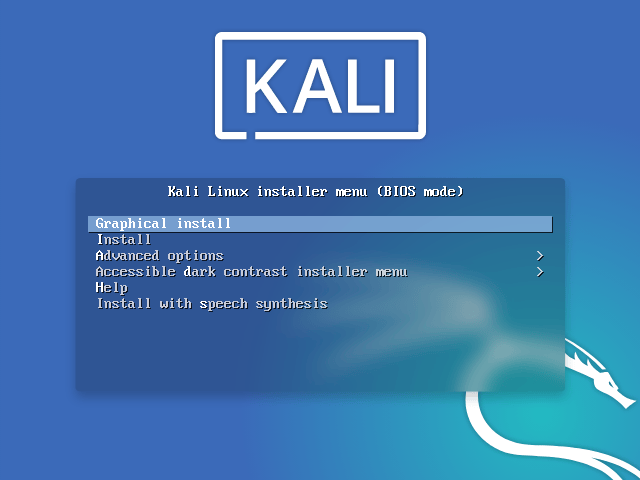
If you’re using the live image instead, you will see another mode, Live, which is also the default boot option. 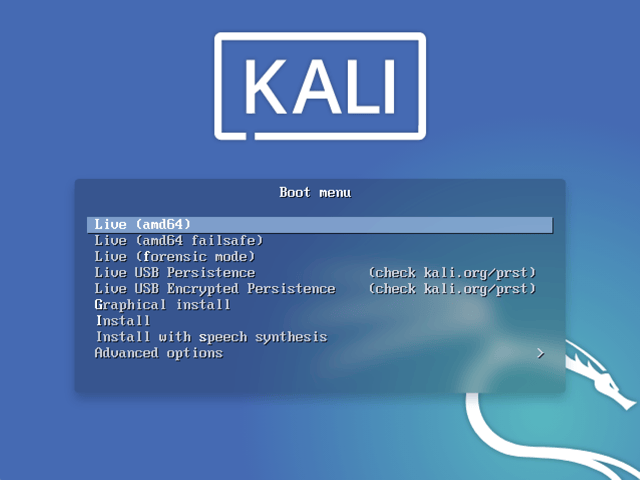
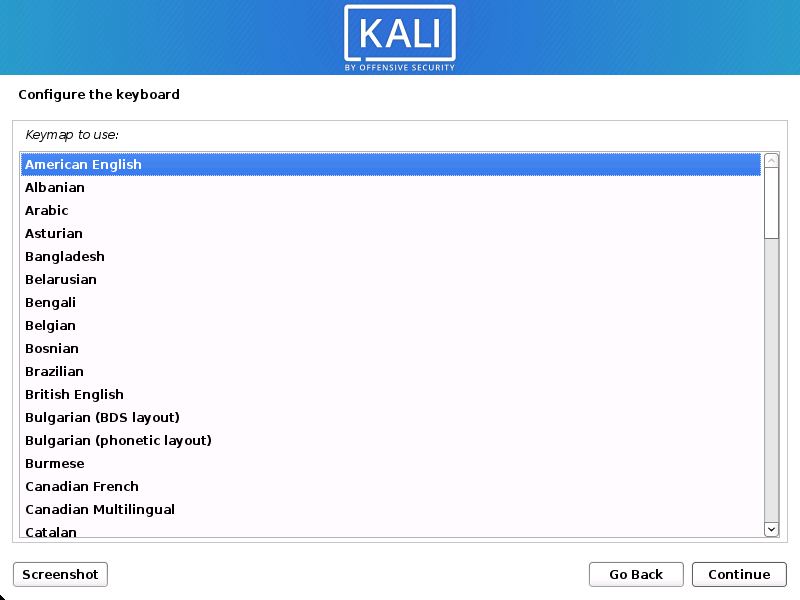
Language
- Select your preferred language. This will be used for both the setup process and once you are using Kali Linux.

- Specify your geographic location.

- Select your keyboard layout.
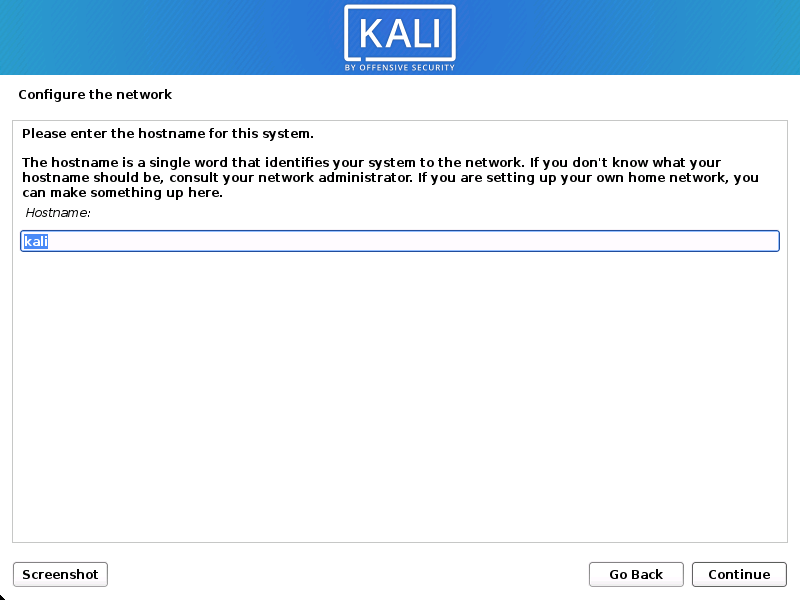
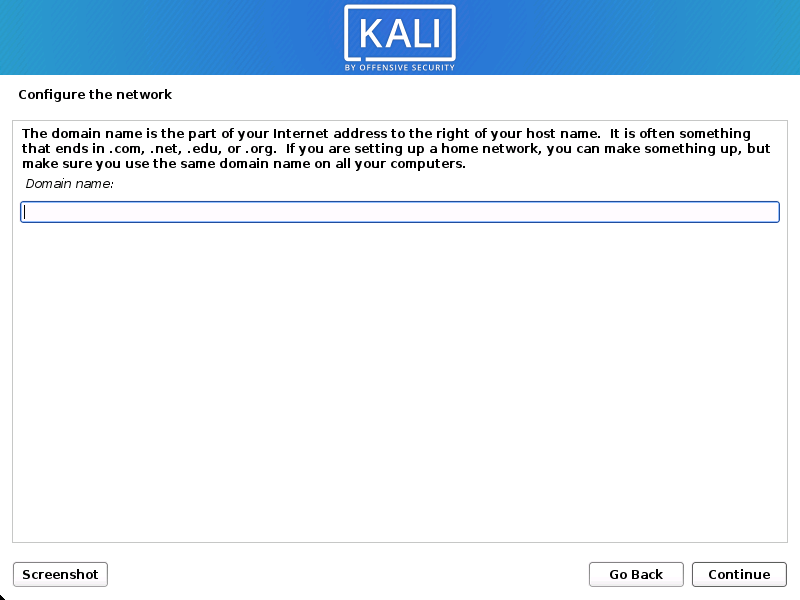
Network
- The setup will now probe your network interfaces, looks for a DHCP service, and then prompt you to enter a hostname for your system. In the example below, we’ve entered kali as our hostname.
If there is no network access with DHCP service detected, you may need to manually configure the network information or do not configure the network at this time.
- If there isn’t a DHCP service running on the network, it will ask you to manually enter the network information after probing for network interfaces, or you can skip.
- If Kali Linux doesn’t detect your NIC, you either need to include the drivers for it when prompted, or generate a custom Kali Linux ISO with them pre-included.
- If the setup detects multiple NICs, it may prompt you which one to use for the install.
- If the chosen NIC is 802.11 based, you will be asked for your wireless network information before being prompted for a hostname.
- You may optionally provide a default domain name for this system to use (values may be pulled in from DHCP or if there is an existing operating systems pre-existing).
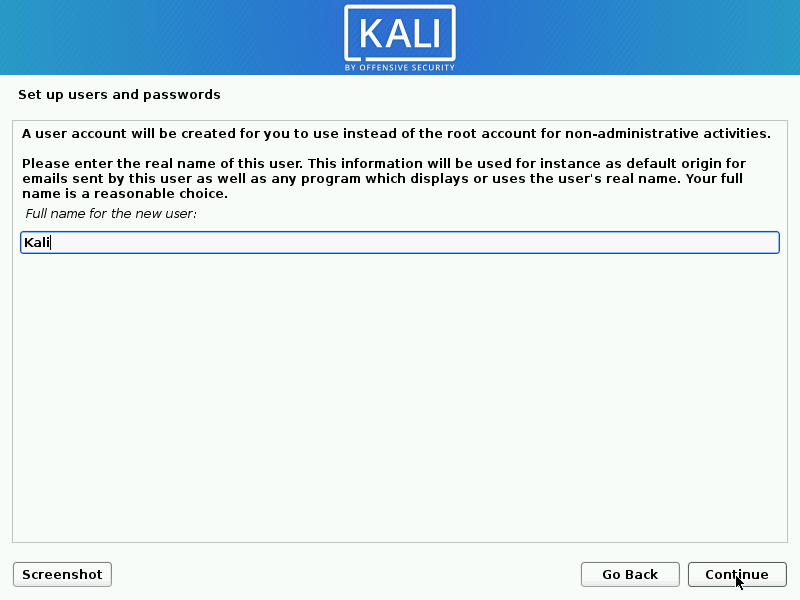
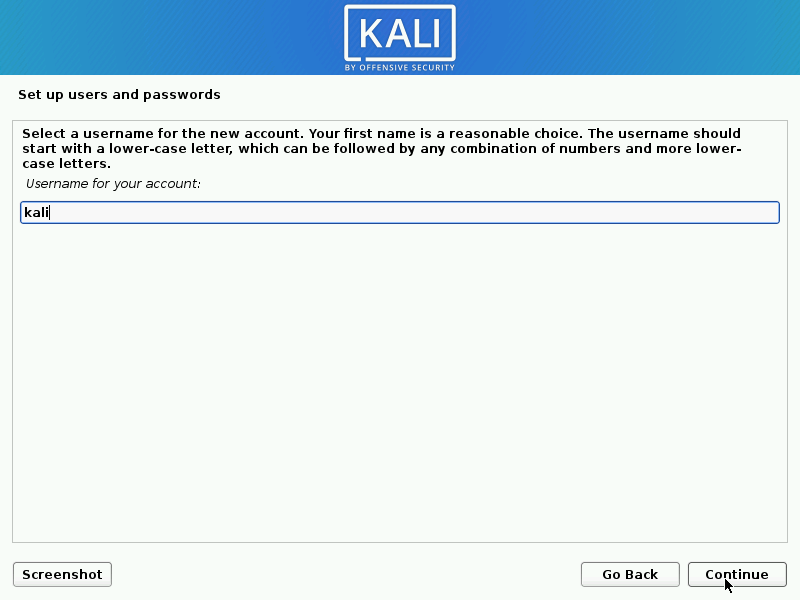
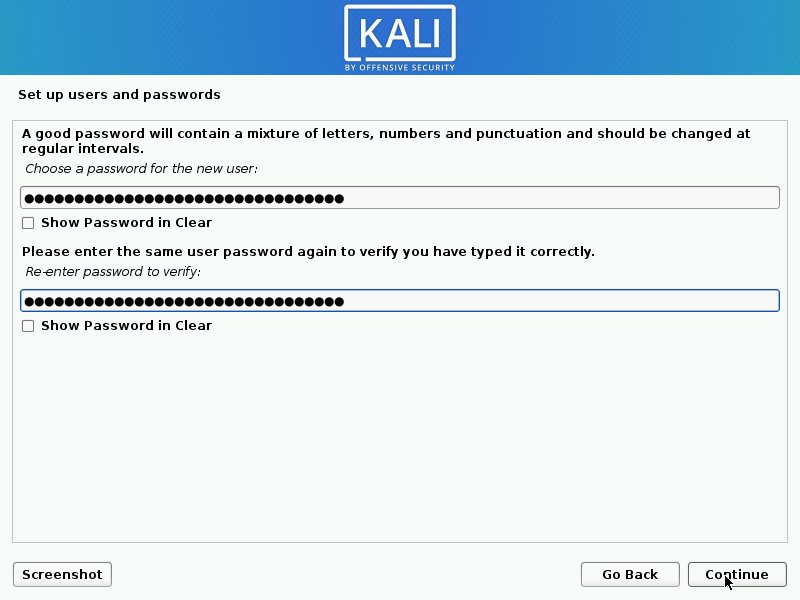
User Accounts
- Next, create the user account for the system (Full name, username and a strong password).
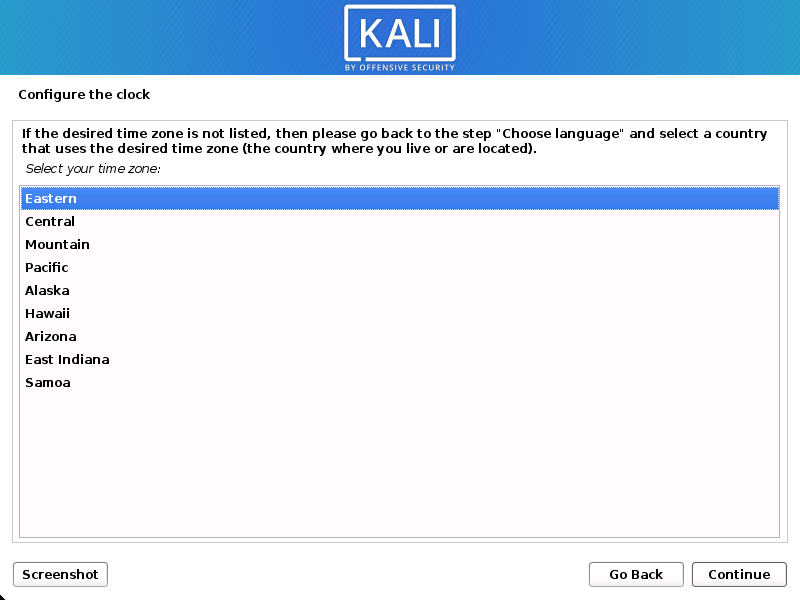
Clock
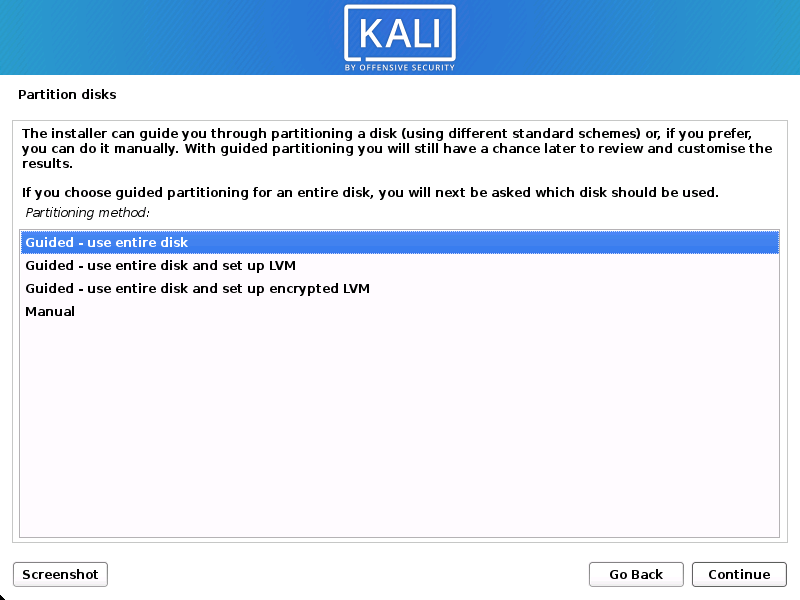
- The installer will now probe your disks and offer you various choices, depending on the setup.
In our guide, we are using a clean disk, so we have four options to pick from. We will select Guided — the entire disk, as this is the single boot installation for Kali Linux, so we do not want any other operating systems installed, so we are happy to wipe the disk.
If there is an pre-existing data on the disk, you will have have an extra option (Guided — use the largest continuous free space) than the example below. This would instruct the setup not to alter any existing data, which is perfect for for dual-booting into another operating system. As this is not the case in this example, it is not visible.
Experienced users can use the “Manual” partitioning method for more granular configuration options, which is covered more in our BTRFS guide.
If you want to encrypt Kali Linux, you can enable Full Disk Encryption (FDE), by selecting Guided — used entire disk and setup encrypted LVM. When selected, later on in the setup (not in this guide) prompt you to enter a password (twice). You will have to enter this password every time you start up Kali Linux.
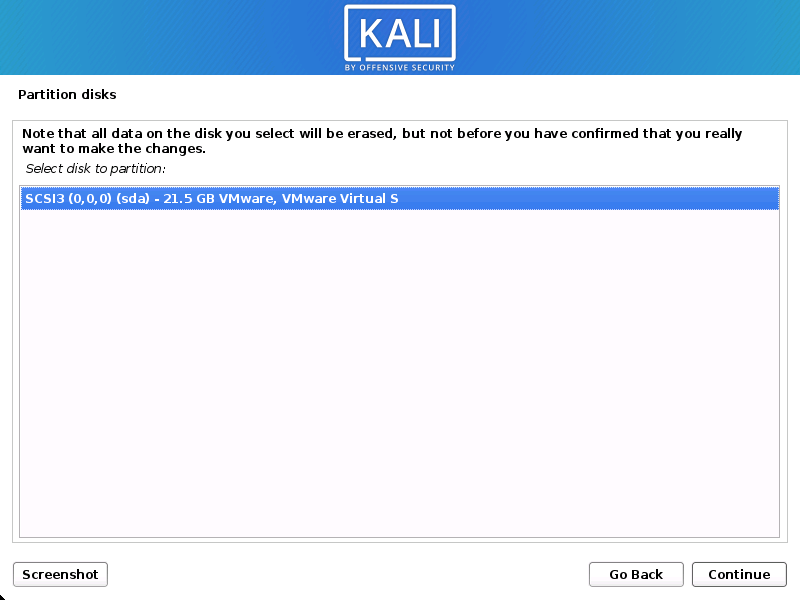
- Select the disk to be partitioned.
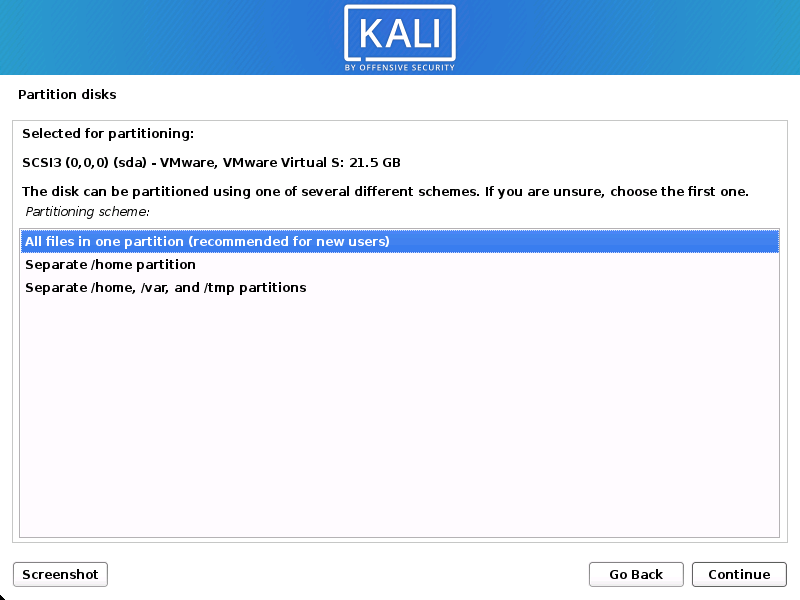
- Depending on your needs, you can choose to keep all your files in a single partition — the default — or to have separate partitions for one or more of the top-level directories.
If you’re not sure which you want, you want “All files in one partition”.
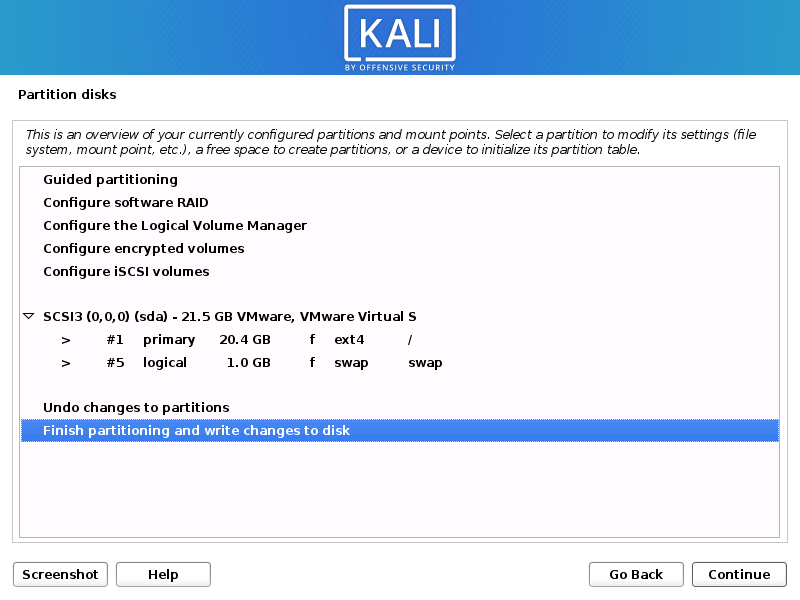
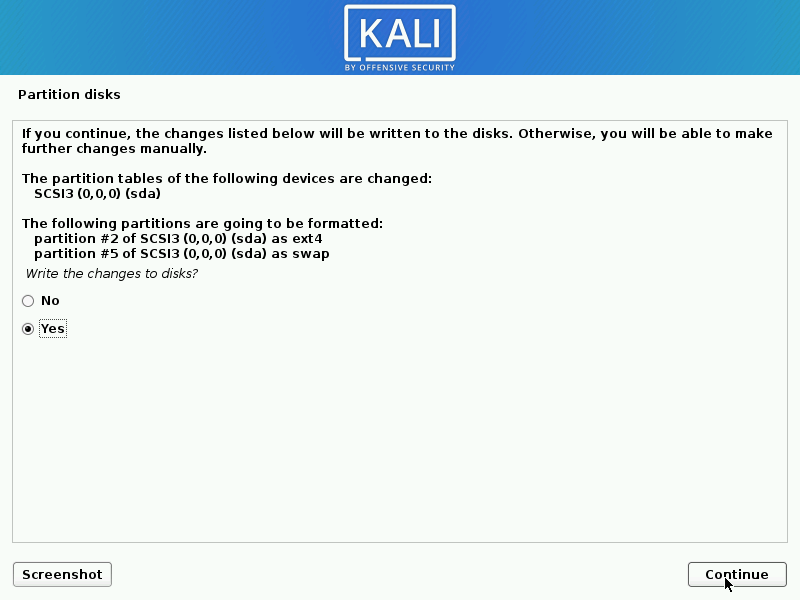
- Next, you’ll have one last chance to review your disk configuration before the installer makes irreversible changes. After you click Continue, the installer will go to work and you’ll have an almost finished installation.
Encrypted LVM
If enabled in the previous step, Kali Linux will now start to perform a secure wipe of the hard disk, before asking you for a LVM password.
Please sure a strong password, else you will have to agree to the warning about a weak passphrase.
This wipe may take “a while” (hours) depending on the size and speed of the drive.
If you wish to risk it, you can skip it.
Proxy Information
- Kali Linux uses a central repository to distribute applications. You’ll need to enter any appropriate proxy information as needed.

Metapackages
If network access was not setup, you will want to continue with setup when prompt.
If you are using the Live image, you will not have the following stage.
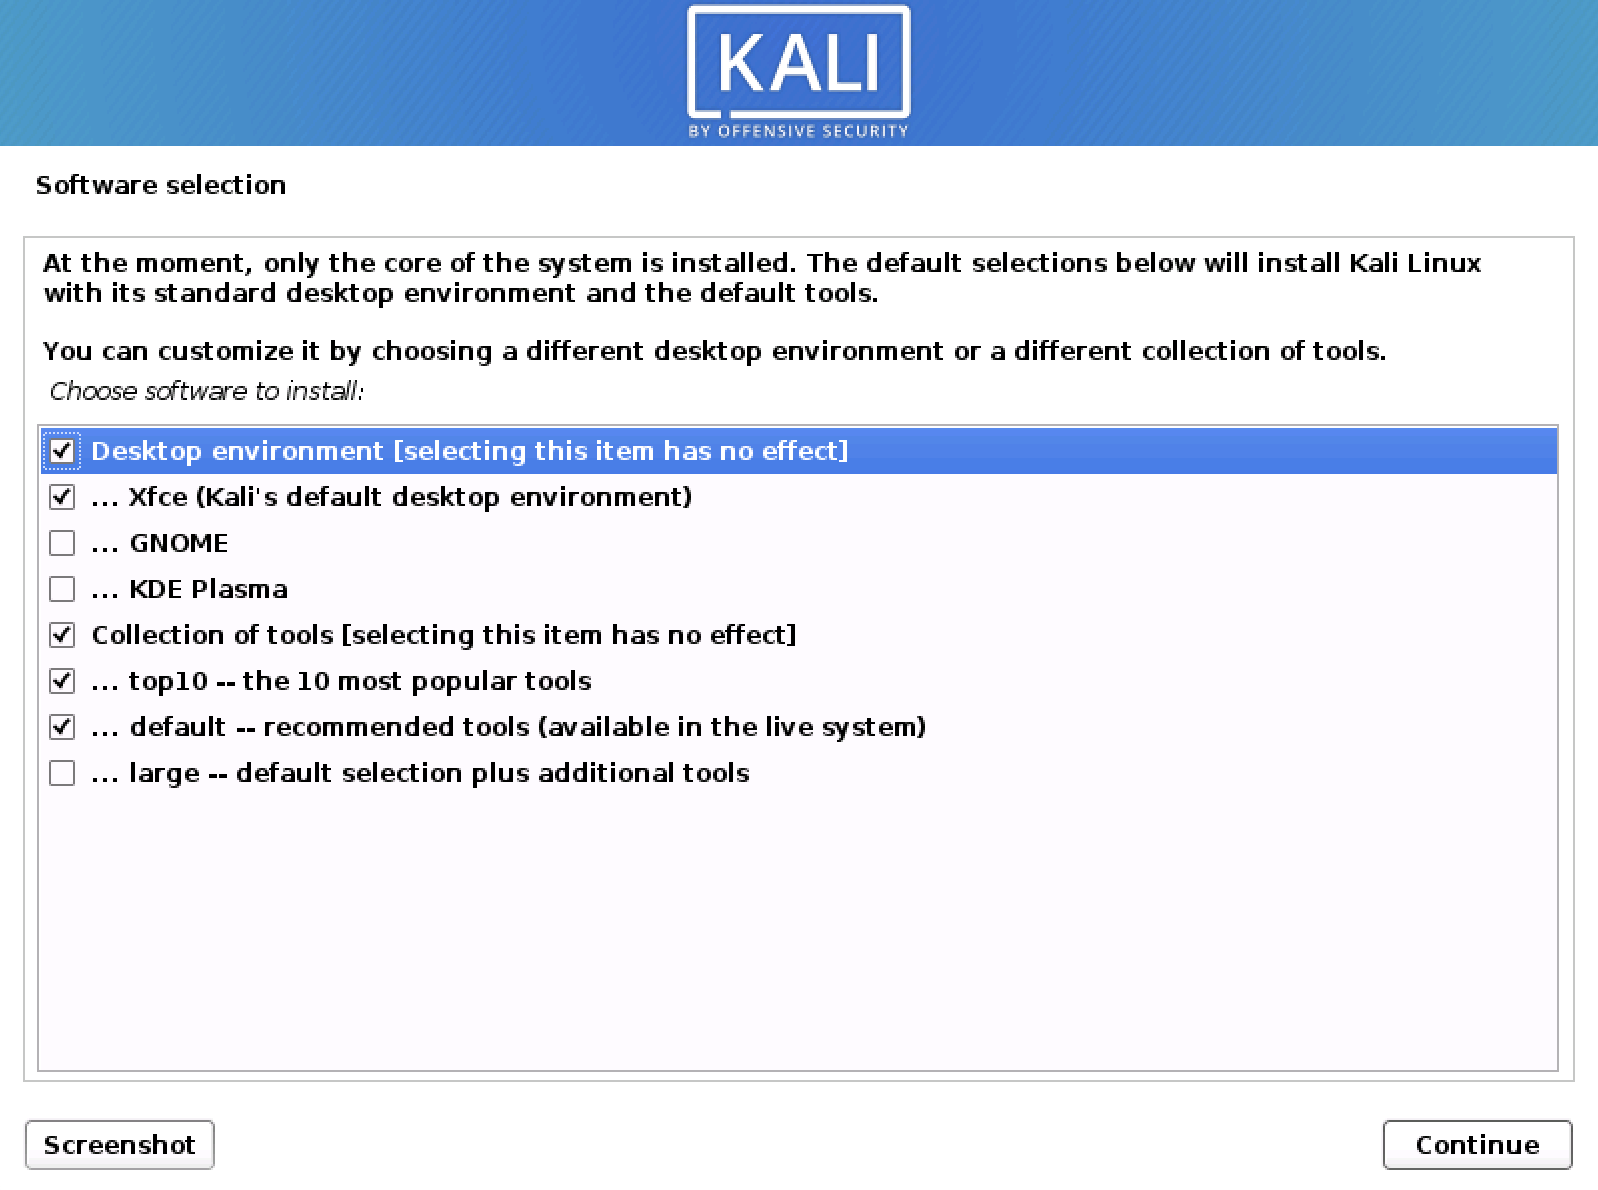
- Next you can select which metapackages you would like to install. The default selections will install a standard Kali Linux system and you don’t really have to change anything here.
Please refer to this guide if you prefer to change the default selections.
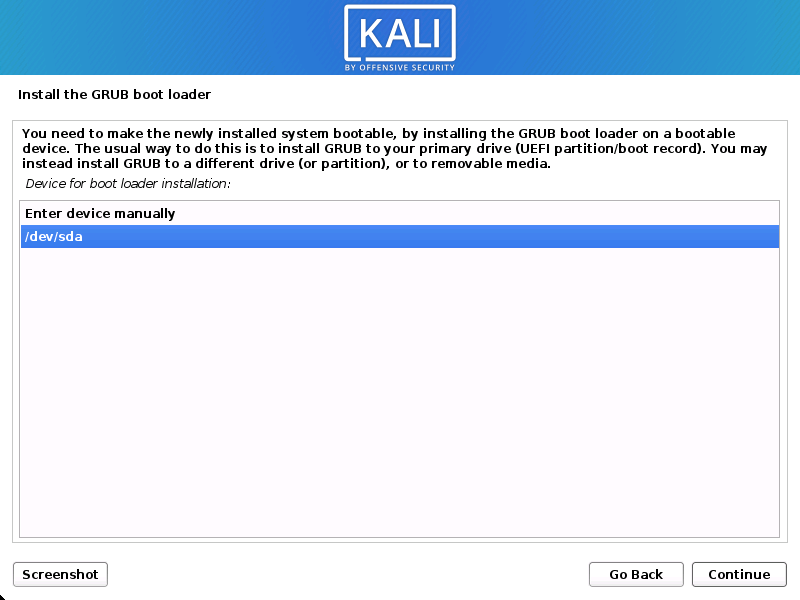
Boot Information
- Next confirm to install the GRUB boot loader.
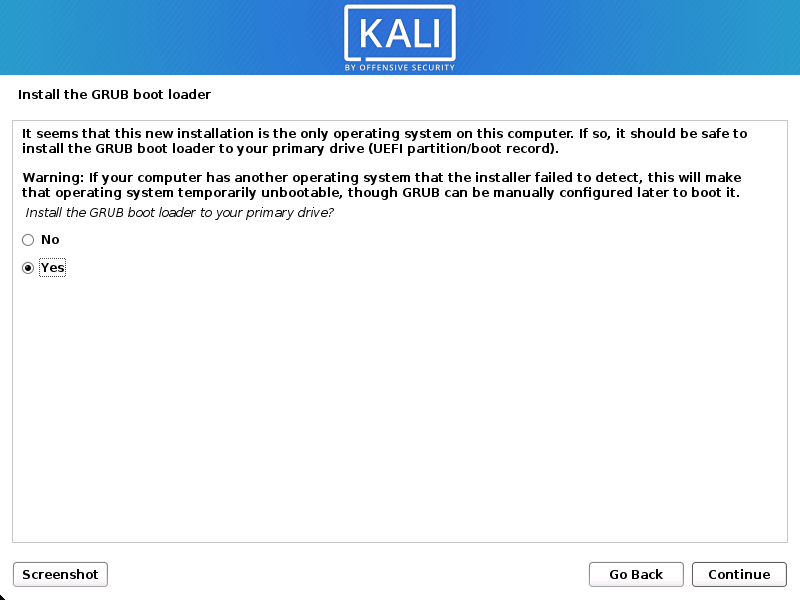
- Select the hard drive to install the GRUB bootloader in (it does not by default select any drive).
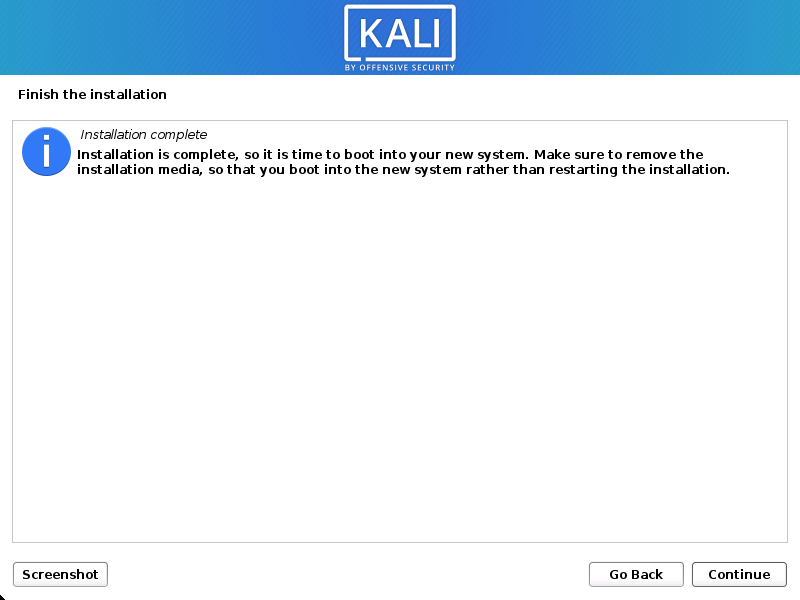
Reboot
- Finally, click Continue to reboot into your new Kali Linux installation.
Post Installation
Now that you’ve completed installing Kali Linux, it’s time to customize your system.
The General Use section has more information and you can also find tips on how to get the most out of Kali Linux in our User Forums.
Updated on: 2021-Sep-27
Author: gamb1t
Источник
Can’t install Kali Linux from USB, fails to find CD-ROM drive
I successfully made a live USB of the Kali Linux.
When I boot from the USB it gives an option to install. I clicked on that option. At one point it was detecting and mounting CD-ROM drives. As I have no CD-drive or any ROM-drive on my laptop, it gives an error
Can’t mount and detect CD-ROM drives.
I tried the «live something» option that takes me directly to Kali Linux and it loads successfully but I can’t install it permanently. I want to install it so I won’t have to waste my time plugging and unplugging the USB.
How to get past the CD-ROM detection and make the installation finish correctly?
6 Answers 6
You could resolve the error by repeating the steps :
Run the installer.
Open a shell ( ALT + F2 ).
Create the directory cdrom directly on the root of the file system:
Note : If you got problems making the directory /cdrom, disable the CD-rom player in BIOS or disconnect the cable
Mount the USB as if it is a CD-ROM:
Where sdb1 is your USB device.
You could carry on installation now
After executing mount -t vfat /dev/sdb1 /cdrom , cd into the /cdrom directory and do an ls to see if the files are there. Then press ALT — F1 to go back, continue and re-select «detect CDROM»
when the Window shows CDROM couldn’t be mounted ,
Unplug your USB from system and re insert it
wait for mount/ detection (usb LED glow)
You could do what I did. Hit escape, type install, hit enter, skip CD drive.

If you use Rufus (v 2.x) to burn the ISO to USB drive, make sure the option is «DD Image» in «Create a bootable disk using«. Not sure if Unetbootin offers the same option. If image is copied using this method, you don’t need to go to terminal and manually mount it.
With Rufus (v 3.x), you can not explicitly choose DD mode. IF the ISO is hybrid or has DD mode, Rufus will prompt you to choose ISO or DD mode AFTER clicking start button.

I tried all the answers here and more google results, but none worked. I eventually figured it out, the issue is the file format is not vfat, but iso9660.
When you get the CDROM not found error follow these steps:
Enter a shell ( CTRL + Alt + F2 )
Note: Kali told me to press ( Alt + F2 ), but this didn’t work
Get a list of devices with blkid:
Note: I have shortened my list to the relevant row. Also you can see the storage type is iso9660, not vfat
Mount the Kali CD with the mount command:
Check the contents of /cdrom are as expected:
Switch back to the installer ( CTRL + Alt + F5 )
Note: Kali told me to press ( Alt + F1 ), but this didn’t work. I tried F1 through to F5 until I found the correct combination
From the menu tell it to mount the CDROM, if asked choose /dev/sdc1 and /cdrom. I know we have already mounted the drive, but for some reason this step didn’t work previously, but worked fine after following the previous steps.
Источник


