- Linux Boot Logo
- Contents
- Create an image to suitable format (C include file)
- Add your file to Linux build system
- Recompile & install kernel
- Remove Login from framebuffer terminal
- Deactivate remaining cursor
- Как включить boot logo (то где ядра в пингвинах измеряются)
- Изменение загрузочной заставки в Ubuntu
- Установка новых тем
- Создание собственных тем
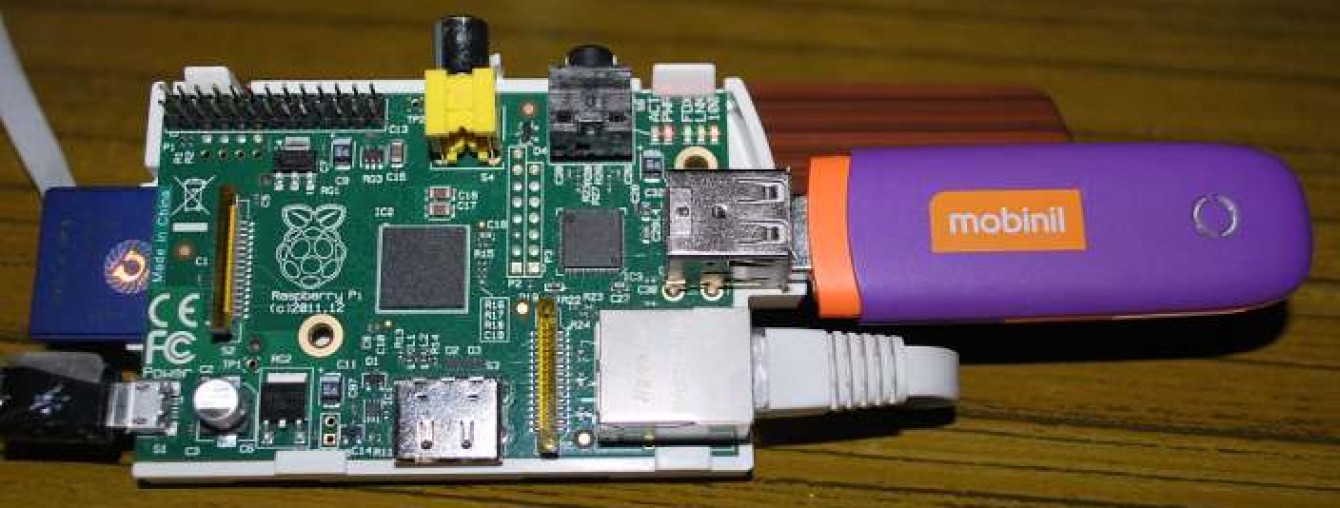
- Application Server
- Online App, with hardware programming
- Create your own boot logo
- Create your own boot logo
- Contents
- Preparations
- Developping the boot logo
- Converting the image
- Going to a 224 color image
- Put it inside the Kernel image
- Editing the necessary files
- Edit the Makefile
- Edit the logo.c file
- Edit the Kconfig file
- Editing the header file
- For the 2.6.28 kernel version
- For the 2.6.36 kernel version
- Select your boot logo and compile
- Removing the blinking cursor
- For the 2.6.36 kernel version
- For the 2.6.28 kernel version
- Getting the cursor to blink again from a terminal
- Important notice
Linux Boot Logo
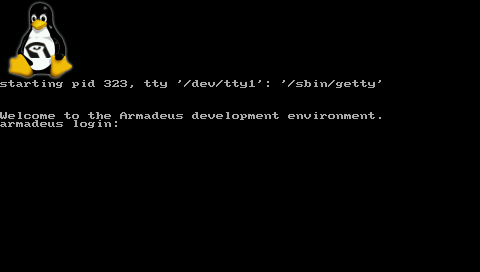
On this page we will explain you how to change the Boot Logo/Screen of Linux.
By default the following screen is displayed on your LCD:
Contents
Create an image to suitable format (C include file)
- create a new image fitting the size of your LCD (320×240, 480×272 or 800×480), with The Gimp (for example).
- save it in PPM RAW file format, let’s say my_boot_logo.ppm
- install Netpbm package:
- reduce the number of colors in your image to 224:
- convert it to PPM ASCII format (if pnmnoraw is not available on your distribution (ex: LUbuntu 17.10), try with pnmtoplainpnm):
- get the armadeus envt variables:
- copy the PPM to $ARMADEUS_LINUX_DIR/drivers/video/logo/ directory with a name ending with _clut224.ppm:
- Linux will automatically convert your .ppm to a .c file, after you have added it to the build system, using the $ARMADEUS_LINUX_DIR/scripts/pnmtologo script. This is the purpose of the next step.
Add your file to Linux build system
- If you have overwritten $ARMADEUS_LINUX_DIR/drivers/video/logo/logo_armadeus_clut224.ppm with your own logo at the previous stage, then you can jump to the next step; otherwise:
- Edit $ARMADEUS_LINUX_DIR/drivers/video/logo/Makefile
- Put it your logo file name at line 18 (replace current one):
- Edit $ARMADEUS_LINUX_DIR/drivers/video/logo/logo.c
- Add it your logo C struct name at line 39:
Recompile & install kernel
- Make sure that the «Armadeus Logo» option is selected in:
- Then recompile your kernel:
and install it on your board.
- Restart your board and you should see your image:
Remove Login from framebuffer terminal
- On your target, edit /etc/inittab
- Comment line 28:
Deactivate remaining cursor
It may be a remaining cursor at the left upper corner of the screen. Indeed virtual console cursor is activated by default in Linux. To deactivate it at boot stage, you will have to:
- on recent kernels (3.8+), follow tips here
- otherwise:
- Edit source file $ARMADEUS_LINUX_KERNEL/drivers/char/vt.c
- Near line 1620, in function reset_terminal(), change
After this modification, at any moment, you can get your blinking cursor back with:
Источник
Как включить boot logo (то где ядра в пингвинах измеряются)
вместо пингвинов артефакты на весь экран до появление приветсвия
проблема не в видяхе не в загрузчике — а именно в конфиге — т.к брал другой рабочий конфиг из под слаки — там всё работает
но нужно пингвинов в моём конфиге включить

А если так попробовать ? kernel 4.10.15
то ты все логотипы врубил?) не это не сработает
попробовать ядро посвежее ?
проблема не в видяхе не в загрузчике — а именно в конфиге — т.к брал другой рабочий конфиг из под слаки — там всё работает
+ и явно не в ядре
CONFIG_DRM_I915=m ? Почему не Y? Вообщето кроме CONFIG_LOGO=Y нужно ещё и CONFIG_FB=Y .
В Frame buffer hardware drivers по CONFIG_FB_* вообще всё без разбора либо M либо Y? Это за тебя твоя левая пятка решила всё без разбора повключать?
Вообще конфиг ядра по ссылке знатно упорот.
me увидел тэги этой темы и понял что нет ничего удивительного а всё закономерно.
так там же и есть Y
или я не понял твоего сарказма
в слакваревском конфиге «CONFIG_DRM_I915=m» — всё работает
то уже далеко не первая версия конфига — да там под конец я всё подряд поврубал
Ты не озвучил своё железо так между прочим. Однако даже не смотря на это, и помимо полной каши, CONFIG_FB_VESA меня тоже немного смущает.
Твои настройки похожи на решения твоей левой пятки. Ощущение такое что либо ты не думая делал либо незная…
Я бы ставил CONFIG_LOGO=Y , CONFIG_FB=Y , CONFIG_DRM_I915=Y Чуть менее чем вовсе всё из CONFIG_FB_* я бы выключил.
И да всем чмоки в этам чатики.
intel HD видяха
ок лишнее повырубаю
но в любом случае » CONFIG_LOGO=Y, CONFIG_FB=Y, CONFIG_DRM_I915=Y » этого для работы недостаточно
ах да «CONFIG_DRM_I915=Y» незя — только =m
сначала ты предлагал включить что и так включено — сейчас ещё и модуль который в ядро не компилится предложил врубить(и вообще для кого я писал что есть рабочий конфиг где всё и так работает?)
модуль который в ядро не компилится
Почему? У меня модуль поддержки карт Intel собран монолитно в ядре, всё работет.
kostik87 забей ибо ТС видимо ещё и настраивать ядро даже не начинал учится потому как о зависимостях видимо либо не слышал либо не знает. Лучше скажи CONFIG_FB_VESA на этом самом CONFIG_DRM_I915 не будет ломать фреймбуффер?Ну и какого хрена? Но ты давай, выстави себя ничтожным посмешищем ещё раз.
У меня выключен CONFIG_FB_VESA.
ну я хз в menuconfig не врубается оно в *
даже если там чёто довключить и оно будет =y проблема не в этом я уже писал выше
Чтобы можно можно было включить соответствующую опцию монолитно нужно что бы и её зависимости были включены монолитно, выбери соответствующую опцию в menuconfig, нажми h и смотри её зависимости. Далее нажимай клавишу / ищи зависимости и включай их так как нужно.
Так же можно искать опции, которые сейчас не видны в конфигураторе ввиду неудовлетворённых зависимостей.
я с ним собирал — пингвины есть — и там фреймбуферов гораздо больше чем у меня — явно не в этом проблема
ок понятно — но это трата времени
Что? Ну и гуляй отсюда. Если для тебя трата времени в чём-то разобраться, что тебе нужно, тем более тебе дали совет где и как разбираться, то почему пользователи фопума должны тратить своё время для тебя?
я с ним собирал — пингвины есть — и там фреймбуферов гораздо больше чем у меня — явно не в этом проблема
Фреймбуверов больше говоришь? Нажимай клавигу /, вводи в поиск CONFIG_FB и смотри зависимости найденных опций.
Удачи тебе в твоём саморазвитии.
трата времени включить DRM I915 в ядро т.к в слаке и с =m работает..
Источник
Изменение загрузочной заставки в Ubuntu
Начиная с версии 10.04 в Ubuntu используется графический загрузчик plymouth. Именно он и рисует красивую анимацию при загрузки системы. О том, как изменить стандартный логотип Ubuntu перед тёмно-фиолетовым фоном на другие красивости, читайте дальше в этой статье. Непосредственно загрузчик Plymouth установлен в системе по умолчанию в папке /lib/plymouth, проверить это можно комадной plymouth —get-splash-plugin-path
Установка новых тем
Папка с темами для загрузки находится соответственно в /lib/plymouth/themes/
Открываем её. Тем, прямо скажем, негусто. Давайте для начала установим дополнительные готовые темы. Открываем Центр приложений или Synaptic, вводим plymouth-theme. Система выводит список тем для загрузки. Выбираем все с названием вида plymouth-theme-имя.
После успешной установки выполняем в терминале:и видим список установленных нами тем. Можно выбрать любую, введя её номер. Я выбрал Solar:
После успешного применения изменений, необходимо переконфигурировать образ загрузки системы. Для этого выполняем:
На этом всё. Новая заставка успешно применена.
Для возврата в стандартной выполните:
Создание собственных тем
Теперь немного о создании собственных тем загрузки.
Все файлы, связанные с темой загрузки находятся в каталоге /lib/plymouth/themes/имя_темы
За описание отвечает файл имя_темы.plymouth
За красивую анимацию отвечает скрипт имя_темы.plymouthДавайте попробуем создать простую тему загрузки. Для этого создаём каталог /lib/plymouth/themes/theme_name
В созданный каталог помещаем фон темы под именем wallpaper.png
В терминале выполняем:и вставляем следующее:
[Plymouth Theme]
Name=Theme_name
Description=Wallpaper only
ModuleName=script[script]
ImageDir=/lib/plymouth/themes/theme_name
ScriptFile=/lib/plymouth/themes/simple/theme_name.scriptwallpaper_image = Image(«wallpaper.png»);
screen_width = Window.GetWidth();
screen_height = Window.GetHeight();
resized_wallpaper_image = wallpaper_image.Scale(screen_width,screen_height);
wallpaper_sprite = Sprite(resized_wallpaper_image);
wallpaper_sprite.SetZ(-100);Для установки новой темы выполняем:
Теперь тему можно выбрать стандартным способом с помощью update-alternatives —config default.plymouth
После выполнения этой команды тему можно увидеть при выключении системы, для установки этой темы в качестве загрузочной выполняем update-initramfs — u от имени суперпользователя.Итак, мы создали простую статичную заставку. Для создании динамичной анимации необходимо глубокой знание синтаксиса скриптов для plymouth, а подобных документов в сети я не нашёл. Поэтому я поступил проще и сделал несколько заставок на основе имеющихся. Например, вот такую:
Для создания темы выполняем:
В систему будет установлена тема с простым скриптом для загрузки.
Далее выполняем:В тексте ищем Window.SetBackgroundTopColor (0.16, 0.00, 0.12) и меняем значения на нужный цвет фона, например черный:
Window.SetBackgroundTopColor (0.0, 0.00, 0.0);
А строчку Window.SetBackgroundBottomColor просто закомментируем.
Сохраняем и применяем тему командами, описанными выше.Следующая заставка основана на стандарной, в ней заменён фон:
Для начала создаем в каталоге /lib/plymouth/themes/ новую папку, например green. Копируем в неё все файлы из каталога ubuntu-logo
Копируем в папку green свой фон wallpaper.png (расширение обязательно Png!)
В папке green переименовываем ubuntu-logo.plymouth в green.plymouth и заменяем содержание на[Plymouth Theme]
Name=Green
Description=A simple green theme
ModuleName=script[script]
ImageDir=/lib/plymouth/themes/green
ScriptFile=/lib/plymouth/themes/script/green.scriptПереименовываем ubuntu-logo.script в green.script. Открываем этот файл, находим и коментируем строчки:
Window.SetBackgroundTopColor (0.16, 0.00, 0.12);
Window.SetBackgroundBottomColor (0.16, 0.00, 0.12);wallpaper_image = Image(«wallpaper.png»);
screen_width = Window.GetWidth();
screen_height = Window.GetHeight();
resized_wallpaper_image = wallpaper_image.Scale(screen_width,screen_height);
wallpaper_sprite = Sprite(resized_wallpaper_image);
wallpaper_sprite.SetZ(-100);Сохраняем файл.
Устанавливаем тему командойТеперь новую тему можно выбрать стандартным способом.
Links
Все перечисленные действия выполнены мною в системе Ubuntu 10.10 без проблем и ошибок. Если у Вас что-либо не получилось — это исключительно вмешательство высших сил.
PS Да, я буду рад получить ссылки на полный синтаксис скриптов для plymouth.
Источник
Application Server
Online App, with hardware programming
Create your own boot logo
Create your own boot logo
In this tutorial there will be explained how to show your own image on the LCD display while your Linux system is booting.
Contents
Preparations
- A complete system using buildroot
- You need a board with the U-boot bootloader downloaded in NAND Flash.
Developping the boot logo
Linux users can use the Gimp for creating a logo. Gimp is an open source alternative for expensive Programs like Photoshop,… etc. On the Ftp website you can find a simple image I created in Gimp:
You find an .xcf and a .ppm file. Best is to download the .xcf file and open it using Gimp image editor.
As you can see it’s a pretty simple image, but it can be used for tutorial purposes. As you can see I’m using the 4.3″ LCD which has a 480*272 resolution. For other resolutions, you’ll have to adapt the image’s size of course.
Converting the image
When you’ve adapted the image as you please, you can save it using another extension .ppm and give the file the name:
Going to a 224 color image
Now to fulfill the Linux kernels requirements, we need to adapt the ppm file a little bit more. The kernel boot screens only use 224 color images. So to convert our image, let’s open a new terminal and type:
Reduce the colors to 224 with the following command:
Put the last file into ASCII mode:
Put it inside the Kernel image
Move inside the buildroot directory:
This will remove any build data, so we can restart with a fresh unpacked directory of the kernel. Edit the menuconfig of the kernel to unzip the archive:
and exit the menuconfig. Now move into the unpacked directory of the kernel:
And copy the logo_linux_custom_ascii_224.ppm to the logo directory:
IMPORTANT: the _clut224 ending is very important for the kernel!
Editing the necessary files
Move into the logo directory:
Edit the Makefile
And around line 19 add the followin line:
Edit the logo.c file
And add the following line somewhere between all the _CLUT224 ifdef routines:
Edit the Kconfig file
And add the following lines to add your own boot logo to the menuconfig, of course you can change the text to whatever you want:
Editing the header file
This depends on which kernel version you are using:
For the 2.6.28 kernel version
You need to reopen the logo.c file again:
And add the following header around line 39:
For the 2.6.36 kernel version
Move into the include directory of the linux kernel:
And around line 50, add the following line:
Select your boot logo and compile
Inside the main directory of buildroot, type:
Exit the menuconfig and build the new system
Download the zImage to the board an you’ll see the new boot logo appearing!
Removing the blinking cursor
You’ll see that in the top left corner, the cursor keeps blinking, we can remove it by makeing the following change to the kernel source code:
For the 2.6.36 kernel version
Look for line 1640 and change:
For the 2.6.28 kernel version
Look for line 1623 and change:
Getting the cursor to blink again from a terminal
To activate the cursor again, you can boot your system and in a minicom terminal, type:
Important notice
Remember that for now we have change the output build directory from buildroot, which means that when you use
All the changes you made will be lost, because buildroot starts again from the archive inside the dl folder
Best is to create a new archive from the output/build/linux-custom directory and put it inside the dl folder or to make all the changes we’ve just made directly inside the kernel .tgz archive inside the dl folder.
Источник


 kostik87 забей ибо ТС видимо ещё и настраивать ядро даже не начинал учится потому как о зависимостях видимо либо не слышал либо не знает. Лучше скажи CONFIG_FB_VESA на этом самом CONFIG_DRM_I915 не будет ломать фреймбуффер?