- How to Lock a Folder in Windows 8/8.1 and 10
- Locking a Folder in Windows 8/8.1/10:
- 5 best folder and file locker tools for Windows 10
- What are the best file and folder lockers for Windows 10?
- WinZip
- WinZip
- Folder Lock
- Folder Lock
- IObit Protected Folder
- Gilisoft Privacy Protector
- Gilisoft Privacy Protector
- WinRAR
- How to Lock Folder in Windows 10 (Password Protect Folder)
- 1. Use Batch File to Password Protect and Lock Folder in Windows 10
- 2. Encrypt and Password Protect Folders Using NTFS Advanced Permissions
- 3. Use BitLocker to Encrypt, Password Protect, and Lock Folders in Windows
- Lock Folder in Windows 10 – Conclusion
How to Lock a Folder in Windows 8/8.1 and 10
Privacy is a serious concern for some and computer’s are part of life for everyone. Many users have asked about how to protect/lock their data inside a folder the easy way so only they can access it. Some users cannot restrict their use of PCs to their family members and friends, or work colleagues and they may need to protect their data/folder, which is where a protected folder, locked to everyone except you comes handy.
In versions prior to Windows 8, this was not possible and people had to use 3rd party tools to achieve this. Lucky we are, to be alive in the reign of Windows 8/8.1 and 10 – where this is super easy.
Locking a Folder in Windows 8/8.1/10:
No third party software are needed to achieve this. Follow these simple steps. Navigate to the folder where the files you want to protect are present. Open the folder and right click inside the empty space to create a new text document. For this purpose, navigate to New > Text Document inside the contextual menu.
A new text file will be created as a result. You don’t need to name this file for now.

Double click the text file to open it in notepad and Paste the following code mentioned.
title Folder Locker
if NOT EXIST Locker goto MDLOCKER
echo Are you sure u want to Lock the folder(Y/N)
if %cho%==Y goto LOCK
if %cho%==y goto LOCK
if %cho%==n goto END
if %cho%==N goto END
echo Invalid choice.
echo Folder locked
echo Enter password to Unlock folder
if NOT %pass%==Write-Password-Here goto FAIL
echo Folder Unlocked successfully
echo Invalid password
echo Locker created successfully
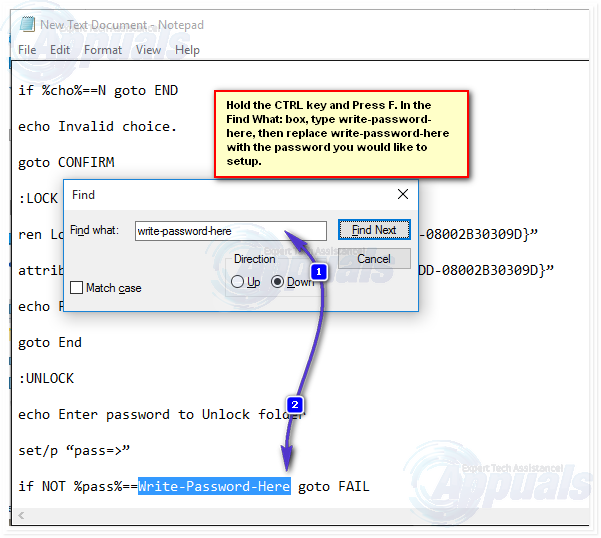
After pasting the code inside the text file, search for “Write-Password-Here” To save your time, you can press CTRL + F shortcut key combination on the keyboard and type “Write-Password-Here” inside the search field. Click on Find Next button to let it search for you. It would highlight the text you searched for. Replace the “Write Password-Here” text to any password you want to use to access the folder.
After typing your relevant password, click on File at the top left of the notepad application and select Save As. On the Save As window appearing after, move to the Save As type section and select the All Files from the list. 
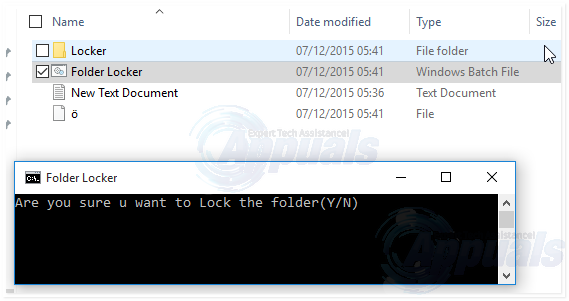
Change the name of the file by navigation to File name section and type “Folder Locker.bat” (without quotes). Then click Save. Double click the bat file and it would run the script to generate a new folder called Locker inside the same folder. Now, you can move the files you want to lock into this Locker folder.
Now, you need to open the bat file again. A command prompt will be launched as a result. Type Y inside the command prompt and hit Enter key. It would lock the folder as well as diminish the locked folder from the screen.
To unlock the folder, double click on the bat file again and type the password you entered before. In my case, I will type appuals and hit Enter key to get my locked folder back.
5 best folder and file locker tools for Windows 10

- Security and privacy are sensitive issues that many people like to not talk about. However, measures need to be taken in order to make sure everything you do remains private.
- Here are our top picks for locker software that can help protect your files and folders from unauthorized access.
- Make sure you also check out these best Privacy Protector Software for more information.
- Don’t forget to bookmark our Encryption & Data Protection Hub.

- Unzip all major file formats: ZIP, RAR, 7Z, TGZ, TAR, etc.
- Encrypts the files you zip for maximum protection
- Manage your files easily (PC, Cloud, network)
Open archived files
with ease on your PC
You and every other user of your computer usually have full access to the majority of files and folders on your machine. Most of the time, that’s not a problem, because users usually have nothing to hide from each other, therefore they keep their files and folders unsecured.
But, some users actually have a reason to block access to their documents. Maybe you’re working in a public place, and don’t want anyone to access your personal files.
Or you’re a parent not wanting your child to access inappropriate content. Whatever the reason, we’re sure some of our readers need to keep their files and folders safe.
Luckily, it’s a piece of cake in an environment like Windows 10, because there are so many tools for protecting your files and folders, that you’ll have a hard time deciding which option is the best.
That’s where we come in, to show you our best picks of file and folder lockers for Windows 10.
What are the best file and folder lockers for Windows 10?
WinZip
WinZip provides one of the best encryption systems allowing you to password-protect your zip files. But the tool is actually a lot more sophisticated than that and it includes a plethora of additional options for you to choose from.
File management features are a big plus, but you can also benefit from compression options for practically anything from images to folders and zip PDFs.
In addition, you can make use of the integrated repair tools to keep your files and folders not only secure but also optimized.
WinZip makes it easy to password-protect, compress, save, repair, and share your files and zip folders with an easy-to-use interface, plus you get a free 30-day trial before making the purchase.
Let’s quickly look at its key features:
- A strong file encryption solution
- Integrated compression and repair tools
- Save space on your PC
- Password-protection for all your zip files
WinZip
Folder Lock
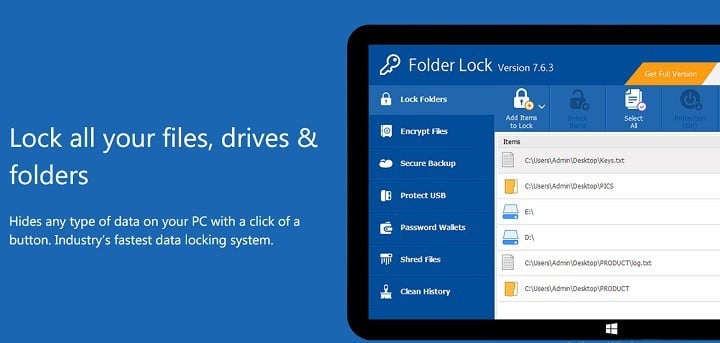
Folder Lock is arguably the best solution for keeping your files and folders safe in Windows 10. But it also covers email attachments, USB and CD drives, and even wallets with store credits, and other sensitive information.
If you want to encrypt more than one file or folder, you can even set up a master password, to access all your locked content with just one key.
By setting up a master password, you don’t have to memorize passwords for each locked file or folder.
You also don’t have to worry about losing your data, because Folder Lock backs up encrypted files in real-time, and stores them in the cloud.
Note: This feature requires creating an account, which is something some users won’t like.
Let’s quickly look at its key features:
- Lock folders and encrypt files in seconds
- Sync and backup
- Password-protect USB/External Drive
- Shred and permanently delete files
- Clean device history and Stealth mode
- Save Wallets / Cards / Passwords
Folder Lock
IObit Protected Folder
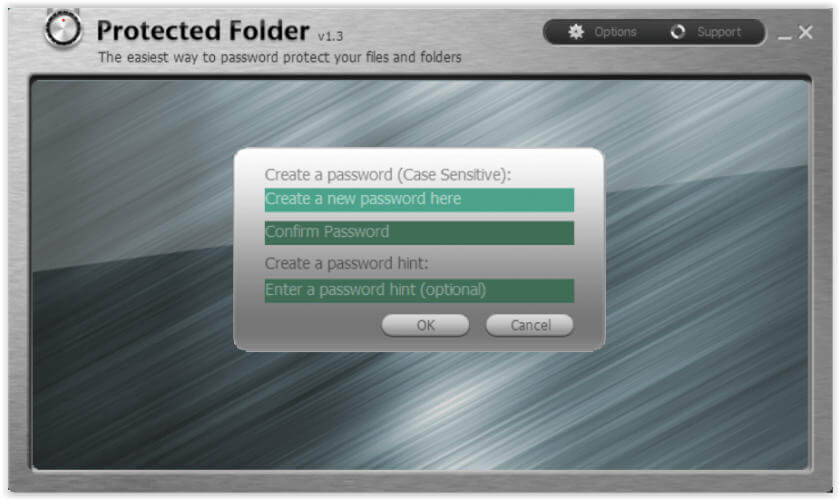
IObit is constantly improving its product palette by the needs of the users and Protected Folder is a tool that proves it. This folder locker allows you to easily protect your important data with a password.
The tool not only offers you protection from prying eyes that are trying to access your important data but also keeps it safe against malicious attacks.
It has a locking engine optimized to keep locked your files and folders even when you PC is the subject of a virus or spyware attack. The tool is user-friendly and allows you to set such options like deny read, deny write or hide.
Let’s quickly look at its key features:
- Password-protect important files and data
- Enhanced privacy mode
- Keep locking files even if your PC has been infected by malware
- Hide from view, block access to files and modify protection settings

- Free Version
- Easy-to-use
- ‘Undelete’ function
Gilisoft Privacy Protector
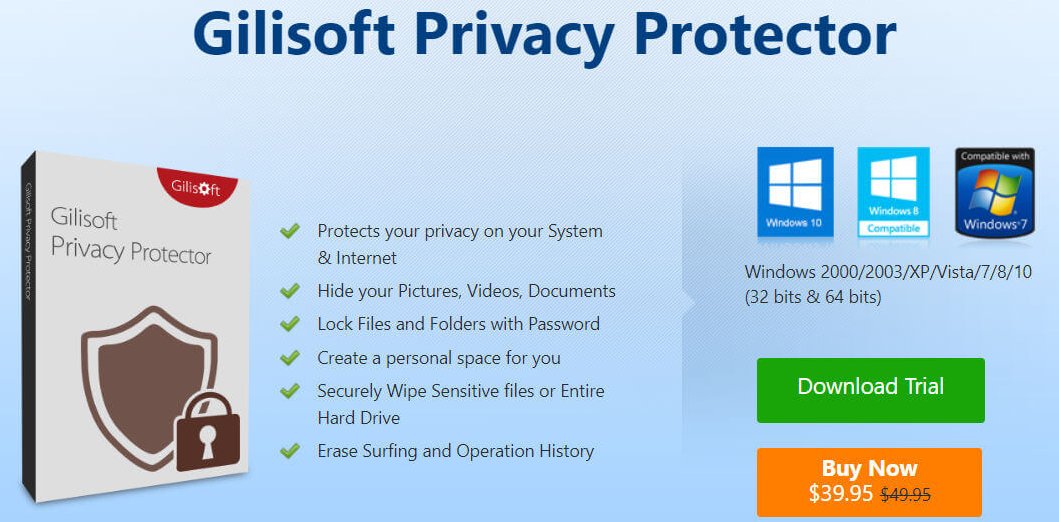
Gilisoft Privacy Protector is a complete privacy suite that will securely shred all deleted files so that they cannot be recovered anymore, delete your browsing and Windows history, clear any traces of third-party programs, and more.
Additionally, GiliSoft Privacy Protector effectively prevents most illegal operations performed by hackers or malicious software such as viruses, trojans, and spyware.
In fact, it is so good that it will protect your privacy even if you are actually sharing the same PC with someone else. It does this by efficiently hiding documents, videos, pictures, and it even password protects them as an added measure.
Let’s quickly look at its key features:
- Clears Windows and browsing history
- Removes third-party software traces
- Shreds files and folders
- Hides documents
- Password-protects files, folders or disk
- Stops viruses from tempering with your files

Gilisoft Privacy Protector
WinRAR
WinRAR is actually a compression tool, however, its 256-bit password encryption and authenticated signature technology make it a strong contender for our list that simply cannot be overlooked.
This software brings a myriad of file management features that will help you better organize your documents, free disk space, and protect your files and folders with the ultimate encryption. Plus, you get to test it for up to 40 days completely free of charge.
Let’s quickly look at its key features:
- 256-bit password encryption and its authenticated signature technology
- Supports all popular compression formats (RAR, ZIP, CAB, ARJ, LZH, TAR, GZip, UUE, ISO, BZIP2, Z, and 7-Zip)
- Special compression algorithms for multimedia files, .exe and object libraries
- Split archives into separate disks
That concludes our list of the best file and folder lockers for your Windows 10 running device. If you had any dilemma about choosing the best, and the safest option for your computer, we hope this article helped you make up your mind.
Should you have other suggestions, feel free to let us know in the comments section below.
How to Lock Folder in Windows 10 (Password Protect Folder)
Almost every one of us has important or not-so-important files that we like to hide and protect from others. In fact, using the attrib command you can hide folder in such a way that it will not be visible even if someone tries to unhide folders using regular methods. Apart from that, there are several ways you can lock folder and password protect it. Below are some of the easiest methods you can use to lock folders or even drives in Windows 10.
Jump to:
1. Use Batch File to Password Protect and Lock Folder in Windows 10
The simplest way to lock a folder in Windows is to use a batch file. All you have to do is add the all the contents you want to lock away in the folder created by the batch file, lock the folder and the batch file will completely hide it from the plain sight. When you need access, you have to enter the password in the batch file to reveal the folder.
This method is perfect for hiding and protecting not-so-important files that you don’t want others to see. Simply follow the below steps and you should have a working batch script to lock folder in Windows.
Warning: This method is not a secure way to protect your files and folders. Anyone with a little knowledge about bat files or know where and how to look can unlock the content. To secure important files and folders, I’d recommend following the 3rd method.
1. Open the File Explorer and go to the drive or folder where you want to store the locked folder. In my case, I’m selecting a folder called WindowsLoop in my D drive.
2. The first thing we need to do is create a batch script. You can do that with a regular text file. So, right-click in the File Explorer and select “New -> Text Document”.

3. Rename the text file to lock.bat . You can name the file anything you want. Just make sure that the file extension is .bat, not .txt.

4. Right-click on the newly created file and select the “Edit” option. This action will open the batch file in the Notepad. In the Notepad, copy and paste the below code.
5. In line 23 of the pasted code, replace “ENTER_YOUR_PASSWORD” with the actual password that you’d like to lock the folder with.
6. After entering your own password, select “File -> Save” to save the batch file changes. Close the file after saving.

7. Now, double-click on the lock.bat file.

8. You will be prompted for a password. Type the password you’ve added in the batch file and press Enter .

9. As soon as you press the Enter button, you will see a new folder called Locker in the same folder as the batch file.

10. You can save any number of files or folders in the Locker folder. As you can see from the image below, I’ve stored my super secret folder in the Locker folder.

11. Next, execute the lock.bat file again. You will be asked whether you’d like to lock the folder. Type Y and press Enter .

12. Just like before, the folder is completely hidden from the plain sight.

If you want access to the locked folder, execute the batch file again, enter the password and you will see the locked folder.
2. Encrypt and Password Protect Folders Using NTFS Advanced Permissions
Note: You need to be using the Pro version of Windows. Moreover, the file system should be NTFS.
Windows 10 lets you natively encrypt a folder contents with your user account password. Since Windows uses your user account to encrypt the folder, other users on your system cannot access the contents of the encrypted folder. Only you can access the folder by logging to your user account. If your system only has a single user account then create another one for other users and change the password for your user account so that only you can log into your user account.
1. First, check that the folder you want to protect is located in an NTFS formatted drive. To do that, right-click on the drive and select “Properties”. You will see the drive file system next to “File System”. It should be saying “NTFS”.

2. Now, create a folder in the NTFS drive. Now, right-click on the folder and select the “Properties” option.

3. In the folder properties window, click on the “Advanced” button.

4. Now, select the checkbox “Encrypt contents to secure data” and click on the “Ok” button.

5. Click on the “Apply” and “Ok” button in the main folder properties window.

6. As soon as you apply the changes, you will see a notification to back up the private key. This is not essential. However, backing up allows you to recover data stored in the encrypted folder if you lose access to your user account. Click on the “Notification”.

7. To back up the private key, click on the “Back up now” option and follow the wizard. Once you are done backing up, you should see the key file in your Documents folders. Follow the next steps after completing the backup.

8. Now, copy the files and folders you’d like to lock up. Files added to the encrypted folder have a little lock icon. Since the folder is encrypted by your user account, you can use the encrypted folder like any other folder.

9. If any other user from other user accounts tries to access the contents of the encrypted folder, they will be greeted to an error message something like the below one.

Do keep in mind that this method is certainly better than the first one, however, it still is not perfect. So, don’t store important files using this method. That being said, it still is a good method to lock not-so-important files that you don’t want others to see.
3. Use BitLocker to Encrypt, Password Protect, and Lock Folders in Windows
Windows 10 Pro version has a built-in powerful encryption tool called BitLocker. You can use the BitLocker tool to encrypt entire drives. Once encrypted, it is almost impossible to get access to the contents of the encrypted drive without proper authorization. To encrypt a drive using BitLocker follow the below steps.
1. Open the start menu, search for “Manage BitLocker” and open it.

2. The BitLocker Management screen will list all the available drives. Find the drive you want to encrypt and click on the “Turn BitLocker On” link next to it.

3. You will be asked to choose the authentication type. In my case, I’m selecting the password authentication. So, select the “Use a password to unlock the drive”, enter your password, and hit the “Next” button.

4. For recovery purposes, you will be asked to back up the recovery key. Click on the “Save to a file” option.

5. Select the destination where you’d like to save the recovery key. In my case, I’m select the desktop. Keep this file safe and secure so that if you ever forgot the BitLocker password, you can use this file to decrypt the drive and access the contents.

6. In the BitLocker wizard, select “Encrypt used disk space only” and click on the “Next” button.

7. Select “Compatible mode” and click “Next”.

8. Click on the “Start encrypting” button. Depending on how much data there is in the drive, it can take some time to complete the encryption process. So, it back and wait.

9. Once the drive is encrypted, you will see a lock icon on the drive icon in the File Explorer. You can use it as your regular drive.

10. Every time you log into your system, you will see a locked drive. To unlock the drive, double-click on it.

11. You will be prompted to enter the BitLocker password. Enter the password and the drive will be unlocked and decrypted so that you can use it like any other drive.

That is it. It is that simple to encrypt drive with BitLocker in Windows 10. If you looking to protect important files and folder, this is the method you should be using.
Lock Folder in Windows 10 – Conclusion
As you can see, there are multiple ways to protect files and folders with a password in Windows 10. Use the first method for files that you’d like to hide from the plain sight. Use the second method for not so important files but you’d still like others not to access them easily. For important files like your financial documents, personal media, etc., use the BitLocker method. The BitLocker method is the most secure of all three and as long as you use a good password, it is almost impossible to access the contents of the BitLocker encrypted drive without proper authentication.
If you like this article, do check how to enable Windows defender sandbox and how to enable Windows 10 sandbox to run applications in a sandboxed environment.


