- 5 best folder and file locker tools for Windows 10
- What are the best file and folder lockers for Windows 10?
- WinZip
- WinZip
- Folder Lock
- Folder Lock
- IObit Protected Folder
- Gilisoft Privacy Protector
- Gilisoft Privacy Protector
- WinRAR
- 4 Ways to Quickly Lock Files and Folders in Windows 10 Natively
- Ajinkya Bhamburkar
- 1. Locking a File in Windows
- 2. New User Account & File Permissions
- 3. Zip & Lock Files
- Changing File Extension
- 4. Make a New Partition & Hide it
- So, Whats Your Method?
- Read Next
- How to Manage Files and Folders Efficiently on Windows 10
- How to Delete Files on Windows 10 That Insist on Staying
- How to Turn off Auto-Lock in Windows 10
- How to Change BitLocker Password in Windows 10
- Top 13 Ways to Fix Folder Access Denied Error in Windows
- 2 Best Ways to Rename Multiple Files at Once on Mac
- Solid Explorer vs FX Explorer: Which Is the Best File Manager
- What’s the Difference Between PIN and Password for Login in Windows 10
- Did You Know
5 best folder and file locker tools for Windows 10

- Security and privacy are sensitive issues that many people like to not talk about. However, measures need to be taken in order to make sure everything you do remains private.
- Here are our top picks for locker software that can help protect your files and folders from unauthorized access.
- Make sure you also check out these best Privacy Protector Software for more information.
- Don’t forget to bookmark our Encryption & Data Protection Hub.

- Unzip all major file formats: ZIP, RAR, 7Z, TGZ, TAR, etc.
- Encrypts the files you zip for maximum protection
- Manage your files easily (PC, Cloud, network)
Open archived files
with ease on your PC
You and every other user of your computer usually have full access to the majority of files and folders on your machine. Most of the time, that’s not a problem, because users usually have nothing to hide from each other, therefore they keep their files and folders unsecured.
But, some users actually have a reason to block access to their documents. Maybe you’re working in a public place, and don’t want anyone to access your personal files.
Or you’re a parent not wanting your child to access inappropriate content. Whatever the reason, we’re sure some of our readers need to keep their files and folders safe.
Luckily, it’s a piece of cake in an environment like Windows 10, because there are so many tools for protecting your files and folders, that you’ll have a hard time deciding which option is the best.
That’s where we come in, to show you our best picks of file and folder lockers for Windows 10.
What are the best file and folder lockers for Windows 10?
WinZip
WinZip provides one of the best encryption systems allowing you to password-protect your zip files. But the tool is actually a lot more sophisticated than that and it includes a plethora of additional options for you to choose from.
File management features are a big plus, but you can also benefit from compression options for practically anything from images to folders and zip PDFs.
In addition, you can make use of the integrated repair tools to keep your files and folders not only secure but also optimized.
WinZip makes it easy to password-protect, compress, save, repair, and share your files and zip folders with an easy-to-use interface, plus you get a free 30-day trial before making the purchase.
Let’s quickly look at its key features:
- A strong file encryption solution
- Integrated compression and repair tools
- Save space on your PC
- Password-protection for all your zip files
WinZip
Folder Lock
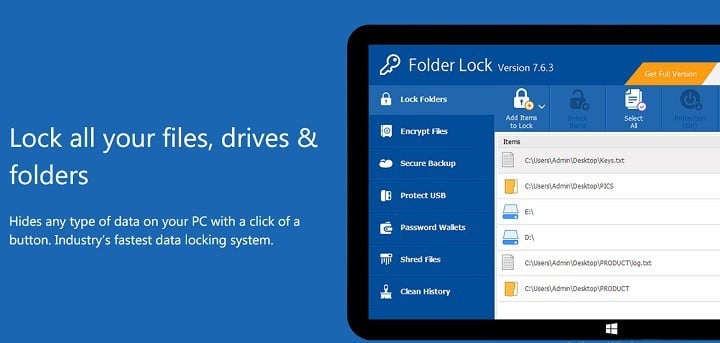
Folder Lock is arguably the best solution for keeping your files and folders safe in Windows 10. But it also covers email attachments, USB and CD drives, and even wallets with store credits, and other sensitive information.
If you want to encrypt more than one file or folder, you can even set up a master password, to access all your locked content with just one key.
By setting up a master password, you don’t have to memorize passwords for each locked file or folder.
You also don’t have to worry about losing your data, because Folder Lock backs up encrypted files in real-time, and stores them in the cloud.
Note: This feature requires creating an account, which is something some users won’t like.
Let’s quickly look at its key features:
- Lock folders and encrypt files in seconds
- Sync and backup
- Password-protect USB/External Drive
- Shred and permanently delete files
- Clean device history and Stealth mode
- Save Wallets / Cards / Passwords
Folder Lock
IObit Protected Folder
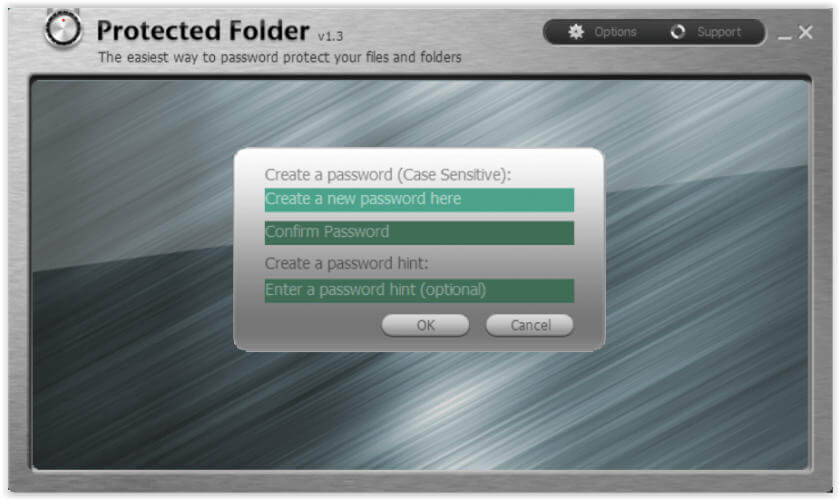
IObit is constantly improving its product palette by the needs of the users and Protected Folder is a tool that proves it. This folder locker allows you to easily protect your important data with a password.
The tool not only offers you protection from prying eyes that are trying to access your important data but also keeps it safe against malicious attacks.
It has a locking engine optimized to keep locked your files and folders even when you PC is the subject of a virus or spyware attack. The tool is user-friendly and allows you to set such options like deny read, deny write or hide.
Let’s quickly look at its key features:
- Password-protect important files and data
- Enhanced privacy mode
- Keep locking files even if your PC has been infected by malware
- Hide from view, block access to files and modify protection settings

- Free Version
- Easy-to-use
- ‘Undelete’ function
Gilisoft Privacy Protector
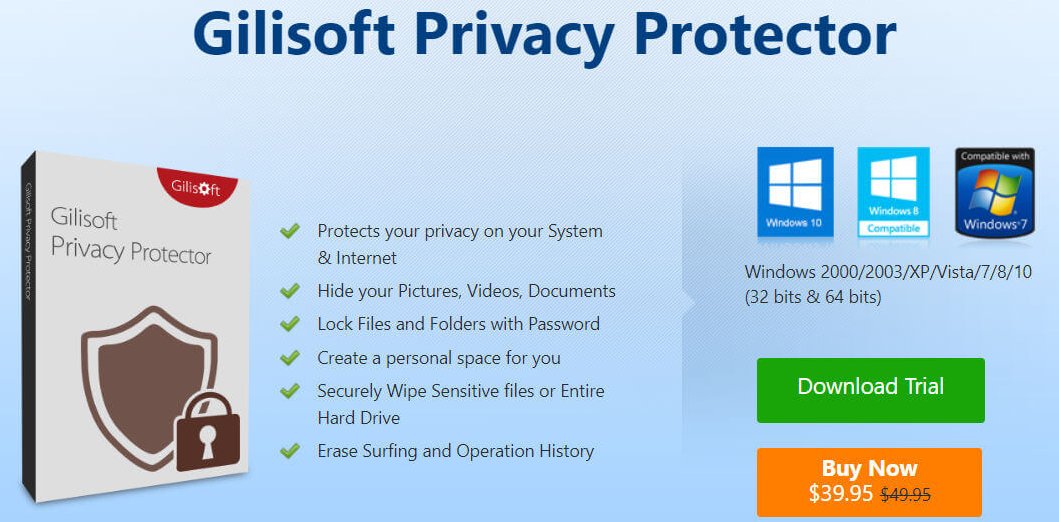
Gilisoft Privacy Protector is a complete privacy suite that will securely shred all deleted files so that they cannot be recovered anymore, delete your browsing and Windows history, clear any traces of third-party programs, and more.
Additionally, GiliSoft Privacy Protector effectively prevents most illegal operations performed by hackers or malicious software such as viruses, trojans, and spyware.
In fact, it is so good that it will protect your privacy even if you are actually sharing the same PC with someone else. It does this by efficiently hiding documents, videos, pictures, and it even password protects them as an added measure.
Let’s quickly look at its key features:
- Clears Windows and browsing history
- Removes third-party software traces
- Shreds files and folders
- Hides documents
- Password-protects files, folders or disk
- Stops viruses from tempering with your files

Gilisoft Privacy Protector
WinRAR
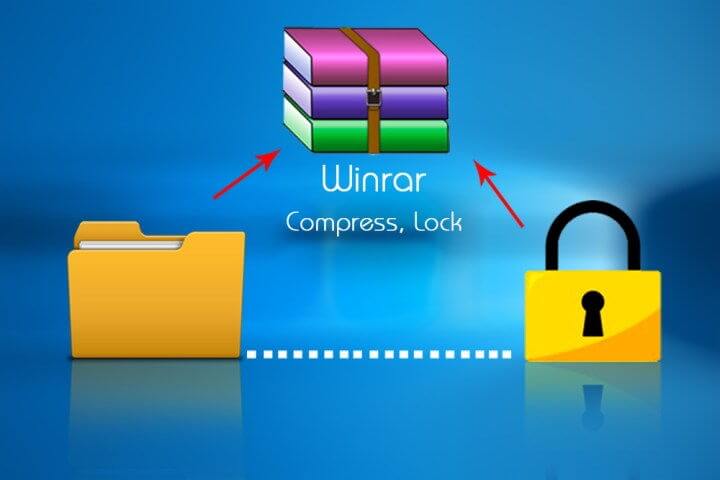
WinRAR is actually a compression tool, however, its 256-bit password encryption and authenticated signature technology make it a strong contender for our list that simply cannot be overlooked.
This software brings a myriad of file management features that will help you better organize your documents, free disk space, and protect your files and folders with the ultimate encryption. Plus, you get to test it for up to 40 days completely free of charge.
Let’s quickly look at its key features:
- 256-bit password encryption and its authenticated signature technology
- Supports all popular compression formats (RAR, ZIP, CAB, ARJ, LZH, TAR, GZip, UUE, ISO, BZIP2, Z, and 7-Zip)
- Special compression algorithms for multimedia files, .exe and object libraries
- Split archives into separate disks
That concludes our list of the best file and folder lockers for your Windows 10 running device. If you had any dilemma about choosing the best, and the safest option for your computer, we hope this article helped you make up your mind.
Should you have other suggestions, feel free to let us know in the comments section below.
4 Ways to Quickly Lock Files and Folders in Windows 10 Natively
Ajinkya Bhamburkar
22 Mar 2016
Recently my boss asked me to lend him my external hard disk (for reasons which can’t be explained). I was little uneasy as it contained some personal stuff which I was not comfortable sharing. Of course, I had the option of telling the true reason but didn’t want to seem rude. So I fired up Google to find some quick ways to lock up the files on Windows.

Turns out there is no way to do that without the help of an external app. Fortunately, I had an internet connection so I downloaded a simple app for the purpose and handed over the drive knowing my personal stuff was safe. But what if you’re stuck in a similar situation without access to the internet? There is popular script floating around the internet which makes it look like you’re actually locking a folder, but in reality, it just hides-unhides the folder and is not an effective method at all. So today we will see four ways in which you can cleverly hide your stuff natively in Windows without any external help (somewhat).
1. Locking a File in Windows
Before we move on to the various methods, it’s important to understand how encryption works in Windows. If you encrypt a file/folder in Windows, you can easily open it, transfer it or mail it and it will still open on the receiving end. So one might wonder what it is the use of Encryption then? The answer is that the encryption key (generated when you encrypt something for the first time) is associated with your account, more specifically to your password. So whenever you log into to your account all the encrypted files are decrypted on the fly and available in the normal state. But in case, if someone physically steals your drive or makes a new account on your PC, he/she will be unable to open them. Also, there are some limitations of encryption, it is only available to Pro edition users & will work only on NTFS partition. Now let’s see what are the basic steps to encrypt a file or folder in Windows.
Step 1: Any file or folder can be encrypted in Windows, provided the above conditions are satisfied. Right-click on the file > Properties > Advanced button under General tab > check the Encrypt contents to secure data.

Step 2: Click on OK and the filename will turn green or a lock symbol will appear depending on Windows version. You can add other users who can access the file by clicking the Details button as shown in the screengrab above and clicking on Add.

Cool Tip: Encryption is not only for Windows, it’s important on all platforms. Learn more about encryption for Mac, iOS and Android.
2. New User Account & File Permissions
If someone wants to use your PC or want to borrow your laptop you can just create a new account for them and change the permissions on the files and folders you don’t them to view. Let’s see the step by step process.
Step 1: Go to Control Panel > User Accounts, click on Manage another account > Add someone else to this PC. Make sure that the new account you’re creating is not an admin account or else this whole process will be futile as an admin account can override all permissions irrespective of file or folder.

Step 2: Once you have the new account set up, pool all your files and folder in one single folder. This will make managing permissions for several files easy. Right-click on the folder > Properties > Security tab, click on the edit button. A new window will open.

Step 3: In the new window click on the Add… button to add the new user to the list. One more window will open in which you have to enter the exact account name and then click on Check Names.

If the account doesn’t show up, click on Advanced… > Find Now, which list all accounts present on the PC. Select the account and click on OK, in both the previous windows to return to Permissions window.
Step 4: Once you have added the concerned account, check the Full Control box under Deny column and finally click Apply to save.
Now if someone tries to access those files they will get an Access denied error. For added effect give your folder some technical name like Windows System files or Admin Files to make it look like they are really system files. The above process can also be done in reverse i.e. setting the permissions for the files in the new account so the files cannot be accessed in the original account. This way someone will not get suspicious as why they are being given new account to use. But do mind the Admin account clause I mentioned earlier.
3. Zip & Lock Files
This method actually requires a third party app, 7-Zip to work. But 7-zip has become the de-facto apps for managing compressed files for Windows, it should always be present on everybody’s PC. If you are having WinRar, it will also work.
Step 1: Pool all your files in a single folder as you can’t add files once the archive is created. Right click on the folder and select 7-Zip > Add to archive….
Step 2: A new window will open with options to tweak. You may keep the default as they are. Under Encryption, enter the password of your choice, without which anyone will be able to open them. Finally, click on OK and you are done.

Note: Due to the way in which archives works, one can open the archive and see the filenames and file type. It’s only when they try to open or extract the file they will be asked for a password. So if you don’t want your, oh let’s just say collection of documentaries, to be browsed, first add them to a zip file and then add the zip to archive.
Changing File Extension
This method is one of those simple things which you would be astonished that you didn’t know before. Used in conjunction with zip files, it will effective for most of the users. And this also one of the only effective methods for Home edition users as their Windows doesn’t have encryption or Bitlocker.
Step 1: As usual put all your stuff in a single folder. Create a new zip file as shown in the screenshot below.

Step 2: Right-click on the zip file and change the extension .zip to something else. Again try avoiding popular extensions and name the file something technical . If you can’t see the .zip extension, you need to enable the setting by going to Control Panel > Folder Options > uncheck the Hide extensions for known file types option. It’s wise to turn this option ON again to confuse someone further.
4. Make a New Partition & Hide it
If you have enough free space on your hard disk you can make a free partition and dump all the stuff you want to lock in it and then hide it.
Step 1: Create a new partition by following the guide here or here.
Step 2: Copy all your stuff to the partition. From here on, Windows Pro edition users can just use Bitlocker or encrypt the contents (if the partition is on an external HDD) and Windows Home edition users can hide the partition by following the next step.
Step 3: Go to Control Panel > Administrative Tools > Create and format hard disk partitions > right click on the partition you created in Step 1 > Change Drive Letter and Paths …. In the new window, click on remove.

It will show a warning, accept it. Now your partition will not be visible in My Computer or anywhere in Windows. Of course, a clever user might figure this out and make the partition visible again following the method shown in the next step. To not let this happen, change the permissions for the partition as described above.
Step 4: To bring back the drive, again go to Control Panel > Administrative Tools > Create and format hard disk partitions > Change Drive Letter and Paths …. In the new window, click on Add, to assign a letter to the drive.
One other method is to create the new partition in Linux formats (ext2 or ext3). But that will require an external app but is also one of the simplest ways to hide something. To make an ext3 you can use any of the major partition managers available. This ext3 partition will not be visible in My Computer and to read or transfer the files stored on it, you will need an ext3 partition reader. I would recommend using this excellent open-source app. Of course, other alternatives are just a Google search away.
So, Whats Your Method?
The above methods are mostly for locking access or hiding files sans any external help. If you venture out there are numerous solutions available, some open source, some proprietary. If you have some other methods do share with us through comments.
Last updated on 5 Jul, 2019
The above article may contain affiliate links which help support Guiding Tech. However, it does not affect our editorial integrity. The content remains unbiased and authentic.
Read Next

How to Manage Files and Folders Efficiently on Windows 10
Here are some useful organizational tips and tricks on managing files and folders on # Windows 10 computers.

How to Delete Files on Windows 10 That Insist on Staying
There are some files in # Windows that just can’t be deleted. If you’re facing such issues on your # Windows 10 machine, try out these steps.

How to Turn off Auto-Lock in Windows 10
Learn how to turn off auto lock in # Windows 10, and why you should or shouldn’t turn it off or reasons behind it. There are two troubleshooting steps here.

How to Change BitLocker Password in Windows 10
Here are three ways to change # BitLocker # password on your # Windows 10 computer. I will also share a # BitLocker alternative that is equally good and free to use.

Top 13 Ways to Fix Folder Access Denied Error in Windows
Trying to open a folder on # Windows 10 but viewing the access denied pop-up error instead? Here’s a detailed # troubleshooting guide on how to fix this error and regain access.

2 Best Ways to Rename Multiple Files at Once on Mac
Wondering how to rename several files at once? Here are two useful ways to achieve rename multiple files in bulk on your # Mac.

Solid Explorer vs FX Explorer: Which Is the Best File Manager
In this guide, we will compare two amazing and feature-rich file managers — Solid Explorer and FX Explorer. Let’s see how they are similar and how they differ.

What’s the Difference Between PIN and Password for Login in Windows 10
Learn the difference between a # password and a PIN in # Windows 10 and why you should consider using one with your cloud Microsoft account for maximum # security.
Did You Know
Microsoft Edge was initially code-named Project Spartan.


