- Киношная картинка с помощью LUTs в Adobe Premiere Pro за несколько секунд. Бесплатные LUT пресеты
- Найдены возможные дубликаты
- Видеомонтаж
- Правила сообщества
- Davinci Resolve 17 для НОВИЧКОВ | Основы Цветокоррекции
- Как в одиночку дома создать 3D кино? Вот так вот!
- How to Install LUTs in Premiere
- How to Install LUTs in Premiere Pro?
- Installing LUT on Mac
- Installing LUT on Windows
- How to Open LUTs without Installing?
- How to Create LUTs?
- Method 1 — Using Adobe Premiere Pro
- Method 2 — Using Adobe Lightroom
- Method 3 — Using Adobe Photoshop
- Free LUTs for Adobe Premiere Pro
- 73 Best Free Luts for Premiere Pro to Make Cinematic Videos
- Free Cinematic Luts for Premiere Pro
- 1. Free LUTs from Colour Grading Central
- 2. 16 Free Canon Cinestyle Luts
- 3. 8 Cinematic LUTs for Premiere Pro
- 4. Free LUTs Cinematic from Preset Pro
- 5. 35 Free LUTs for Color Grading
- 6. Free Movie Look Pack
- 7. Free Vintage LUT for Premiere
- 8. 10 Free Cinematic Luts
- Rounding Up
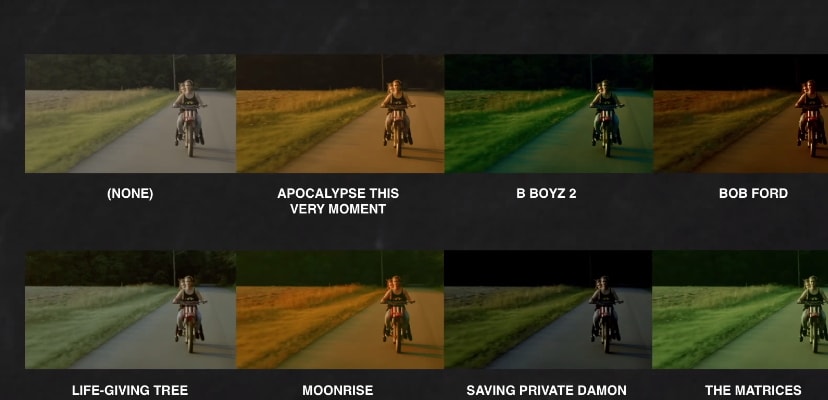
Киношная картинка с помощью LUTs в Adobe Premiere Pro за несколько секунд. Бесплатные LUT пресеты
Привет. Сегодня поговорим о быстрой цветокоррекции видео с помощью LUT пресетов. Качественная работа с цветом позволяет насытить ваше видео яркими красками и эмоциями. Приятного просмотра)

Найдены возможные дубликаты

Видеомонтаж
587 постов 4.7K подписчиков
Правила сообщества
Критикуй, мамкин оператор.
Я бы банил за такие заголовки навсегда
блядь, и тут инстаграмм
ебош туториал как пользоваться меню «File»
пиздобол, этих презетов миллионы (и все бесплатны), ты создал миллионный+1
Я одну вещь скажу. В таких видео морда автора — это последнее, что интересно зрителю.

Davinci Resolve 17 для НОВИЧКОВ | Основы Цветокоррекции
В этом ролике я 35 минут рассказываю об основах цветокоррекции в такой крутой (и кстати бесплатной!) программе — Davinci Resolve 17!
Расскажу про основные кольца для цветокоррекции в Давинчи 17, затронем работу с кривыми, а также сделаем маску и даже посмотрим как работает новый инструмент для быстрого создания маски — Magic Mask. Еще сделаем стандартный трекинг маски, также поработаем с таким крутым инструментом, как Qualifier, он же аналог HSL в Premiere Pro.
Davinci Resolve — это профессиональная программа для цветокоррекции, именно поэтому здесь очень много инструментов, и новичку может показаться все это слишком сложным. Но, уверяю вас, если подходит с умом — то можно постигнуть практически всё!

Как в одиночку дома создать 3D кино? Вот так вот!
Мой первый пост на Пикабу, поэтому не судите строго.
Я не мастер красиво рассказывать истории, но я мастер делать видосики разных направлений.
Одно из моих любимых направлений как раз является соединение 3д графики с реальным миром. Все началось с того что я прошел в топ 100 молодых режиссеров проекта CAST.
Нам дали задание создать 5 минутную короткометражку за 3 дня на тему ЭПИДЕМИИ.
Я был одним из тех на кого возлагали надежды и ждали чего то эдакого.
И поскольку, я мог сделать это самое ЭДАКОЕ, я приступил к раскадровке и сценарию.
По итогу получилась интересная история, пост апокалипсиса, в которой главный герой чуть ли не последний на земле человек, потерявший своих близких, и все что ему остается это сидеть и ждать своего финала, который напрямую зависит от генератора (защитного поля). В довесок ко всему вокруг бродят а-ля зомби(фотку моделек скинул) которые разрушают последнюю соседнюю колонию.
По идее я вышел за рамки короткого видео, и это начало расти в более сложный и крутой проект. Но суровая реальность такова, что я не только не успел к конкурсной сдаче, но и в целом забросил проект в долгий ящик, снимал я его в начале Августа, а допинать его труп смог только 31 числа.
Само собой банальная проблема таких проектов отсутствие должного финансирование, да и работают над такими видео не в одиночку как я, а как минимум компания из 20+ человек.
Поэтому вашему вниманию хочу представить а-ля хайлайты под хороший аккомпонемент LP.
Источник
How to Install LUTs in Premiere
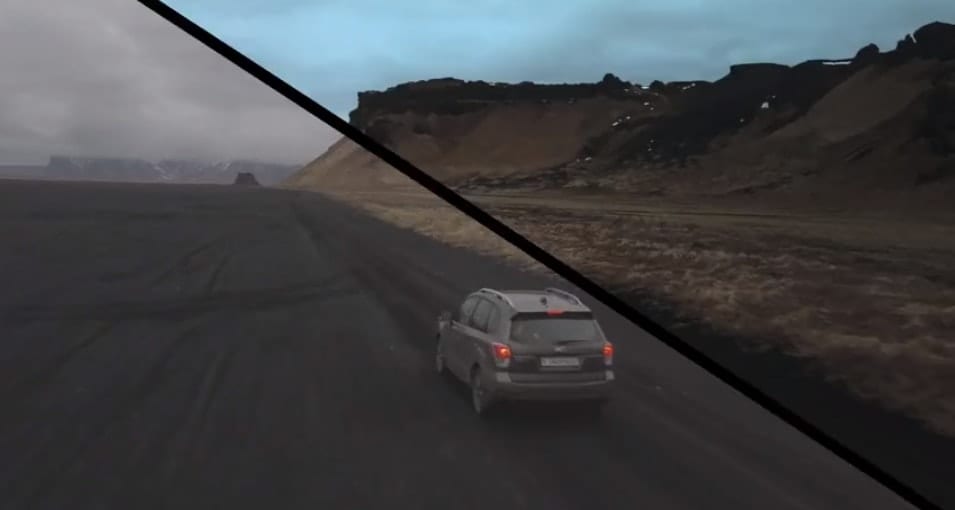
View more about how to install LUTs in Premiere and do professional video color grading in several clicks. Give your clips a film or cinematic color correction easy and fast.

How to Install LUTs in Premiere Pro?
There are several ways of how to install LUTs in Premiere Pro, but I found the following method the easiest one.
Installing LUT on Mac
STEP 1: Open a new search window. Go to Library / Application Support / Adobe / Common / LUT
STEP 2: Find there the “Creative” folder and open it. If it does not exist, create it.
STEP 3: Copy the LUT files here. You need to copy separate files, not a folder.
STEP 4: Restart Premiere Pro. Now, LUTS should be available in the pop-up list on the Creative tab of the Lumetri interface.
Installing LUT on Windows
STEP 1: To install LUT, you need to move files from LUTs to the Premiere Pro folder. By default, it is C: \ Program Files \ Adobe \ Adobe Premiere Pro CC [Version] \ Lumetri \ LUTs \ Creative
STEP 2: Restart Premiere Pro (if it was opened), open the Color panel, Lumetri Color, Creative tab and find your Adobe Premiere LUTs in the drop-down list.
How to Open LUTs without Installing?

If you need to apply LUTs once, then you can skip the installation process and use them directly.
STEP 1: Open Premiere Pro, click on the Color tab / Lumetri Color / Basic Correction.
STEP 2: You will see the “Input LUT” button with the clickable word “None” next to it.
STEP 3: Find the necessary LUT on the computer and open it. Here you can adjust the white balance, tone, highlights/shadows and more, if necessary.
In such a way you can load only one LUT at a time, and when you load another LUT, the previous one disappears.
How to Create LUTs?
Sometimes the LUTs you find on the web don’t satisfy your needs and vision of how the videos should look. In this case, I suggest you creating LUTs on your own. There are three 3 to do it.
Method 1 — Using Adobe Premiere Pro
STEP 1: Open Premiere Pro, load any video into it and go to the Color tab / Lumetri Color.
STEP 2: Perform video color correction, first alter the basic settings, then the creative and the Curve.
STEP 3: Find the “Lumetri Color” panel heading at the top. There will be four strips next to this heading. Click on it.
STEP 4: Go to the “Export .cube” button. Choose a place to save the file. You can save it immediately to the LUTs folder for permanent use:
For Windows: C:\Program Files\Adobe\Adobe Premiere Pro CC [Version]\Lumetri\LUTs\Creative
For MacOS: Library / Application Support / Adobe / Common / LUT So, you have LUT Premiere file. You can import it into any program that supports .cube files.
Method 2 — Using Adobe Lightroom
This method is suitable if apart from the video editing you are engaged in photography and have Lightroom. In my opinion, it is the longest and most complex approach, but it gives more opportunities for color correction.
STEP 1: Download and install free IWLTBAP LUT Generator software.
STEP 2: Unzip the archive and run the program for the necessary operating system. At the same time download the Neutral-125.png which you will use for further operations.
STEP 3: Open Premiere Pro, select the necessary frame on the timeline and take a screenshot.
STEP 4: Open Lightroom, import the screenshot into the library and Neutral-125.png.
STEP 5: Click on the screenshot and make the color correction for this frame. You can’t fine-tune Clarity, Detail, Lens Corrections, Transform and Effects in this image, since it will not be applied to the LUT, as only the color information and related actions are recorded in this file.
STEP 6: Next, press Ctrl (Cmd) + Shift + C, copy all the settings from the processed image and apply them to Neutral-125.png Ctrl (Cmd) + Shift + V.
STEP 7: Export the image you get with a PPI value equal to 72.
STEP 8: Open IWLTBAP LUT Generator, click Convert to CUBE, look for the exported Neutral-125.png file.
STEP 9: Go back to Premiere Pro, create a new Adjustment Layer. Move it to the timeline, stretch it along the necessary fragments of the material and go to the Color workspace.
STEP 10: Select the Adjustment Layer on the timeline, open the Creative tab, use the “Browse . ” to find the file with the “.cube” extension and use it. Done!
Method 3 — Using Adobe Photoshop
If it seems difficult for you to create free LUTs for Lightroom, the method with Photoshop is twice quicker.
STEP 1: Take a screenshot of the video for which you want to make LUTs. Open this screenshot in Photoshop.
STEP 2: You can work with the image only on the Adjustment Layer (Window / Correction), all other changes to LUTs will not be applied.
STEP 3: After the color correction, you need to export the file: File / Export / Look Up Table. Choose the .cube format, so you can add LUTs to Premiere and use them in this software.
STEP 4: Choose the quality. I recommend 256 if your computer can handle it, otherwise export will take a lot of time.
STEP 5: Select the folder to save your files. You can immediately select the Premiere Pro LUTs folder:
For Windows: C:\Program Files\Adobe\Adobe Premiere Pro CC [Version]\Lumetri\LUTs\Creative
For MacOS: Library / Application Support / Adobe / Common / LUT
- View more about how to download Photoshop free.
Free LUTs for Adobe Premiere Pro
If you do not want to spend time creating LUTs on your own or all paid photo LUTs you saw on the net are either of poor quality or change nothing, here is my own set of LUTs for Premiere Pro.
Источник
73 Best Free Luts for Premiere Pro to Make Cinematic Videos

Benjamin Arango
Sep 13, 2021• Proven solutions
Luts are commonly used by editors and photographers alike to fine-tune the color grading in their end projects. For everything from converting videos to black and white, to inverting the colors in smartphone photography, does so using a Luts.
These conversion files are not as complicated as they seem. In cinema, at least, they are the best way to colour grade footage to a high-quality finished product.
What editors and photographers don’t know is that there are free luts for premiere pro out there. This article is dedicated to finding cinematic lut premieres that you can use, for free, when putting together your films. What are the 73 best luts for Premiere Pro? Let’s find out.
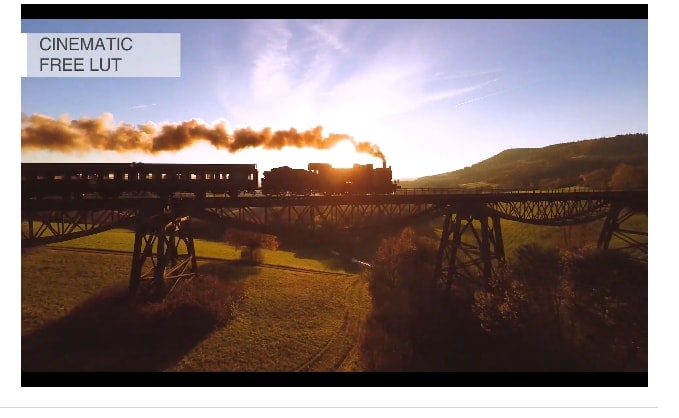
Free Cinematic Luts for Premiere Pro
Without further ado, here are some of the best free cinematic LUTs for Premiere Pro that is available on the market.
1. Free LUTs from Colour Grading Central
Seeking to emulate the subtle nuances of Hollywood films (their words, not ours), these LUTs are imitations for high-end fine tuning to creating a perfect movie. As well as providing free LUTs for Premiere Pro, these also work with Final Cut Pro. The pack is called the Cinema Grade Plugin, and you can download it for free, directly from their website.
One thing we do like about this package is that their plugin allows for previewing before application. They also bypass the drop-down menu selection. This eliminates a whole lot of scroll-through time as you search for the correct table.
2. 16 Free Canon Cinestyle Luts
Cinematic LUT premiere is turned into something exemplary with the use of these 16 free Canon luts. One of the biggest names in the photography industry: it is only fair that Canon gives away some of their honed software, for free! We tracked down the best of them so you could have access to a full range of free LUTs for Premiere Pro.

Fresh from Ground Controller, you can gain free Cinestyle to REC 709 LUT by following the link above. This gives you access to colour grading tables capable of retouching even the least colorful film. It’s beautiful, it’s easy to use, it works with most apps, and it is one of the best free luts for Premiere Pro that you can get. Plus, there’s 16 of them. It doesn’t get better than that.
3. 8 Cinematic LUTs for Premiere Pro
These cinematic LUTs are provided in an easy-to-access format. Click to select your LUT and again to apply it, preview what it looks like, and improve your experience. All of this is simple with a cinematic lut premiere. These LUTs are provided by Filter grade, a well-known firm for tech freebies. We particularly like this pack because of the walkthroughs they provide.
It isn’t just easy to use – it is all there for you on video if you need more help. Go to their website, watch the instruction manual, and DIY the best cinematic color grading LUTs – for free! Whether you are struggling to install and use your free LUTs for Premiere Pro, or whether you are a total beginner, we recommend this package for you.
4. Free LUTs Cinematic from Preset Pro
Preset Pro is a little different from the other cinematic LUTs out there. This is mainly because they have been specially devised to work in harmony with Premiere Pro. Where the others on our list spared a glance towards compatibility with the likes of Final Cut Pro, the team at Preset focused solely on making free LUTs for Premiere Pro.

This gives them the edge if this happens to be the system of your choice. If not, though, this double-edged sword might not work as you expect it to. The good news is it is completely free, totally cinema compliant, and lightroom friendly!
5. 35 Free LUTs for Color Grading
On the upper end of the spectrum comes this offering from Rocketstock. Rocketstock is another well-known brand, even if you haven’t heard this title before. Their parent company is Shutterstock – which everyone has heard. If there is a decent marker as to the high-tech capabilities of a LUT pack, it is the brand name behind it.
These 35 LUTs are sure to contain what you need. Best used by those who are always editing, this pack includes vintage feel, lightening and darkening, softening and sharpening – everything you need from a full set of tables. Colour grade with the best of them with these free luts for Premiere Pro.
6. Free Movie Look Pack
This pack does exactly what it promises to: it gives you free luts for Premiere Pro, in a pack! This free movie retouching pack includes cinematic lut premieres within depth colour grading tuition. That’s right – this pack also comes with a complete tutorial that will help you get the most from your program. It’s not as extensive as some of the previous packs, but it does contain everything you need to get started.
7. Free Vintage LUT for Premiere
If you are developing a moody, atmospheric film, then there might only be one single free LUT for Premiere Pro that you need… the Vintage table. This pack provides it – specifically, Kodachrome K-Tone LUT. This comes free from photographer Frank Glencairn, so you know the source is reputable.
8. 10 Free Cinematic Luts
Finally, on our list today, we have the free cinematic LUTs only found at Fix the Photo. This firm does exactly what it promises to. It fixes your photographs and films with a choice of ten different tables. Instantly adjust your colouring, highlight or lowlight, or blend colours. This pack also has cull compatibility with macs.
Rounding Up
A decent cinematic lut, Premiere Pro doesn’t always need a specially devised program. Many LUTs have been programmed to work across various platforms, operating systems – and film types. So whether you need film industry quality luts, or whether you are just a dabbler: you can find them all here, for free, right now. So what’s stopping you?
Источник


