- Apple Keyboard
- Contents
- Numlock is on
- Repeating keys on a wireless keyboard
- hid_apple module options
- Function keys do not work
- Switching Cmd and Alt/AltGr
- Swap the Fn and left Control keys
- _have_changed_place_with_§_and_½»> have changed place with § and ½
- _have_changed_place_with_^_and_°_(or_@_and_#,_or_`_and_
- PrintScreen and SysRq
- Treating Apple keyboards like regular keyboards
- Use a patch to hid-apple
- Troubleshooting configuration not picked up by the module
- Use un-apple-keyboard
- Change the Behavior Without Reboot
- Magic Keyboard does not connect
- Enable dvorak/dvp
- No input during root disk decryption
- How to pair Apple Magic Keyboard (A1314) on Ubuntu 18.04 and act as Numpad
- Настройка Apple Slim keyboard под Linux
- 1.Компилим ведро.
- 2.Немного шаманства.
- 3. И это ещё не всё.
- 4. Для маньяков
- 5. Для несогласных.
Apple Keyboard
Some keyboard models that use the Apple keyboard driver may have swapped keys or missing functionality. This article describes how to change the settings for the keyboard so that it behaves as expected.
Contents
)»> 8 have changed place with ^ and ° (or @ and #, or ` and
Numlock is on
You may find that the numlock is on. The symptoms are that only the physical keys 7 , 8 , 9 , u , i , o , j , k , l and surrounding keys work and output numbers. To fix this hit Fn+F6 twice. You might need to use a utility like numlockx .
Alternatively, set the keycodes manually using xmodmap to avoid use Numlock:
Repeating keys on a wireless keyboard
Unpair the keyboard and then re-pair it. The trick is to hold down the power button throughout the entire pairing process.
hid_apple module options
- fnmode — Mode of top-row keys
- swap_opt_cmd — Swap the Option («Alt») and Command («Flag») keys
- iso_layout — Enable/Disable hardcoded ISO-layout of the keyboard. Possibly relevant for international keyboard layouts
- swap_fn_leftctrl — Swap the Fn and left Control keys
Function keys do not work
If your F keys do not work, this is probably because the kernel driver for the keyboard has defaulted to using the media keys and requiring you to use the Fn key to get to the F keys. To change the behavior temporarily, append 2 to /sys/module/hid_apple/parameters/fnmode .
To make the change permanent, set the hid_apple fnmode option to 2:
To apply the change to your initial ramdisk, in your mkinitcpio configuration (usually /etc/mkinitcpio.conf ), make sure you either have modconf included in the HOOKS variable or /etc/modprobe.d/hid_apple.conf in the FILES variable. You would then need to regenerate the initramfs.
Switching Cmd and Alt/AltGr
This will switch the left Alt and Cmd key as well as the right Alt / AltGr and Cmd key.
Temporary and immediate solution:
Permanent change, taking place at next reboot:
Swap the Fn and left Control keys
This will switch the Fn and left Control keys.
Temporary and immediate solution:
Permanent change, taking place at next reboot:
_have_changed_place_with_§_and_½»> have changed place with § and ½
 This section is being considered for removal.
Alternatively, set the keycodes manually using xmodmap:
If you use a Canadian multilingual layout (where the «ù» and the «/» is switch) use this:
_have_changed_place_with_^_and_°_(or_@_and_#,_or_`_and_
)»> have changed place with ^ and ° (or @ and #, or ` and
With German layout, circumflex/degree symbol and are exchanged. With French layout, @/# are exchanged. With the US layout, `/
and are exchanged.
To change the behavior temporarily, overwrite /sys/module/hid_apple/parameters/iso_layout with 0 :
To make the change permanent, set the hid_apple iso_layout option to 0:
PrintScreen and SysRq
Apple Keyboards have an F13 key instead of a PrintScreen / SysRq key. This means that Alt+SysRq sequences do not work, and application actions associated with PrintScreen (such as taking screenshots in many games that work under Wine) do not work. To fix this, you can add setxkbmap -option «apple:alupckeys» to your .xinitrc . This will map PrintScreen / SysRq to F13 , as well as Scroll lock to F14 and Pause to F15 .
Alternatively, follow the Map scancodes to keycodes article to map the F13 scancode to the PrintScreen / SysRq keycode, where 458856 (0x070068) is the scancode of F13 , and sysrq is the keycode of PrintScreen / SysRq .
Treating Apple keyboards like regular keyboards
Depending on the customisations you want to accomplish, there are two solutions available and some options that are in the kernel. You need to choose one of the other.
Use a patch to hid-apple
While the original hid-apple module does not have options to further customize the keyboard, like swapping Fn and left Ctrl keys or having Alt on the left side of Super , there is a patched version adding this functionality to the module. To use it, install the hid-apple-patched-git-dkms AUR package. This will install the patched hid-apple and mask out the original one.
The package uses DKMS to automatically recompile the module during kernel upgrades. While the dkms will be pulled in by dependency. You still need to install an appropriate kernel header package manually. See the DKMS page for more info.
In addition to the patched kernel module, a configuration file is also provided by the package at /usr/lib/modprobe.d/hid_apple.conf , which enables PC-like layout by default:
- Top-row keys are normally function keys, switchable to media keys by holding Fn key, as in #Function keys do not work.
- Four keys at the lower left corner act as Ctrl , Fn , Super , Alt , in this order.
- Two keys at the lower right corner act as Alt , Ctrl , in this order.
- If you have an Ejectcd key, it will act as Delete key.
If you wish to change the default options, copy the configuration file to /etc/modprobe.d and make desired changes:
The file under /etc/modprobe.d will completely override the one with the same name under /usr/lib/modprobe.d , and the content is NOT merged.
Alternatively, put additional options in a file with a different name if you want to keep default ones,
Please refer to the project README for the exact meaning of each configuration option and tweaking the configuration file to suit your needs. Learn more about modprobe.d at Kernel module#Using files in /etc/modprobe.d/.
After installation, reboot for the change to take effect, or #Change the Behavior Without Reboot.
Troubleshooting configuration not picked up by the module
First, make sure the patched version is loaded, see what parameters are provided by the module:
If you do not see new options like swap_fn_leftctrl , ejectcd_as_delete , etc., check your dkms installation.
Then, check if configuration files are correctly included in initramfs:
Check the presence and content of inintramfs/usr/lib/modprobe.d/hid_apple.conf and any other relevant configuration files in inintramfs/etc/modprobe.d . If they are not there, you should check your /etc/mkinitcpio.conf to include those. By default, there should be a modconf hook that automatically include those files, if not, add it to the HOOKS array after autodetect .
Alternatively, list those files in FILES array explicitly:
Refer to Mkinitcpio#BINARIES and FILES and Mkinitcpio#HOOKS for more explanation on what this means.
Finally, rebuild the initramfs and reboot.
Use un-apple-keyboard
If you do not need all of these customizations and you do not want to compile a new module manually or using dkms, there is an AUR package un-apple-keyboard AUR which does not rely on a new kernel module, but rather just to mappings. It enables the following features:
- The keyboard is considered as an ISO keyboard (e.g. and > located at the right of the Left Shift key are working like expected).
- The function keys are disabled by default. You need to press the Fn key in combination to trigger them. By default, the behavior are thus keys F1 to F12
- The Alt and Cmd keys are swapped.
- F13 is mapped to SYSRQ , F14 to Scroll Lock and F15 to Pause .
The first 3 aforementioned features are brought to you using the default linux kernel module hid-apple .
The last one is provided by providing a mapping to keyfuzz AUR .
Change the Behavior Without Reboot
To reload the kernel module without reboot, run rmmod hid_apple && modprobe hid_apple .
Magic Keyboard does not connect
If you have a magic keyboard that will not connect to the system through the built in tools, such as the Gnome 3 bluetooth menu in settings, install blueman and its dependencies and attempt to connect with it. If it still fails to connect, make sure you have bluetoothctl and hcitool installed.
Enable dvorak/dvp
By default xkb loads translation table (actually called xkb_symbols ) macintosh_vndr/us for macintosh keyboard:
This translation table located in /usr/share/X11/xkb/symbols/macintosh_vndr/us and do not contains dvorak/dvp layout. You can use default translation table from /usr/share/X11/xkb/symbols/us and add command setxkbmap in your .profile for forced loading layout:
No input during root disk decryption
You may have to manually add the hid_apple module to the mkinitcpio configuration:
Or place the keyboard hook before autodetect so that all keyboard drivers are included:
Regenerate the initramfs after doing either of these.
Источник
How to pair Apple Magic Keyboard (A1314) on Ubuntu 18.04 and act as Numpad

I was browsing options for Bluetooth keyboards recently and was lucky to hit an Apple Magic Keyboard for as low as 25 Euro. Once I’ve received the packet I was impassioned to start using it. How disappointed I was when I found out that it pairs only as half-Numpad (in my case only 7–8–9–0 keys were active) and disconnects right after Caps Lock pressed. In the end I’ve found the solution which I would like to share here today.
Step 1. Make sure the keyboard is off. The best way to do that is to power cycle by removing batteries and plugging them back.
Step 2. Open terminal. Run the following commands:
Step 3. Power on your Magic Keyboard. Hold the power button and do not release until step 5.
Step 4. In bluetoothctl type:
It will start scanning for available Bluetooth devices. What we are looking for would be indicated like this:
Step 5. Copy MAC address for the keyboard from the previous step. Add keyboard as trusted device:
Once it trusted start pairing:
Step 5. Release the‘ Power on’ button on the keyboard and type PIN code on the keyboard. It won’t indicate anything in the terminal, but that’s fine. Commit PIN by hitting ‘Enter’. If pairing is successful output will be similar to that:
Step 6. Now your keyboard is paired, but most likely it will be acting as a Numpad. To resolve this issue run following in terminal:
Congratulations — now you have fully working Apple Keyboard!
Источник
Настройка Apple Slim keyboard под Linux
Недавно праздновал свой 23 день рождения и был одарен коллегами замечательнейшим девайсом. Apple Slim Aluminium Keyboard.
Да-да-да. Именно с большой буквы каждое слово.
По моему скромному мнению, лучшей клавиатуры для разработчика не найти. Особенно для такого любителя Linux как я.
Клавиатура удобная, ничего не скажешь, писать об этом больше не буду, и так уже везде понаписано. Однако не без проблем.
Мой любимый рабочий компьютер с Gentoo напрочь отказался работать с мультимедийными клавишами и прочими радостями современного мира. Немного погуглив я обнаружил что я не одинок и огромное количество народа тоже страдает от этого. Однако четкой и подробной инструкции на русском (да и на английском ) я так и не нашел. Специально для таких как я страдальцев и предназначен сей коротенький мануал.
Тут в комментариях просят картинку клавиатуры: 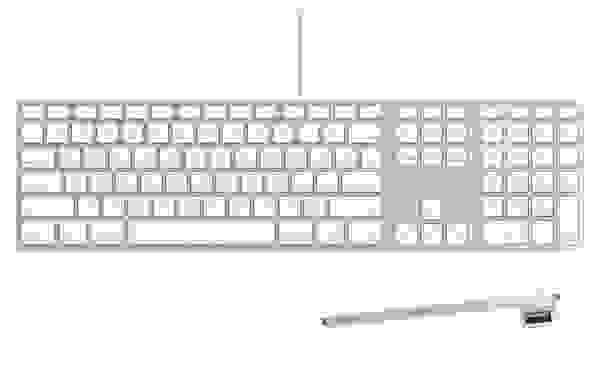
А вот тут можно про неё почитать.
Оговорюсь, что все последующие операции мы будем выполнять в режиме суперпользователя. А также, все предложенные кейкоды работают только для Slim клавиатуры. Для клавиатуры ноутбука придется повторить все самому.
1.Компилим ведро.
Первое что пришлось сделать мне как пользователю столь дружелюбного дистрибутива как Gentoo, это конечно перекомпилировать ядро.
Без этого X-сервер напрочь отказывается видеть недостающие клавиши.
Замечу, что пользователям Ubuntu этого делать не придётся так как для них разработчики уже всё что надо сделали.
Предполагаю что исходные тексты ядра у вас уже лежат /usr/src/linux
Идем туда и делаем make menuconfig
В открывшемся диалоге находим:
Device Drivers → HID Devices
И жмакаем галочку на «Enable support for Apple laptop/aluminium USB special keys».
Далее, как обычно следует make && make modules_install && make install
Если не скомпилилось — зовем соседа-линуксоида, гуглим форумы и.т.д в поисках солюшена, что бы узнать что не так и как эту проблему побороть.
2.Немного шаманства.
Замечу, что после того как ядро успешно установилось, всё практически заработает. Но, как это принято в мире Linux, не без подвоха.
Теперь, для того что бы нажать, к примеру, кнопку F1 надо предварительно удерживать до этого не работающую клавишу Fn. Что, поверьте, очень раздражает и навевает мысли о суициде.
Что бы поправить это безобразие, делаем такую штуку:
echo 2 > /sys/module/hid/parameters/pb_fnmode
Что бы данное изменение применялось каждый раз при загрузке системы, надо добавить эту команду в конец стартового скрипта.
В разных дистрибутивах он находится в разных местах.
Приведу пример для Gentoo:
/ etc/conf.d/local.start
и для Ubuntu:
/etc/rc.local
3. И это ещё не всё.
». А ещё на ней есть обратные апострофы. Нужная в общем-то кнопка.
Также не работают кнопки в верхнем ряду: Print Screen, Scrool Lock и Pause.
Не так часто я их использую, но всё же не по себе от того что они не работают.
Ну и самый пожалуй главный недочет — это то что нет кнопки Insert, зато есть F16-F19 которые как бы некуда девать.
Этими проблемами мы и займемся.
Для изменения раскладки клавиатуры мы будем использовать две стандартные X-утилиты: xev и xmodmap. Изменения будут производится уже не под суперпользователем, а под вашим системным пользователем, в вашем домашнем каталоге.
Запускаем xev и пробуем нажимать на клавиши.
После нажатия читаем что вываливается на экран. Я нажал на букву «ё» и увидел вот что:
KeyRelease event, serial 34, synthetic NO, window 0x3c00001,
root 0x1a6, subw 0x0, time 31989750, (533,667), root:(538,692),
state 0x10, keycode 94 (keysym 0x3c, less), same_screen YES,
XLookupString gives 1 bytes: (3c) «
О чём это нам говорит?
Была нажата клавиша с keycode 94. На неё назначен печатный символ « keycode 49 = grave asciitilde Cyrillic_io Cyrillic_IO
Заменяем так что бы получилось:
keycode 94 = grave asciitilde Cyrillic_io Cyrillic_IO
Для теста запускаем: xmodmap
/.Xmodmap
И пробуем по нажимать. Ура? Всё работает.
Тем же путем находим коды клавиш F13 — F15 и назначаем на них нужные действия.
Я назначил вот так:
keycode 191 = Print Sys_Req Print Sys_Req Print Sys_Req
keycode 192 = Scroll_Lock NoSymbol Scroll_Lock NoSymbol Scroll_Lock
keycode 193 = Pause Break Pause Break Pause Break
Ну а Insert повесим на F16:
keycode 194 = Insert NoSymbol Insert NoSymbol Insert
В итоге я получил такой файл .Xmodmap:
keycode 94 = grave asciitilde Cyrillic_io Cyrillic_IO
keycode 191 = Print Sys_Req Print Sys_Req Print Sys_Req
keycode 192 = Scroll_Lock NoSymbol Scroll_Lock NoSymbol Scroll_Lock
keycode 193 = Pause Break Pause Break Pause Break
keycode 194 = Insert NoSymbol Insert NoSymbol Insert
Замечу, что после того как этот файл появился в вашем домашнем каталоге, ничего больше делать не надо. Он сам автоматически применится после рестарта X-сервера.
4. Для маньяков
Некоторые, привыкшие к типичному для обычных клавиатур расположению клавиш: Ctrl | Win | Alt не могут привыкнуть к тому, что на эппловской клавиатуре это расположение изменено на: Ctrl | Alt | Cmd.
Сmd — это как бы то же самое что и Win. Для linux она выглядит как «Meta» или «Super».
Для этого, используя тот самый xmodmap мы придумали следующий ремапинг:
clear Mod4
clear Mod1
keycode 115=Alt_L
keycode 64=Super_L
add Mod4 = Super_L
add Mod1 = Alt_L
5. Для несогласных.
Конечно, предложенная схема удобна далеко не всем. Но руководствуясь этой инструкцией каждый сможет настроить свою клавиатуру так как он хочет.
Ну и конечно, та часть инструкции которая отвечает за ремапинг клавиш, может помочь и тем кто не является счастливым обладателем клавиатуры от Apple.
Например можно отлично настроить мультимедийные клавиши на клавиатурах на которых они присутствуют. 🙂 Или подпрвить не устраивающую вас раскладку.
Источник


