- Install Cisco AnyConnect Secure Mobility Client on a Mac Computer
- Available Languages
- Download Options
- Objective
- Introduction
- AnyConnect Software Version
- Install AnyConnect Secure Mobility Client
- Prerequisites
- Check these other articles out!
- Applicable Devices | Software Version
- Licensing Information
- Step 1
- Step 2
- Step 3
- Step 4
- Step 5
- Step 6
- Step 7
- Step 8
- Step 9
- Step 10
- Step 11
- Step 12
- Step 13
- Additional Resources
- AnyConnect App
- View a video related to this article.
- AnyConnect macOS 11 Big Sur Advisory
- Available Languages
- Download Options
- 1. Introduction
- 2. About the AnyConnect System Extension
- 3. Approving the AnyConnect System Extension
- 3.1 Extension Approval by End User
- 3.2 Extension Approval using MDM
- Understand AnyConnect Network Access Manager Logging
- Available Languages
- Download Options
- Contents
- Introduction
- Prerequisites
- Requirements
- Components Used
- Enable NAM Logging
- Configure NAM Packet Capture
- Log Collection
- Reading NAM Logs
- Log Summary of a Network Connection without 802.1x Enabled Authentication
- Log Summary of a Network Connection using 802.1x and PEAP over Wired Network
Install Cisco AnyConnect Secure Mobility Client on a Mac Computer
Available Languages
Download Options
Objective
This article shows you how to download and install the Cisco AnyConnect Secure Mobility Client version 4.9.x on a Mac Computer.
This article is only applicable to the RV34x series routers, not Enterprise products.
Introduction
AnyConnect Secure Mobility Client is a modular endpoint software product. It not only provides Virtual Private Network (VPN) access through Secure Sockets Layer (SSL) and Internet Protocol Security (IPsec) Internet Key Exchange version2 (IKEv2) but also offers enhanced security through various built-in modules.
AnyConnect Software Version
Install AnyConnect Secure Mobility Client
This toggled section provides details and tips for beginners.
Prerequisites
- You need to purchase client license(s) from a partner like CDW or through your company’s device procurement. There are options for 1 user (L-AC-PLS-3Y-S5) or packets of licenses including one year for 25 users (AC-PLS-P-25-S). Other license options available as well, including perpetual licenses. For more details on licensing, check out the links in the Licensing Information section below.
- Download the latest version of firmware available for your router.
Check these other articles out!
Applicable Devices | Software Version
- RV340 | 1.0.03.21 (Download latest)
- RV340W | 1.0.03.21 (Download latest)
- RV345 | 1.0.03.21 (Download latest)
- RV345P | 1.0.03.21 (Download latest)
Licensing Information
AnyConnect client licenses allow the use of the AnyConnect desktop clients as well as any of the AnyConnect mobile clients that are available. You will need a client license to download and use the Cisco AnyConnect Secure Mobility Client. A client license enables the VPN functionality and are sold in packs of 25 from partners like CDW or through your company’s device procurement.
Want to know more about AnyConnect licensing? Here are some resources:
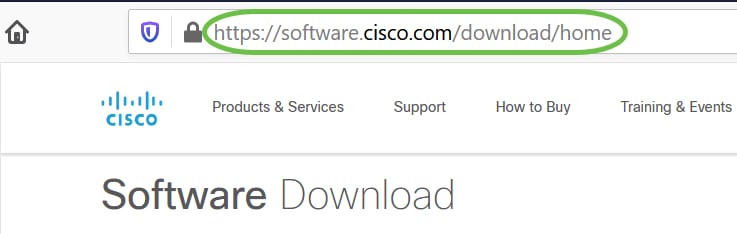
Step 1
Open a web browser and navigate to the Cisco Software Downloads webpage.
Step 2
In the search bar, start typing ‘Anyconnect’ and the options will appear. Select AnyConnect Secure Mobility Client v4.x.
Step 3
Download the Cisco AnyConnect VPN Client. Most users will select the AnyConnect Pre-Deployment Package (Mac OS) option.

The images in this article are for AnyConnect v4.9.x, which was latest version at the time of writing this document.
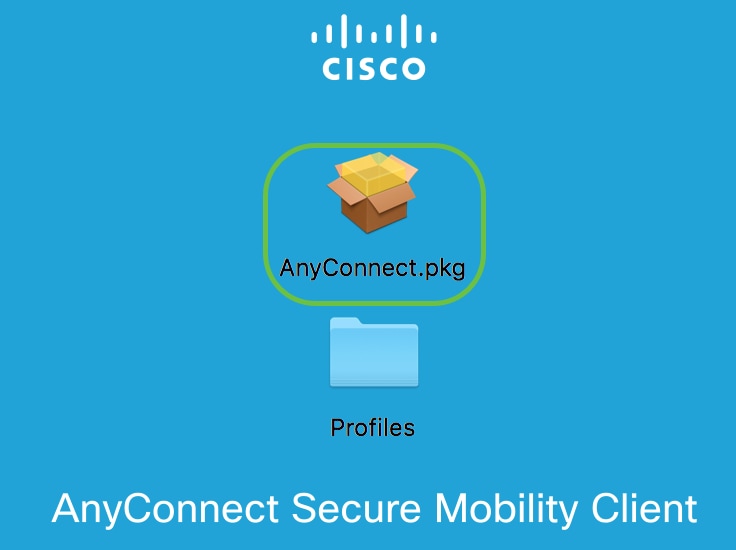
Step 4
Double-click the installer.
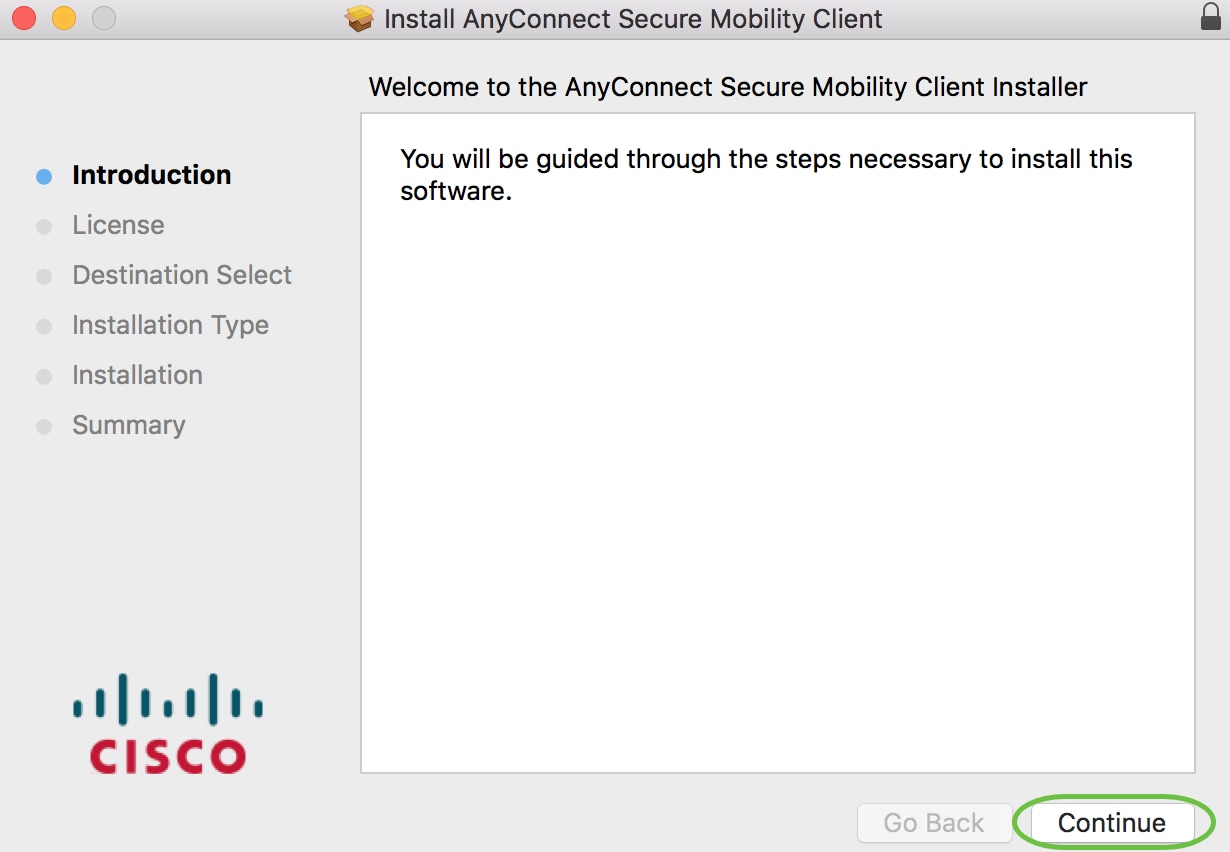
Step 5
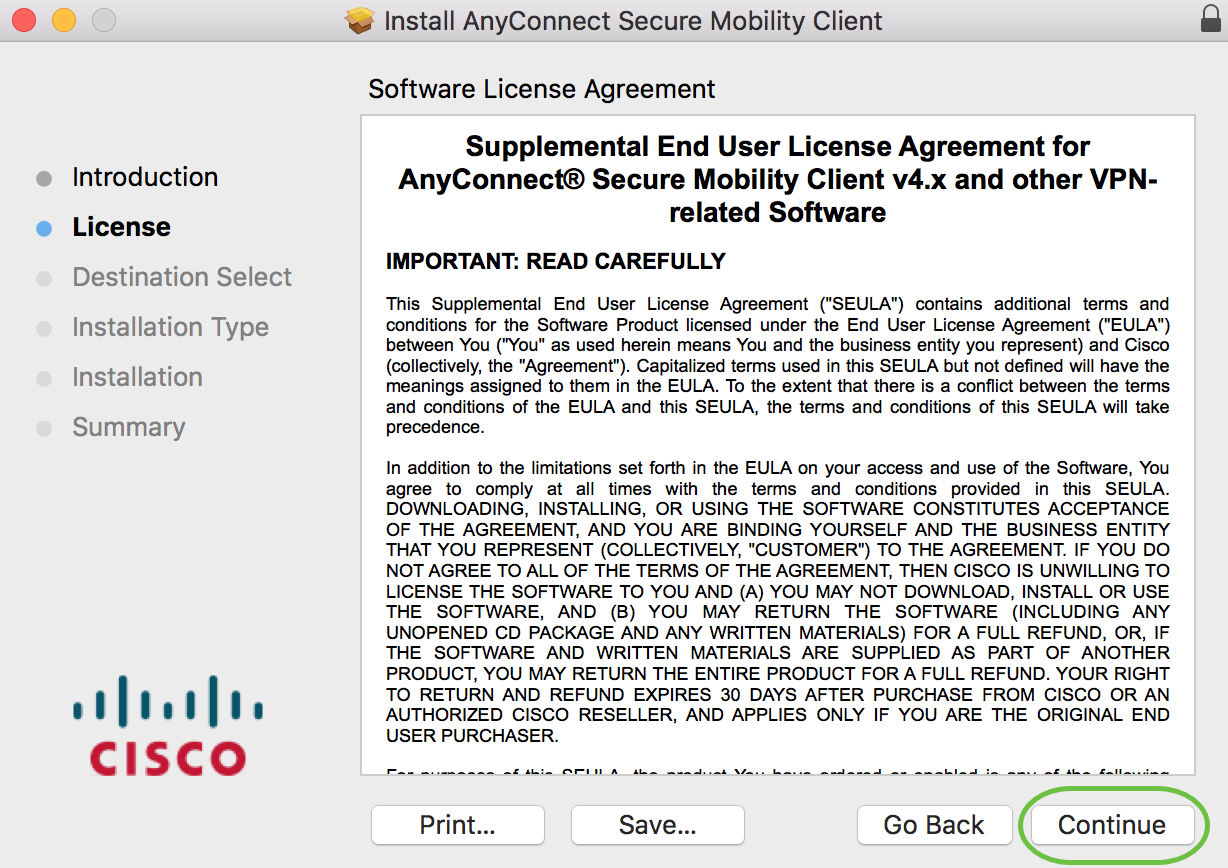
Step 6
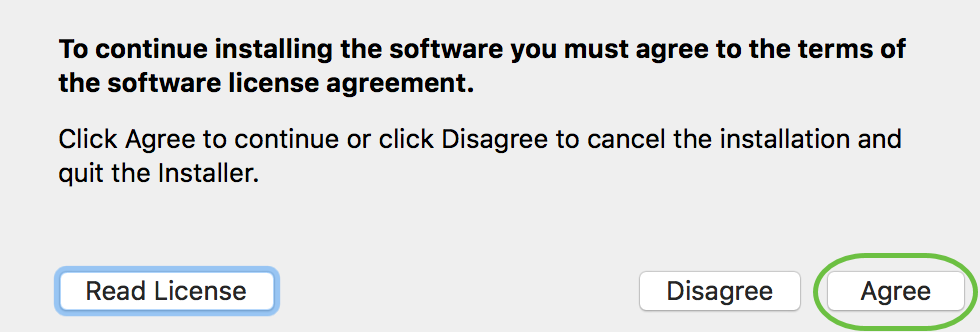
Go over the Supplemental End User License Agreement and then click Continue.
Step 7
Step 8
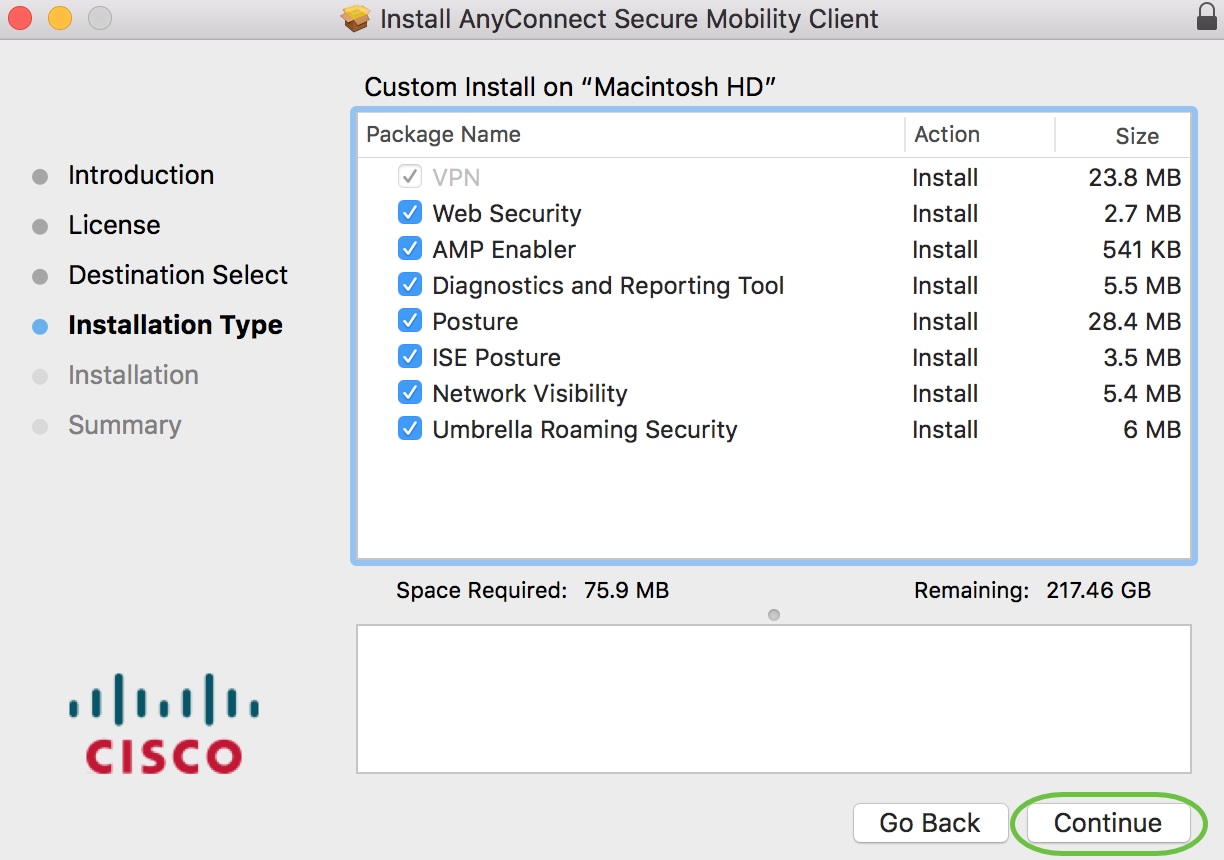
Choose the components to be installed by checking or unchecking the corresponding check boxes. All components are installed by default.
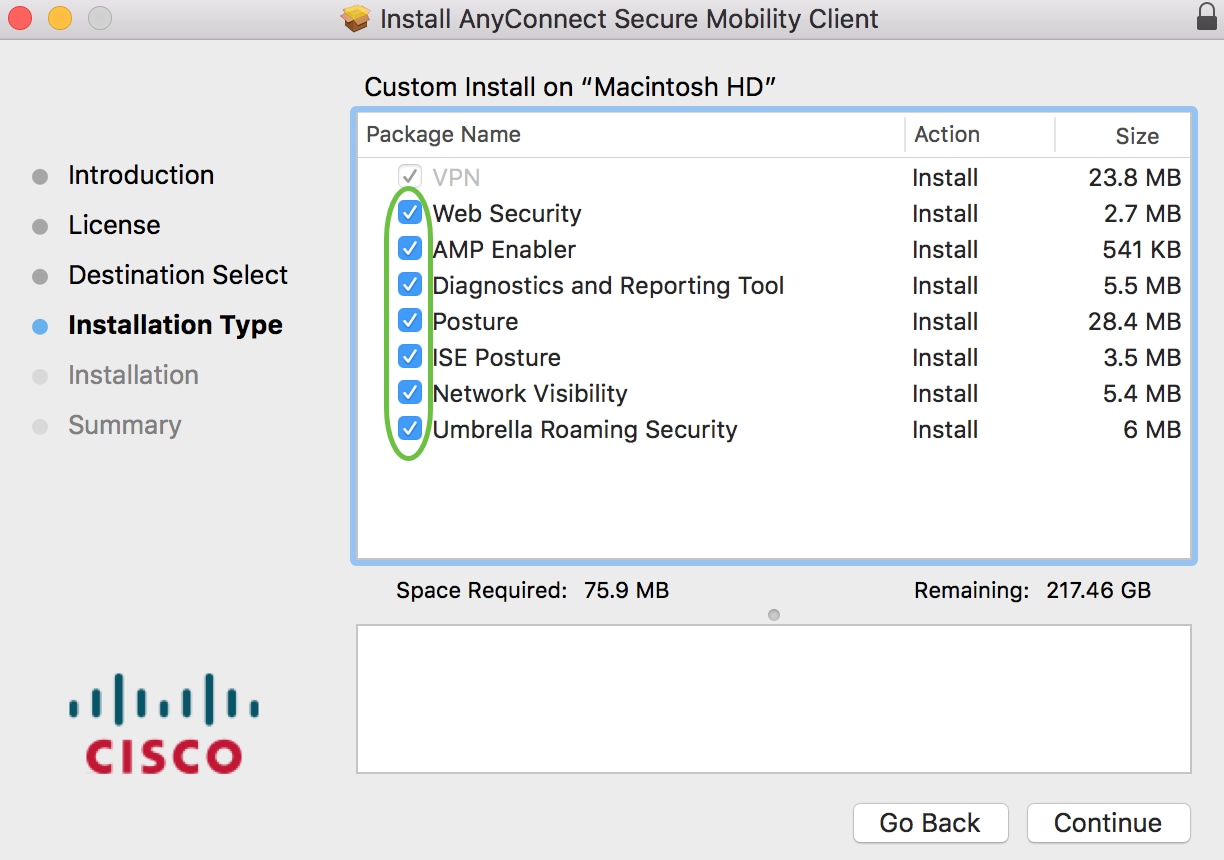
The items you select in this screen will appear as options in AnyConnect. If deploying AnyConnect for end-users, you may want to consider deselecting options.
Step 9
Step 10
Step 11
(Optional) Enter your password in the Password field.
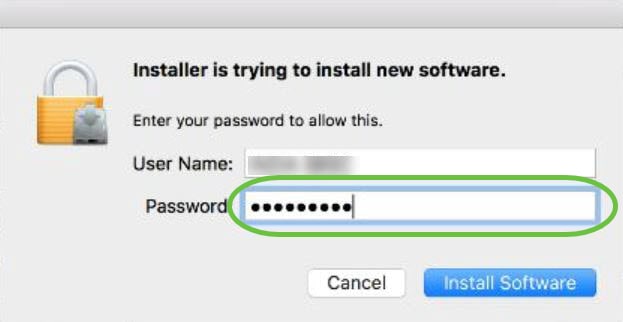
Step 12
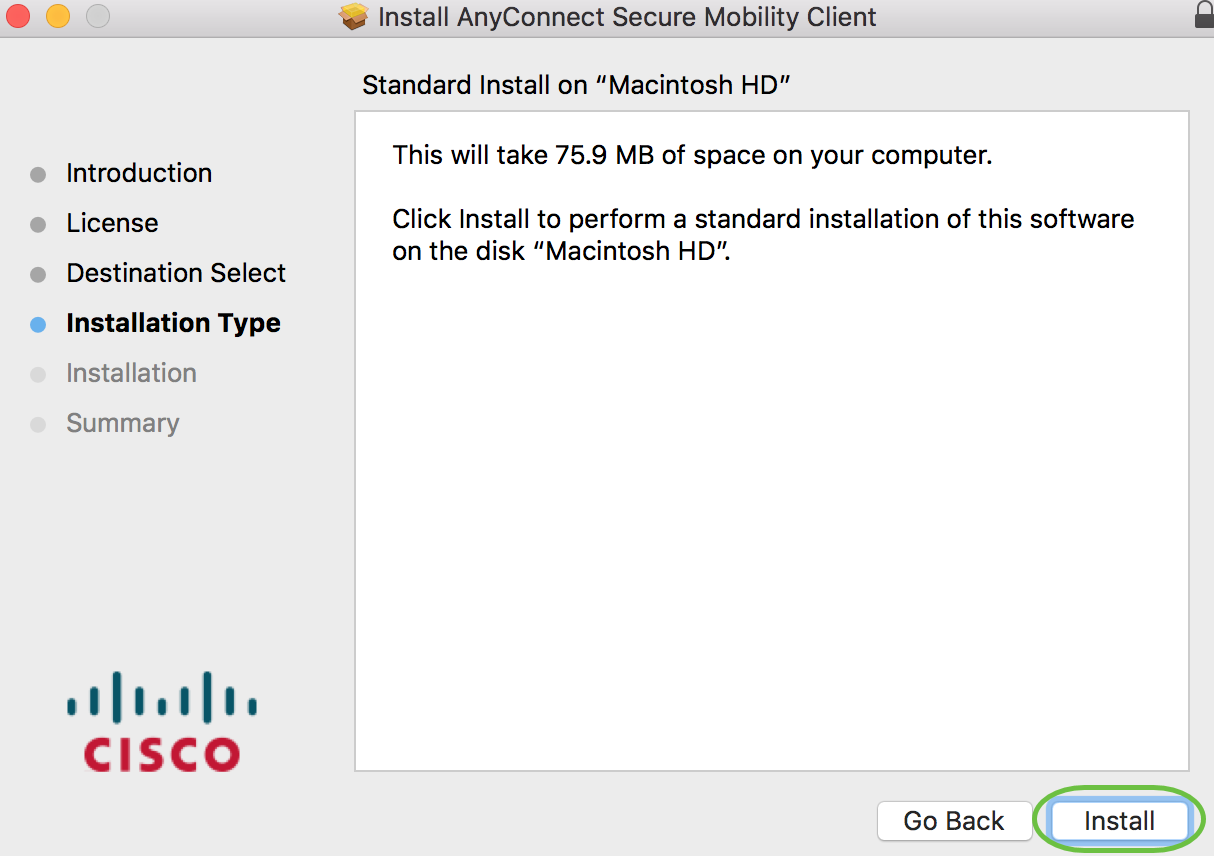
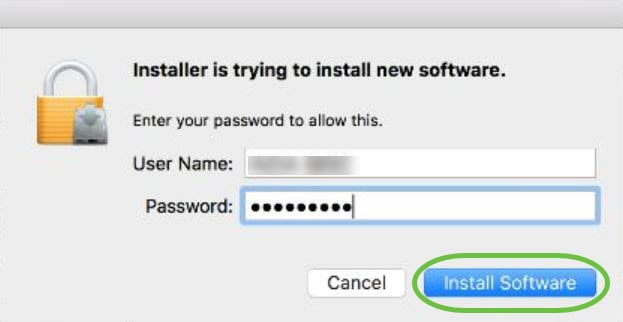
Click Install Software.
Step 13
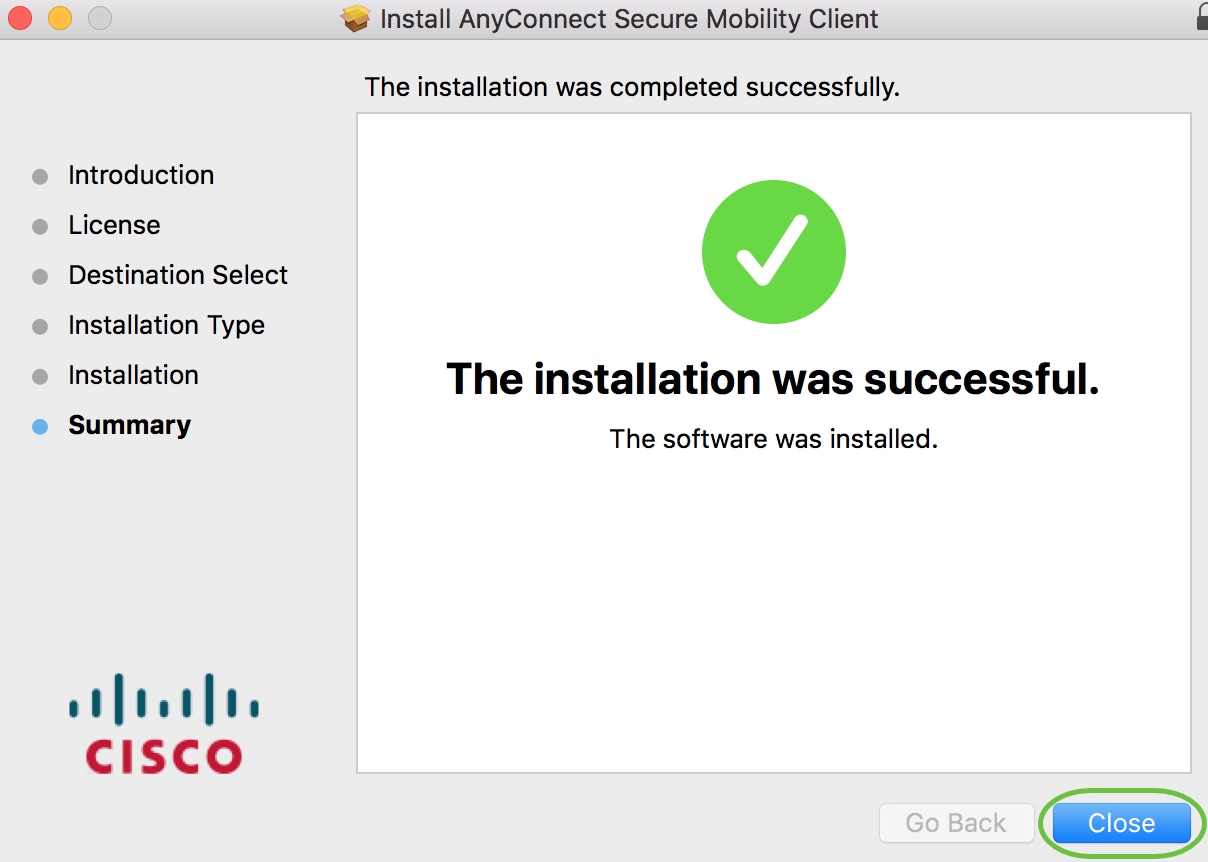
You have now successfully installed the AnyConnect Secure Mobility Client Software on your Mac computer.
Additional Resources
AnyConnect App
To try out AnyConnect on mobile devices, the App can be downloaded from Google Play store or Apple store.
View a video related to this article.
Источник
AnyConnect macOS 11 Big Sur Advisory
Available Languages
Download Options
AnyConnect Changes Related to macOS 11 (Big Sur)
Table of Contents
Table of Figures
1. Introduction
AnyConnect 4.9.04xxx leverages the System Extension framework available in macOS 11 (Big Sur). This differs from past AnyConnect versions, which rely on the now-deprecated Kernel Extension framework. This is the minimum version required to run AnyConnect on macOS 11.
This advisory describes changes introduced in the new AnyConnect version and the steps administrators can take to confirm AnyConnect is operating correctly on macOS 11. There are important changes in approving the AnyConnect system extension, as detailed in the next section.
The advisory also details the steps for failing over to the AnyConnect kernel extension, as last-resort workaround in case a critical system extension (or related OS framework) issue is encountered. The AnyConnect kernel extension is installed on macOS 11 solely for this purpose, it is no longer used by default.
2. About the AnyConnect System Extension
AnyConnect uses a network system extension on macOS 11, bundled into an application named Cisco AnyConnect Socket Filter. (This app controls the extension activation and deactivation and is installed under /Applications/Cisco.)
The AnyConnect extension has the following three components:
These components are visible in the macOS System Preferences – Network UI window:

Figure 1 — DNS proxy component
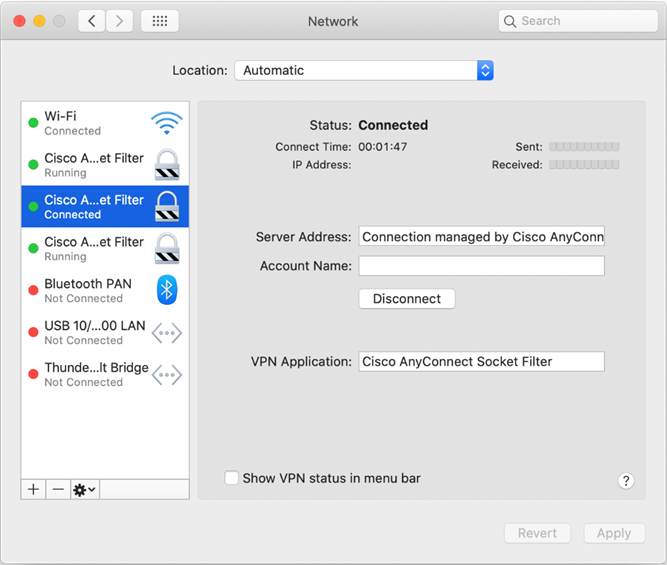
Figure 2 — App/Transparent proxy component
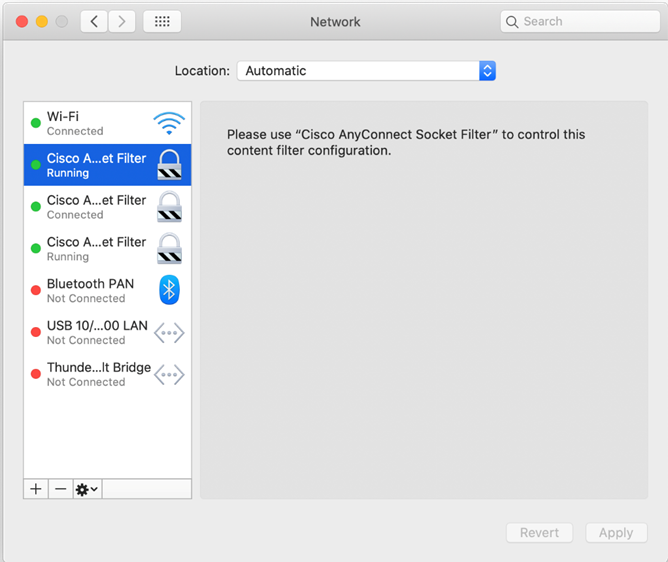
Figure 3 — Content filter component
AnyConnect requires its system extension and all its components to be active in order to operate properly, which implies that the mentioned components are all present and show up as green/running in the left pane of the macOS Network UI, as per above screenshots.
3. Approving the AnyConnect System Extension
macOS 11 requires end user or MDM approval before system extensions are allowed to run.
Two approvals are required for the AnyConnect system extension:
— Approve the system extension loading/activation.
— Approve the extension’s content filter component activation.
3.1 Extension Approval by End User
The AnyConnect system extension and its content filter component can be approved by end user, by following either the OS prompting, or the more explicit AnyConnect Notification app’s instructions.

Figure 4 — Extension blocked — OS prompt
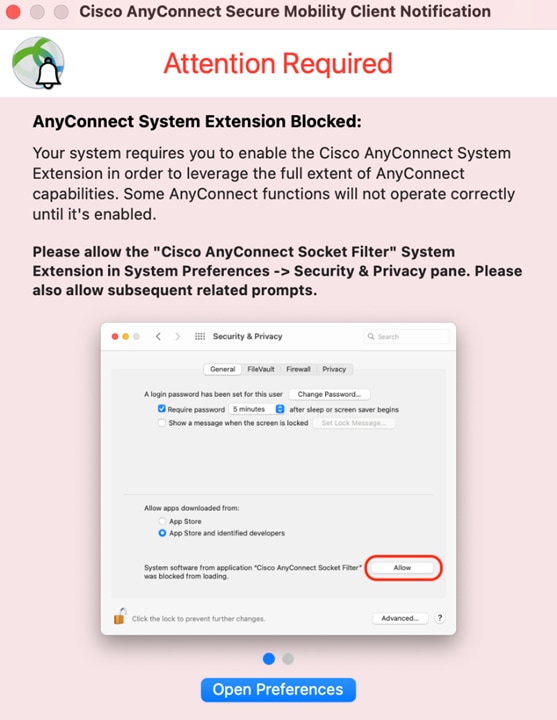
Figure 5 — Extension blocked — AnyConnect prompt
After opening the Security & Privacy Preferences window, click the bottom-left lock and provide the requested credentials, as prompted, to unlock it and allow changes.
The window’s appearance depends on whether the AnyConnect extension is the only one requiring approval. If that’s the case, simply click the Allow button.

Figure 6 — AnyConnect extension approval
Otherwise click the Details… button, then select the ”Cisco AnyConnect Socket Filter” check box and click OK.

Figure 7 — AnyConnect extension approval (multiple unapproved extensions)
Shortly after approving the AnyConnect extension, the user is shown another popup, this time for approving the extension’s content filter component.

Figure 8 — AnyConnect extension’s content filter approval
After the extension’s content filter approval is complete, the extension and its components should be active, as confirmed by the AnyConnect Notification app:

Figure 9 — AnyConnect extension approval confirmation
3.2 Extension Approval using MDM
The AnyConnect system extension can also be approved without end user interaction, using a management profile’s SystemExtensions payload with the following settings:
Источник
Understand AnyConnect Network Access Manager Logging
Available Languages
Download Options
Contents
Introduction
This document describes how to enable AnyConnect Network Access Manager (NAM) logging as well as to collect and interpret the logs. The examples included in the document describe different authentication scenarios and the logs that reflect the steps taken by Network Access Manager to authenticate the client.
Prerequisites
Requirements
There are no specific requirements for this document.
Components Used
This document is not restricted to specific software and hardware versions.
The information in this document was created from the devices in a specific lab environment. All of the devices used in this document started with a cleared (default) configuration. If your network is live, make sure that you understand the potential impact of any command.
Enable NAM Logging
If an issue is identified that may be related to NAM module, the first step is to enable Extended Logging feature. This must be done on the client endpoint while NAM module is running.
Step 1. Open AnyConnect window and make sure it’s in focus.
Step 2. Press this key combination, Left Shift + Left Alt + L. There is no response.
Step 3. Right click on AnyConnect icon in Windows System Tray. A menu pops up.
Step 4. Select Extended Logging so it has a check mark displayed. NAM now logs detailed debug messages.
Configure NAM Packet Capture
When Extended Logging is enabled, NAM also keeps a packet capture buffer going. The buffer is by default limited to about 1MB. If packet capture is needed, it may be beneficial to increase buffer size so it captures more activities. To extend the buffer, a XML setting file must be manually modified.
Step 1. On the Windows PC, browse to:
C:\ProgramData\Cisco\Cisco AnyConnect Secure Mobility Client\Network Access Manager\system\
Step 2. Open file internalConfiguration.xml.
Step 3. Locate XML tag
and adjust the value to 10 for a 10MB buffer size, and so on.
Step 4. Reboot the client PC for the change to take effect.
Log Collection
NAM log collection is done via Diagnostic And Reporting Tool (DART), which is a module of AnyConnect suite. In the installer, select a module and use AnnyConnect full installation ISO to install. The Cisco Media Services Interface (MSI) installer can also be found inside the ISO.
After you enable Extended Logging and perform a test, simply run DART and go through the dialogue, the log bundle is located by default on the Windows Desktop.
In addition to DART bundle, the NAM message log is also helpful to locate the relevant data in the NAM log. In order to find the NAM message log, navigate to AnyConnect settings window > Network Access Manager > Message History. The message log contains timestamp of each network connection event, which can be used to find the logs relevant to the event.
Reading NAM Logs
NAM logs, especially after you enable Extended Logging, contains a large amount of data, most of which are irrelevant and can be ignored. This section lists out the debug lines to demonstrate each step NAM takes to establish a network connection. When you work through a log, these key phrases may be helpful to locate part of the log relevant to the issue.
Log Summary of a Network Connection without 802.1x Enabled Authentication
Explanation: This indicates that the user has selected a network from NAM module, and NAM has received a userEvent of START.
Explanation: Both Access State Machine and Network State Machine have been started.
Explanation: The IPv4 instance got cancelled in order to reset the states.
Explanation: The adapter with ID 484E4FEF-392C-436F-97F0-CD7206CD7D48 was selected to connect to network test123, which is the name of the network connection configured in NAM.
Explanation: NAM has successfully engaged the adapter for this network. Now NAM tries to associate (connect) to this network (which happens to be wireless):
Explanation: openNoEncryption indicates that the network is configured as open. On the Wireless Lan Controller it uses MAC Authentication Bypass (MAB) to authenticate.
Explanation: cs can be seen a lot in NAM logs. These are irrelevant logs and should be ignored.
Explanation: These are Simple Object Access Protocol (SOAP) messages used to tell AnyConnect GUI to display the connection status message such as Associating in this case. Any error messages displayed on NAM window can be found in one of the SOAP messages in the log which can be used to locate the issue easily.
Explanation: NAM receives an AUTH_SUCCESS event, which misleads because there is no authentication which currently happened. You are get this event simply because you connect to an open network, so by default authentication is successful.
Explanation: Association to Service Set Identifier (SSID) is successful, time to handle authentication.
Explanation: Since this is an open network, it is by default authenticated. At this point, NAM is connected to the network and now starts DHCP process:
Explanation: NAM successfully acquires an IP address.
Explanation: Once an IP address is received NAM will send ARP (A ddress Resolution Protocol) request to the gateway (Get-Connectivity). Once the ARP response is received the client is connected.
Log Summary of a Network Connection using 802.1x and PEAP over Wired Network
Explanation: NAM started to connect to network WiredPEAP.
Explanation: NAM matched an adapter to this network.
Explanation: NAM started connecting to this wired network.
Explanation: Client sends EAPOL_START.
Explanation: Client receives Identity Request from the switch, it now looks for a credential to send back.
Explanation: By default, Anyconnect sends anonymous as unprotected identity (outter identity), so here it tries anonymous and see if the server is OK with it. The fact that the identity is anonymous as opposed to host/anonymous indicates that it’s a user authentication, rather than machine authentication.
Explanation: RADIUS server sends an Extensible Authentication Protocol-Transport Layer Security (EAP-TLS) frame without any content. Its purpose is to negotiate EAP-TLS protocol with the client.
Explanation: NAM recognizes server’s request to use EAP-TLS but the client is configured to use Protected Extensible Authentication Protocol (PEAP). This is the reason that NAM sends back a counter-offer for PEAP.
Explanation: RADIUS server accepts the outter/unprotected identity.
Explanation: The Protected portion of PEAP (to establish a secure tunnel to exchange inner credentials) starts, after client receives a confirmation from RADIUS server to continue the use of PEAP.
Explanation: NAM sends a client hello encapsulated in EAP message and waits for server hello to come. The server’s hello contains ISE certificate, so it takes some time to finish transferring.
Explanation: NAM extracted the subject name of the ISE server from server certificate. Since it doesn’t have server certificate installed in the trust store, you do not find it there.
Explanation: NAM looks for the inner/protected identity to be sent to RADIUS server after tunnel is established. In this case, «Automatically use my Windows logon name and password» option has been enabled on the wired adapter, so NAM uses windows logon credentials instead of asking the user for it.
Explanation: NAM sent client key and cipher spec to server and received confirmation. SSL negotation is successful and a tunnel is established.
Explanation: Protected identity is sent to the server, who accepts the identity. Now server requests password.
Explanation: NAM receives password request and sends password to server.
Explanation: Server receives the password, verifies it and sends EAP-Success. Authentication is successful at this point, and client proceeds as it gets the IP address from DHCP.
Источник


