- Building from the Command Line with Xcode FAQ
- Building from the Command Line with Xcode FAQ
- What is the Command Line Tools Package?
- Downloading command-line tools is not available in Xcode for macOS 10.9. How can I install them on my machine?
- How can I uninstall the command-line tools?
- I have multiple versions of Xcode installed on my machine. What version of Xcode do the command-line tools currently use?
- How do I select the default version of Xcode to use for my command-line tools?
- How do I build my projects from the command line?
- My app has multiple build configurations. How do I set a default build configuration for xcodebuild?
- How do I run unit tests from the command line?
- Как установить инструменты командной строки в Mac OS X (без XCode) 2021
- Mac OS X Welcome Videos
- Установка инструментов командной строки в Mac OS X
- Что устанавливается с помощью инструментов командной строки и где
- Устранение ошибки «в данный момент недоступно»
Building from the Command Line with Xcode FAQ
Building from the Command Line with Xcode FAQ
This document provides answers to frequently asked questions about command line tools.
What is the Command Line Tools Package?
The Command Line Tools Package is a small self-contained package available for download separately from Xcode and that allows you to do command line development in macOS. It consists of the macOS SDK and command-line tools such as Clang, which are installed in the /Library/Developer/CommandLineTools directory.
Downloading command-line tools is not available in Xcode for macOS 10.9. How can I install them on my machine?
In macOS 10.9 and later, the Downloads pane of Xcode Preferences does not support downloading command-line tools. Use any of the following methods to install command-line tools on your system:
If Xcode is installed on your machine, then there is no need to install them. Xcode comes bundled with all your command-line tools. macOS 10.9 and later includes shims or wrapper executables. These shims, installed in /usr/bin , can map any tool included in /usr/bin to the corresponding one inside Xcode. xcrun is one of such shims, which allows you to find or run any tool inside Xcode from the command line. Use it to invoke any tool within Xcode from the command line as shown in Listing 1 .
Listing 1 Using xcrun to run dwarfdump in the Terminal application.
Download the Command Line Tools package from the Developer website
The Command Line Tools package is available for download on the Download for Apple Developers page. Log in with your Apple ID, then search and download the Command Line Tools package appropriate for your machine such as macOS 10.12 as shown in Figure 1 .
Figure 1 Download page for the Command Line Tools package. 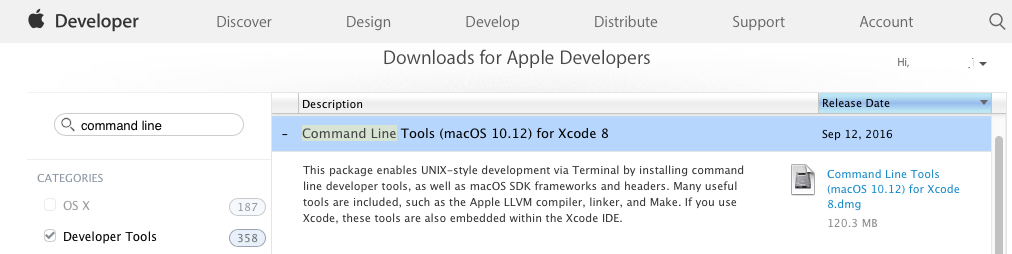
Note: In macOS 10.9 and later, Software update notifies you when new versions of the command-line tools are available for update.
Install the Command Line Tools package via the Terminal application
You can install the Command Line Tools package by running the xcode-select —install command.
Note: macOS comes bundled with xcode-select , a command-line tool that is installed in /usr/bin . It allows you to manage the active developer directory for Xcode and other BSD development tools. See its man page for more information.
How can I uninstall the command-line tools?
Xcode includes all of the command-line tools. If it is installed on your system, remove it to uninstall the command-line tools.
If the /Library/Developer/CommandLineTools directory exists on your system, remove it to uninstall the command-line tools.
I have multiple versions of Xcode installed on my machine. What version of Xcode do the command-line tools currently use?
To find out what version of Xcode is being used by your tools, run the following command in Terminal:
Listing 2 Printing the version of Xcode currently used by the command-line tools.
How do I select the default version of Xcode to use for my command-line tools?
To select a default Xcode for your command-line tools, run the following command in Terminal:
is the path to the Xcode.app package you wish to use for development.
Listing 3 Setting the default Xcode version.
How do I build my projects from the command line?
xcodebuild is a command-line tool that allows you to perform build, query, analyze, test, and archive operations on your Xcode projects and workspaces from the command line. It operates on one or more targets contained in your project, or a scheme contained in your project or workspace. xcodebuild provides several options for performing these operations as seen its man page . xcodebuild saves the output of your commands in the locations defined in the Locations preferences pane of your Xcode application, by default.
See below for various xcodebuild usage. Be sure to navigate to the directory containing your project or workspace in Terminal before running any of the following commands.
To list all schemes in your workspace, run the following command in Terminal:
where is the name of your workspace.
Listing 4 Listing all schemes in the MyApplication workspace.
To list all targets, build configurations, and schemes used in your project, run the following command in Terminal:
where is the name of your project.
Listing 5 Listing all information about MyProject, an Xcode project.
To build a scheme in your project, run the following command in Terminal:
where and build are respectively the name of your scheme to be built and the action to be performed on your scheme.
Listing 6 Building the tvOS scheme.
Note: xcodebuild supports various build actions such as build , analyze , and archive that can be performed on your target or scheme. However, build is performed by default when no action is specified as shown in Listing 7 .
To build your target with a configuration file, run the following command in Terminal:
where and are respectively the name of your target to be built and the name of your configuration file. See Xcode Help’s Build configuration file reference for more information about xcconfig files.
Listing 7 Building the iOS target with a configuration file.
To change the output locations of your xcodebuild command, use the SYMROOT (Build Products Path) and DSTROOT (Installation Build Products Location) build settings that respectively specify a location for your debug products and .dSYM files and one for your released products. See Xcode Help’s Build setting reference for more information about these build settings.
Listing 8 Setting up a location for iOS’ debug app version.
Listing 9 Setting up a location for iOS’s released app version.
My app has multiple build configurations. How do I set a default build configuration for xcodebuild?
In Xcode, the Configurations section of your project’s Info pane provides a pop-up menu, which sets the default configuration to be used by xcodebuild when building a target. Use this pop-up menu to select a default build configuration for xcodebuild as seen in Figure 2 .
Figure 2 Debug set as the default build configuration for xcodebuild. 
How do I run unit tests from the command line?
xcodebuild provides several options for running unit tests.
To build and run unit tests from the command line, execute the following command in Terminal:
To build unit tests without running them from the command line, execute the following command in Terminal:
To run unit tests without building them from the command line, execute any of the following command in Terminal:
The test action requires specifying a scheme and a destination. See How do I implement the Build For Testing and Test Without Building features from the command line? for more information about build-for-testing and test-without-building actions.
The -workspace option allows you to specify the name of your workspace. Use this option when your scheme is contained in an Xcode workspace.
The -project option allows you to specify the name of your Xcode project. Use this option when your scheme is contained in an Xcode project. It is required when there are multiple Xcode projects in the same directory and optional, otherwise.
The -destination option allows you to specify a destination for your unit tests. It takes an argument , which describes the device, simulator, or Mac to use as a destination. It consists of a set of comma-separated key=value pairs, which are dependent upon the the device, simulator, or Mac being used.
The -only-testing and -skip-testing options, which are optional, allow you to run only a specific test and to skip a test, respectively. They take an argument , which specifies the test to be executed or excluded. test-identifier ‘s format is as follows:
TestTarget , which is required, is the name of the test bundle. TestClass and TestMethod , which are both optional, respectively represent the name of the class and the name of the method to be tested.
Note: See Xcode Scheme and Run your app in Simulator for more information about scheme and destination, respectively.
For macOS apps, destinationspecifier supports the platform and arch keys as seen in Table 1 . Both keys are required for running your unit tests in macOS.
Источник
Как установить инструменты командной строки в Mac OS X (без XCode) 2021
Mac OS X Welcome Videos
Пакет инструментов командной строки предоставляет пользователям терминалов Mac множество часто используемых инструментов, утилит и компиляторов, включая make, GCC, clang, perl, svn, git, size, strip, strings, libtool, cpp, what и многие другие полезные команды, которые обычно находятся в стандартных установках Linux. Мы включили полный список новых двоичных файлов, доступных через инструментарий командной строки ниже, для тех, кто заинтересован, или вы можете просто убедиться в этом после установки пакета, который мы рассмотрим здесь.
Это руководство предназначено для MacOS 10.13 High Sierra, 10.12 Sierra, OS X 10.11 El Capitan, OS X 10.10 Yosemite, Mac OS X 10.9 и более новых выпусков. Пользователи Mac, работающие под управлением предыдущих версий OS X, могут продолжать устанавливать средства командной строки и gcc (без Xcode) через установщик пакетов, доступный на веб-сайте Apple Developer, как описано здесь.
Установка инструментов командной строки в Mac OS X
- Запустите Терминал, находящийся в / Applications / Utilities /
- Введите следующую командную строку:

Появится всплывающее окно обновления программного обеспечения, которое спрашивает: «Команде xcode-select требуются инструменты разработчика командной строки. Хотите ли вы установить инструменты сейчас? ». Чтобы подтвердить это, нажмите« Установить », а затем при необходимости согласитесь с Условиями обслуживания (не стесняйтесь их внимательно прочитать, мы будем здесь).

Дождитесь завершения загрузки пакета инструментов командной строки, он будет около 130 МБ и устанавливается довольно быстро, в зависимости от скорости вашего соединения

После завершения программа установки завершается самостоятельно, и вы можете подтвердить, что все работает, попытавшись использовать одну из только что установленных команд, например gcc, git, svn, rebase, make, ld, otool, nm, что бы вы ни хочу из списка ниже. Предполагая, что установка прошла непрерывно, команда будет выполнена, как и ожидалось. Это также означает, что вы можете компилировать и устанавливать вещи из исходного кода напрямую, без использования менеджера пакетов. Наслаждайтесь новым инструментарием командной строки Unix!
Что устанавливается с помощью инструментов командной строки и где
Для тех, кто интересуется подробностями того, что установлено на их Mac и куда он направляется, весь пакет инструментов командной строки помещается в следующую директорию:
Вы можете просмотреть этот каталог, если хотите, или можете просто узнать об этом на тот случай, если вы захотите изменить или настроить какой-либо пакет позже.
Обратите внимание, что каталог — это корневой каталог / библиотека Mac OS, а не пользовательский каталог
Если вы хотите увидеть 61 новую доступную вам команду, все они находятся в / Library / Developer / CommandLineTools / usr / bin /, но мы также перечислили их в алфавитном порядке ниже для удобства:
ar
as
asa
bison
BuildStrings
c++
c89
c99
cc
clang
clang++
cmpdylib
codesign_allocate
CpMac
cpp
ctags
ctf_insert
DeRez
dsymutil
dwarfdump
dyldinfo
flex
flex++
g++
gatherheaderdoc
gcc
gcov
GetFileInfo
git
git-cvsserver
git-receive-pack
git-shell
git-upload-archive
git-upload-pack
gm4
gnumake
gperf
hdxml2manxml
headerdoc2html
indent
install_name_tool
ld
lex
libtool
lipo
lldb
lorder
m4
make
MergePef
mig
mkdep
MvMac
nasm
ndisasm
nm
nmedit
otool
pagestuff
projectInfo
ranlib
rebase
redo_prebinding
ResMerger
resolveLinks
Rez
RezDet
RezWack
rpcgen
segedit
SetFile
size
SplitForks
strings
strip
svn
svnadmin
svndumpfilter
svnlook
svnrdump
svnserve
svnsync
svnversion
unifdef
unifdefall
UnRezWack
unwinddump
what
xml2man
yacc
Устранение ошибки «в данный момент недоступно»
Появляется сообщение об ошибке «Не удается установить программное обеспечение, поскольку оно недоступно на сервере обновления программного обеспечения»? Что ж, вам повезло, потому что это сообщение об ошибке, вероятно, указывает, что на Mac уже установлен Xcode.
Начиная с Mac OS X 10.9 и далее, если Xcode уже установлен в Mac OS X, то также устанавливаются и инструменты командной строки (вы можете проверить это, попытавшись запустить gcc или make из терминала). Соответственно, это руководство предназначено для пользователей, которые не хотят устанавливать более широкий пакет разработки XCode, и вместо этого предпочитают устанавливать только утилиты командной строки. Да, это означает, что вы можете удалить все приложение XCode и установить только инструменты командной строки, если хотите, поскольку для многих пользователей и системных администраторов это единственная причина, по которой они установили XCode для начала.
Источник


