- How to Create New File on Mac
- Create Text File on Mac With TextEdit
- Create file
- Save file
- Use Terminal to Create New File on Mac
- Use Automator App to Create a New File on Mac
- Set up a new task in Automator
- Enable Automator task
- Use Automator to Make New File
- File creation task listing
- Create New File In Mac Finder
- Conclusion
- Recent Posts
- About Me
- Question: Q: Finder — Create new files directly from a folder using finder ?
- All replies
- Знакомство с приложением Finder на компьютере Mac
- Изменение представления файлов
- Использование бокового меню в окнах Finder
- Поиск файлов
- Удаление файлов
How to Create New File on Mac
I absolutely love Macs. They are very easy to use and much more stable than Windows computers. But if there is one thing, I miss a lot, the thing that Windows does better than Mac, is easiness of creating a new file.
To create a new file on a Mac launch TextEdit app from the Launchpad. In the app menu select Format, Make Plain Text (or use Command-Shift-T keys). Next, go to the File option in the menu and click Save. Finally, select the output folder, provide the name of the new file, and click Save.
There are many ways to make creating files easier. Let’s review four possible solutions in detail.
Create Text File on Mac With TextEdit
Creating a file using TextEdit is the simplest way for someone who does not want to do anything too technical.
The disadvantage of this approach is that you cannot create files in the Finder. Instead, you have to browse to the required folder every time when creating a file.
TextEdit is a default application that comes with every Mac and it is free.
Create file
To start TextEdit hold Command key and hit Space bar. In a search windows type TextEdit and hit Enter.
By default, TextEdit creates files in RTF format (look like Word documents).
To switch to plain text either press Shift-Command-T.
Or go to the app menu, select Format, this will display a dropdown where you need to click on Make Plain Text option.
Save file
To save the document either press Command-S or go to the app menu, select File and then Save.
The Save File window will pop up.
First, change the name of the file from Untitled to whatever you need. Now make sure that the file will be saved in the correct folder by checking Where section.
If you click on the dropdown next to Where label it will provide a list of different locations including Favorites and Recent folders.
 Save file in Textedit
If the folder you need is not in the list, click on an icon that looks like a down arrow. This will change the folder selection from the list to a Finder window. In this window, you can browse and find the folder for your file. You can even create a new folder if needed.
The last option in the Save File dialog is a Plain Text Encoding. By default, it’s Unicode (UTF-8) and it should be enough in most cases. But if you need you can also change the Encoding.
By default, the extension of the new file will be .txt. You can, however, change the file extension when needed.
For instance, if you are creating a bash file you need to create a file in plain text format and save it with a .sh file extension.
Use Terminal to Create New File on Mac
If you are not afraid to be more technical you can use the Terminal app for creating files.
Since the goal to create files after browsing to the folder in the Finder app we start by enabling the Terminal app for current Finder folder.
Steps to enable Terminal are the following:
- Open System Preferences either from the LaunchPad or from Spotlight Search.
- To run it from the Spotlight Search press Command-Space to bring it up. In the search bar type System Preferences (autocomplete will kick in so you wouldn’t need to type the whole word).
- In the System Preferences click on Keyboard icon.
- Click on Shortcuts tab.
- In the left part of the box click on Services.
- Find New Terminal at Folder option under Files and Folders section.
- Make sure that the checkbox is checked.
- Close the window.
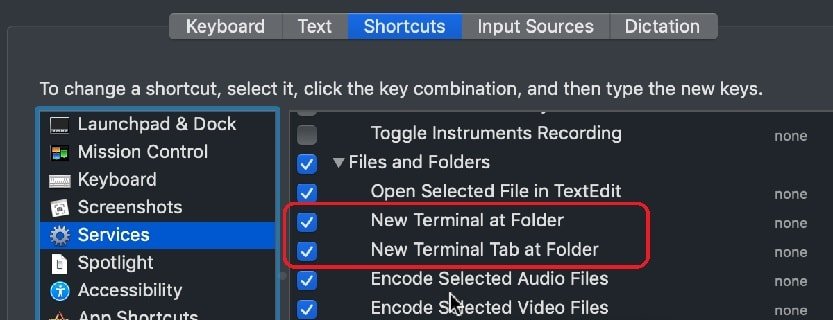 Set up Terminal app in Services
Now browse to the folder you need.
Right click on the folder. The context menu will include Services option at the bottom. This option includes different commands available for the current folder. Click on New Terminal at Folder, the option we just enabled in System Preferences.
A new Terminal window will open with the current folder set to the one you had selected in the Finder app.
In the Terminal type: touch
For instance, if I want to create a file called MyTextFile.txt I should type:
touch MyTextFile.txt
You will see a file appear in Finder. Now you can right click on the file and either click Open which will open the file with TextEdit application or select Open With option.
However, TextEdit is not the only app. There are other apps that can create new file on Mac.
Use Automator App to Create a New File on Mac
Both options we reviewed so far have issues. The first option requires to browse to the folder each time when a new file is created, the second option requires using a Terminal app which most users are not very comfortable with.
Besides, there is always a risk to forget the touch command for someone who creates new files occasionally. Ideally, we prefer a solution which does not require remembering UNIX commands with the flexibility of having creating files from the current Finder folder.
Fortunately, there is such an option – using the Automator app. The Automator app is a very old one and was in mac OS (or OS X) for a long time. People used Automator to automate some routine tasks.
For instance, some people use it to rename files in folders with hundreds of files. Or you can create a new Voice command by using Dictation and Automator. At the same time, the Automator app is very hard to use and very limited in functionality. However, it works fine for our purposes.
The trick is to do everything exactly as provided, misspelling even one character will result in failure of the operation (but don’t even if it something doesn’t work it’s not going to break your Mac).
Set up a new task in Automator
- Start Automator from LaunchPad\Others folder or from Spotlight Search by typing Automator.
- In the starting window click on Quick Action icon.
- Change the dropdown next to Workflow receives current from Automatic (text) to folders and in any application to Finder.app.
- There are various actions on the left, but you need a specific one. In the Search bar type “script”. The search results will display several results, but you need Run AppleScript. Click on it.
- Next drag Run AppleScript to the right under the workflow.
- Select and delete the entire text in the script starting from “on run” and ending with “end run” including.
- Copy and paste text from Listing 1 below to the white box.
- Save all by pressing Command-S.
- The window will pop up asking to provide a name for the quick action. Type New File and hit Save button.
The quick action is created. Now it needs to be enabled just like quick action for the terminal.
Enable Automator task
- Open System Preferences.
- In the System Preferences click on the Keyboard icon.
- Click on Shortcuts tab.
- In the left part of the box click on Services.
- Find New File option under Files and Folders section.
- Make sure that the checkbox is checked.
- Close the window.
 Select Run AppleScript action on the left
Use Automator to Make New File
Now use Finder to browse to the folder you need. Right click on the folder. The context menu will include Services option at the bottom. Click on New File option.
The action will bring up a message box with a title Enter file name, folder followed by the current folder path in parentheses. The new file will be created in that folder.
Under the title, there will be a name of the file to be created. By default, the name is filename.txt. You can change it to anything you like. Under the hood, the quick action calls a UNIX touch command just like in the case of Terminal solution.
After typing in a new file name click Ok. If you change your mind and decided not to create a file you can click Cancel and no file will be added.
Congratulations, you have your own automated action created!
File creation task listing

Create New File In Mac Finder
This problem of adding new files seems to be so popular and I don’t understand why Apple is resisting to add an option of creating new files to the right-click menu.
Use a third-party app called “New File Menu” to create a new file in Mac Finder. Once the app is installed, use browse to the folder, and use right-click to bring up context menu with “New File Menu” option. Click on menu option to create file.
To install the app do the following:
- Start App Store
- Type New File Menu Free in the Search bar
- In the search results find the New File Menu app and click on Get
- After installation your Mac will ask to enable the extension
- Click on Open System Preferences button
- In the System Preferences enable a checkbox called Finder Extensions in NewMenuFileFree section
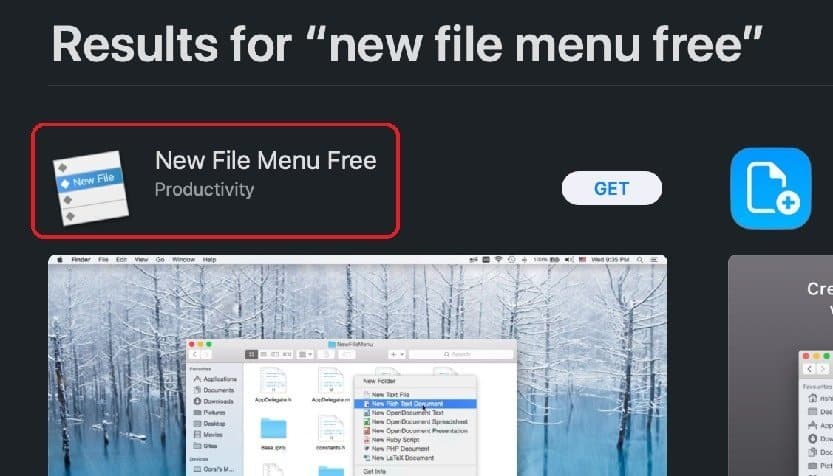 Search New File Menu Free in App Store
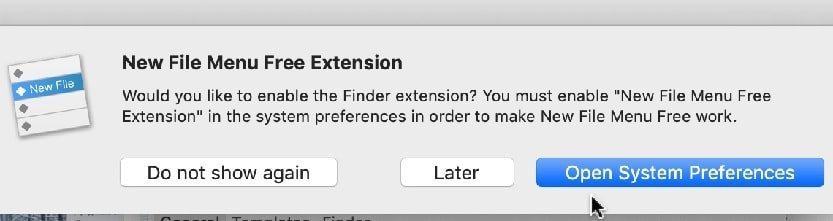 Open System Preferences to configure the extension
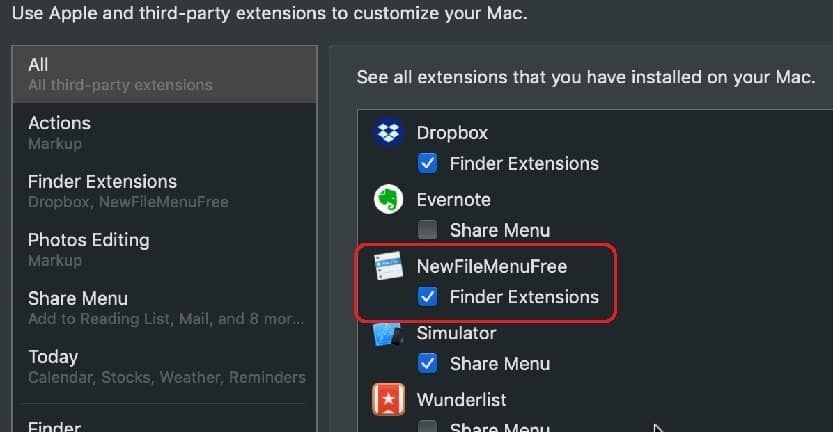 Enable extension in System Preferences
The disadvantage of the free version of the app is that it only allows one type of files to be created.
If you mostly creating Word files you can choose Word document from the templates, but in this case, you will not be able to create text files from the context menu.
Good news is that if you need more templates than you can install the paid version of the app.
Conclusion
There are many ways to creating new files in Mac. We reviewed just 4 of them, but either solution should be enough and none of them is hard to implement.
Personally, I like New File Menu app. I can always create a new text file in the Finder by using a right click.
Topics:
Hi, I am Al. I’ve been working with computers for more than 20 years and I am passionate about Apple products. You can reach me at [email protected]
Recent Posts
People constantly reach out to me to ask me what kind of computer should they buy for various activities. Usually, your choice is dictated by the software you need to be able to run. Once you know.
It took me a long time to switch from PCs to Macs. After trying to figure out how the Mac operating system works, I finally gave up and installed Windows on my Mac mini (my first Apple.
About Me
Hi, I am Al. I’ve been working with computers for more than 20 years and I am passionate about Apple products. You can reach me at [email protected]
Источник
Question: Q: Finder — Create new files directly from a folder using finder ?
In Finder, is there a way to do a right-click in a folder and create a new file like: New Text File or New Document from that location?
I used to do this oftenly in Windows (right click, New Word document) but I have not found it in Mac OS X, any work around ?
Macbook Pro, Mac OS X (10.6.4)
Posted on Aug 17, 2010 6:35 PM
All replies
Loading page content
Page content loaded
Aug 17, 2010 6:51 PM
Aug 17, 2010 6:54 PM
Aug 17, 2010 7:01 PM
Try the [Apple feedback page|http://www.apple.com/feedback>. However, note that this is unlikely to be added. It would be a very cumbersome feature.
On Windows, you’re almost guaranteed to be tied to a particular set of document creation tools. If you’re using an office suite other than MS Office, you’re so weird you might as well be using a Mac! 🙂 This means that commands like «New Document» make sense there.
On a Mac, a «document» could be created with MS Word, Pages, TextEdit, NeoOffice, OpenOffice, Mellel, Nisus Writer Marinter Write, or any of a host of other programs. (Mac users tend to put less emphasis on the popular tool and prefer to use the tool that «fits the hand» best.) Further complicating things is the fact that «document» is a very generic term, since every spreadsheet is a document, every Photoshop file is a document, etc. The contextual menu would rapidly become unmanageable if it had to fill up with «New Whatever Document» commands for every app on your hard drive!
Источник
Знакомство с приложением Finder на компьютере Mac
Знакомство с Finder — это первый шаг к пониманию принципов поиска и упорядочивания документов, мультимедийных файлов, папок и других объектов.
Finder — это первое приложение, которое видит пользователь после загрузки Mac. Его окно открывается автоматически и не сворачивается при использовании других приложений. Интерфейс Finder представляет собой рабочий стол со строкой меню в верхней части экрана. Для отображения содержимого Mac, iCloud Drive и других устройств хранения данных используются окна и значки. Приложение Finder называется так потому, что с его помощью можно найти и упорядочить все файлы.

Изменение представления файлов
Чтобы изменить представление файлов в окнах Finder, используйте меню «Вид» в строке или ряд кнопок в верхней части окна Finder. Файлы можно просматривать в виде значков , списка , колонок и галереи . Меню «Вид» содержит параметры сортировки и упорядочивания элементов для каждого представления, например по типу, дате или размеру. Узнайте больше о настройке представлений.
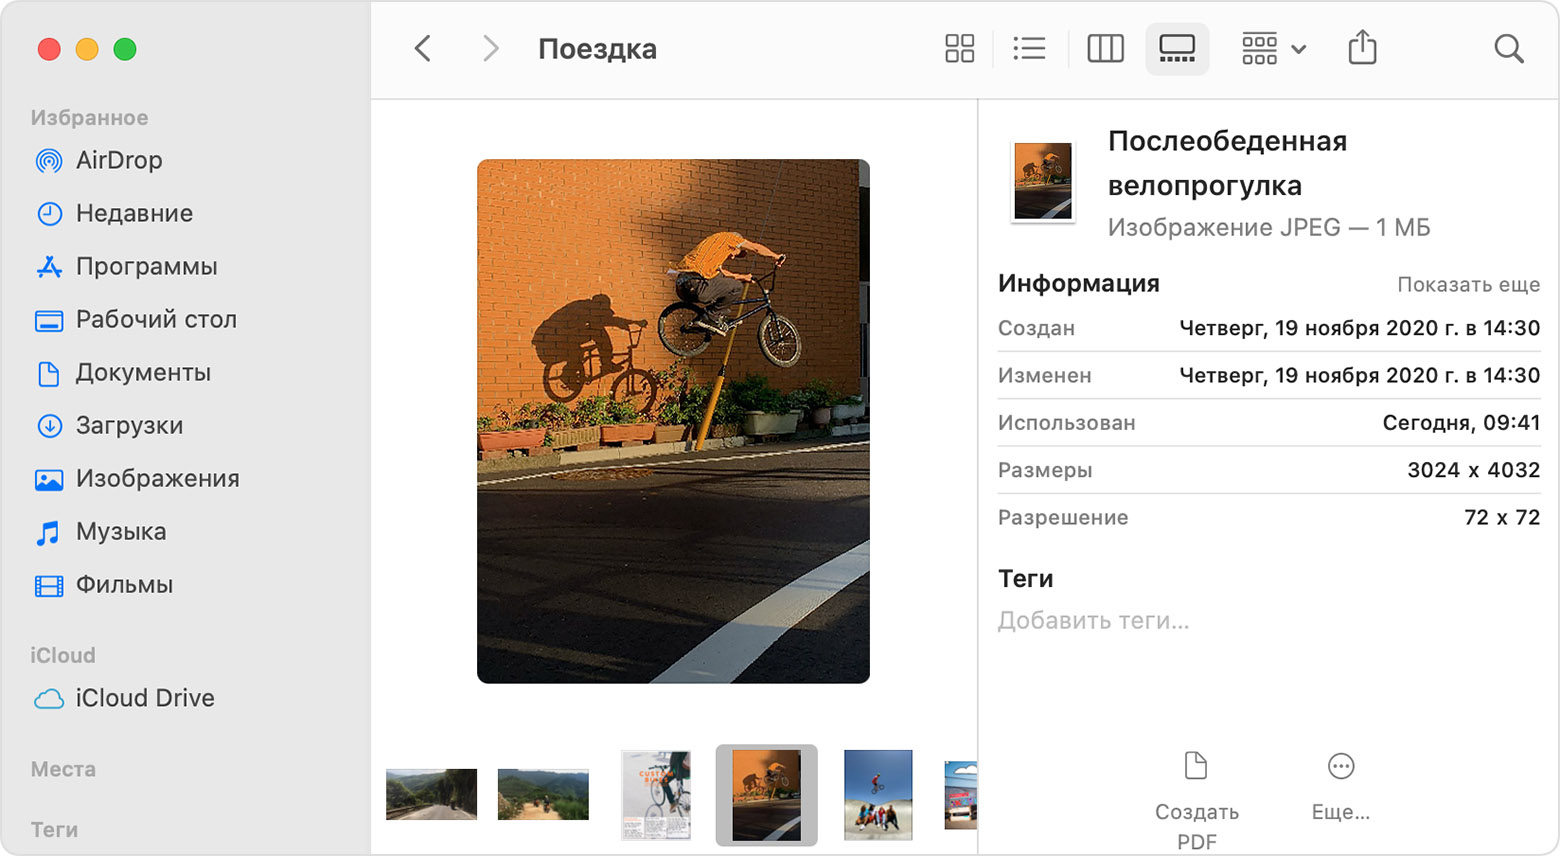
Представление «Галерея» с боковой панелью слева и панелью просмотра справа.
В режиме галереи вы можете просматривать файлы в виде больших миниатюр, чтобы легко определять изображения, видеофайлы и любые другие типы документов. Представление «Галерея» даже позволяет воспроизводить видео и просматривать многостраничные документы. В более ранних версиях macOS доступен похожий, но менее функциональный режим галереи под названием Cover Flow .
Использование бокового меню в окнах Finder
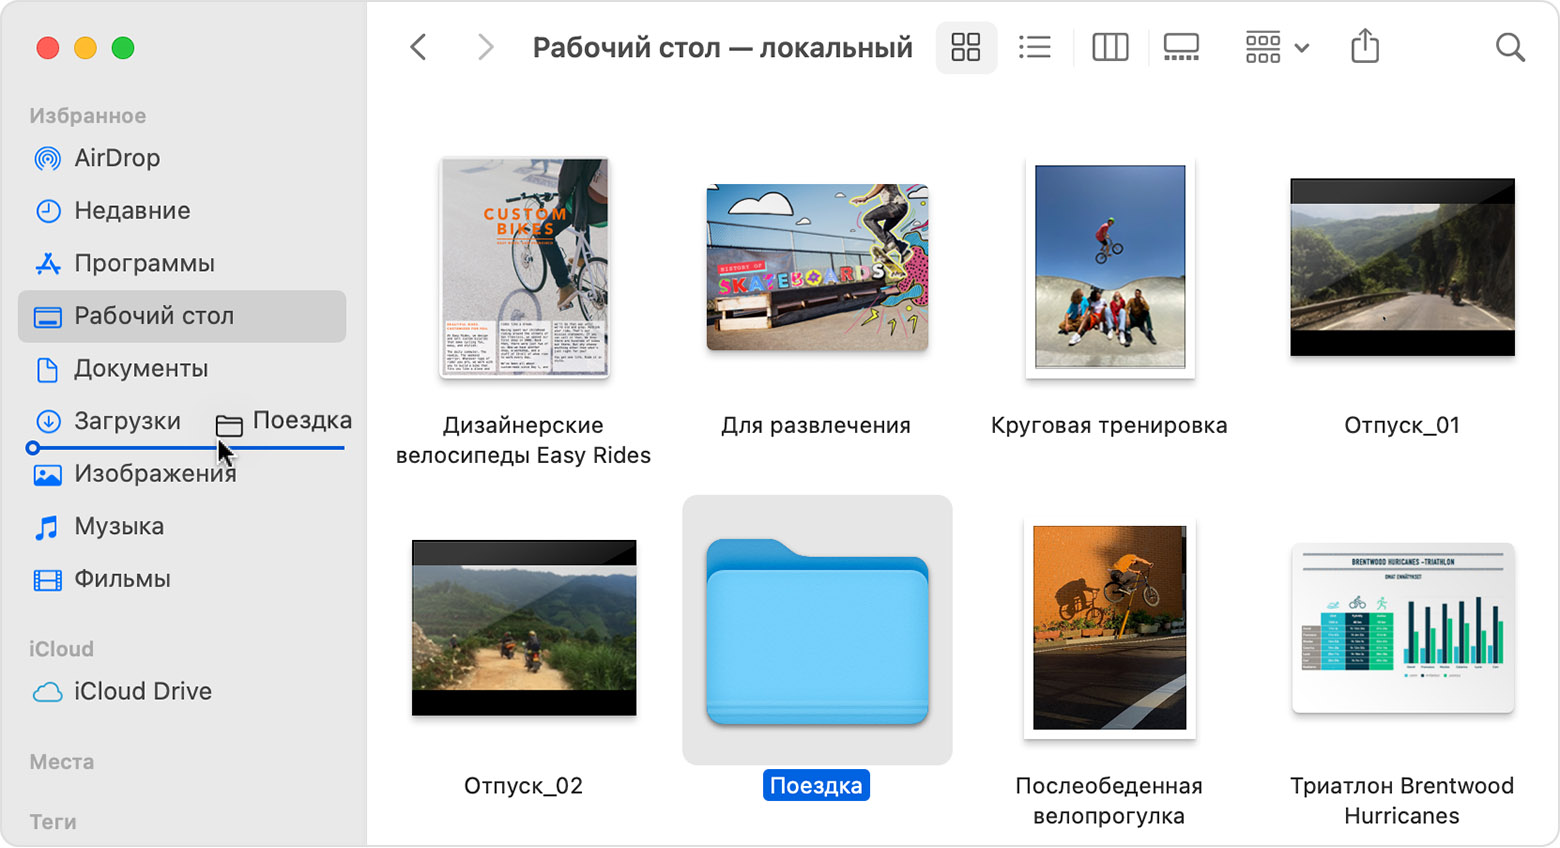
В боковом меню в окнах Finder содержатся ярлыки для AirDrop, часто используемых папок, iCloud Drive, устройств, таких как жесткие диски, и многого другого. Элементы бокового меню (как и панели Dock) открываются одним нажатием.
Чтобы изменить набор элементов в боковом меню, перейдите в меню Finder > «Настройки» и выберите «Боковое меню» в верхней части окна настроек. Также можно перетягивать файлы в боковое меню или из него. Узнайте больше о настройке бокового меню.
Поиск файлов
Чтобы выполнить поиск с помощью Spotlight, нажмите значок лупы в строке меню или воспользуйтесь сочетанием клавиш Command и пробел. Spotlight похож на быстрый поиск на iPhone или iPad. Узнайте больше о приложении Spotlight.
Чтобы выполнить поиск из окна Finder, введите запрос в поле поиска, расположенном в углу окна.
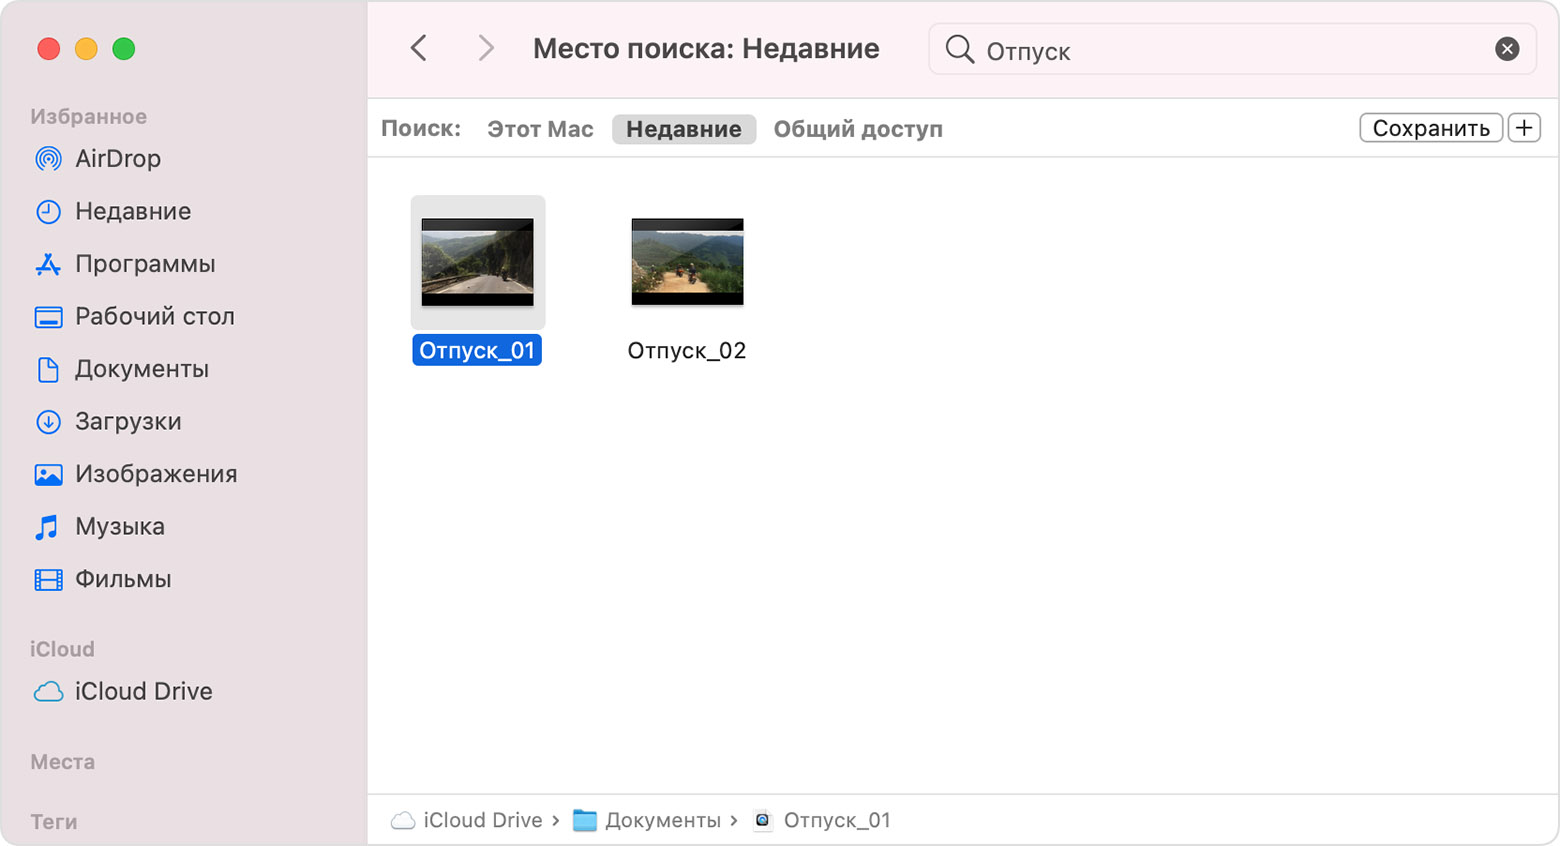
При выборе найденного объекта его местоположение отобразится в нижней части окна. Чтобы отобразить это представление из Spotlight, нажмите «Показать все в Finder» в нижней части окна Spotlight с результатами поиска.
Удаление файлов
Чтобы переместить файл в корзину, перетяните его на значок «Корзина» (панель Dock). Можно также выделить один или несколько файлов и выбрать «Файл» > «Переместить в Корзину» (сочетание клавиш Command и Delete).

Чтобы восстановить файл из корзины, откройте ее, нажав соответствующий значок, и перетяните файл в другое место. Или выделите файл и выберите «Файл» > «Возвратить».
Чтобы удалить файлы в корзине, выберите «Файл» > «Очистить Корзину». Это поможет освободить дисковое пространство для других файлов. В macOS Sierra на компьютере Mac можно настроить автоматическую очистку корзины.
Источник


