- Как: добавить пользователя из командной строки OS X на Mac 2021
- ÐÑÐµÐ¼Ñ Ð¸ СÑекло Так вÑпала ÐаÑÑа HD VKlipe Net
- Добавление учетных записей пользователей на Mac из командной строки OS X
- Mac os create user terminal
- Hint Options
- How to Create an Admin Account in the Mac Terminal
- How to Create an Admin Account on a Mac Using Terminal
- How to Make Yourself an Administrator From the Terminal on Mac
- How to Change Your Username on Mac
- How to Create an Admin Account in a Single User Mode
- Frequently Asked Questions
- How Does Terminal Work on Mac?
- Can I Have Multiple Administrator Accounts on My Mac?
- How Do I Create User Accounts From the Terminal in macOS?
- Managing Your Mac Admin Accounts
Как: добавить пользователя из командной строки OS X на Mac 2021
ÐÑÐµÐ¼Ñ Ð¸ СÑекло Так вÑпала ÐаÑÑа HD VKlipe Net
Добавление учетных записей пользователей на Mac из командной строки OS X
Эти команды необходимо запускать от имени пользователя root или с помощью команды «sudo». Для получения дополнительной информации о команде sudo см. Справочную страницу sudo.
Создайте новую запись в локальном (/) домене в категории / пользователи.
dscl / -create /Users/toddharris
Создайте и установите для свойства оболочки значение bash.
dscl / -create /Users/toddharris UserShell /bin/bash
Создайте и установите полное имя пользователя.
dscl / -create /Users/toddharris RealName «Dr. Todd Harris»
Создать и установить идентификатор пользователя.
dscl / -create /Users/toddharris UniqueID 503
Создайте и установите свойство идентификатора группы пользователя.
dscl / -create /Users/toddharris PrimaryGroupID 1000
Создайте и настройте домашний каталог пользователя.
dscl / -create /Users/toddharris NFSHomeDirectory /Local/Users/toddharris
Установите пароль.
dscl / -passwd /Users/toddharris PASSWORD
Если вы хотите, чтобы доктор Харрис мог выполнять административные функции:
dscl / -append /Groups/admin GroupMembership toddharris
Команда dscl работает во всех версиях Mac OS X, поэтому, если вам нужно добавить пользователя на Mac из командной строки, это способ сделать это.
Если вам известен другой метод, сообщите нам об этом в комментариях.
Источник
Mac os create user terminal
Here are the steps required to create a user in the terminal on a Mac OS X machine. First you need to know the current users, and their user IDs. Open the terminal and type: This should report all users that are in the 500+ range for the user ID. User accounts generally start at 501, and work up, so look at the list returned, and pick the next available number to assign to the new user you are creating. You will use it in place of the uid 555 below.
The first line here will create the user, but then you need to assign it some properties. The user I am creating here has a shortname of «ftpuser». Feel free to substitute the shortname of your choice. Remember you can’t reuse a shortname, so if there is already a user called «ftpuser», you need to pick something else. The home directory can really be anywhere, but we are using the standard location in this example. By assigning the /dev/null shell, we are preventing the user from logging in via SSH. The Mac OS X default shell is /bin/tcsh. There are other properties you can assign a user, but these are the basic ones that you should use. Then you will be prompted to enter the password you want to create for the new user. Optionally you can skip this step, and the account is created, but logins are disabled until the password has a value assigned.
The last step is to create the user’s home directory. You could simply create the directory and give the user ownership of it, or use the lines below to copy the standard Mac OS X user template. This will create the standard set of directories and files for the new user. This is basically what happens when you use the Accounts Preference Pane to create an account. Optionally you could SSH to another machine and create accounts.
- Currently 2.60 / 5
You rated: 1 / 5 (10 votes cast)
Hint Options
Here is an excellent shell script that helps automate the process:
You must make the script executable before running. There are some examples about how to use the script here:
the grep can be done more succintly as nireport / /users name uid | egrep «52<2>«
I tried the command and this list returned (in addition to my known users). Are these 200+ range users embedded in the system or should I start worrying about a security issue?
news 250
pgsql 252
games 253
canna 254
postfix 255
tomcat 257
jabber 258
nah these are just user accounts that those applicatins need to run.. Typically in unix, for security purposes, you run a server like mysqld as an unpriveleged user mysql. That way if badguy tries to buffer overflow mysql all they get is the priveleges that user mysql had, maybe no shell if that user had no shell.
. is a script or GUI utility that does «create new user based on existing user.»
Right now I use a dummy account when doing system builds, then I go into NetInfo Manager and change names and file paths in the dummy account as needed, to approximate that sort of function. It’s kind of a pain.
Anyone know a way to do this?
What would be even cooler, though, would be if that functionality was made into an option in Carbon Copy Cloner. 🙂
Not sure if this helps you, but for my «build» purposes I need additional accounts created to keep serials and authorizations of apps i install as admin in an admin account. The way to do this is to populate the Default User Template with the prefs and files which keep those SNs. some apps serialize themselves, but others like QT Pro and DVDSP and many others do not and do it by user (lame!). so look in /System/Library/User\ Template/English.lproj for some answers.
I have been refining my adduser script for many months. It has some elements that are specific to my organization. In general this becomes a much more complicated process than it would first appear. Some things to consider about advantages of this method for adding user accounts.
Apple’s GUI does not preserve resource forks when populating the home directory. If you need to customize your builds like we do, this can be a deal breaker. My script uses CpMac (part of Dev tools) to overcome this shortcoming.
Apple’s GUI does not allow you to specify a UID or alternate home directory.
I’m not sure if using the tools with OSX Server solve either of these issues, but we don’t run a server so it was not important for me to know anyway.
Another thing to consider about command line management of user accounts is the add/remove process for groups. I had to add a lot of logic to search the Netinfo database for duplications. I also needed cleanup code so you don’t wind up with users left in the database after they have been removed. or, more importantly, left in one group, but not another.
No script I have found so far (not even mine) has addressed the creation of the config file in /private/etc/httpd/users. The GUI handles this, but none of the scripts do. I plan to work on this eventually. There may be other things the GUI does too that are not obvious.
It’s a can of worms, but for many it’s one worth opening.
—
Mark Moorcroft
ELORET Corp. — NASA/Ames RC
Sys. Admin.
Wouldn’t Ditto have worked? It has a switch to keep the Resource Forks of files.
Instead of /dev/null , I would use /usr/bin/false as a no shell user’s shell. More secure IMO.
One thing I found was at http://homepage.mac.com/pinus/fink.html. This is a page with a lot of Japanese (I think) characters, but about a third of the way down the page is a transcript of a session of installing «The GIMP» with Fink, and it mentions pretty much the same list of users.
See below for a script that does a whole lot more:
There’s a problem with the Home directory creation part of this tip. If you try it, you’ll find that, first of all, the user’s directory gives no read rights to others. It should do this, so others can access their public folder. Second, it doesn’t copy all the directories in English.lproj.
The correct procedure is the following:
% sudo ditto /System/Library/User\ Template/English.lproj /Users/newuser
% sudo chown -R newuser:staff /Users/newuser
Using «/usr/sbin/createhomedir -u username» is easier than creating the home directory manually. Actually I just usually do createhomedir -a after creating all the users accounts.
when i set /dev/null or /sbin/nologin the user can no longer ftp to the server. I want a way to keep them from using ssh but allowing them to ftp. How do I do this?
That’s part of your ftp server. There is an option that allows users without shell access to access your ftp server. I’m not sure what ftp server MacOS X ships by default (sftp is good enough for my users).
Hope that helps.
P.S. I’m not sure if proftpd has been ported to MacOS X, but I’m sure that there is somebody somewhere who is doing just that. Proftpd allows you to do what you are requesting with a simple «Allow. » clause in your configuration file.
This tip is not working at all for me.
it could be usefull to add that to add to your local NetInfo database you should use:
sudo niutil -create /local@ip adres /users/foo
However when I check the above Terminal commands in NetInfo Manager I also get to see the newly created user, none of the extra attributes.
It doesn’t give error messages in the Terminal.
After:
niutil -create /local@192.168.1.173 /users/flip passwd \»*\»
the terminal states:
niutil: No match.
I’ve used some helpfull info from: http://www.bresink.de/osx/DocsNFSManager/index.html
yeah, i know it’s been almost a year, but heres your answer:
the * is being parsed as «any series of characters» if you replace the * with a [code]\*[/code] it’ll be quite happy to work.
—
vacuums do not suck. they merely provide an absence that allows other objects to take the place of what becomes absent.
Источник
How to Create an Admin Account in the Mac Terminal

The terminal is a Mac utility that is often overlooked because some users find it arcane. But it provides an opportunity to customize elements of your Mac by using command line prompts. This way, you can perform tasks that would otherwise require additional software.

One advantage of using Terminal is that you can quickly create a new admin account, replace an admin, or add new users on your Mac. In this article, we’ll go over all the details regarding how to use Terminal as a Mac administrator, and we’ll answer a few commonly asked questions.
How to Create an Admin Account on a Mac Using Terminal
Creating a new admin account using Mac’s graphical interface is often the fastest option, but there are times when using Terminal is a preferable option.
For example, if you’re troubleshooting an issue remotely via the Screen Sharing feature, you’ll need to open Terminal. Before diving into the steps you’ll need to take to create an administrator account using Terminal, let’s find out where you can find this utility:
- Go to the “Finder” app and then select “Applications.”

- Scroll down and double-click on the “Utilities” folder.
- Find Terminal and open it.


Now, follow these steps to make a new administrator account:
- Type in sudo dscl . -create /Users/username and then hit enter. Then change the “username” part with one word of your choosing. Type in a new password and hit “enter” again.
- Type in sudo dscl . -create /Users/username UserShell /bin/bash and hit “enter “again.
- Now add the following command: sudo dscl . -create /Users/username RealName“Jane Smith” and hit “enter.”
- The next step is to type in sudo dscl . -create /Users/username PrimaryGroupID 1000 followed by “enter.”
- Continue by typing in sudo dscl . -create /Users/username NFSHomeDirectory /Local/Users/username and hitting “enter.” This prompt creates a new user folder.
- To replace the password, type in sudo dscl . -passwd /Users/username password followed by “enter.” Choose a new password you’ll use every time you log in.
- To give the user administrative privileges, type in “sudo dscl . -append /Groups/admin GroupMembership username” and hit “enter.”


How to Make Yourself an Administrator From the Terminal on Mac
If you’re using a Mac on which you don’t have an administrative role, you can change that by entering specific commands in Terminal.
That will give you permission to change important settings, as well as other privileges such as installing new programs. Here’s how you can change an existing user account to an administrative account via Terminal:
- Open the Terminal app following the same steps listed above.
- Type in sudo dscl / -append /Groups/admin GroupMembership USERNAME and replace “username” with your name.
- Now enter the administrative password.
You will get an administrative function upon executing that command. Keep in mind that you must have the administrative password to make this change in the first place.
How to Change Your Username on Mac
You can easily change your username on macOS, but you need to change the name of the home folder as well for it to work. So, here is how to change the name of the home folder:
- Log in to the administrative account on your Mac.
- Open the Users folder on the account you want to rename.
- Rename the home folder, but make sure there are no spaces in the name. You’ll need to enter the administrator’s name and password.
The next step is renaming the Mac user account:
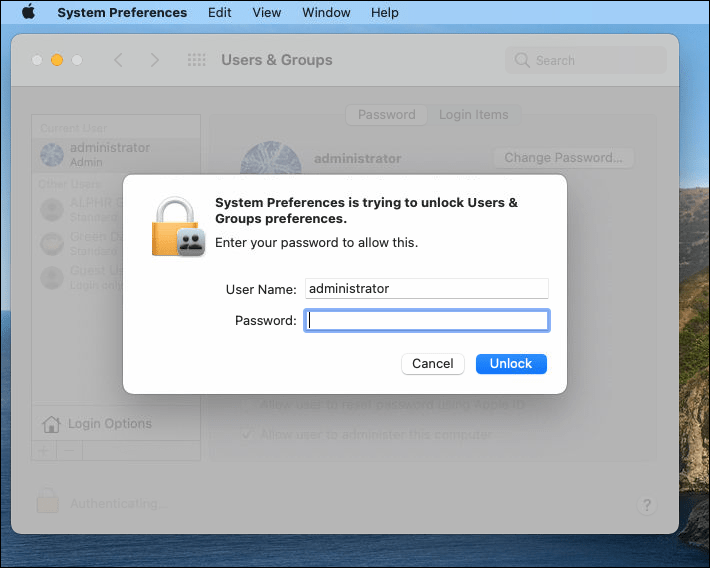
- From the admin account on Mac, follow the path Menu>System Preferences.
- Select “Users & Groups” and click on the lock icon. Then enter the admin name and password.
- Click on the user you want to rename and select “Advanced Options.”
- Enter the same name you used for the home folder.
- Go to “Home directory” and change the account name to match the home folder as well.
- Select “Ok” and then restart your computer.
- Next time you log into the newly renamed account, make sure all the files and folders are visible.


How to Create an Admin Account in a Single User Mode
The first thing you need to do to create an admin account from a Single User Mode is shut down your Mac. Then restart it in a Single User Mode by turning it on while pressing and holding “Command + R.” Then follow these steps:
- Enter /sbin/mount -uw / command when prompted and press “enter.”
- Next, type in rm /var/db/.applesetupdone and hit “enter.” This will remove the file that tells the OS the setup process has been performed before.
- When this file is removed, you need to restart your Mac again.
- Next time the Mac reboots, you’ll see a “Welcome to Mac” window on the screen. You can follow the prompts to make a new admin account.

Frequently Asked Questions
We’ve included some more information for you in this section.
How Does Terminal Work on Mac?
The terminal is an app found in the Utilities folder inside all Mac devices. It has a Unix command-line system, which some users prefer.u003cbru003eu003cbru003eEvery command you use in Terminal contains three elements. The first is the command itself. The second is the argument that provides the information about the resource on which the command operates. And the third is having the option for modifications of the output.
Can I Have Multiple Administrator Accounts on My Mac?
The answer is yes. Your Mac can have more than one administrator account. You can also change standard or share-only user accounts to administrator accounts.
How Do I Create User Accounts From the Terminal in macOS?
To create a user account from Terminal in Mac, follow steps 1-6 in this article under u0022How to Create an Admin Account on a Mac Using Terminal.” All you need to do is skip the final step, and you’ll have the standard user account.
Managing Your Mac Admin Accounts
The macOS graphic interface allows users to create new admin accounts and add and remove admin privileges as well. But in some instances, accessing this feature via the Terminal app is faster and simpler.
It’s also a great way to get acquainted with the basics of how macOS works. Follow the steps we’ve provided to add new admin accounts via Terminal.
Have you used Terminal on Mac before? What was the main reason? Let us know in the comments section below.
Источник


