Identify the ports on your Mac
If you’re not sure which port to use with your external display, hard drive, camera, printer, iPhone, iPad, or other device, the port shapes and symbols in this guide should help.
Information about these and other types of Mac ports is in the specifications for your Mac: Choose Apple menu > About This Mac, click Support, then click Specifications. Or check your Mac user guide.
Thunderbolt / USB 4
These Mac models have Thunderbolt / USB 4 ports:
You can connect a single external display and other devices that connect using either a Thunderbolt 3 cable or USB-C cable. You can also connect a USB-C charge cable to charge your notebook, or a USB-C to Lightning cable to charge your iPhone or iPad. If you have a device that doesn’t connect to this port, you might be able to use an adapter to connect it.
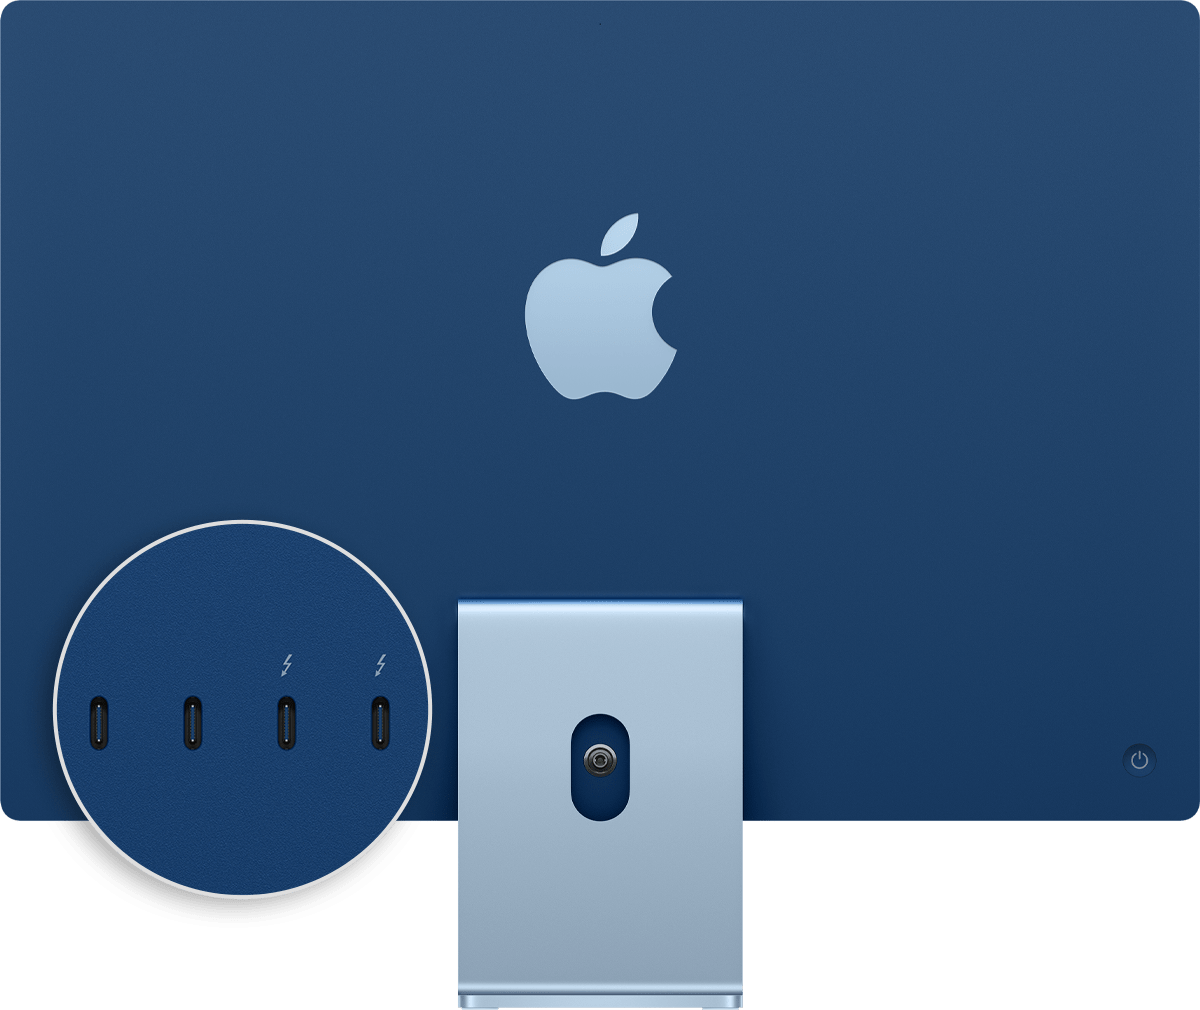
On iMac (24-inch, M1, 2021), the symbol appears above each Thunderbolt / USB 4 port. To connect a display, use either of the ports with the Thunderbolt symbol .

Thunderbolt 3
These Mac models have Thunderbolt 3 ports:
- iMac (Retina 5K, 27-inch, 2020)
- iMac (Retina 5K, 27-inch, 2019)
- iMac (Retina 4K, 21.5-inch, 2019)
- iMac (Retina 5K, 27-inch, 2017)
- iMac (Retina 4K, 21.5-inch, 2017)
- iMac (21.5-inch, 2017)
- iMac Pro
- Mac Pro (2019)
- Mac Pro (Rack, 2019)
- Mac mini (2018)
- MacBook Air (Retina, 13-inch, 2020)
- MacBook Air (Retina, 13-inch, 2019)
- MacBook Air (Retina, 13-inch, 2018)
- MacBook Pro (13-inch, 2020, Two Thunderbolt 3 ports)
- MacBook Pro (13-inch, 2020, Four Thunderbolt 3 ports)
- MacBook Pro (16-inch, 2019)
- MacBook Pro (13-inch, 2019, Two Thunderbolt 3 ports)
- MacBook Pro (15-inch, 2019)
- MacBook Pro (13-inch, 2019, Four Thunderbolt 3 ports)
- MacBook Pro (15-inch, 2018)
- MacBook Pro (13-inch, 2018, Four Thunderbolt 3 ports)
- MacBook Pro (15-inch, 2017)
- MacBook Pro (13-inch, 2017, Four Thunderbolt 3 ports)
- MacBook Pro (13-inch, 2017, Two Thunderbolt 3 ports)
- MacBook Pro (15-inch, 2016)
- MacBook Pro (13-inch, 2016, Four Thunderbolt 3 ports)
- MacBook Pro (13-inch, 2016, Two Thunderbolt 3 ports)
Use these ports with displays and other devices that connect using either a Thunderbolt 3 cable or USB-C cable. You can also connect a USB-C power adapter and cable to charge your notebook computer. If you have a device that doesn’t connect to this port, you might be able to use an adapter to connect it.

If your Mac notebook or desktop computer has more than one port like this, each port supports Thunderbolt 3 and USB-C.
USB 3
These Mac models have USB 3 ports:
- iMac (24-inch, M1, 2021) with four ports
- MacBook (Retina, 12-inch, 2017)
- MacBook (Retina, 12-inch, Early 2016)
- MacBook (Retina, 12-inch, Early 2015)
On MacBook, use this port with displays and other devices that connect using a USB-C cable. You can also connect a USB-C power adapter and cable to charge your notebook computer. If you have a device that doesn’t connect to this port, you might be able to use an adapter to connect it.
On iMac (four-port model only), use the USB 3 ports with external devices that connect using a USB-C cable. To connect an external display, use either of the ports with the Thunderbolt symbol .
Thunderbolt
These Mac models have Thunderbolt or Thunderbolt 2 ports:
- MacBook Pro introduced in 2011 through 2015
- MacBook Air introduced in 2011 through 2017
- Mac mini introduced in 2011 through 2014
- iMac introduced in 2011 through 2015
- Mac Pro introduced in 2013
Use these ports with displays and other devices that connect using a Thunderbolt cable.
Thunderbolt and Thunderbolt 2 are not the same as Mini DisplayPort . They have the same shape, but use different symbols on the cable and port. However, this port does support Mini DisplayPort for video output, so you can use a Mini DisplayPort cable to connect a Mini DisplayPort display.
Mini DisplayPort
These Mac models have Mini DisplayPort:
- MacBook Pro introduced in late 2008 through 2010
- MacBook Air introduced in late 2008 through 2010
- Mac mini introduced in 2009 and 2010
- iMac introduced in 2009 and 2010
- Mac Pro introduced in 2009 through 2012
Use this port with displays that connect using a Mini DisplayPort cable.
Mini DisplayPort is not the same as Thunderbolt or Thunderbolt 2 . They have the same shape, but use different symbols on the cable and port.
Use these ports with devices that connect using a USB-A cable. USB ports are sometimes known by the USB specification of the port, such as USB 2 or USB 3.

Use HDMI with displays and TVs that connect using an HDMI cable.
Ethernet
Use Ethernet with networks and devices that connect using an Ethernet (RJ45) cable.
On some iMac models, the Ethernet port is located on the computer’s power adapter. If your power adapter doesn’t have an Ethernet port, you can use an Ethernet adapter.
FireWire
| FireWire 400 | FireWire 800 |
Use FireWire with devices that connect using a FireWire 400 or FireWire 800 cable.
SD card
Use the SD card slot with SD, SDHC, SDXC, MMC, and UHS-II media cards, such as those used by digital cameras.
Audio
Use Audio-Out — or — with headphones, speakers, and other audio-output devices that connect using an audio cable that has a 3.5 mm (1/8 inch) audio jack.
Use Audio-In with a microphone or other audio-input device that connects using an audio cable that has a 3.5 mm (1/8 inch) audio jack.
Power
Use the power port , if available, to connect your computer to AC power using a MagSafe cable or adapter. This port isn’t available on newer Mac notebook computers, which use Thunderbolt 3 or USB-C for power and charging. Learn more about power adapters and cables for Mac notebook computers.
Learn more
Information about products not manufactured by Apple, or independent websites not controlled or tested by Apple, is provided without recommendation or endorsement. Apple assumes no responsibility with regard to the selection, performance, or use of third-party websites or products. Apple makes no representations regarding third-party website accuracy or reliability. Contact the vendor for additional information.
Источник
# USB Mapping
# This guide is outdated, see USBMap’s README
(opens new window) for updated information until this guide is rewritten
Table of Contents:
So with the prerequisites out of the way, we can finally get to the meat of this guide. And now we get to finally read one of my favorite books before I go to bed each night: The Advanced Configuration and Power Interface (ACPI) Specification!
Now if you haven’t read through this before(which I highly recommend you do, it’s a thrilling tale), I’ll point you to the meat of the USB situation:
- Section 9.14: _UPC (USB Port Capabilities)
Here we’re greeted with all the possible USB ports in ACPI:
| Type | Info | Comments |
|---|---|---|
| 0 | USB 2.0 Type-A connector | This is what macOS will default all ports to when no map is present |
| 3 | USB 3.0 Type-A connector | 3.0, 3.1 and 3.2 ports share the same Type |
| 8 | Type C connector — USB 2.0-only | Mainly seen in phones |
| 9 | Type C connector — USB 2.0 and USB 3.0 with Switch | Flipping the device does not change the ACPI port |
| 10 | Type C connector — USB 2.0 and USB 3.0 without Switch | Flipping the device does change the ACPI port. generally seen on 3.1/2 motherboard headers |
| 255 | Proprietary connector | For Internal USB ports like Bluetooth |
# Intel USB Mapping
USB mapping on Intel is super easy mainly because both the ACPI is sane and more tools available for the platform. For this guide we’ll be using the USBmap tool
Now open up USBmap.command and select D. Discover Ports :

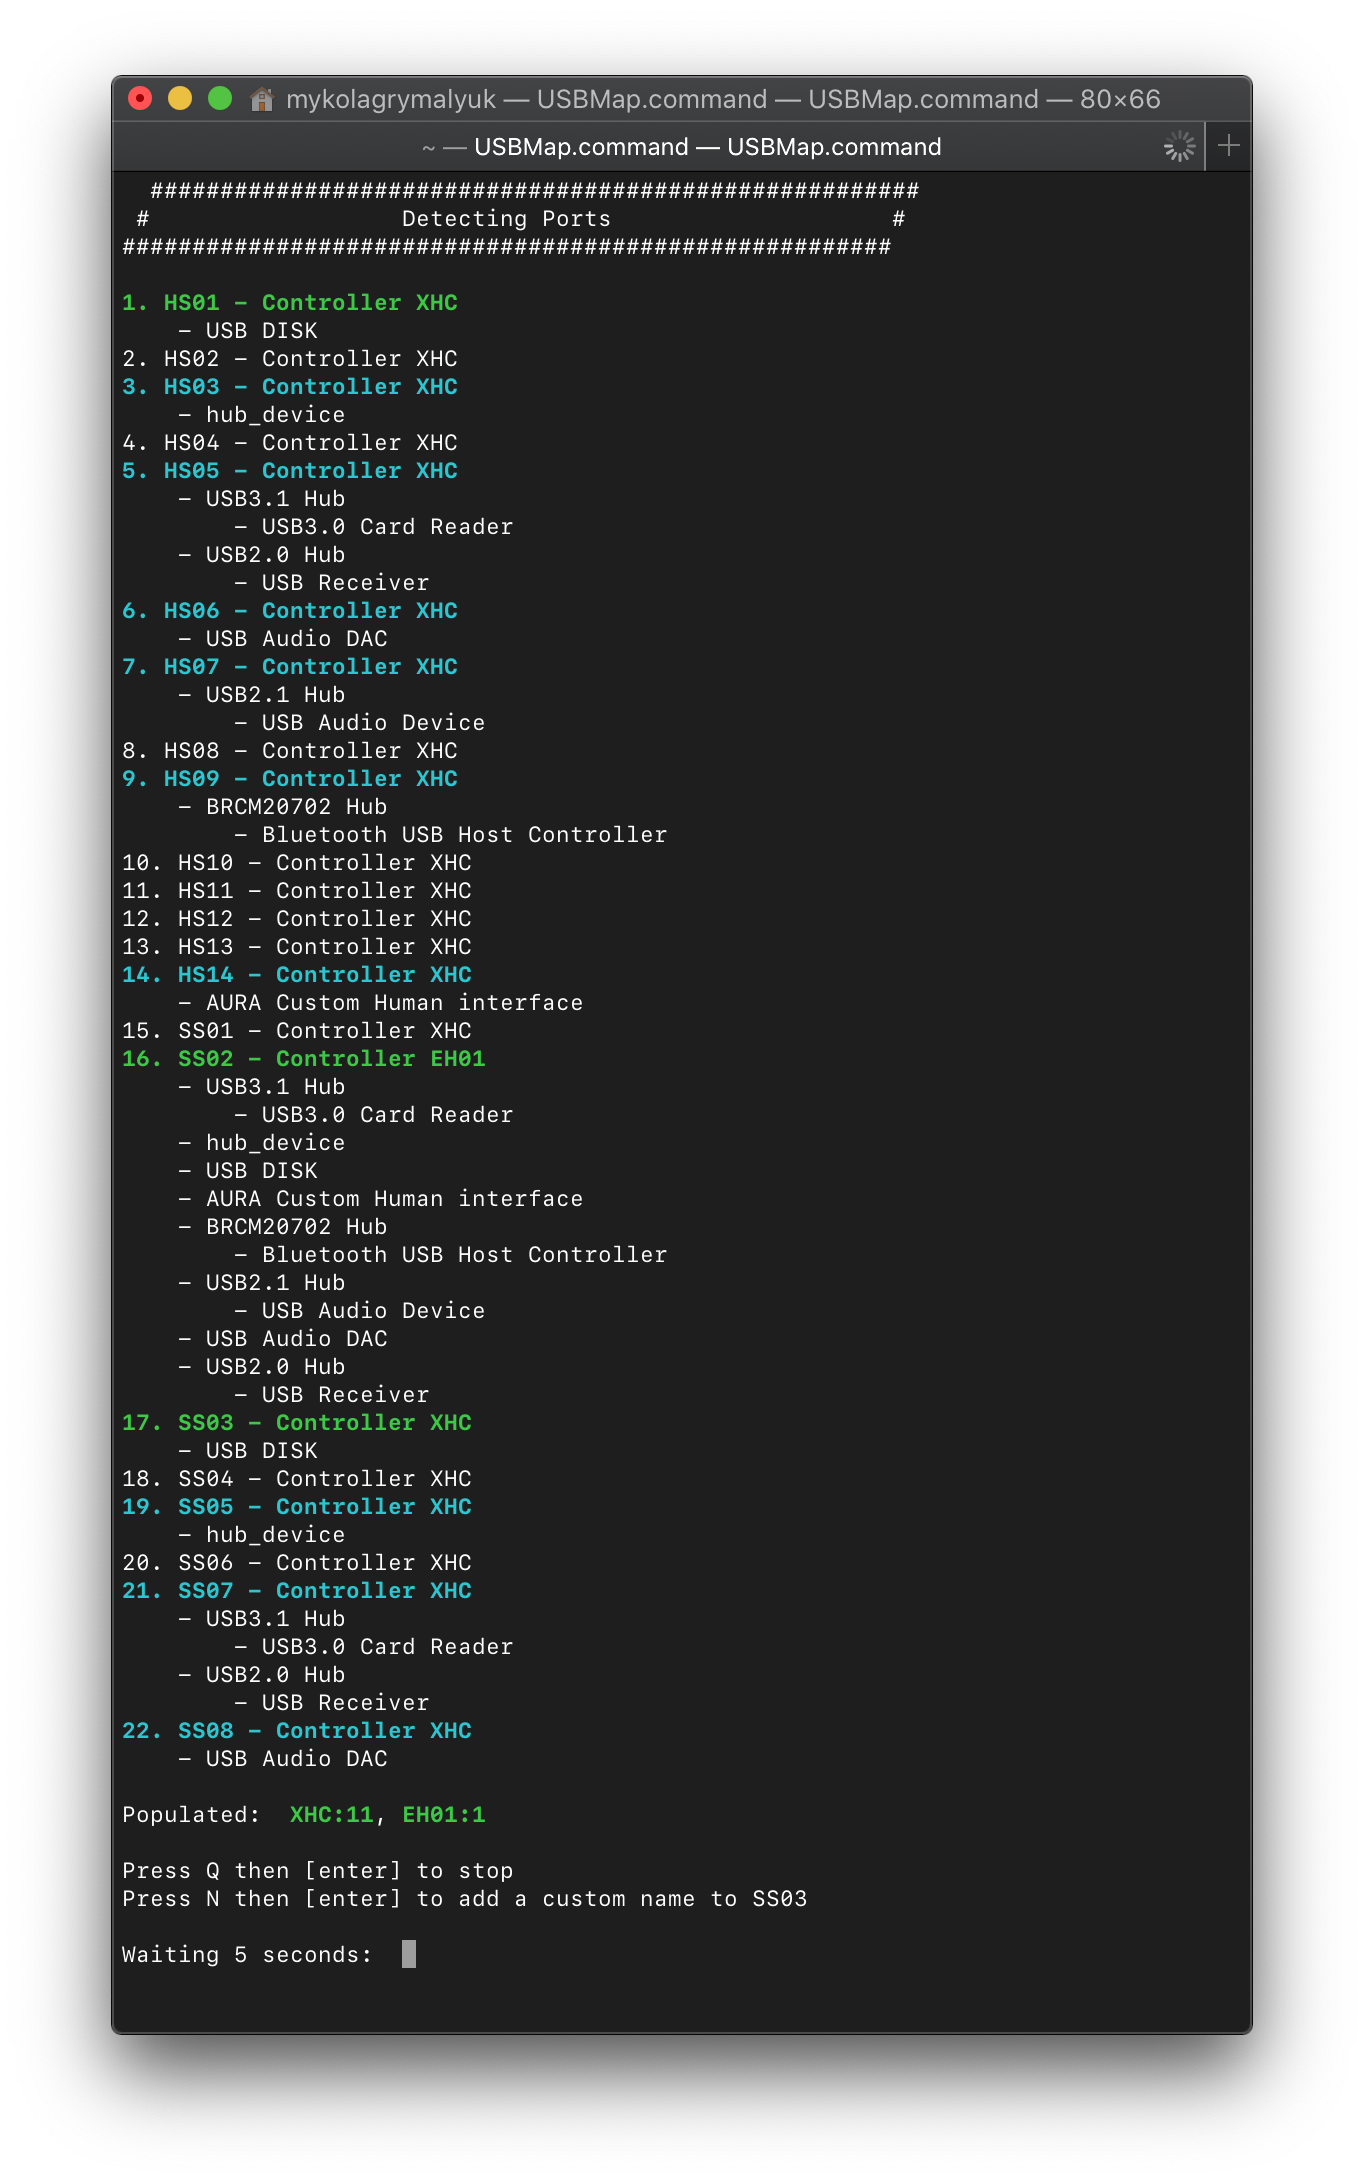
The interface for USBmap is quite simple and easy to grasp so won’t go into detail here, the README.md
(opens new window) should do you well enough. The basic idea is insert a device, give it a name to remember the port by, remove and then try another port until you have a whole list of ports you want to keep.
- Note: USRx(ie. USR1, USR2) ports are not real USB ports, they’re specifically USBR ports
(opens new window) which macOS has no support for(and why real Macs don’t have this). These can be excluded from your USB map.
Once you’re done discovering your ports, select Press Q then [enter] to stop then head to P. Edit Plist & Create SSDT/Kext from the main menu.
For this example, I’ll choose all the ports that were discovered, remember that there is a 15 port limit so you cannot go over it. USB hubs will count as one USB port so you can expand from there if you are limited on ports.
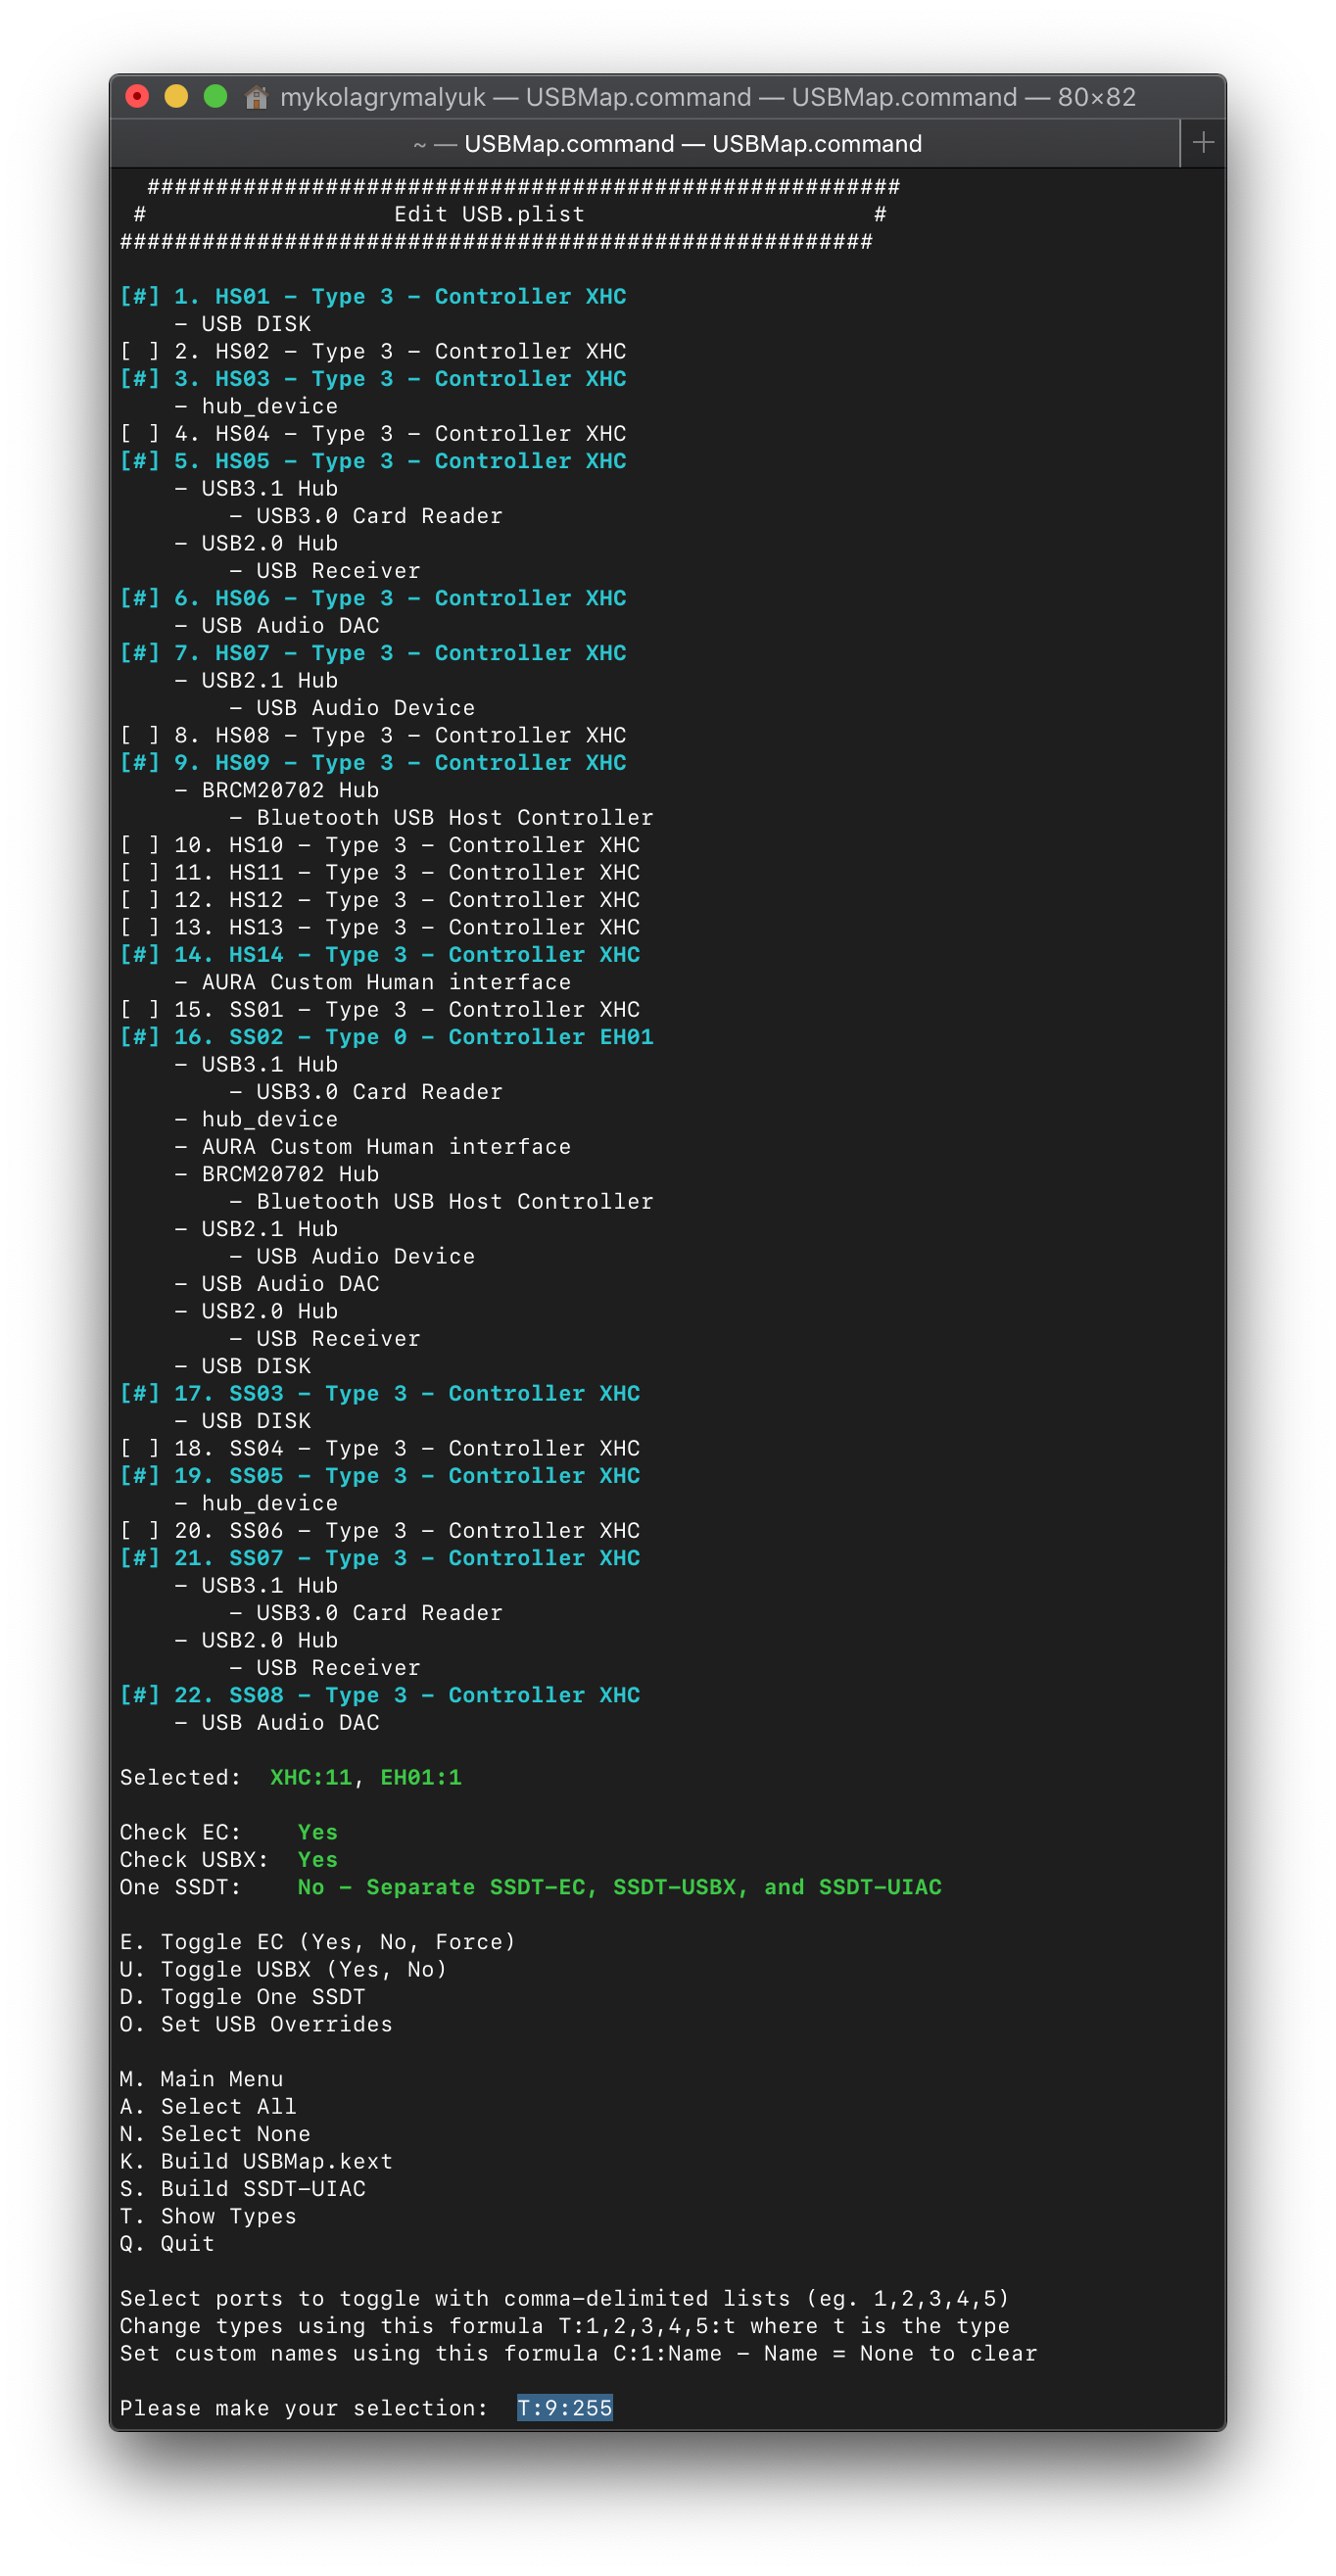
The above will set all ports listed to type 3 which is USB 3.0.
This will set my Bluetooth to internal, this is super important as macOS expects Bluetooth to always be internal.
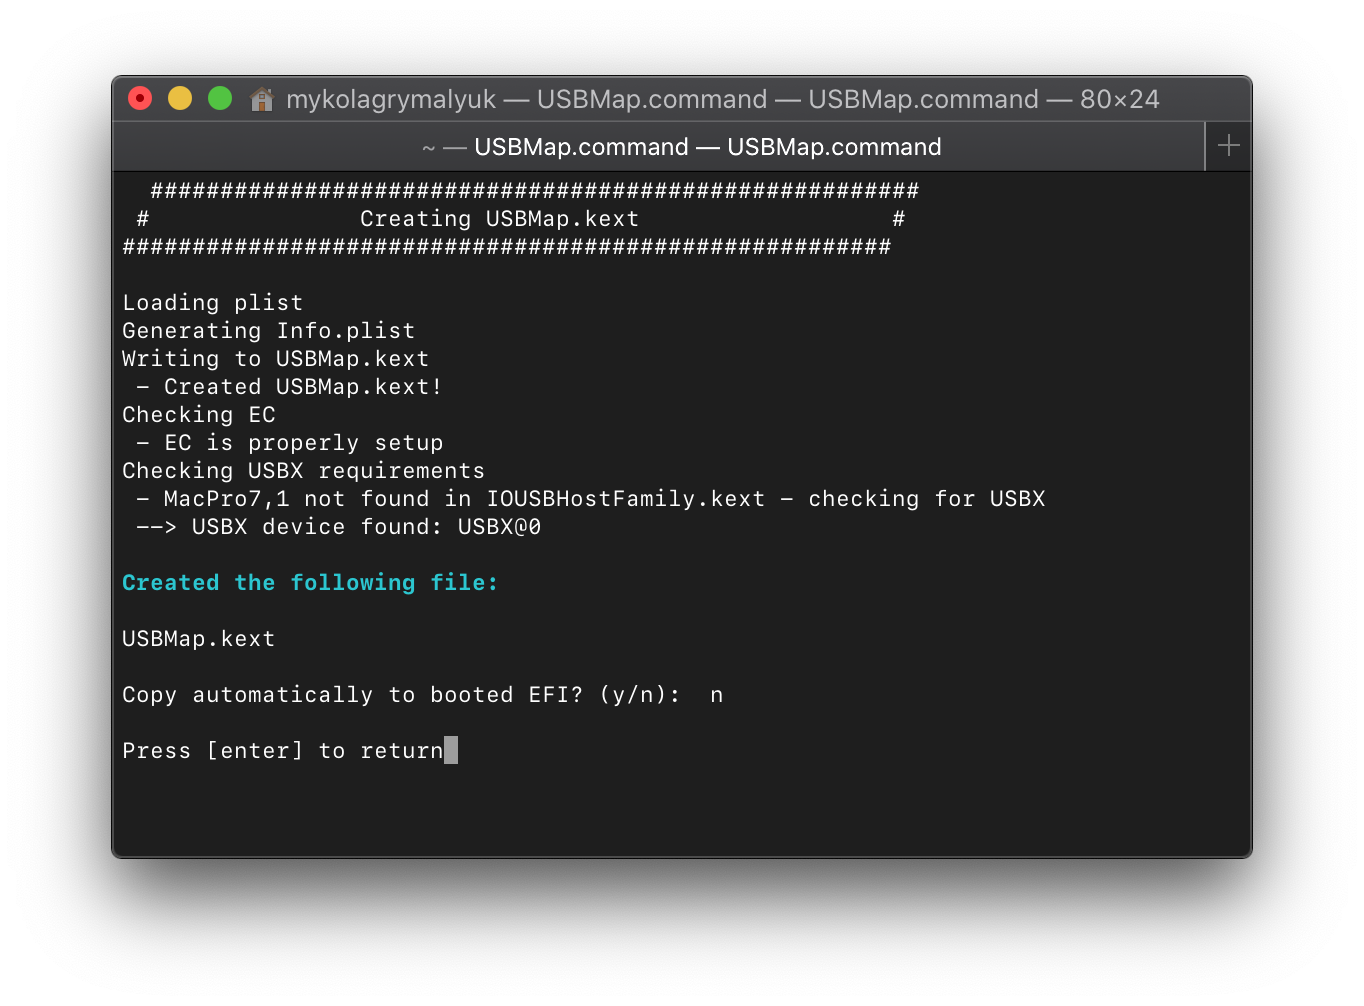
Now we can select K. Build USBMap.kext and let it build our kext for us.
Note: Do not use either the SSDT-UIAC.aml or USBInjectAll with the USBmap.kext. This kext we just made should be used by itself with no other USB kexts besides XhciUnsupported if your system needs it. Reason for this is USBInjectAll is no longer being maintained and the USBmap.kext version is how real Macs USB map as well so as close to «Apple Like» as possible to fit the OpenCore mood.
Now reboot and run USBmap again, you should see a lot less ports in your map:
Источник
About USB on Mac computers
USB is available with type A (USB-A) and type C (USB-C) ports, depending on the Mac model.
USB type A ports have this shape and may also be called USB, USB 2, or USB 3 ports, depending on the USB specification supported.
USB type C ports have this shape and are available on Mac as USB 3, Thunderbolt 3, or Thunderbolt / USB 4 ports.
Learn more about identifying the ports on your Mac. If the cable from your USB device doesn’t fit in the USB port on your Mac, learn about adapters you can use.
USB specifications
The specification of a USB port determines the maximum data-transfer rate (speed) and power delivered by the port. This is important primarily when you want the most speed for your USB device, or when your USB device needs more power than it’s getting.
To learn which specification a USB port on your Mac supports, choose Apple menu > About This Mac, click Support, then click Specifications. You can also use System Information to get more detail, including about USB devices directly connected to your Mac.
| USB specifications on Mac | Data transfer | Power delivery |
|---|---|---|
| USB 4 | Up to 40 Gbps | Up to 100W at 20V |
| USB 3 (USB 3.1 Gen 2) | Up to 10 Gbps | Up to 15W at 5V |
| USB 3 (USB 3.1 Gen 1) | Up to 5 Gbps | Up to 900 mA at 5V |
| USB 2 | Up to 480 Mbps | Up to 500 mA at 5V |
| USB 1.1 | Up to 12 Mbps | Up to 500 mA at 5V |
If a USB device is slow or not recognized
USB specifications all work with each other, but data-transfer speed and power are limited by the cable or device that uses the earliest specification. For example, if you connect a USB 3 device to a USB 2 port, your device is limited to USB 2 speed and power.
- Make sure that the USB port on your Mac and the USB cable used by your device both meet or exceed the USB specification of the device itself.
- Plug your device directly into your Mac instead of a USB hub or other device.
- If your USB device came with an AC power adapter, you should probably use it. Your device might need more power than the port it’s plugged into can provide.
- Update the software on your Mac. Also check with the manufacturer of your USB device for firmware or other software updates. Then restart your Mac.
Information about products not manufactured by Apple, or independent websites not controlled or tested by Apple, is provided without recommendation or endorsement. Apple assumes no responsibility with regard to the selection, performance, or use of third-party websites or products. Apple makes no representations regarding third-party website accuracy or reliability. Contact the vendor for additional information.
Источник


