- iOS Beta deployment using fastlane
- Building your app
- Codesigning
- Uploading your app
- Beta testing services
- Release Notes
- Best Practices
- Fetching the latest build number from TestFlight
- Committing the build number to version control
- Use the number of commits
- Getting started with fastlane for iOS
- Setup Xcode for fastlane
- Xcode command line tools (macOS)
- Installing fastlane
- Managed Ruby environment + Bundler (macOS/Linux/Windows)
- Homebrew (macOS)
- System Ruby + RubyGems (macOS/Linux/Windows)
- Setting up fastlane
- What’s next?
- Set up environment variables
- Use a Gemfile
- Getting started with fastlane for Android
- Installing fastlane
- Managed Ruby environment + Bundler (macOS/Linux/Windows)
- Homebrew (macOS)
- System Ruby + RubyGems (macOS/Linux/Windows)
- Setting up fastlane
- Setting up supply
- Collect your Google credentials
- Configure supply
- Fetch your app metadata
- What’s next?
- Set up environment variables
- Use a Gemfile
iOS Beta deployment using fastlane
Building your app
fastlane takes care of building your app using an action called build_app, just add the following to your Fastfile :
Additionally you can specify more options for building your app, for example
Try running the lane using
If everything works, you should have a [ProductName].ipa file in the current directory. To get a list of all available parameters for build_app, run fastlane action build_app .
Codesigning
Chances are that something went wrong because of code signing at the previous step. We prepared our own Code Signing Guide that helps you setting up the right code signing approach for your project.
Uploading your app
After building your app, it’s ready to be uploaded to a beta testing service of your choice. The beauty of fastlane is that you can easily switch beta provider, or even upload to multiple at once, without any extra work.
All you have to do is to put the name of the beta testing provider of your choice after building the app using build_app:
fastlane automatically passes on information about the generated .ipa file from build_app to the beta testing provider of your choice.
To get a list of all available parameters for a given action, run
Beta testing services
You can easily upload new builds to TestFlight (which is part of App Store Connect) using fastlane. To do so, just use the built-in testflight action after building your app
Some example use cases
If you used fastlane init to setup fastlane, your Apple ID is stored in the fastlane/Appfile . You can also overwrite the username, using upload_to_testflight(username: «bot@fastlane.tools») .
To get a list of all available options, run
With fastlane, you can also automatically manage your beta testers, check out the other actions available.
Firebase App Distribution
Install the Firebase App Distribution plugin:
Authenticate with Firebase by running the firebase_app_distribution_login action (or using one of the other authentication methods):
Then add the firebase_app_distribution action to your lane:
For more information and options (such as adding release notes) see the full Getting Started guide.
To get your API token, open API Tokens in Account Settings. From there, you can find your existing API token, or create a new one.
To get a list of all available options see the hockey action docs, or run
To get a list of all available options, run
More information about the service on TestFairy.com.
More information about additional supported beta testing services can be found in the list of «Beta» actions
Release Notes
Automatically based on git commits
Your changelog changes, so it doesn’t make a lot of sense to store a static release note in the Fastfile .
Get a list of all available options using fastlane action changelog_from_git_commits , here are some examples
Prompt for changelog
You can automatically be asked for the changelog in your terminal using the prompt action:
Fetching the changelog from the file system or remote server
You can fetch values from anywhere in your Fastfile , including the file system and remote server
Best Practices
Manage devices and testers using fastlane
If you’re using TestFlight you don’t need to worry about UDIDs of your devices. Instead you just maintain a list of testers based on their Apple ID email address.
fastlane supports automatically registering devices using different approaches
boarding
boarding allows you set up a registration page for your beta testers, so they can enter their email address and start testing your application.
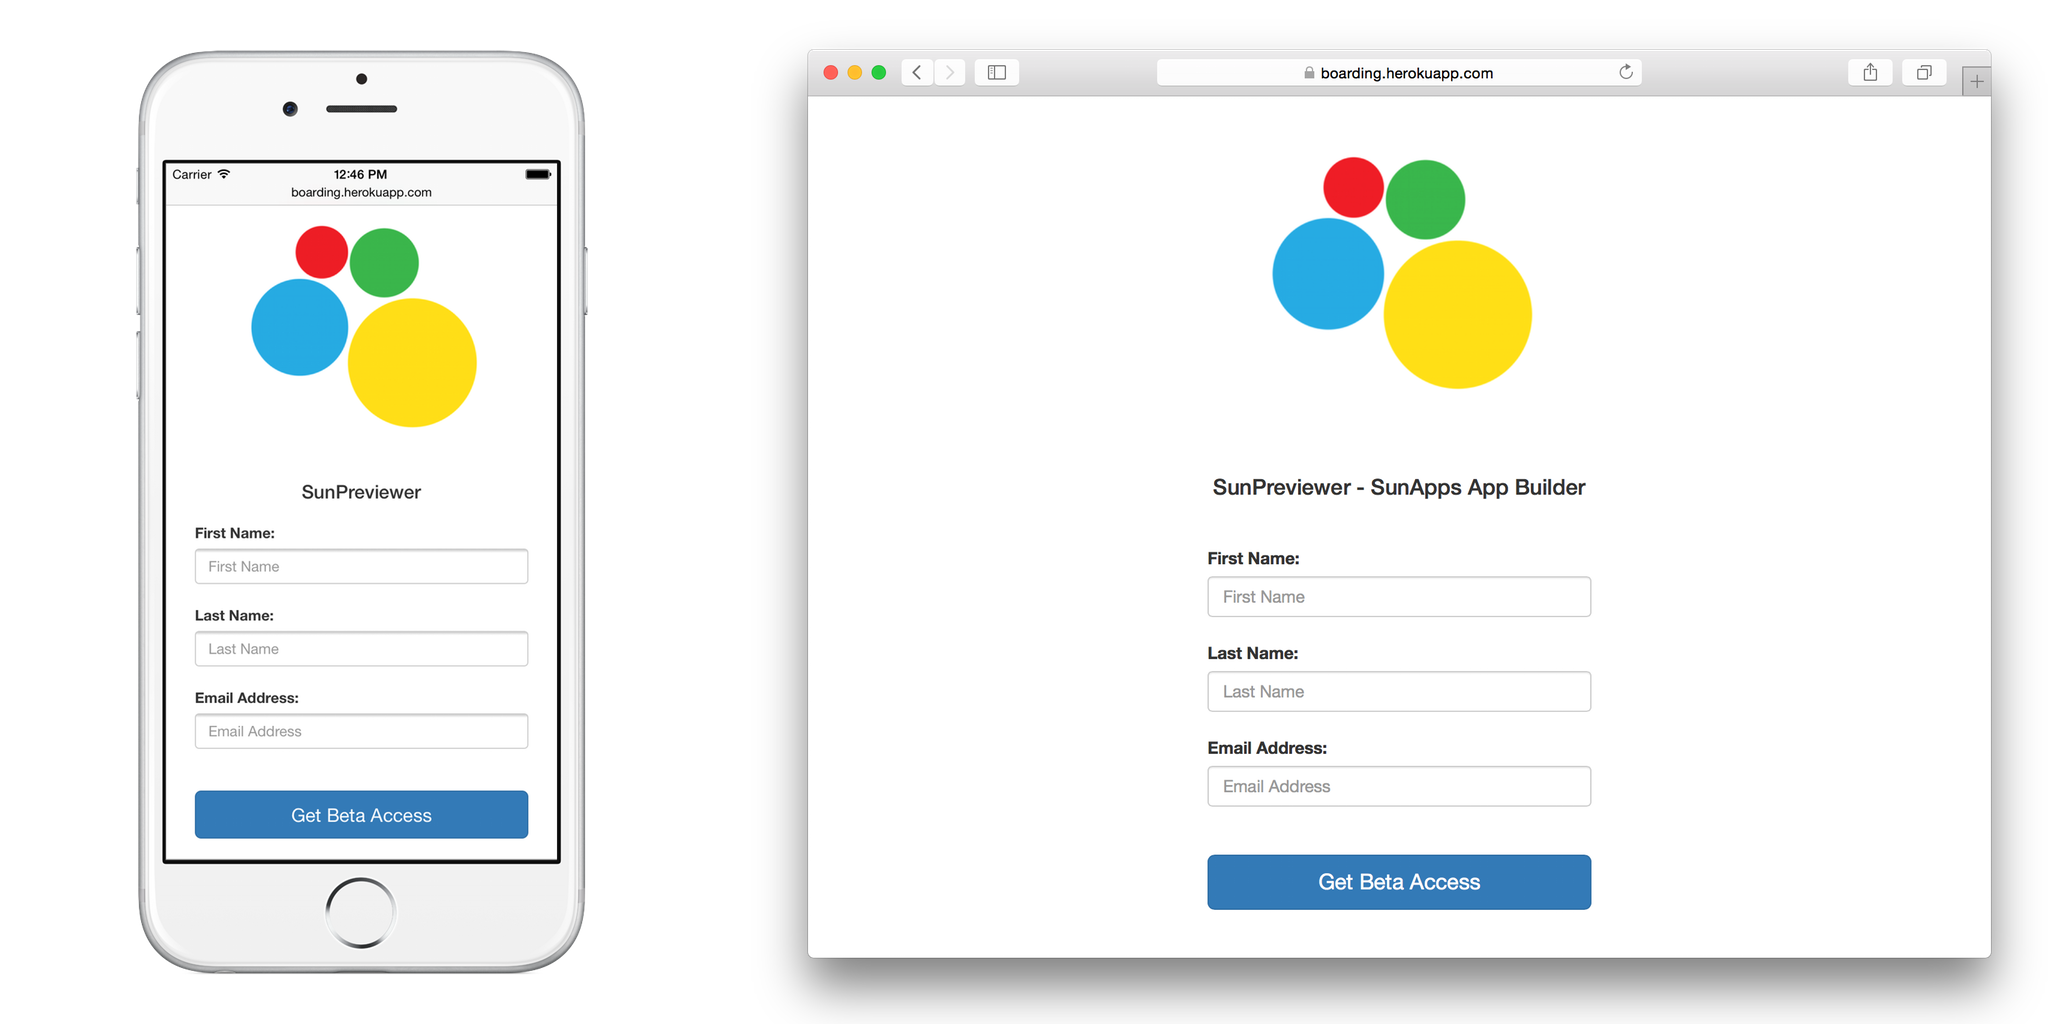
Check out the boarding GitHub repo for more information.
pilot
pilot is automatically installed with fastlane, you can use it to register individual testers to TestFlight
Third party beta testing services
If you’re using a third party beta testing service, you’ll need to manage your registered devices and their UDIDs. fastlane already supports device registrations and updating provisioning profiles out of the box.
The devices.txt should look like this:
Incrementing the build number
Depending on the beta testing service you use, you’ll have to increment the build number each time you upload a new build. This is a requirement for TestFlight for example.
To do so, there are some built-in fastlane actions available, here are some examples
Fetching the latest build number from TestFlight
The code sample below will use the latest build number from TestFlight and temporarily set it.
Committing the build number to version control
The code sample below will increment the build number and commit the project changes to version control.
For all the steps above, there are more parameters available, run the following to get a full list:
Use the number of commits
This isn’t recommended, however some teams prefer this approach. You can use the number of commits of the current branch (via number_of_commits ) as the build number. This will only work if you always run the build on the same branch.
Источник
Getting started with fastlane for iOS
Setup Xcode for fastlane
Xcode command line tools (macOS)
Installing fastlane
fastlane can be installed multiple ways. The preferred method is with Bundler. fastlane can also be installed directly through with Homebrew (if on macOS). It is possible to use macOS’s system Ruby but it’s not recommended as it can be hard to manage dependencies and cause conflicts.
Managed Ruby environment + Bundler (macOS/Linux/Windows)
Ruby
If you use macOS, system Ruby is not recommended. There is a variety of ways to install Ruby without having to modify your system environment. For macOS and Linux, rbenv is one of the most popular ways to manage your Ruby environment.
fastlane supports Ruby versions 2.5 or newer. Verify which Ruby version you’re using:
Bundler
It is recommended that you use Bundler and Gemfile to define your dependency on fastlane. This will clearly define the fastlane version to be used and its dependencies, and will also speed up fastlane execution.
- Install Bundler by running gem install bundler
- Create a ./Gemfile in the root directory of your project with the content
- Run bundle update and add both the ./Gemfile and the ./Gemfile.lock to version control
- Every time you run fastlane, use bundle exec fastlane [lane]
- On your CI, add bundle install as your first build step
- To update fastlane, just run bundle update fastlane
Homebrew (macOS)
This way you don’t have to install Ruby separately and instead homebrew installs the most adequate Ruby version for fastlane. See this page for details.
System Ruby + RubyGems (macOS/Linux/Windows)
This is not recommended for your local environment, but you can still install fastlane to system Ruby’s environment. Using sudo often occurs unwanted results later due to file permission and makes managing your environment harder.
Setting up fastlane
Navigate your terminal to your project’s directory and run
Note that if you want to create your first app on your App Store Connect account, you need to set the developer name ( company_name ) with PRODUCE_COMPANY_NAME environment variable:
To get more information check company_name description in the Create app documentation.
To have your Fastfile configuration written in Swift (Beta)
Swift setup is still in beta. See Fastlane.swift docs for more information.
Depending on what kind of setup you choose, different files will be set up for you. If you chose to download the existing app metadata, you’ll end up with new folders that look like this:
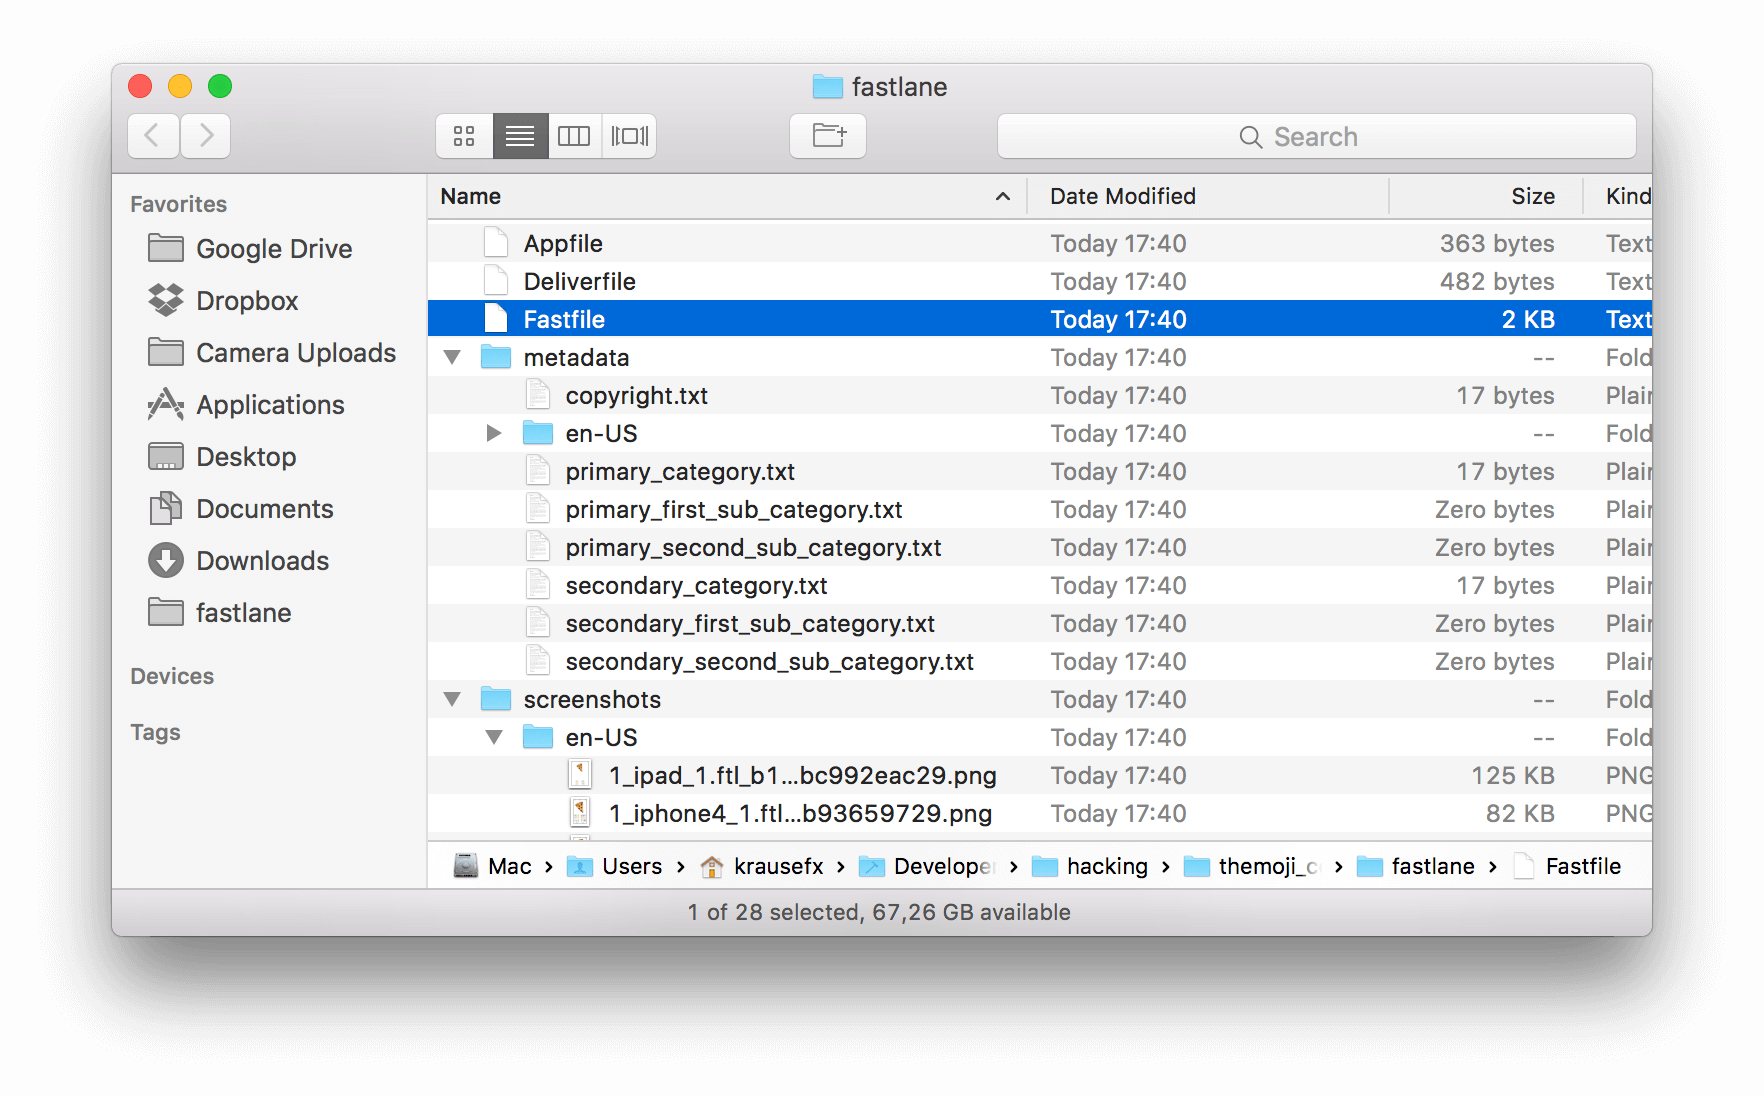
The most interesting file is fastlane/Fastfile , which contains all the information that is needed to distribute your app.
What’s next?
fastlane created all the required files for you. Now you can go ahead and customise fastlane to generate screenshots, or automatically distribute new builds, and much, much more. Here’re some examples:
Do note that if the automation you’re building requires connectivity with Apple’s servers, such as for code signing when building your app, or uploading your app to the App Store Connect, and so on, you will need to authenticate. Check out Authenticating with Apple services to learn the best ways to authenticate, catered for your specific use case.
Set up environment variables
fastlane requires some environment variables set up to run correctly. In particular, having your locale not set to a UTF-8 locale will cause issues with building and uploading your build. In your shell profile add the following lines:
You can find your shell profile at
/.zshrc depending on your system.
Use a Gemfile
It is recommended that you use a Gemfile to define your dependency on fastlane. This will clearly define the used fastlane version, and its dependencies, and will also speed up using fastlane.
Источник
Getting started with fastlane for Android
Installing fastlane
fastlane can be installed multiple ways. The preferred method is with Bundler. fastlane can also be installed directly through with Homebrew (if on macOS). It is possible to use macOS’s system Ruby but it’s not recommended as it can be hard to manage dependencies and cause conflicts.
Managed Ruby environment + Bundler (macOS/Linux/Windows)
Ruby
If you use macOS, system Ruby is not recommended. There is a variety of ways to install Ruby without having to modify your system environment. For macOS and Linux, rbenv is one of the most popular ways to manage your Ruby environment.
fastlane supports Ruby versions 2.5 or newer. Verify which Ruby version you’re using:
Bundler
It is recommended that you use Bundler and Gemfile to define your dependency on fastlane. This will clearly define the fastlane version to be used and its dependencies, and will also speed up fastlane execution.
- Install Bundler by running gem install bundler
- Create a ./Gemfile in the root directory of your project with the content
- Run bundle update and add both the ./Gemfile and the ./Gemfile.lock to version control
- Every time you run fastlane, use bundle exec fastlane [lane]
- On your CI, add bundle install as your first build step
- To update fastlane, just run bundle update fastlane
Homebrew (macOS)
This way you don’t have to install Ruby separately and instead homebrew installs the most adequate Ruby version for fastlane. See this page for details.
System Ruby + RubyGems (macOS/Linux/Windows)
This is not recommended for your local environment, but you can still install fastlane to system Ruby’s environment. Using sudo often occurs unwanted results later due to file permission and makes managing your environment harder.
Setting up fastlane
Navigate your terminal to your project’s directory and run
You’ll be asked to confirm that you’re ready to begin, and then for a few pieces of information. To get started quickly:
- Provide the package name for your application when asked (e.g. io.fabric.yourapp)
- Press enter when asked for the path to your json secret file
- Answer ‘n’ when asked if you plan on uploading info to Google Play via fastlane (we can set this up later)
That’s it! fastlane will automatically generate a configuration for you based on the information provided.
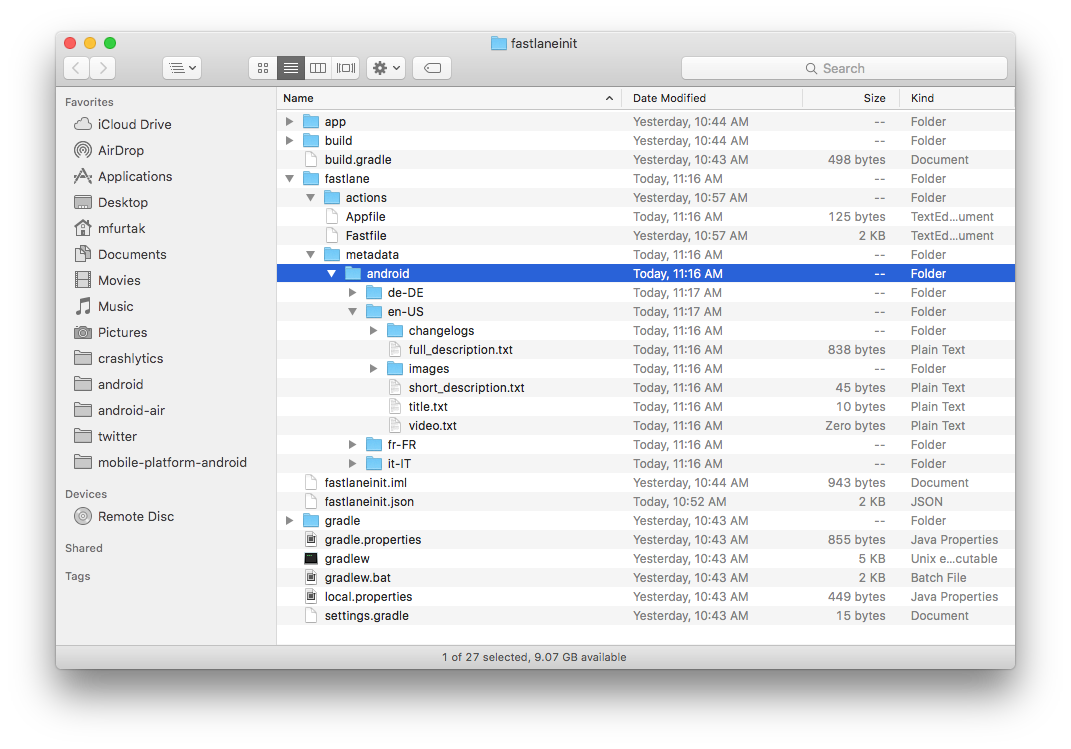
You can see the newly created ./fastlane directory, with the following files:
- Appfile which defines configuration information that is global to your app
- Fastfile which defines the «lanes» that drive the behavior of fastlane
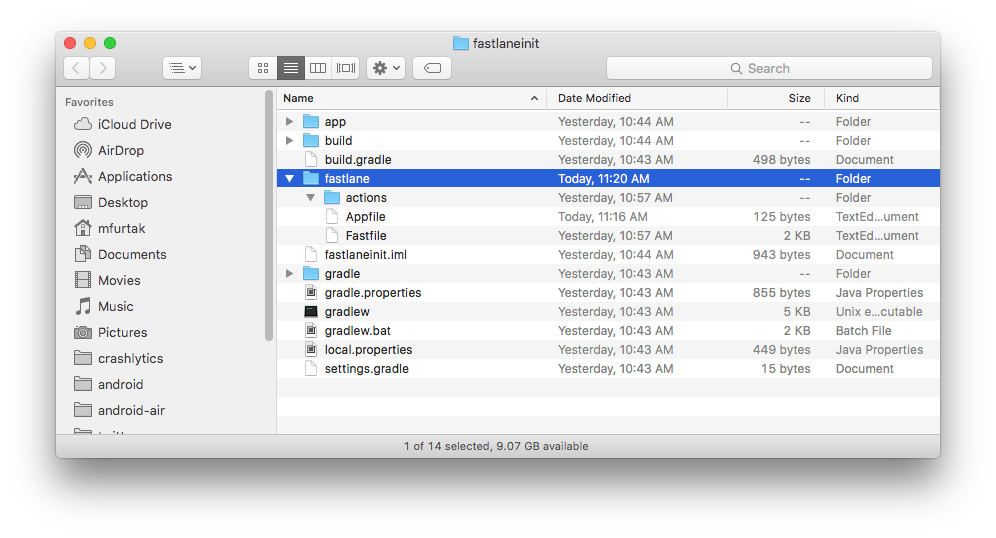
The most interesting file is fastlane/Fastfile , which contains all the information that is needed to distribute your app.
Setting up supply
supply is a fastlane tool that uploads app metadata, screenshots and binaries to Google Play. You can also select tracks for builds and promote builds to production!
For supply to be able to initialize, you need to have successfully uploaded an APK to your app in the Google Play Console at least once.
Setting it up requires downloading a credentials file from your Google Developers Service Account.
Collect your Google credentials
Tip: If you see Google Play Console or Google Developer Console in your local language, add &hl=en at the end of the URL (before any #. ) to switch to English.
- Open the Google Play Console
- Click Account Details, and note the Developer Account ID listed there
- Click Setup → API access
- Click the Create new service account button
- Follow the Google Cloud Platform link in the dialog, which opens a new tab/window:
- Click the CREATE SERVICE ACCOUNT button at the top of the Google Cloud Platform Console
- Verify that you are on the correct Google Cloud Platform Project by looking for the Developer Account ID from earlier within the light gray text in the second input, preceding .iam.gserviceaccount.com . If not, open the picker in the top navigation bar, and find the one with the ID that contains it.
- Provide a Service account name and click Create
- Click Select a role, then find and select Service Account User, and proceed
- Click the Done button
- Click on the Actions vertical three-dot icon of the service account you just created
- Select Manage keys on the menu
- Click ADD KEY ->Create New Key
- Make sure JSON is selected as the Key type , and click CREATE
- Save the file on your computer when prompted and remember where it was saved to
- Return to the Google Play Console tab, and click DONE to close the dialog
- Click on Grant Access for the newly added service account at the bottom of the screen (you may need to click Refresh service accounts before it shows up)
- Choose the permissions you’d like this account to have. We recommend Admin (all permissions), but you may want to manually select all checkboxes and leave out some of the Releases permissions such as Release to production
- Click Invite user to finish
You can use fastlane run validate_play_store_json_key json_key:/path/to/your/downloaded/file.json to test the connection to Google Play Store with the downloaded private key. Once that works, add the path to the JSON file to your Appfile:
The path is relative to where you normally run fastlane .
Configure supply
Edit your fastlane/Appfile and change the json_key_file line to have the path to your credentials file:
Fetch your app metadata
If your app has been created on the Google Play developer console, you’re ready to start using supply to manage it! Run:
and all of your current Google Play store metadata will be downloaded to fastlane/metadata/android .
Due to limitations of the Google Play API, supply can’t download existing screenshots or videos.
What’s next?
fastlane is ready to generate screenshots and automatically distribute new builds! To learn more, check out:
Set up environment variables
fastlane requires some environment variables set up to run correctly. In particular, having your locale not set to a UTF-8 locale will cause issues with building and uploading your build. In your shell profile add the following lines:
You can find your shell profile at
/.zshrc depending on your system.
Use a Gemfile
It is recommended that you use a Gemfile to define your dependency on fastlane. This will clearly define the used fastlane version, and its dependencies, and will also speed up using fastlane.
Источник


