- 3 способа подключения дисков HFS+ (macOS) в Windows
- MacDrive
- Paragon HFS+ for Windows
- HFSExplorer
- Комментариев: 2
- Как подружить Windows с файловой системой macOS
- У APFS есть один большой недостаток
- Как исправить ситуацию
- Как это работает
- Что еще есть интересного
- Move your data from a Windows PC to your Mac
- Before you begin
- Move your data
- How to move your information from a PC to your Mac
- After you move your data
- If you have issues moving your data
- What data can I transfer?
3 способа подключения дисков HFS+ (macOS) в Windows

К сожалению, Windows не понимает файловую систему HFS, используемую на Mac. macOS, в этом плане более лояльна к своим пользователям, тут уже «из коробки» имеется возможность чтения данных с разделов NTFS (но не записи). Тоже, странное ограничение, объяснения которому я не нахожу, потому как в составе любой unix-системы (Linux, FreeBSD), уже довольно давно имеется поддержка NTFS.
Стоп, Остапа опять понесло. сегодня, всё-таки, рассмотрим варианты подключения жестких дисков или флешек, отформатированных в Mac OS Extended (другое название HFS Plus или HFS+) в Windows. Спросите, что за трэш? Кому это вообще нужно? Однако, ситуации бывают разные. Сразу оговорюсь, и кого-то, возможно, расстрою, но поддержки новейшей файловой системы Apple File System (APFS), появившейся в macOS High Sierra, пока нет ни в одном из решений.
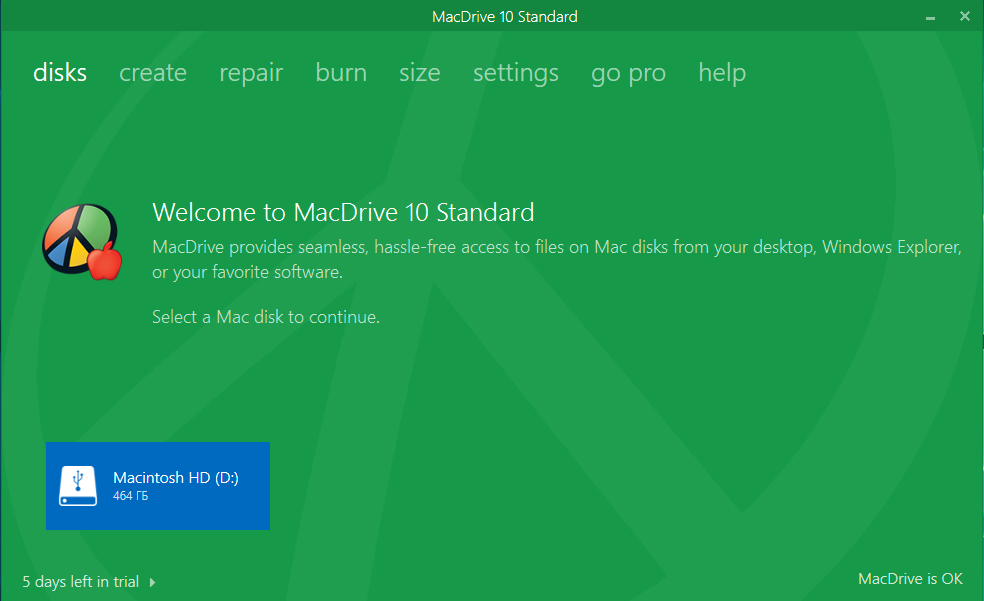
MacDrive

Начну обзор, пожалуй, с самого лучшего и стабильного решения — MacDrive. Хоть я только что и написал, что поддержки APFS нет, однако последняя версия MacDrive 10.5 + APFS (бета) всё-таки имеет возможность чтения дисков, отформатированных с новой файловой системой Apple. Статус бета-версии подразумевает, что её ещё продолжают тестировать и совершенствовать, однако уже сейчас, чтение и копирование файлов с подобных разделов уже работает. Правда, есть и еще одно ограничение — поддержка APFS, в настоящее время, доступна только в Windows 10 и MacDrive не поддерживает зашифрованные диски APFS (а вот это уже облом).
С дисками формата HFS+ никаких ограничений в работе нет, MacDrive позволяет легко читать и писать данные на эти разделы, а также открывать резервные копии Time Machine и копировать файлы из них на Windows-диски. В Windows добавляется специальный драйвер.
Стандартная лицензия на MacDrive стоит 49.99$. Имеется бесплатный пробный период на 5 дней, чего вполне может хватить, если не требуется постоянно работать с такими дисками.
Paragon HFS+ for Windows
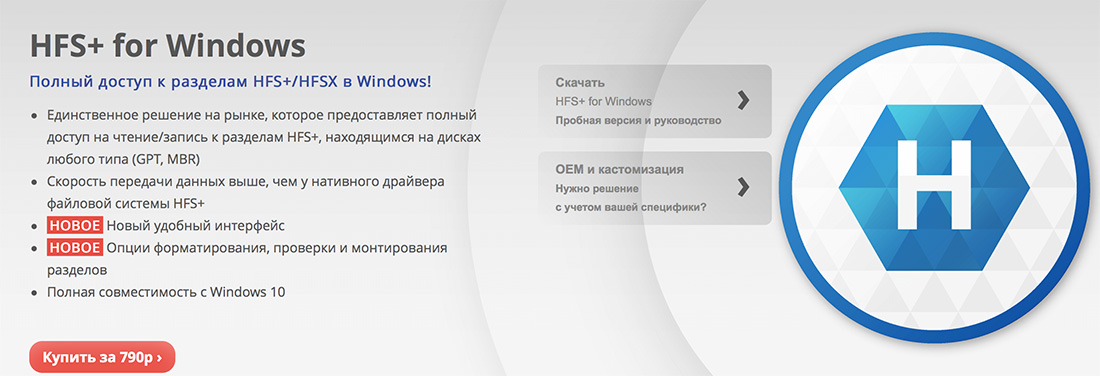
Уж не знаю почему, но Paragon HFS+ считается самым популярным драйвером для поддержки HFS+ в окнах, должен работать с дисками любого типа GPT и MBR. Почему я пишу об этом продукте с таким недоверием? Всё дело в том, что хоть на сайте и заявлена полная совместимость с Windows 10, однако эта хрень, после перезагрузки (а это действие обязательно после установки), благополучно завалила мне десятку в синий экран смерти.
И это, заметьте, на чистом свежеустановленном Windows 10, так что негативное влияние каких-то иных программ исключается. Пришлось загружаться в безопасном режиме (когда отключена загрузка дополнительных драйверов) и удалять нафиг эту поделку с компа. Причём, Paragon HFS+ не разу не бесплатная, лицензия обойдётся в 790 рублей (мне вполне хватило 10-дневной пробной версии).
HFSExplorer
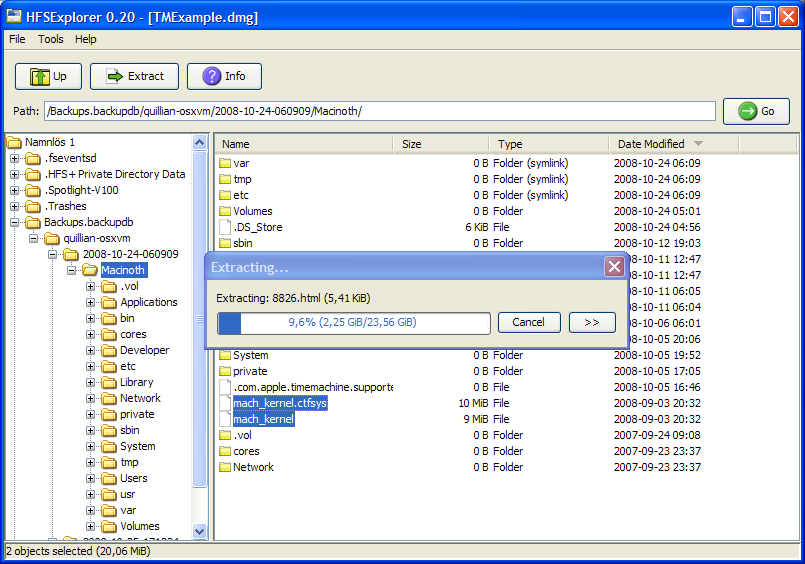
Первые два варианта поддержки HFS+ предполагали использование специальных драйверов в Windows, что позволяло обращаться к таким дискам на уровне системы и она их понимала. При использовании специальных приложений для тех же целей, доступ к файлам на разделах HFS+, будет возможен только внутри этих приложений. Мне известна пара подобных утилит — например, бесплатная HFSExplorer и TransMac (платная с пробным периодом).
HFSExplorer позволяет просматривать и копировать файлы с дисков HFS+. Также имеется возможность создания образов дисков HFS+ для последующей работы. Конечно, это не так удобно, как при использовании драйвера MacDrive, зато абсолютно бесплатно.
Если считаете статью полезной,
не ленитесь ставить лайки и делиться с друзьями.
Комментариев: 2
R-Studio понимает HFS+. Если вам ничего записывать не нужно, то достать инфу можно без проблем
Виталий Благодарю! ..только эта программа помогла мне открыть диск макинтоша
Как подружить Windows с файловой системой macOS
APFS — файловая система, разработанная компанией Apple для замены использовавшейся ранее HFS+.
На данной файловой системе уже работают девайсы под управлением последних версий iOS и macOS.
У APFS есть один большой недостаток
Как и предыдущие версии файловых систем, разработанных Apple, APFS не поддерживается операционной системой Windows.
Если с родной для «окон» NTFS на Mac можно как минимум читать данные, то APFS не увидит ни один Windows-компьютер.
Об этом рано или поздно начинают задумываться все владельцы нескольких рабочих компьютеров с разными операционными системами или владельцы Mac, часто запускающие Windows через BootCamp.
Ну не на флешке же переносить данные из macOS.
Как исправить ситуацию

Простое и изящное решение проблемы предлагают ребята из Paragon Software, которые просто профи в подобных делах. Подружить враждующие файловые системы можно при помощи специальной утилиты APFS for Windows.
Программа стала логичным развитием Paragon HFS+ for Windows. Со старыми Mac, которые не обновляются до macOS Sierra, нужно использовать именно её.
APFS for Windows представляет из себя системный драйвер для Windows, который и позволяет полноценно работать с накопителями, отформатированными в APFS. Поддерживается как чтение данных, так и запись на хорошей скорости.
Для доступа к важным данным предусмотрен режим монтирования read-only, защищающий оригиналы от перезаписи. APFS можно смонтировать даже из образа диска.
Поддерживаются как bit-to-bit raw copy диски, так и виртуальные диски популярных форматов VMDK,VDI,VHD,VHDX. Разработчики уже трудятся над поддержкой .E01 и .Ex0.
Как это работает

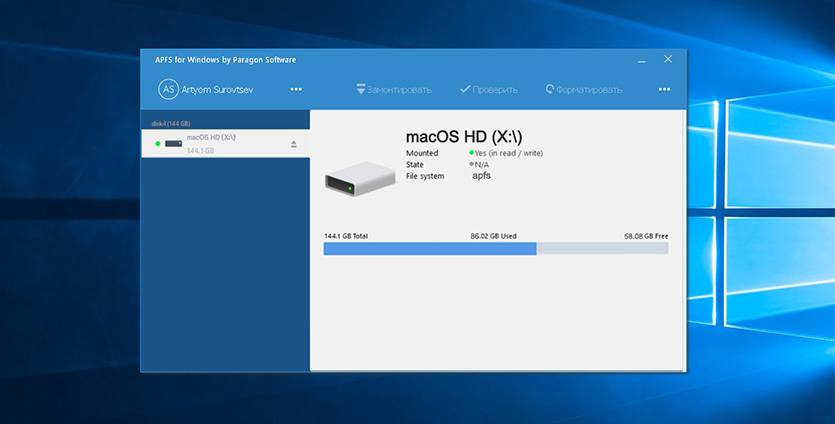
После установки Paragon APFS автоматически находит и монтирует все APFS-разделы и накопители, подключенные к компьютеру. После этого диски доступны в стандартном проводнике и сторонних файловых менеджерах.
Искать нужные данные довольно просто, ведь структура отображаемых папок будет идентична той, которую видит пользователь Mac.
Ничего сложного – разберется любая домохозяйка.
Что еще есть интересного

В macOS Mojave появилась поддержка шифрованных томов и APFS Container, которые составлены из нескольких физических разделов. Создатели Paragon APFS намерены добавить поддержку таких томов в следующих версиях продукта.
А вот прямая ссылка для загрузки.
Для тех, у кого «не приживется» файловая система APFS, в Paragon Software готовят приятный сюрприз — возможность конвертировать APFS обратно в HFS. Это уже тема для отдельной статьи.
Пока самое необходимое для всех активных пользователей macOS и Windows – APFS for Windows
Move your data from a Windows PC to your Mac
Use Windows Migration Assistant to transfer your pictures, documents, and other data from a Windows PC to your Mac.
Windows Migration Assistant transfers your contacts, calendars, email accounts, and more from a PC. It migrates this data to the appropriate places on your Mac. After migrating data to your Mac, authorize your computer for iTunes Store purchases. It’s important to authorize before you sync or play content that you download from the iTunes Store.
If you’re migrating from one Mac to another Mac, follow the steps to move your content to a new Mac.
Before you begin
To prepare for a smooth migration:
- Make sure that Windows is up to date. Migration Assistant works with Windows 7 and later.
- Make sure that you know the name and password of an administrator account on your PC.
- Connect your Mac and PC to the same network, such as your home Wi-Fi network. Or connect an Ethernet cable between the ports on your Mac and PC to create a direct network connection. Some Mac models require an Ethernet adapter, such as the Belkin USB-C to Gigabit Ethernet Adapter or Apple Thunderbolt to Gigabit Ethernet Adapter.
- If you’re using Microsoft OneDrive on your PC, follow Microsoft’s instructions for uninstalling OneDrive before continuing. You can reinstall OneDrive after migration is complete.
Then use the check disk (chkdsk) utility on your PC to make sure that your Windows hard drive doesn’t have any issues:
- Right-click the Start button, then click Run.
- Type cmd and press Enter. Command Prompt opens.
- At the prompt, type chkdsk and press Enter.
- If the utility reports that it found problems, type the following, where drive is the letter that represents your Windows startup disk, such as D:
- Press Enter.
- At the prompt, type Y , then restart your PC.
- Repeat this process until the check disk utility reports no issues. If the utility can’t fix every issue that it finds, you might need to have your PC serviced. Then migrate your data to your Mac.
Move your data
This section guides you through migration, post-migration, and what to do if the steps don’t work for you.
How to move your information from a PC to your Mac
- On your PC, download and install the appropriate Windows Migration Assistant, based on the version of macOS on your Mac:
- Windows Migration Assistant for macOS Big Sur
- Windows Migration Assistant for macOS Mojave and macOS Catalina
- Windows Migration Assistant for macOS Sierra and High Sierra
- Windows Migration Assistant for OS X El Capitan or earlier
- Quit any open Windows apps.
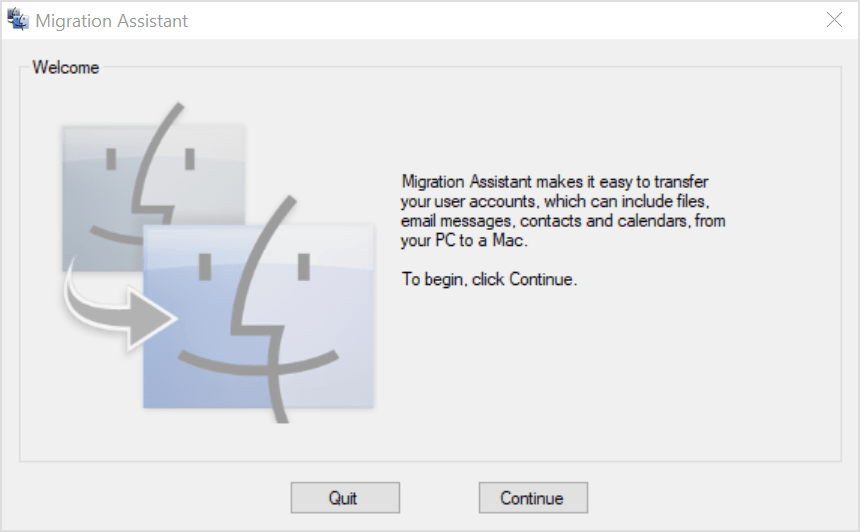
- Open Windows Migration Assistant, then click Continue.

- Start up your Mac. Setup Assistant automatically opens the first time you turn on your Mac. If you’ve already set up your Mac, open Migration Assistant, which is in the Utilities folder of your Applications folder.
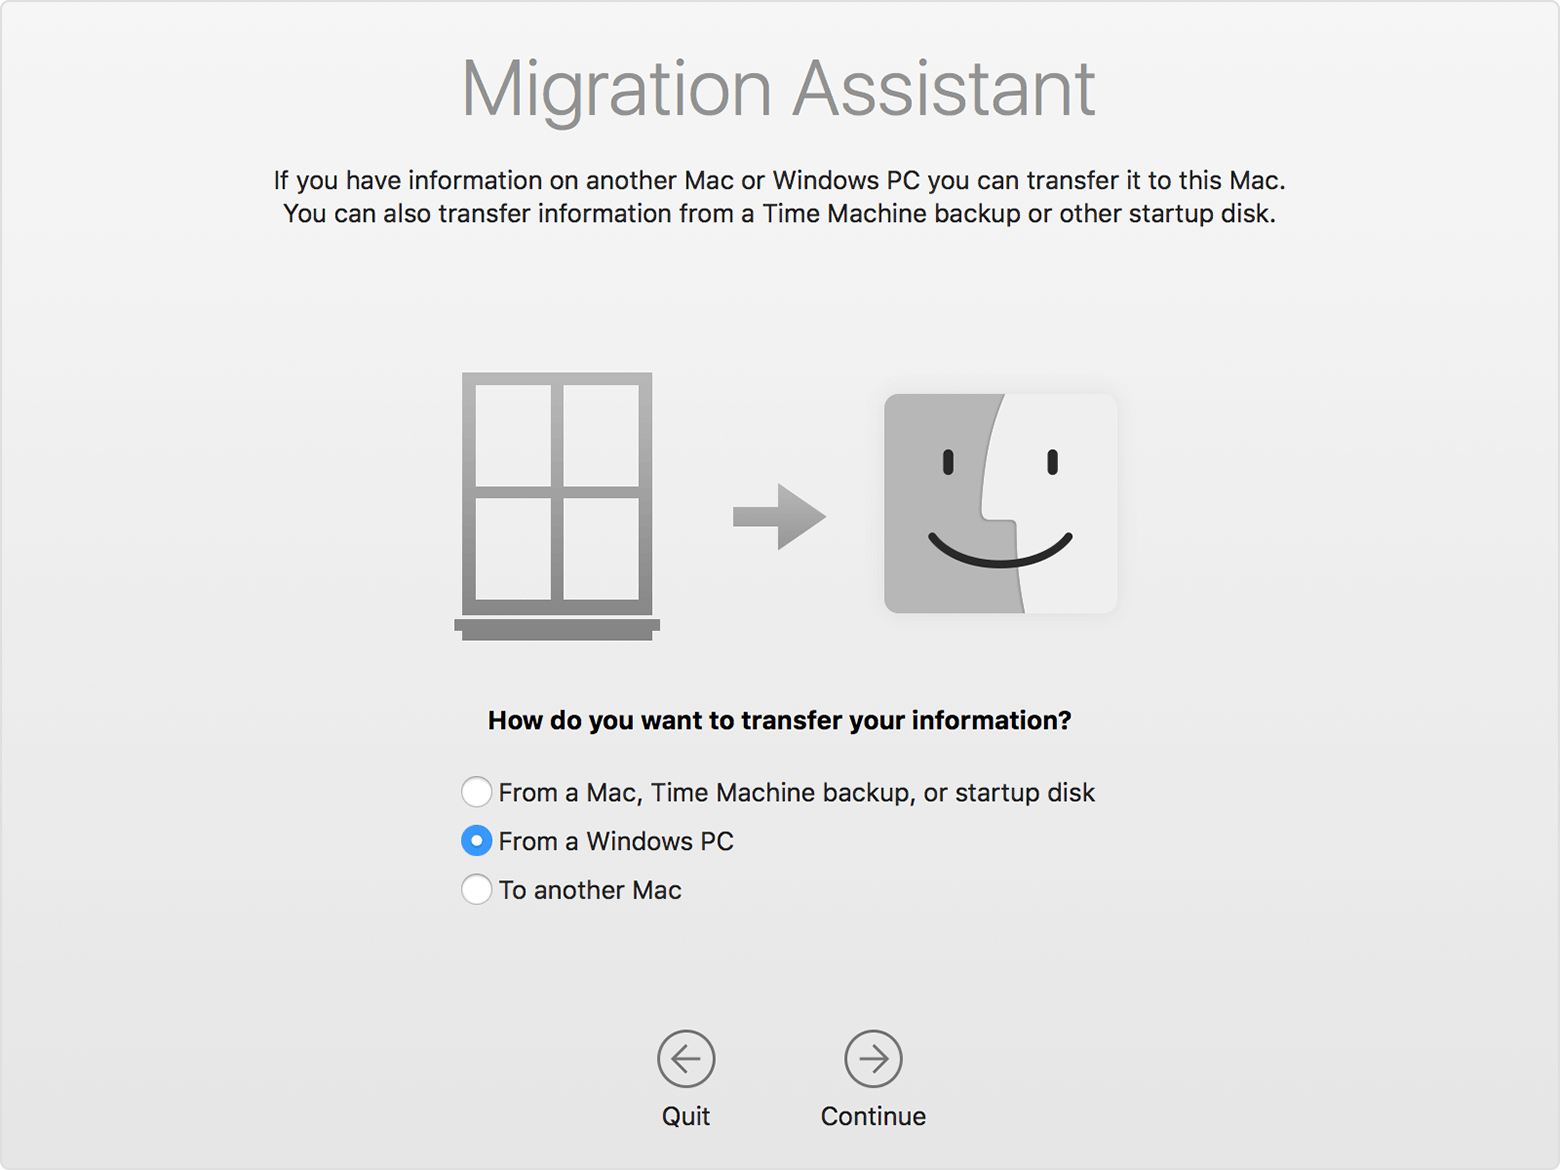
- On your Mac, follow the onscreen prompts until you get to the migration pane of the assistant. Select the option to transfer your information “From a Windows PC,” then click Continue.
- When prompted, enter an administrator name and password.
- Click Continue to close any other open apps.
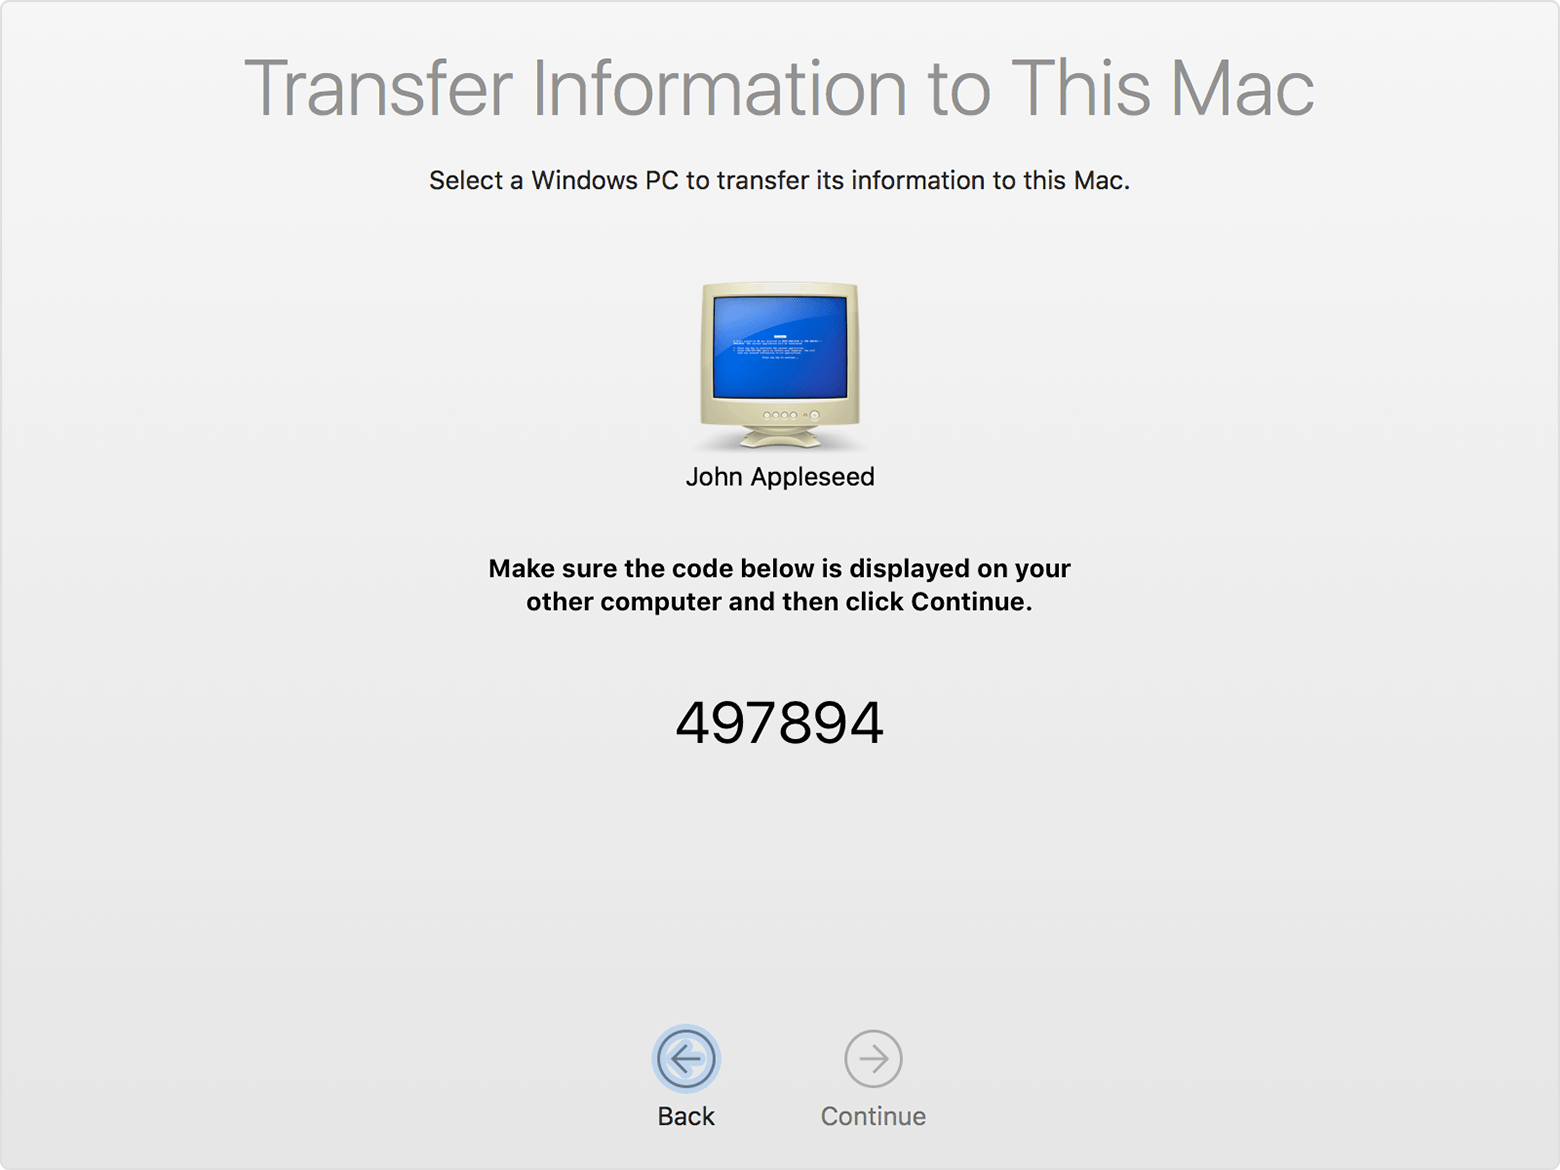
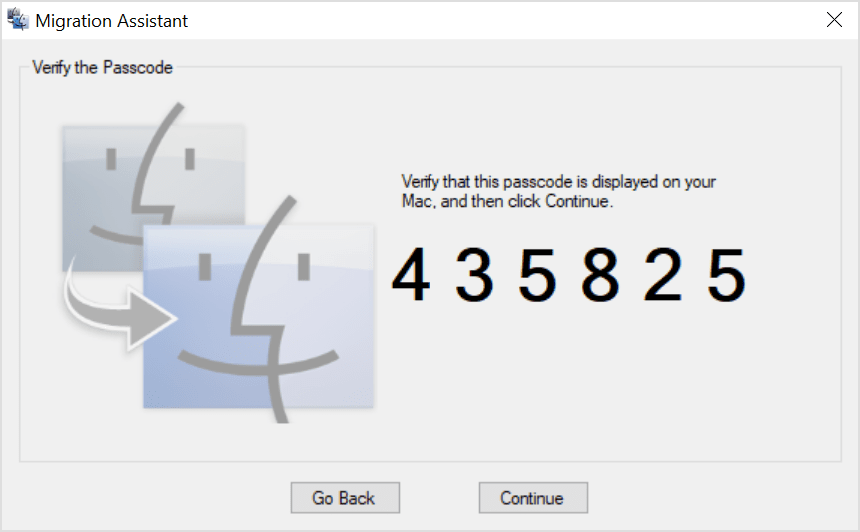
- In the migration window on your Mac, select your PC from the list of available computers. Then wait for the PC to show the same passcode that your Mac shows.
- When both computers display the same passcode, click Continue on your PC and Mac.
- Your Mac scans the drives on your PC to build a list of information to migrate. When the scan completes, select the information that you want to migrate to your Mac and click Continue. Learn about some of the data that you can transfer.
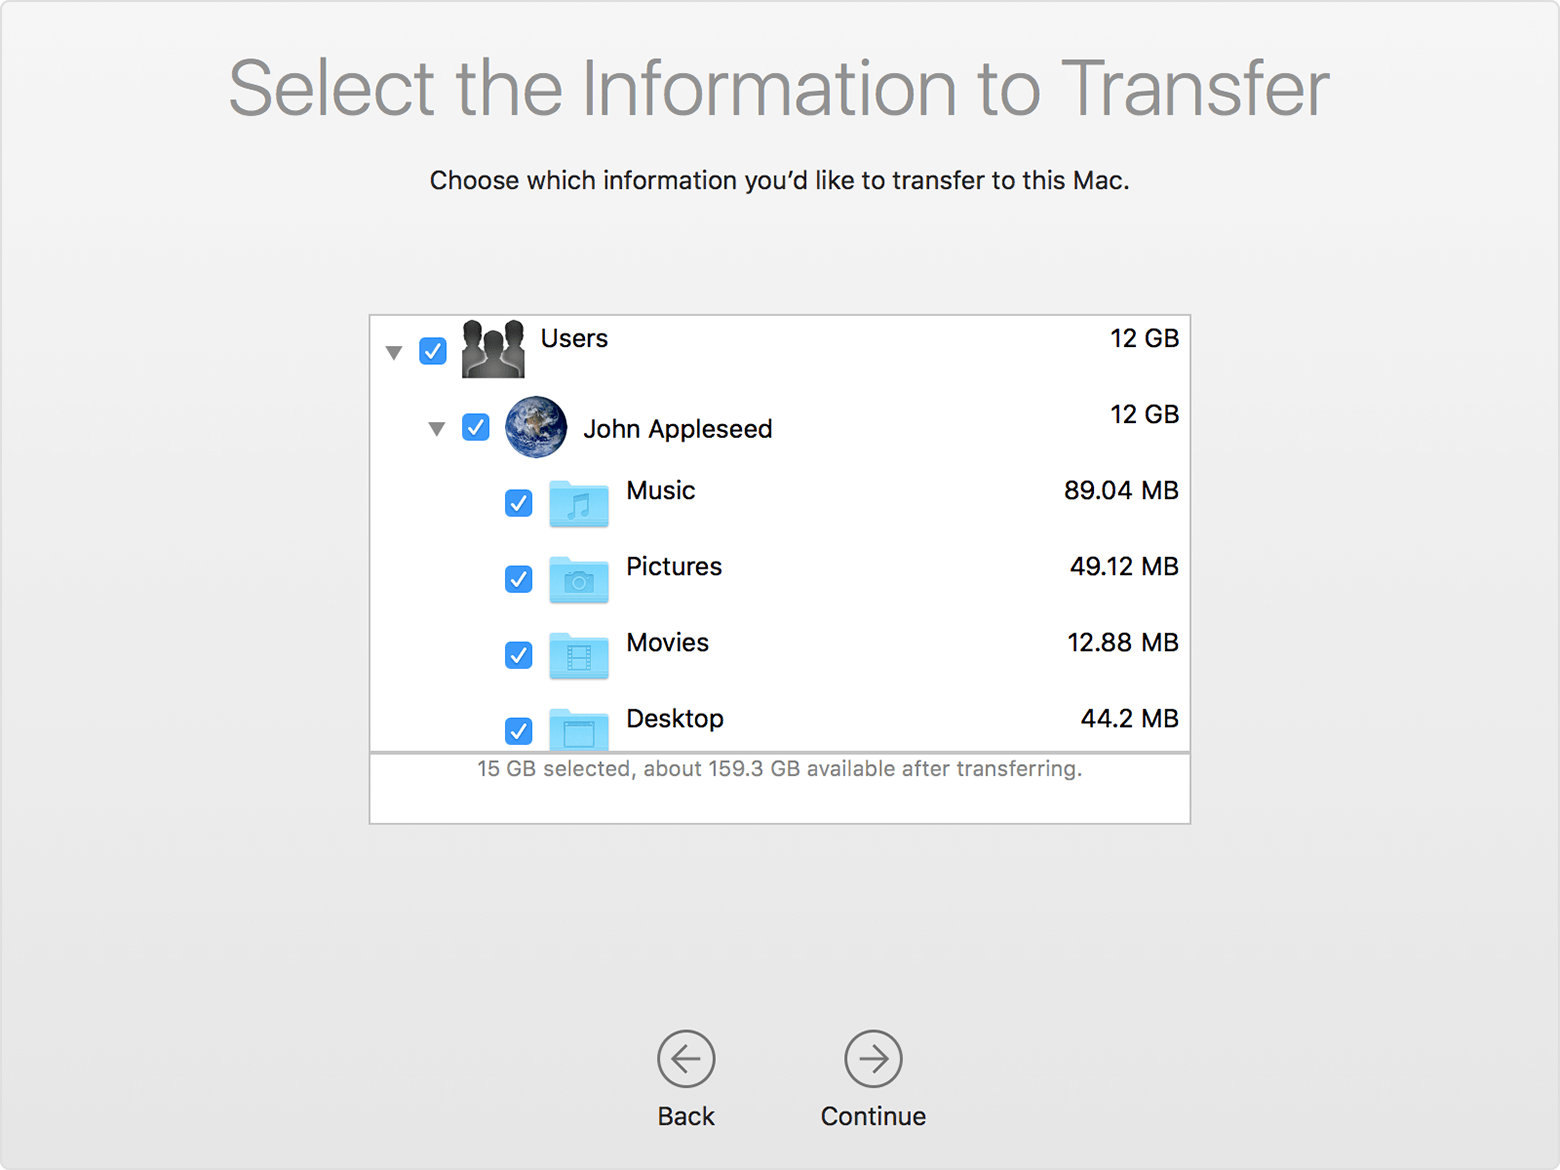
You can watch the progress and estimated time remaining on both the PC and your Mac. They tell you when migration is complete.
After you move your data
When migration completes, close Windows Migration Assistant on your PC. Then log in to the new user account on your Mac. The first time you log in to a user account migrated from your PC, you’re asked to set a password. You can use the same password that you used on your PC, or create a new password.
After logging in to the user account that you migrated, authorize your computer for iTunes Store purchases. It’s important to authorize before you sync or play content downloaded from the iTunes Store.
If you have issues moving your data
- Quit all open apps on your PC, then try migrating your content again. For example, you can press Alt-Tab to choose an open application, then press Alt-F4 to quit it.
- If your PC doesn’t appear in the Setup Assistant or Migration Assistant window on your Mac, make sure the computers are connected to the same network. You can create a network by connecting a single Ethernet cable between your Mac and PC. If that doesn’t help, check for firewall software on your PC and turn it off. After migration completes, you can turn firewall software on again.
- If Migration Assistant doesn’t open on your PC, turn off any antivirus software on your PC. Then try to open Migration Assistant again. After migration completes. You can turn that software on again.
- If you still can’t migrate your information successfully, you can use an external drive or file sharing to manually copy important data to your Mac.
What data can I transfer?
Migration Assistant lets you choose the data to move to your Mac. Here’s what moves over for specific apps and data types:
Email, contacts, and calendar information
Email messages, email-account settings, contacts, and appointments move based on which version of Windows you’re using and which accounts you have.
Outlook 1
Data from 32-bit versions of Outlook in Windows 7 and later move as follows:
- People move to Contacts 2
- Appointments move to the Calendar app
- IMAP and Exchange settings and messages move to the Mail app
- POP settings and messages move to Mail 2
Windows Live Mail
Data from Windows Live Mail in Windows 7 and later moves as follows:
- IMAP settings and messages move to Mail
- POP settings and messages move to Mail 2
Windows Mail
Data from Windows Mail in Windows 7 and later (excluding Windows 8) move as follows:
- IMAP settings and messages move to Mail
- POP settings and messages move to Mail 2
- People move to Contacts
Bookmarks
Bookmarks from Internet Explorer, Safari for Windows, and Firefox move to Safari.
System settings
Language and location settings, and custom desktop pictures move to System Preferences. Your web browser homepage moves to Safari preferences.
Pictures
Photos and other images move to your home folder. You can then add them to Photos, or open Photos and let it search your Mac for photos to import.
iTunes content
Migration Assistant transfers your iTunes media as follows: music to the Apple Music app, videos to the Apple TV app, podcasts to the Apple Podcasts app, and audiobooks to the Apple Books app.
Other files
Migration Assistant also moves these files:
- Files from the top-level folder of the currently logged-in user’s home directory
- Non-system files located in the Windows or Program Files folders
- Top-level folders located on the Windows system disk and other attached disks
1. Migration Assistant doesn’t support 64-bit versions of Outlook. You can manually migrate Mail, Contacts, or Calendars from Outlook 2013 or Outlook 2016 by signing in and entering the content on your Mac manually.
2. Migration Assistant transfers only the Mail or Contacts data that belongs to the logged-in Windows user. To transfer data from another user account, use Migration Assistant again while you’re logged in to another Windows account. Each time you migrate, your Mac creates a new user account.
Information about products not manufactured by Apple, or independent websites not controlled or tested by Apple, is provided without recommendation or endorsement. Apple assumes no responsibility with regard to the selection, performance, or use of third-party websites or products. Apple makes no representations regarding third-party website accuracy or reliability. Contact the vendor for additional information.


