Mac os icons pack windows


Oliver, ну да, вы же предоставили ссылки на свой текст
Все что я сказал выше это мое мнение и оно основано на опыте и банальной логике. Даже тот же неоморфизм был назван в честь скевоморфизма и его задача лишь придавать объем дизайну. Излишний объем, как по мне, но все же. И ничего общего с реальными объектами там нет.
Суть скевоморфизма не только отрисовать что то, что бы оно было похоже на реальную вещь но и передать ощущение реальности этой нарисованной вещи. Передать это через экран можно лишь с помощью объема. Сейчас скевоморфизм в начальном его понимании не используется, но используются его основной принцип — объемы и тени. Они давно используются и во флет дизайне, но умеренно. Во флете иконка будет плоской, но левитировать за счёт тени. А тут сама иконка объемная, все ее элементы.
А шляпа это, потому что это выглядит олдскульно. Тем более что наш мозг лучше воспринимает информацию с простых объектов. Флэт это по сути идеальный дизайн. Его можно и нужно улучшать, но это идеальный дизайн для нашего мозга.
Источник
Изменение значков файлов и папок на Mac
Для любого файла или папки можно выбрать произвольный значок, использовав для этого собственные картинки, значки, загруженные из интернета, или значок другого файла или папки.
Как использовать свое изображение или изображение из Интернета
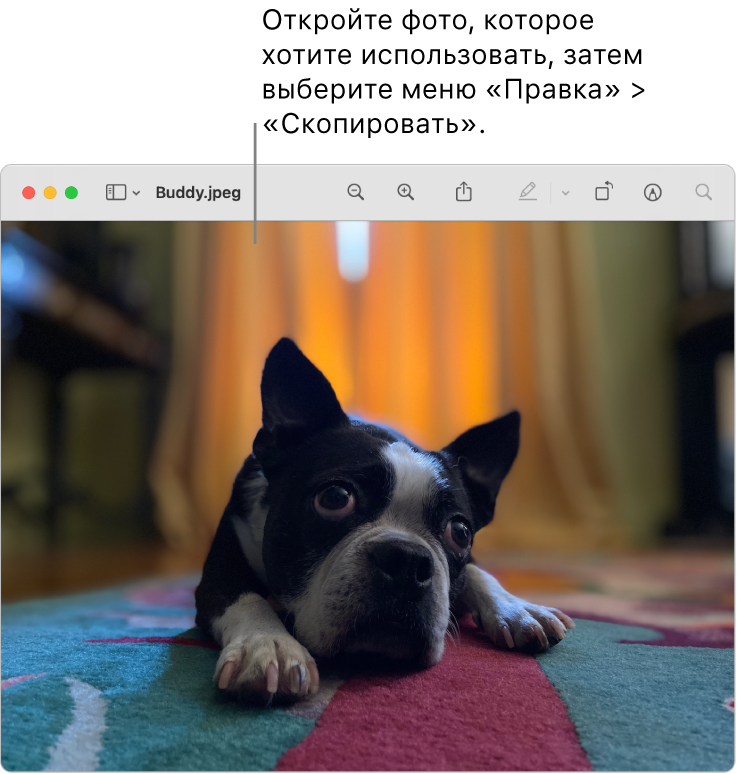
На Mac скопируйте изображение, которое Вы хотите использовать, в буфер обмена.
Один из способов — дважды нажать файл изображения, чтобы открыть его в приложении «Просмотр»  , а затем выбрать «Правка» > «Скопировать».
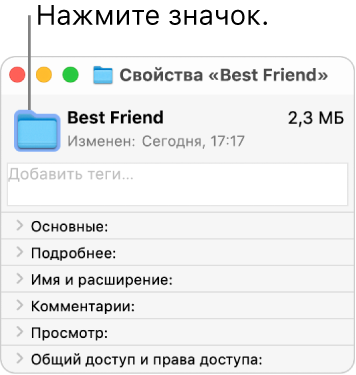
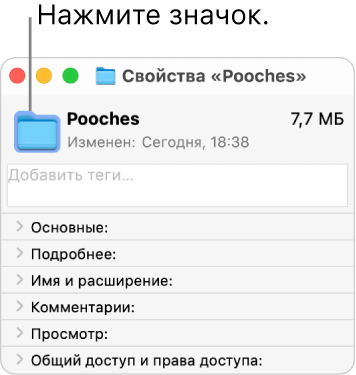
Выберите файл или папку, значок которых Вы хотите изменить, затем выберите «Файл» > «Свойства».
В верхней части окна «Свойства» нажмите значок.
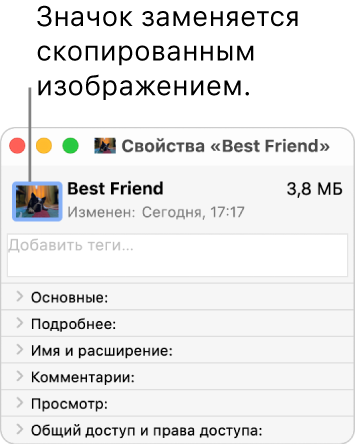
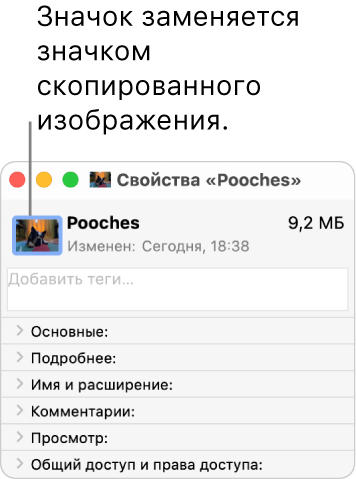
Выберите «Правка» > «Вставить».
Если пункт «Правка» > «Вставить» недоступен, убедитесь, что нажимаете значок в верхней части окна «Свойства».
Если после вставки вместо собственного изображения Вы видите общее изображение JPEG или PNG, убедитесь, что перед вставкой выбрали «Правка» > «Скопировать».
Как использовать значок от другого файла или папки
На Mac выберите файл или папку, значок которых Вы хотите использовать, затем выберите «Файл» > «Свойства».
В верхней части окна «Свойства» нажмите значок, затем выберите «Правка» > «Копировать».
Выберите другой файл или папку и нажмите «Файл» > «Свойства».
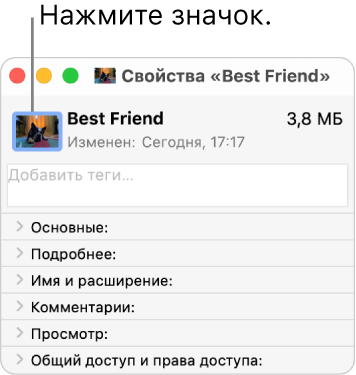
Нажмите значок в верхней части окна «Свойства».
Выберите «Правка» > «Вставить».
Значок папки заменяется выбранным изображением.
Если пункт «Правка» > «Вставить» недоступен, убедитесь, что нажимаете значок в верхней части окна «Свойства».
Если после вставки вместо собственного изображения Вы видите общее изображение JPEG или PNG, убедитесь, что перед выбором пункта «Правка» > «Скопировать» Вы нажали значок в окне «Свойства».
Как вернуться к исходному значку
На Mac выберите файл или папку и нажмите «Файл» > «Свойства».
В верхней части окна «Свойства» выберите созданный Вами значок, затем выберите «Правка» > «Вырезать».
Источник
Mac os icons pack windows
A document icon represents a file that uses a document type your app supports. Traditionally, a document icon looks like a piece of paper with its top-right corner folded down. This distinctive appearance helps people distinguish documents from apps and other content, even when icon sizes are small.
If you don’t supply a document icon for a file type you support, macOS 11 creates one for you by compositing your app icon and the file’s extension onto the canvas. For example, Preview uses a system-generated document icon to represent JPG files.
NOTE If your app runs in earlier versions of macOS, you should supply a legacy document icon. If you let earlier versions of macOS generate a document icon for you, you get different results in different versions. Specifically, macOS 10.15 creates a document icon by compositing your app icon, but not the file extension; macOS 10.14 and earlier use a generic document background if you don’t supply any assets.
If your app opens one or more custom file types, you can create custom document icons to represent them. For example, Xcode uses custom document icons to help people distinguish documents for projects, AR objects, and Swift code files.
To create a custom document icon, you can supply any combination of background fill, center image, and text. macOS 11 layers, positions, and masks these elements as needed and composites them onto the familiar folded-corner icon shape.
macOS 11 composites the elements you supply to produce your custom document icon.
Apple Design Resources provides a template you can use to create a custom background fill and center image for a document icon. As you use this template, follow the guidelines below.
Design simple images that clearly communicate the document type. Whether you use a background fill, a center image, or both, prefer uncomplicated shapes and a reduced palette of distinct colors. Your document icon can display as small as 16×16 pt, so you want to create designs that remain recognizable at every size.
Designing a single, expressive image for the background fill can be a great way to help people understand and recognize a document type. For example, Xcode and TextEdit both use rich background images that don’t include a center image.
Consider reducing complexity in the small versions of your icon. Icon details that are clear in large versions can look blurry and be hard to recognize in small versions. For example, to ensure that the grid lines in the custom heart document icon remain clear in intermediate sizes, you might use fewer lines and thicken them by aligning them to the reduced pixel grid. In the 16×16 px size, you might remove the lines altogether.
The 32×32 px icon has fewer grid lines and a thicker EKG line.
The 16×16 px @2x icon retains the EKG line but has no grid lines.
The 16×16 px @1x icon has no EKG line and no grid lines.
Avoid placing important content in the top-right corner of your background fill. The system automatically masks your image to fit the document icon shape and draws the white folded corner on top of the fill. Create a set of background images in the sizes listed below.
- 512×512 pt (1024×1024 px @2x)
- 256×256 pt (512×512 px @2x)
- 128×128 pt (256×256 px @2x)
- 32×32 pt (64×64 px @2x)
- 16×16 pt (32×32 px @2x)
If a familiar object or glyph can convey a document’s type or its connection with your app, consider creating a center image that depicts it. Design a simple, unambiguous image that’s clear and recognizable at every size. The center image measures half the size of the overall document icon canvas. For example, to create a center image for a 32×32 pt document icon, use an image canvas that measures 16×16 pt. You can provide center images in the following sizes:
- 256×256 pt (512×512 px @2x)
- 128×128 pt (256×256 px @2x)
- 32×32 pt (64×64 px @2x)
- 16×16 pt (32×32 px @2x)
Define a margin that measures about 10% of the image canvas and keep most of the image within it. Although parts of the image can extend into this margin for optical alignment, it’s best when the image occupies about 80% of the image canvas. For example, most of the center image in a 256×256 pt canvas should fit in an area that measures 205×205 pt.
Specify a succinct term if it helps people understand your document type. By default, the system displays a document’s extension at the bottom edge of the document icon, but if the extension is unfamiliar you can supply a more descriptive term. For example, the document icon for a SceneKit scene file uses the term scene instead of the file extension scn. The system automatically scales the extension text to fit in the document icon, so be sure to use a term that’s short enough to be readable at small sizes. By default, the system capitalizes every letter in the text.
Источник


