- Как установить MySQL на Mac OS?
- Подготовка
- Как установить MySQL на Mac OS?
- Как пользоваться?
- Запуск
- Перезапуск
- Устанавливаем пароль на root
- Удаленный доступ к серверу
- Как удалить MySQL на Mac OS?
- brew install mysql on macOS
- 17 Answers 17
- How do I install command line MySQL client on mac?
- 15 Answers 15
- Top 5 MySQL clients for Mac
- 1 TablePlus permalink
- 2 phpMyAdmin permalink
- 3 DBeaver permalink
- 4 Querious permalink
- 5 Sequel Pro permalink
- Thank you for reading, and let’s connect! permalink
- Install MySQL on your Mac
- For Beginners
- Installing MySQL on your own Mac
- Using the official .pkg installer
- MAMP / XAMPP on Mac OS X
- Install from Source
- Using MacPorts
- Mac OS X Server
- Installing MySQL on a Virtual Private Server (VPS)
Как установить MySQL на Mac OS?
MySQL установить на компьютер с MacOS очень просто. Это сделать также просто как установить на Linux. Для установки нам понадобится пакетный менеджер brew и 5-10 минут свободного времени.
Подготовка
Как Вы уже поняли для установки MySQL на Mac OS нам понадобится brew, в котором есть все из мира Linux. Если у Вас его еще нет на Mac`е, то установить можно командой:
Многие разрабы считают, что такие вещи захламляют Mac и им нет места на их компьютере. И что предпочтительно устанавливать MysSQL через докер. Но brew очень бережно относится к вашей операционной системе и при выполнении команды на удаления, он полностью удалить MySQL из ОС.
Как установить MySQL на Mac OS?
Для установки нужно выполнить команду:
Если Вам по какой-то причине нужно установить определенную версию, то в конце указываем mysql@нужная_версия . Примерно вот так — brew install mysql@5.7
Чтобы Ваш мак «научился» работать с алиасом – mysql, нужно создать линк. Это нужно чтобы в консоли было удобно управлять через команду mysql. Для этого выполним:
Если был установлен MySQL 5.7, то команда будет такой: brew link —force mysql@5.7
Если хотите, чтобы MySQL запускался всегда при включении компа, то вот команда для этого:
Эта команда не зависит от версией установленного MySQL.
Вот и все! Сервер баз данных MySQL установлен на ваш Mac OS.
Как пользоваться?
Запуск
Если Вы не сделали автоматическую загрузку сервиса MySQL, то запустить его вручную можно вот так:
Перезапуск
Устанавливаем пароль на root
По умолчанию на root в MySQL не установлен пароль. Исправить просто! Выполняем по очереди команды:
Не забываем, что:
- password — это ваш пароль,
- localhost — это означает, что подключиться к серверу можно будет только с локальной машины. Если нужен доступ извне, то меняем это на знак % или 192.168.0.0, если для безопасности нужно ограничить подключение только из локальной сети.
Удаленный доступ к серверу
Файл конфигурации MySQL на MacOS находится по адресу /usr/local/etc/my.ini. По умлчанию доступ к серверу ограничен только локальной машиной, где он установлен. Чтобы снять это ограничение, нужно в файле конфигурации внести изменения:
Как удалить MySQL на Mac OS?
С пакетным менеджером brew также легко удалять пакеты, как их устанавливать.
Для удаления Mysql на Mac OS воспользуйтесь командой:
Источник
brew install mysql on macOS
I’m trying to setup up MySQL on mac os 10.6 using Homebrew by brew install mysql 5.1.52 .
Everything goes well and I am also successful with the mysql_install_db .
However when I try to connect to the server using:
I’ve tried to access mysqladmin or mysql using -u root -proot as well,
but it doesn’t work with or without password.
This is a brand new installation on a brand new machine and as far as I know the new installation must be accessible without a root password. I also tried:

17 Answers 17
I think one can end up in this position with older versions of mysql already installed. I had the same problem and none of the above solutions worked for me. I fixed it thus:
Used brew’s remove & cleanup commands, unloaded the launchctl script, then deleted the mysql directory in /usr/local/var , deleted my existing /etc/my.cnf (leave that one up to you, should it apply) and launchctl plist
Updated the string for the plist. Note also your alternate security script directory will be based on which version of MySQL you are installing.
I then started from scratch:
- installed mysql with brew install mysql
ran the commands brew suggested: (see note: below)
Start mysql with mysql.server start command, to be able to log on it
Used the alternate security script:
Followed the launchctl section from the brew package script output such as,
Note: the —force bit on brew cleanup will also cleanup outdated kegs, think it’s a new-ish homebrew feature.
Note the second: a commenter says step 2 is not required. I don’t want to test it, so YMMV!
Источник
How do I install command line MySQL client on mac?
I want to install the MySQL client for the command line, not a GUI. I have searched over the web but only found instructions on installing the MySQL server.
15 Answers 15
/.bash_profile and then run source
/.bash_profile or load a new instance of terminal.
If you have already installed MySQL from the disk image (dmg) from http://dev.mysql.com/downloads/), open a terminal, run:
then, reload .bash_profile by running following command:
You can now use mysql to connect to any mysql server:
This strictly installs a command line client, without the other overhead:
Install Homebrew (if you don’t have it):
Then, install mysql-client :
Then, add the mysql-client binary directory to your PATH:
Finally, reload your bash profile:
Then you should be able to run mysql in a terminal, if not try opening a new terminal
/.zshrc if using default zsh (default in recent macOS)
Mysql has a client-only set of utilities:
Mac OSX version available.

There is now a mysql-client formula.
brew install mysql-client
For installing mysql-shell with homebrew, run
you can then launch the mysql shell with
if you want to enter SQL mode directly, run
Open the «MySQL Workbench» DMG file and
Eject the DMG disk
If you installed from the DMG on a mac, it created a mysql client but did not put it in your user path.
Add this to your .bash_profile :
This will let you run mysql from anywhere as you.
Installation command from brew:
Look at what you can do:
Run query from mysqlsh client installed:
As stated by the earlier answer you can get both mysql server and client libs by running
brew install mysql .
There is also client only installation. To install only client libraries run
brew install mysql-connector-c
In order to run these commands, you need homebrew package manager in your mac. You can install it by running
/usr/bin/ruby -e «$(curl -fsSL https://raw.githubusercontent.com/Homebrew/install/master/install)»

Using MacPorts you can install the client with:
You also need to select the installed version as your mysql
The server is only installed if you append -server to the package name (e.g. mysql57-server )
The easiest way would be to install mysql server or workbench, copy the mysql client somewhere, update your path settings and then delete whatever you installed to get the executable in the first place.
The mysql client is available in macOS ports. If you don’t have this excellent third party package manager already installed, it is available from here: https://www.macports.org/
Once you have installed macports, open a terminal and make sure everything is up to date:
There are multiple different versions of MySQL and mariadb (community fork of MySQL) available in the ports repos. List available versions using the following command:
I recommend choosing mariadb over mysql as it is, mostly, a drop in replacement (https://mariadb.com/kb/en/mariadb-vs-mysql-compatibility/) and has excellent community support.
If applicable, choose which version of mariadb you want (a list of versions of mariadb is available here: https://downloads.mariadb.org/mariadb/+releases/). If you’re not bothered, install the default version:
Mariadb (including the mysql-compatible command line client) is now available on your system. On my system, the CLI client resides in the following location:
It’s obviously a bit inconvenient to type out the full path, /opt/local/bin/mysql each time you want to use the client. Ports has already thought of this problem. To view available versions of mysql on your system, run:
Choose one from the list. For example, to use mariadb as the default mysql client:
Now open a fresh terminal window and you should be able to start the mariadb mysql CLI client:
Источник
Top 5 MySQL clients for Mac
25 February, 2021 — 3 minute read
When it comes to databases, MySQL is a big player and widely used. Today we’ll be looking at some MySQL clients we can use on Mac to view these databases.
TL;DR: My personal favorite for Mac is TablePlus. It offers a free variant which is sufficient enough.
1 TablePlus permalink
TablePlus is the MySQL client I’m using currently. I’m still on the free plan, which only allows you to have two tabs open at a time, which is enough for me.

- Clear interface
- Quickly edit multiple rows at once
- RAW query always visible
- Only two tabs on the free version
- No click-through for linked queries
2 phpMyAdmin permalink
phpMyAdmin is another excellent resource to view your MySQL databases. It’s a very good one since most servers will come with phpMyAdmin installed. Making it a good universal interface.
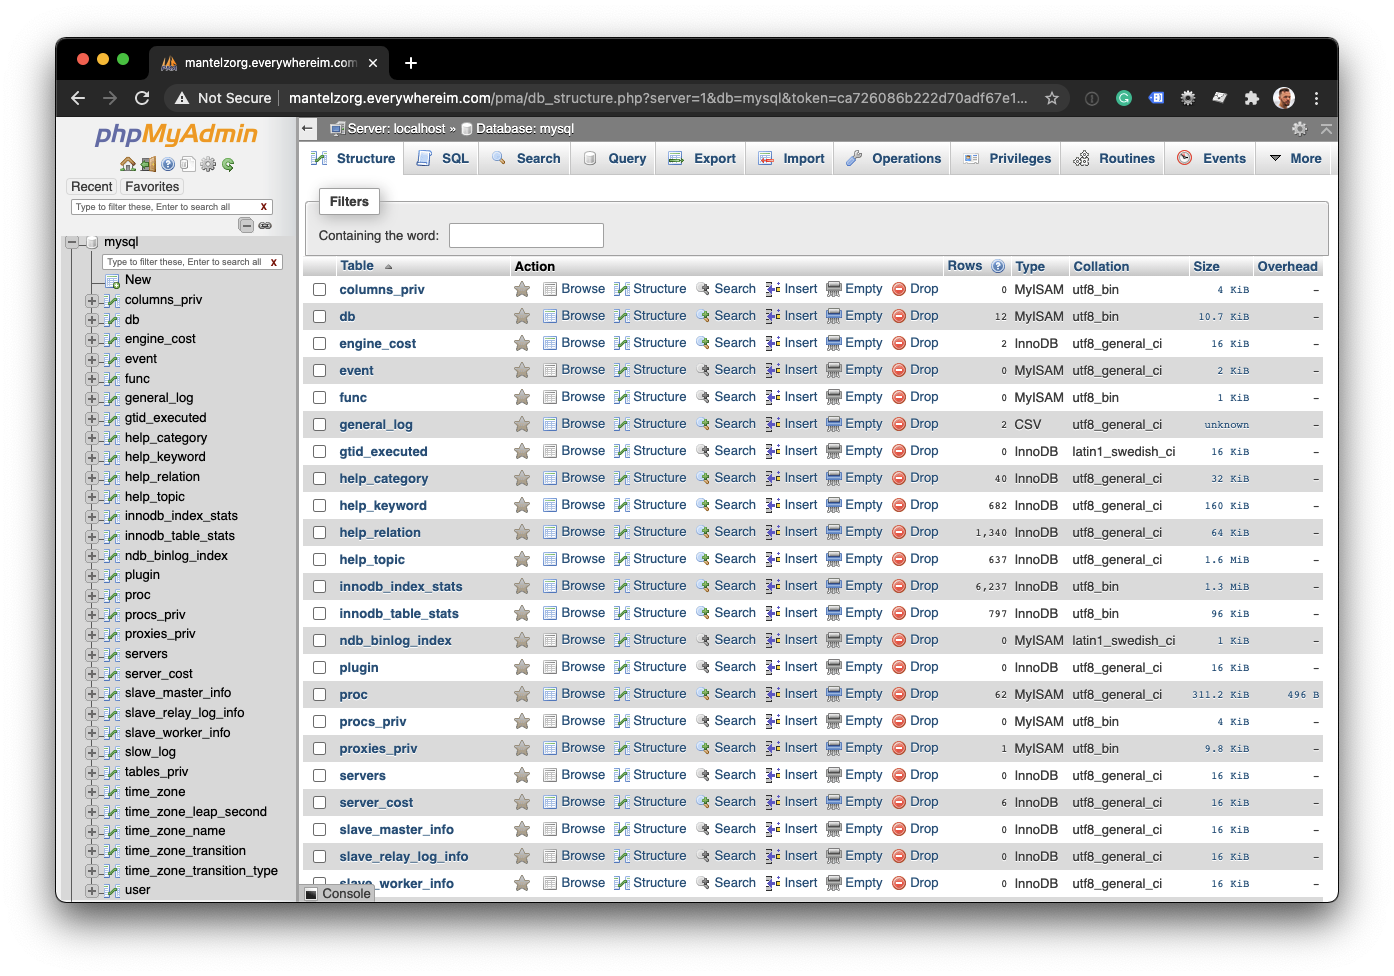
- Close to your server interface for MySQL
- Easy to install
- Web-based
- No syntax highlighting
- Import/Export is web-dependent, making them influenced by the server settings
3 DBeaver permalink
DBeaver is a free and open-source database tool. It’s built around usability.
This tool is complete and has many cool features. For me, however, it feels a bit too much.
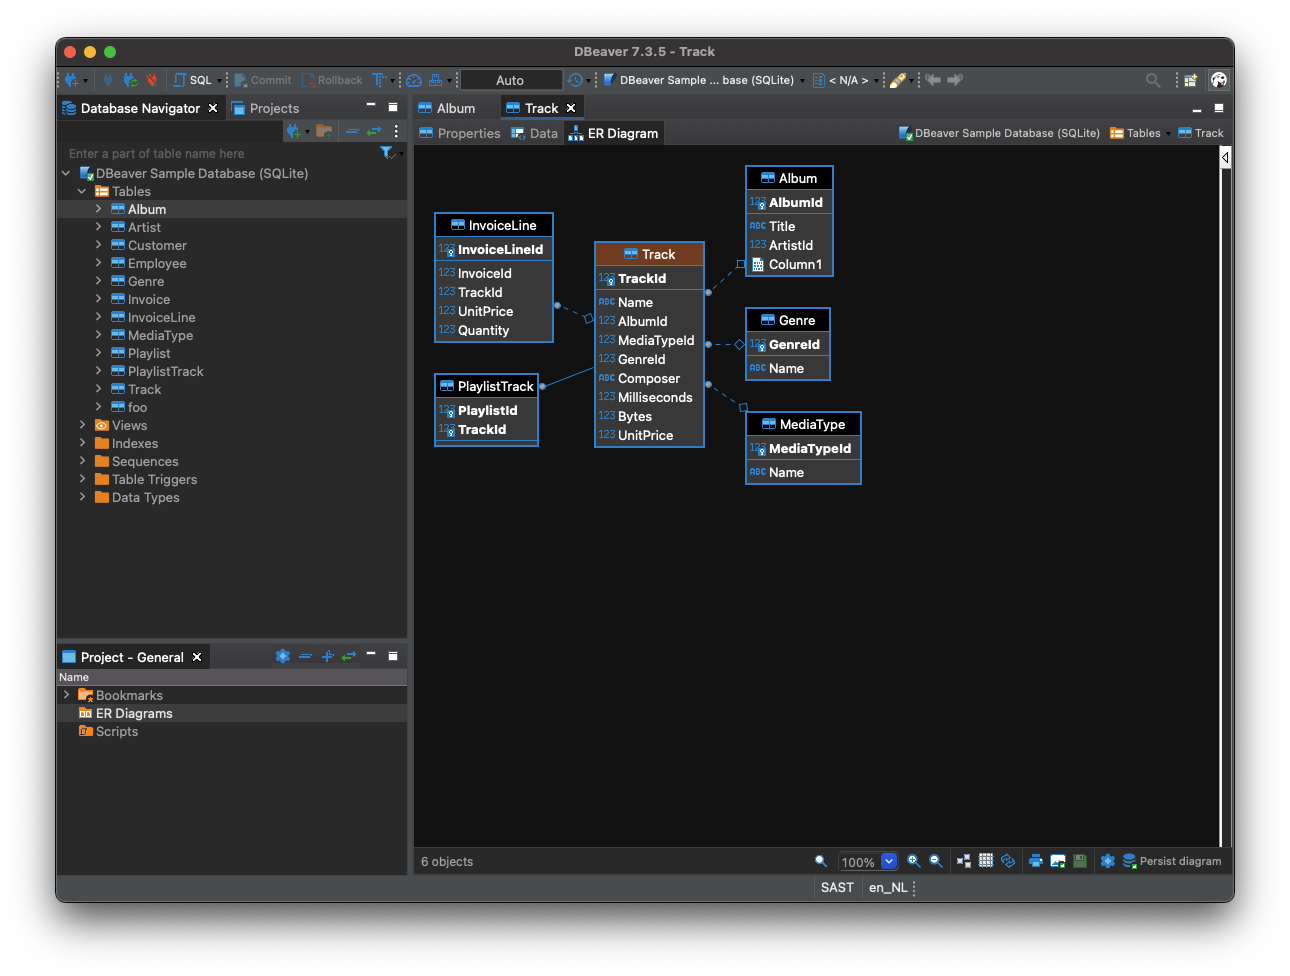
- Packed with useful tools
- ER diagrams!
- Linked query click-through
4 Querious permalink
Very Mac like interface and clear to understand how it works and what it does. I really like the tool however, it should have been a free tool.
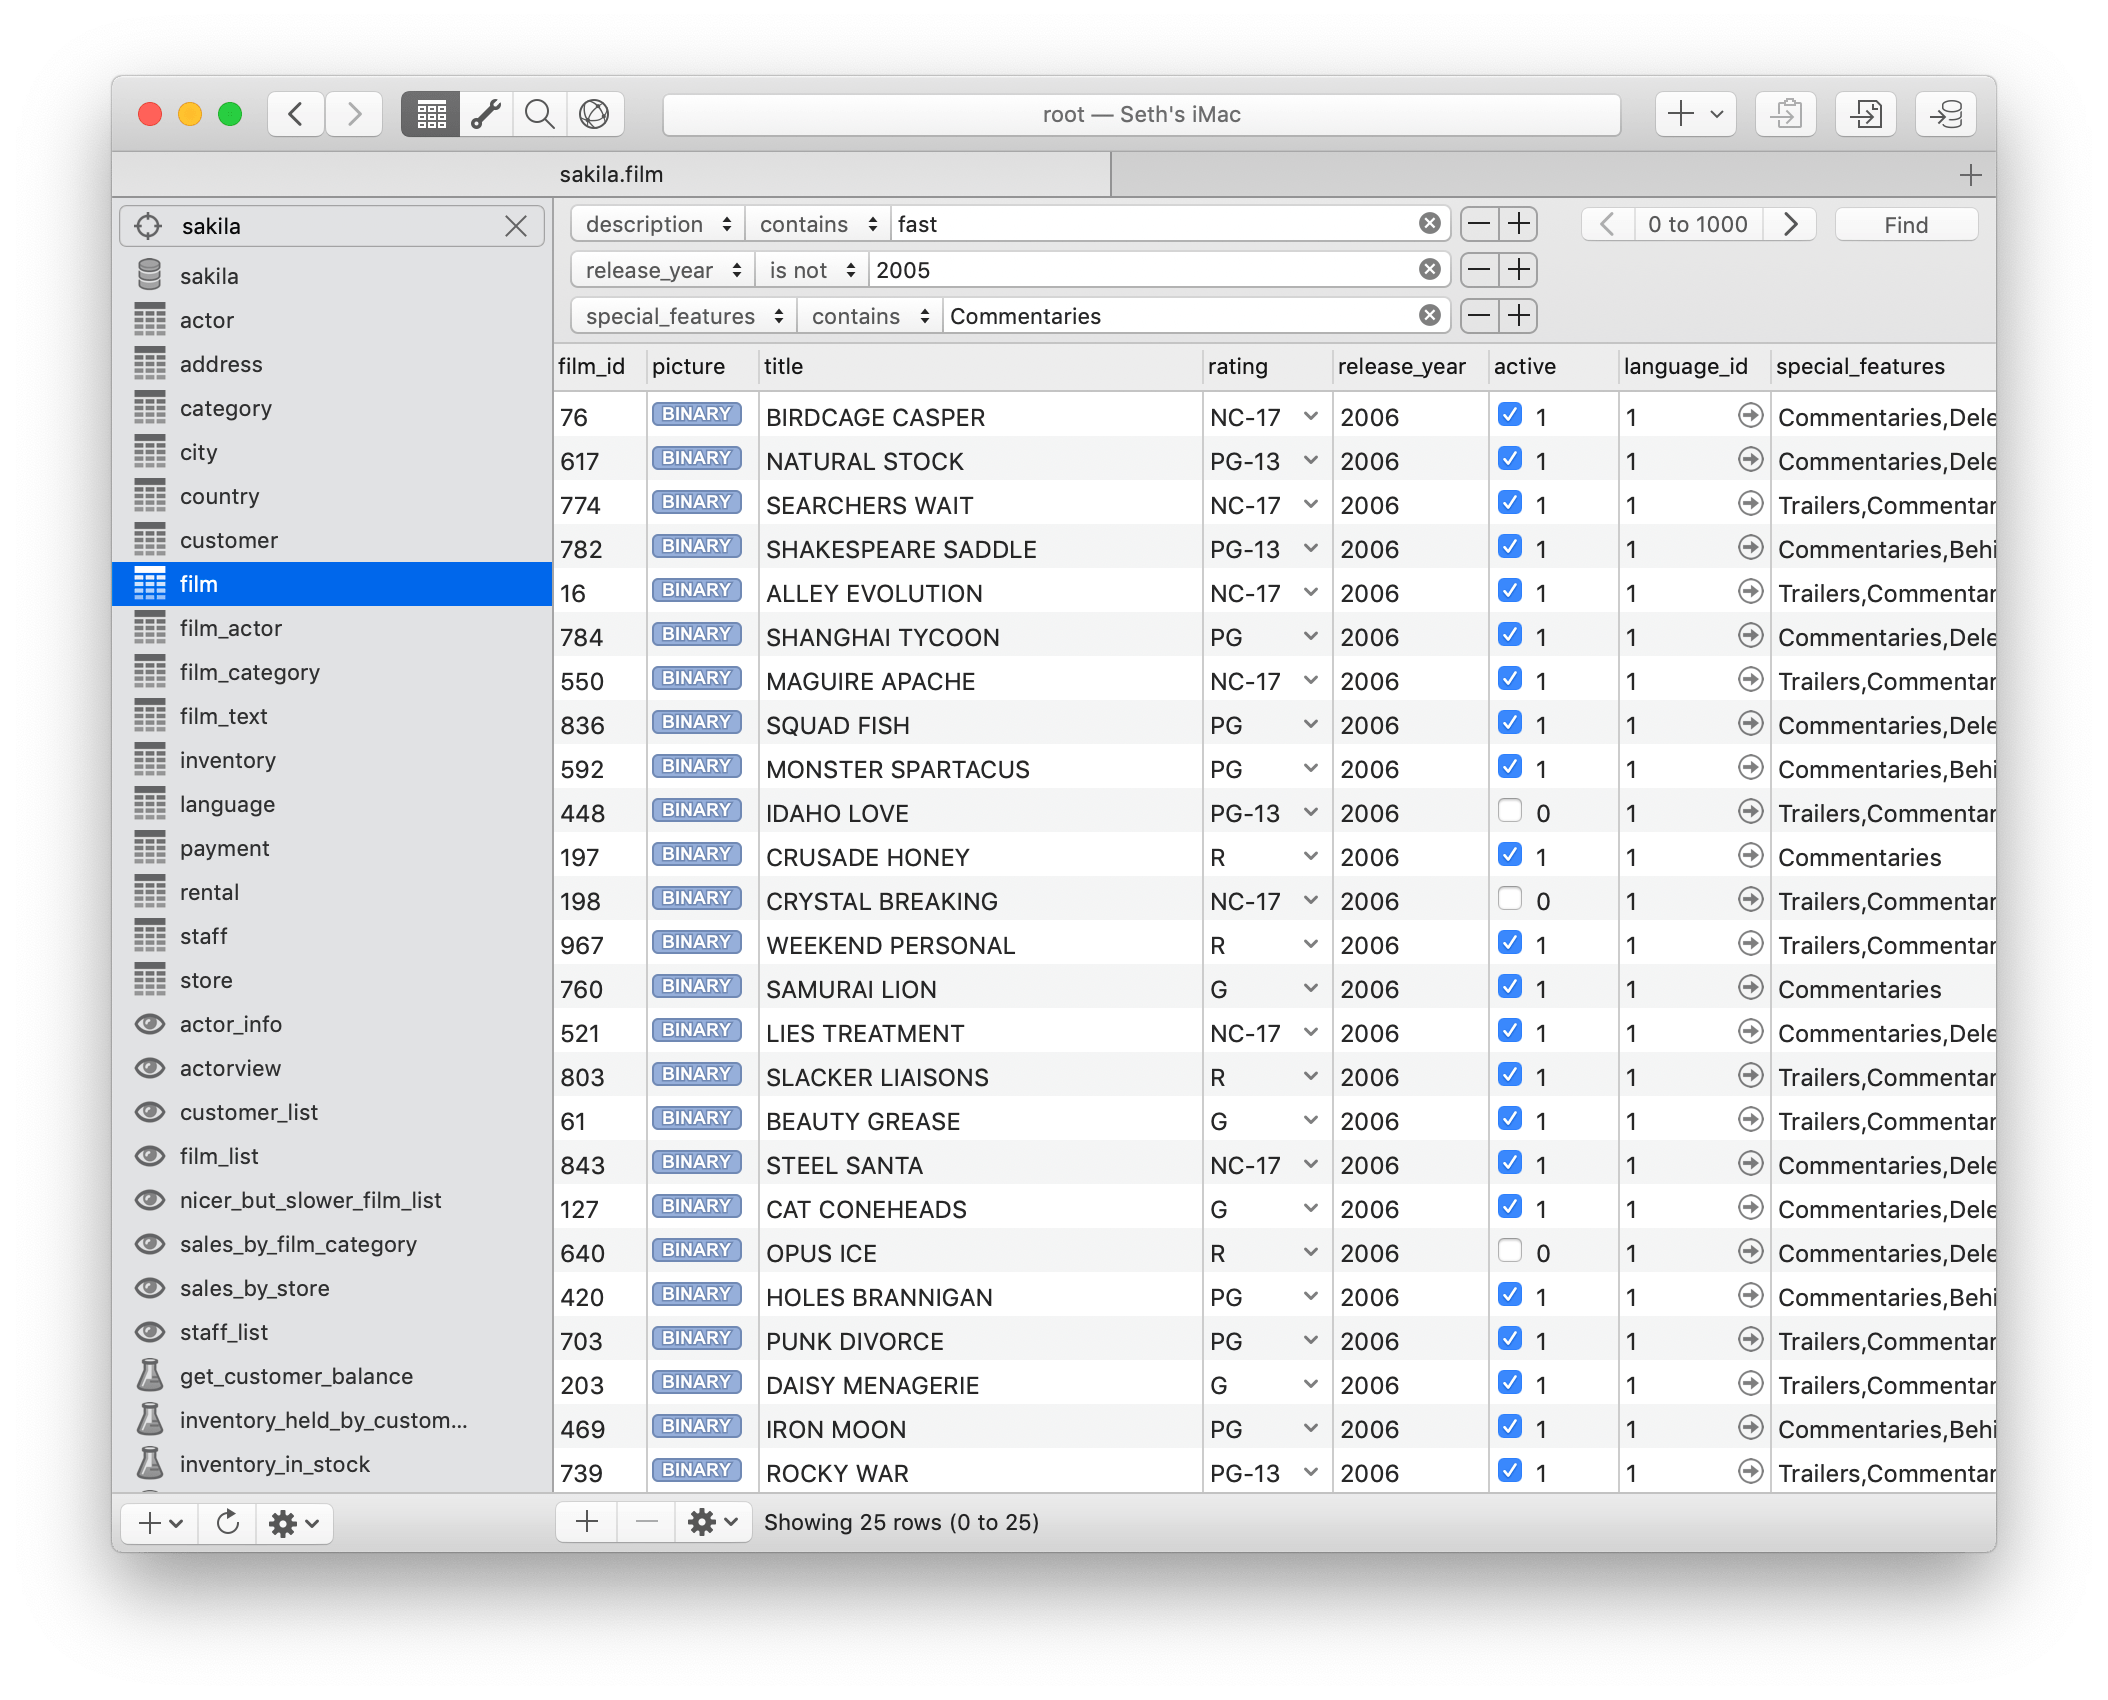
- Build for Mac
- Very good interface for MySQL
5 Sequel Pro permalink
Sequel Pro used to be my favorite MySQL client for Mac, however, they seem to have a fair amount of crashes lately. The reason I switched to TablePlus.
The tool itself is one of the best UI’s for MySQL I’ve personally seen.
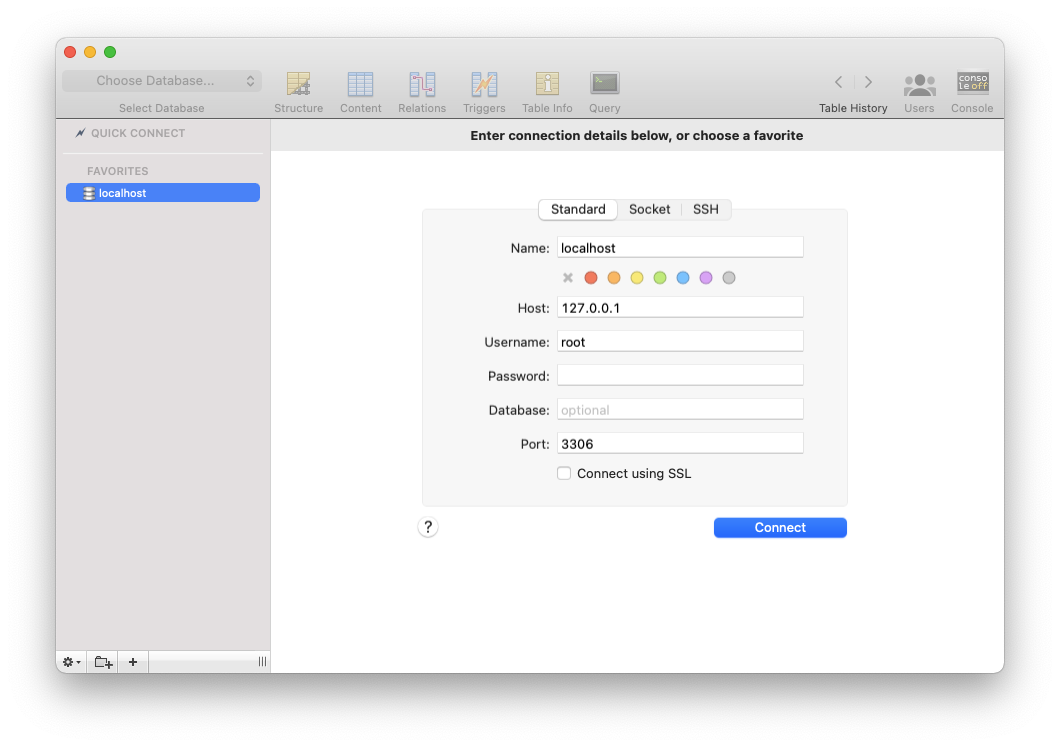
- Very clear UI
- Easy to understand and use
- Crashes often, unfortunately in the latest releases
Thank you for reading, and let’s connect! permalink
Thank you for reading my blog. Feel free to subscribe to my email newsletter and connect on Facebook or Twitter
Источник
Install MySQL on your Mac
For Beginners
Mac OS X doesn’t ship with its own copy of MySQL, nor does Sequel Pro. You will have to install a copy on your local machine, or connect to the MySQL server on a machine somewhere on the Internet.
Most webservers and website packages will include a MySQL installation as part of the services they provide, and usually provide external connection details to allow you to connect to them in an external program like Sequel Pro. (See Web Hosting Providers for a list of hosting options).
Installing MySQL on your own Mac
There are several different ways to install MySQL on Mac OS X. We have provided links to the most common installation methods for Mac OS X.
Using the official .pkg installer
This is the fastest method for installing MySQL on your Mac, but only available for Intel processors. MySQL.com offers a standard MacOS installer package that installs the MySQL Server and several command line utilities. The download also includes a system preference pane for starting/stopping the server. You can optionally install a startup item that starts the MySQL server when your computer starts. The download weighs about 70MB.
MySQL 5.0 for Mac OS X — for MacOS 10.4-10.5, Intel only MySQL 5.1 for Mac OS X — for MacOS 10.4-10.6, Intel only, recommended Version MySQL 5.5 for Mac OS X — for MacOS 10.4-10.6, Intel only
MAMP / XAMPP on Mac OS X
MAMP and XAMPP are complete web development packages. They are designed to give developers an easy way to serve up PHP pages using Apache and MySQL right on their Mac. The two packages differ in the selection of utilities they include, but both of them include their own version of Apache, MySQL, and PHP.
These packages are installed by copying the MAMP/XAMPP folder to your applications folder. There are no hidden files and both packages are trivial to uninstall — just drag the MAMP/XAMPP folder to the trash.
MAMP includes a GUI utility for starting and stopping the servers. The utility also allows basic configuration of the servers, including the port MySQL runs on (default is 8889). There is a commercial utility (named MAMP PRO) available for more advanced options. MAMP includes PHP 4 and 5.2, and MySQL 5.1. The download is about 160MB.
Download MAMP/MAMP Pro — for MacOS 10.4-10.6, Universal binary
XAMPP provides only a utility for starting/stopping the servers. Configuration is performed using command line utilities. XAMPP includes PHP 5.3, MySQL 5.1, and several extras like Perl and an FTP Server. XAMPP weighs in at about 90MB.
Download XAMPP — for MacOS 10.4-10.6, Universal binary
If you use one of these packages, see Connecting to MAMP or XAMPP for further instructions.
Install from Source
Installing a copy of MySQL from source is recommended for advanced users only. There are many advantages to compiling your own copy of MySQL — including speed improvements and system specific customisations (eg. for machines with little RAM). Installation from source also gives you access to cutting edge features and bugfixes before a .pkg installer is available.
You must have the Xcode Developer Tools installed. Compiling takes a very long time compared to installing binaries, but you’ll only have to download about 20MB of source code.
Using MacPorts
If you want to install from source, but spare yourself the hassle of configuring the install, you can use Macports to automatically compile and install MySQL. This method works only if you have MacPorts and the XCode Developer Tools installed. The MySQL download is aproximately 20MB plus dependencies.
With MacPorts you can install the MySQL Server by typing the following command in Terminal:
Afterwards, you must run:
Mac OS X Server
Mac OS X Server comes with MySQL pre-installed. For instructions on how to enable MySQL, see Setup on Mac OS X Server.
Installing MySQL on a Virtual Private Server (VPS)
Источник


