- 3 Ways to Backup Mac Mail
- Method 1. Backup Apple mail using Time Machine
- Method 2. Backup Apple mail using Export Mailbox feature
- Method 3. Backup Apple mail using third-party Mac backup software
- Архивация писем в приложении «Почта» на Mac
- Question: Q: How to Backup Email on Apple Mail?
- Helpful answers
- How to Install Mail Backup X on your computer?
3 Ways to Backup Mac Mail
Mac users attempt to backup Apple Mail to external hard drive for different reasons, for example, protect important messages from unexpected data loss disaster, transfer emails to external hard drive to save disk space, etc. Fortunately, there are many ways can help to manage this job. And each of these methods has its advantages and drawbacks. Next, we will introduce them in details one by one.В
Method 1. Backup Apple mail using Time Machine
When it comes to Mac backup, Time Machine is always the first method to be mentioned. To backup Apple Mail emails, just right click Time Machine icon in the Dock and select ‘Back Up Now’ from the pop-up menu.В
- You should first install and enable Time Machine on your Mac computer.
- You might get the risk of data loss if Time Machine backup restore failed.
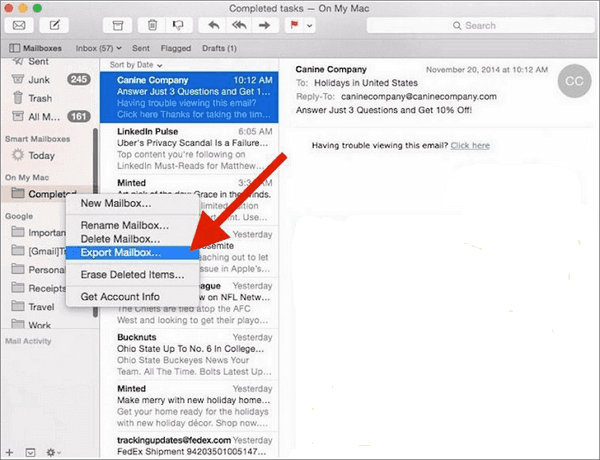
Method 2. Backup Apple mail using Export Mailbox feature
Mail’s Export Mailbox option is a feature which is attractive for users who want to remove messages entirely from Mail while still holding onto copies. With it, you can easily archive email in Apple Mail. To backup Apple mail, you should:В
First, create a mailbox.В Just open Mail and go to Mailbox > New Mailbox, then drag and drop those messages you want to the newly-created mailbox.В
Then, start to export a mailbox.В Right-click on the mailbox in the sidebar and choose «Export Mailbox». Next, choose a destination for the .mbox file and click «Choose».
There are users said that they have lost their emails while archiving apple mail emails as their emails got corrupted and sometimes some unknown errors occurred for no reason.
Method 3. Backup Apple mail using third-party Mac backup software
Due to the drawbacks mentioned above, it is inevitable that users may get some glitches while trying to backup apple mail emails and its mailboxes using Time Machine or Mail’s Export Mailbox feature. In view of this, we think it is better to choose a safer alternative solution — EaseUS Mac backup software to manage the job.В
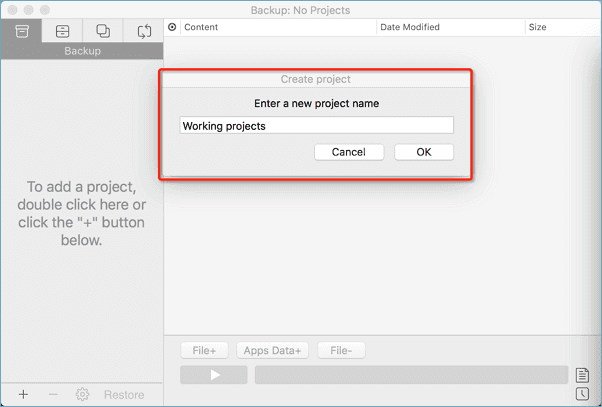
Step 1.В Launch EaseUS Mac backup software, click the first Backup tab > Click + button at the left corner of the left pane to create a backup project — name the backup project and click OK.
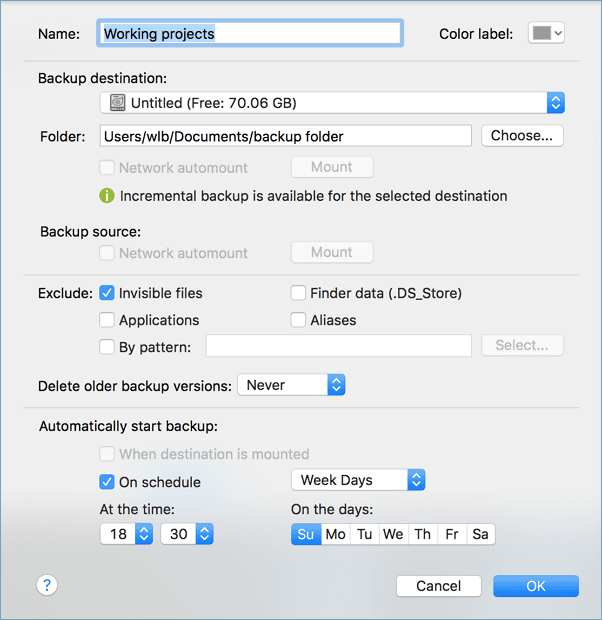
Step 2.В Set up the backup destination where you want to store Mac Mail emails as backups, automatically backup frequency etc and click OK. Here, if you want to backup Apple mailВ to an external hard drive, please connect it to Mac before launching the backup software.
Step 3.В Click File+ to selectively choose files and folders to backup and click the blue start button to backup your MacВ mailВ emails now.В
Источник
Архивация писем в приложении «Почта» на Mac
Если сохранить письма в почтовом ящике «Архив», Вы легко найдете их, когда будете готовы выполнить какое-либо действие.
В приложении «Почта»  на компьютере Mac выберите одно или несколько писем.
Если Вы выбрали разговор, то в архив попадут все сообщения разговора, хранящиеся в текущем почтовом ящике, например в ящике «Входящие». Связанные сообщения из других ящиков архивированы не будут.
Нажмите кнопку «Архивировать»  в панели инструментов приложения «Почта» (или воспользуйтесь панелью Touch Bar).
Если на панели настроек «Просмотр» приложения «Почта» для параметра «Перемещать ненужные сообщения в:» выбрано значение «Архив», то можно архивировать письма непосредственно из уведомлений Почты. Просто наведите курсор на уведомление приложения «Почта» и нажмите «Архивировать».
Приложение «Почта» создает почтовый ящик «Архив» в боковом меню Почты для каждой учетной записи, сообщения которой Вы архивируете, и перемещает в него выбранные Вами сообщения. Для их просмотра нажмите почтовый ящик. Сообщения остаются в почтовом ящике «Архив», пока Вы не удалите или не переместите их.
Источник
Question: Q: How to Backup Email on Apple Mail?
I am new to this Mac world and on the first day of my new job my boss gave me a tedious task to Backup Emails on Apple Mail. Basically, there are 3 email ids, and these are our support email database. So there are tons of emails stacked in the inbox. I have to backup all the emails, contact list, and even the address book. I had a look online for manual procedures and found out that Apple Mail Export and Time Machine Backup are best suited for these backup issues. I did try them, but the problem is they are taking too long. I need a quick solution to Backup emails on Apple Mail.
Are there other alternatives to Backup emails on Apple Mail that are quick, safe and easy to operate? Do let me know asap. Thanks
MacBook Pro with Retina display, iOS 10.3.2
Posted on Aug 4, 2017 7:35 PM
Helpful answers
You just need to locate the Apple Mail Backup Location, as all your emails are stored automatically on your hard drive. From there you can just make the copy of the apple mail database and your backup will be stored securely. Here’s how you can locate your apple mail backup location:
Find and Open the Folder Where OS X Mail Stores Mail
To go to the folder that holds your OS X Mail messages:
- Open a new window in OS X Finder.
- Select Go | Go to Folder… from the menu.
— You can also press Command-Shift-G. - Type «
You can find your folders and messages in sub-folders to the V3 folder:
- Local mailboxes are in the Mailboxes sub-folder.
- POP email accounts can be found in sub-folders with POP- in their name.
- IMAP accounts’ mailboxes are in sub-folder that have IMAP- in their name.
The messages are stored in .mbox folders, one per OS X Mail email folder. Open and explore these folders to discover (and open or copy) the emails saved as .emlx files.
Find and Open the Folder Where Mac OS X Mail 5–8 Store Mail
To open the folder where Mac OS X Mail keeps your messages:
- Open a Finder window.
- Select Go | Go to Folder… from the menu.
- Type «
/Library/Mail/V2″.
— You can have Finder auto-complete the folder names by pressing Tab.
Mac OS X Mail stores the mailboxes in sub-folders to the Mail directory, one sub-folder per account. POP accounts start with POP-, IMAP accounts with IMAP-.
Find and Open the Folder Where Mac OS X Mail 1-4 Store Mail
To locate the folder where Mac OS X Mail 1-4 stores mail:
- Open a new Finder window.
- Go to your home directory.
— You can use the Home toolbar button
— or select Go | Home from the menu to go home. - Open the Library/Mail directory..
Some alternative to Backup Email on Apple Mail are:
Aug 11, 2017 10:57 PM
There’s more to the conversation
Loading page content
Page content loaded
Your Apple Mail Data is automatically stored on your system. If you want to backup the data, you just need to make a copy of that database. Here’s how you can Backup email on Apple Mail:
- Go to Finder
- Press and hold the option key while you click on the Go menu
- Select Library
- You can let go of the option key now
- Within the Library folder you’ll see a folder called Mail
- Copy this folder (just right-click on the folder and select Copy «Mail», or press command + C )
- Navigate to where you want to save your backup (obviously another drive!)
- Now you can paste a copy (e.g. by pressing command + V )
There you have it, you’ve made a copy of all your Mail data.
However, this only makes a copy of the Database on that moment, and not of the further emails to arrive. This is where Time Machine and some other applications come in handy:
Aug 11, 2017 10:57 PM
You just need to locate the Apple Mail Backup Location, as all your emails are stored automatically on your hard drive. From there you can just make the copy of the apple mail database and your backup will be stored securely. Here’s how you can locate your apple mail backup location:
Find and Open the Folder Where OS X Mail Stores Mail
To go to the folder that holds your OS X Mail messages:
- Open a new window in OS X Finder.
- Select Go | Go to Folder… from the menu.
— You can also press Command-Shift-G. - Type «
You can find your folders and messages in sub-folders to the V3 folder:
- Local mailboxes are in the Mailboxes sub-folder.
- POP email accounts can be found in sub-folders with POP- in their name.
- IMAP accounts’ mailboxes are in sub-folder that have IMAP- in their name.
The messages are stored in .mbox folders, one per OS X Mail email folder. Open and explore these folders to discover (and open or copy) the emails saved as .emlx files.
Find and Open the Folder Where Mac OS X Mail 5–8 Store Mail
To open the folder where Mac OS X Mail keeps your messages:
- Open a Finder window.
- Select Go | Go to Folder… from the menu.
- Type «
/Library/Mail/V2″.
— You can have Finder auto-complete the folder names by pressing Tab.
Mac OS X Mail stores the mailboxes in sub-folders to the Mail directory, one sub-folder per account. POP accounts start with POP-, IMAP accounts with IMAP-.
Find and Open the Folder Where Mac OS X Mail 1-4 Store Mail
To locate the folder where Mac OS X Mail 1-4 stores mail:
- Open a new Finder window.
- Go to your home directory.
— You can use the Home toolbar button
— or select Go | Home from the menu to go home. - Open the Library/Mail directory..
Some alternative to Backup Email on Apple Mail are:
Источник
How to Install Mail Backup X on your computer?
Mail Backup X comes with a simple to install package. For macOS its comes as a DMG and for Windows its an downloadable exe file installer.
All you have to do is simply download the installer file and follow the onscreen instructions suggested in installation wizard. Still we are giving you a step by step tutorial on how to install Mail Backup X on your Mac and PC.
Install Mail Backup X Personal Edition on your Mac:
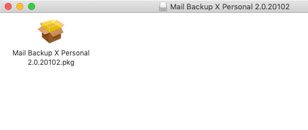
Step 1 : Download the DMG installer file from the Downloads Page of our website.
Step 2: Double click on the DMG file to Mount it. Click the icon for App to Launch the setup Wizard.
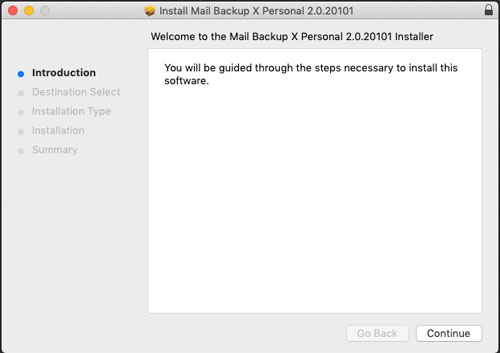
Step 3: Click Continue to proceed with the installation of Mail Backup X Personal Edition on you Mac.
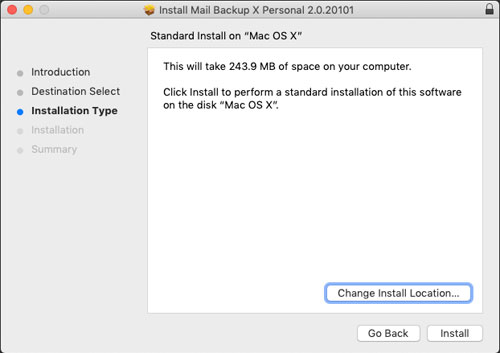
Step 4: You can leave the installation location to default set or may choose Change install location to set your custom location for installing the App. It is recommended to leavc it to default as set in the installer under Applications folder on your Mac. Please click install to proceed further.
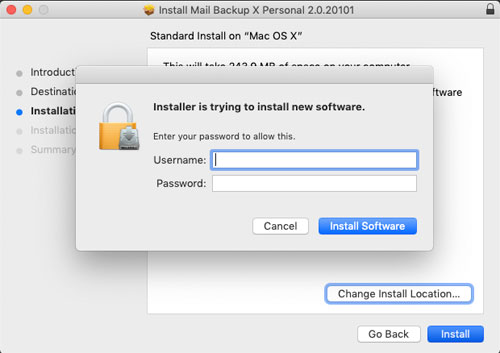
Step 5 : You will be prompted for your Mac Username and Password by macOS to allow the installation to proceed further. Please enter your credentials and macOS will proceed with installation of software.
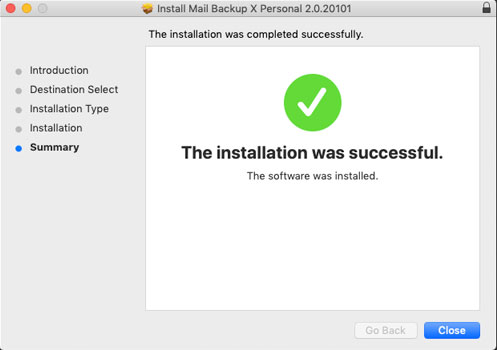
Step 6: macOS will proceed with copying the files and configuring the app for use. Once, done you will notice the message Installation was successful.
Step 7: Important Note for macOS Mojave, Catalina & Big Sur users: Extra Installation steps only to be followed in case you plan to do Apple Mail Backup
Apple restricts access to Mails, Contacts, and Calendar for third-party applications in macOS Mojave, Catalina & Big Sur.
You will need to allow & set permissions for Mail Backup X to access Mails, Calendars, and the Contacts.
Please follow the step-by-step procedure given below to ensure compatibility with macOS Mojave & Catalina.
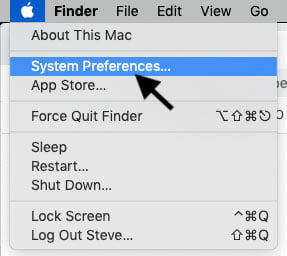
1. Please go to the “System Preferences” on your Mac,
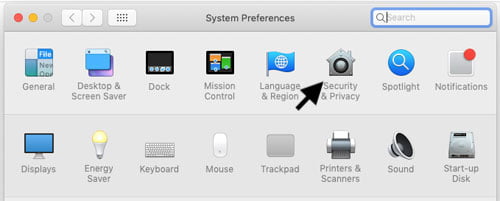
2. Open “Security & Privacy” from the top row.
3. Click on the 4th Tab “Privacy,” which is after Firewall.
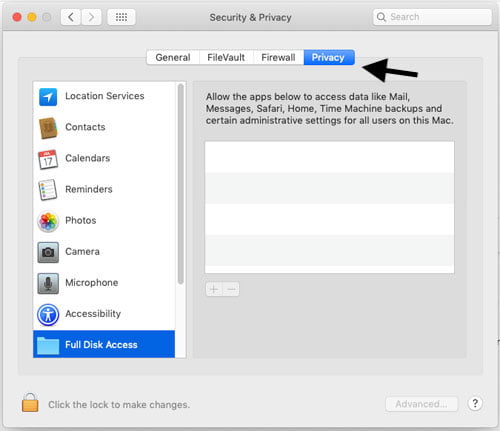
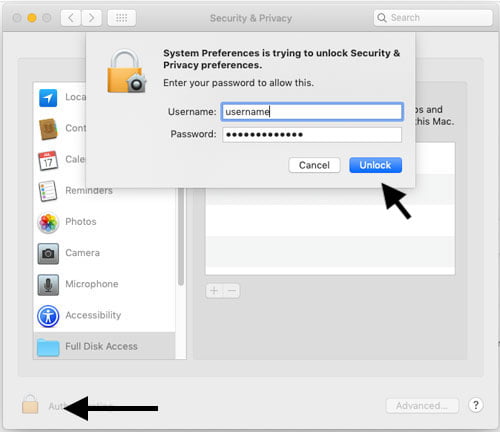
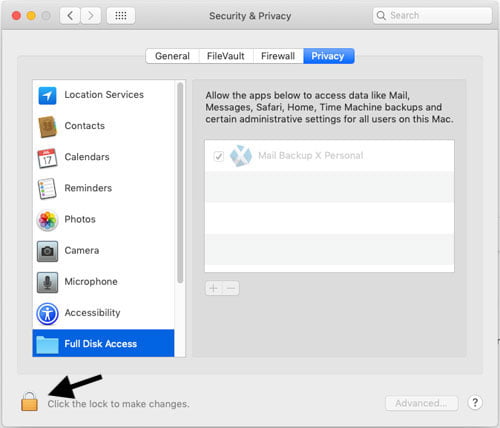
4. Then Click on “Full Disk Access.” And click the Lock icon at the bottom to unlock and allow apps to be added to allowed apps list.
5. Click the [+] icon under the list section and Add Mail Backup X from your Application folder.
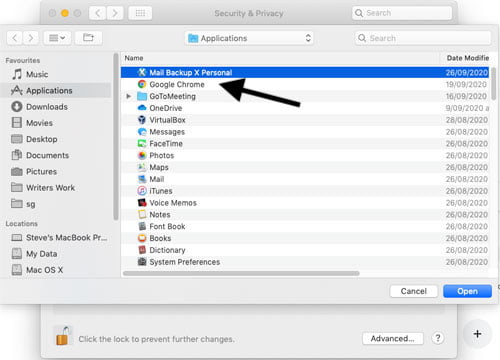
6. Now Mail Backup X is in the list.
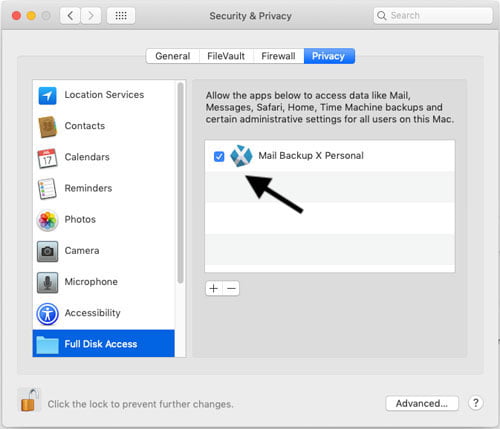
7. Click the Lock icon again to secure the settings and close preferences pane.
8. If Mail Backup X is already running in background and already installed on your system. You will get a prompt suggesting you need to quit Mail Backup X. Please click on “Quit Now.”
9. Relaunch Mail Backup X.
Install Mail Backup X Personal Edition on your Windows PC:
Step 1 : Download the latest software setup of “Mail Backup X Personal Edition” from downloads page on our website.
Step 2: Double-click on the installer file.
Step 3 : Follow on-screen instructions to complete the setup.
Источник


