Как установить Mac OS X на VirtualBox
Вы хотите потестить последнюю версию Apple Marverics OS X? Мы дадим вам к простое руководство, в котором мы покажем шаг за шагом, как установить систему Apple на компьютер под управлением Windows . Все благодаря бесплатной программе виртуализации VirtualBox.
Требования.
Чтобы иметь возможность устанавливать OS X на компьютер, мы должны иметь 64-разрядную версию Windows. Лучше всего походят — последнее — Windows 7 или Windows 8. 32-разрядные версии не поддерживаются. Также будет полезно иметь свободное место на диске для установленной системы.
Что еще необходимо
Для установки OS X Mavericks нам нужно скачать на наш компьютер:
- VirtualBox — программа виртуализации
- Niresh Mavericks — преобразование OS X, адаптированное к установкам на ПК . Для целей VirtualBox, где мы будем устанавливать OS X Mavericks, мы загружаем образ версии ISO. Не загружайте USB-версию.
Создание виртуальной машины.
Сначала мы устанавливаем и запускаем последнюю версию VirtualBox. Затем мы загружаем и устанавливаем пакет расширения Virtualbox.
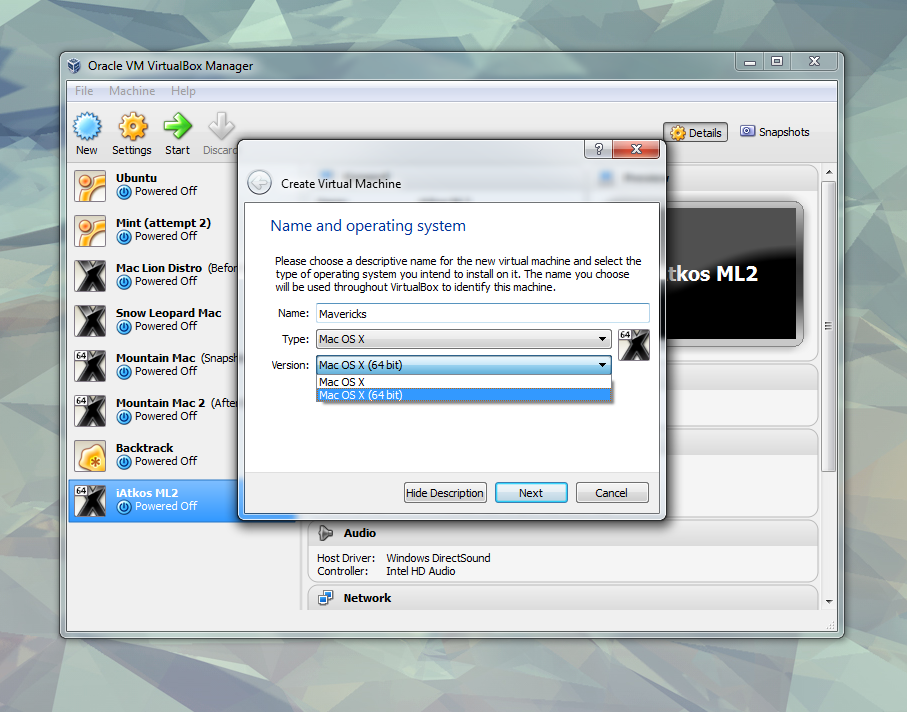
Затем перейдите к установке виртуальной машины. Откройте VirtualBox и нажмите значок «Новая». Даем имя машины — Mavericks и выбираем в поле Версия — Mac OS X (64 бит).

После мы следуем рекомендациям установщика. Мы предоставляем минимум 2 ГБ ОЗУ (предпочтительно 4 ГБ). Также стоит выделить некоторое пространство для новой системы — не менее 10 ГБ.
Когда мы создаем виртуальную машину, мы не запускаем ее сразу. Сначала выберите машину в списке и нажмите кнопку «Настройки».

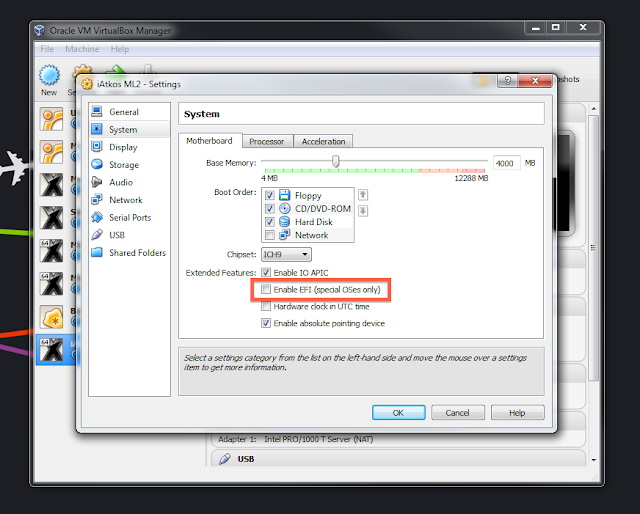
Нам нужно изменить несколько вещей в новом окне настроек. На вкладке «Система» выберите поле «Включить EFI (только специальные ОС)). Сохраните настройки.

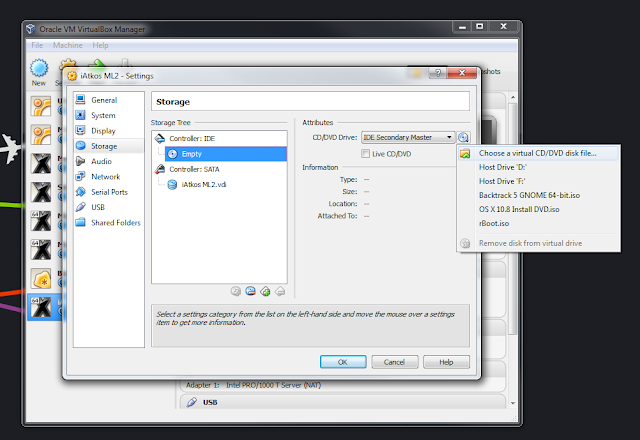
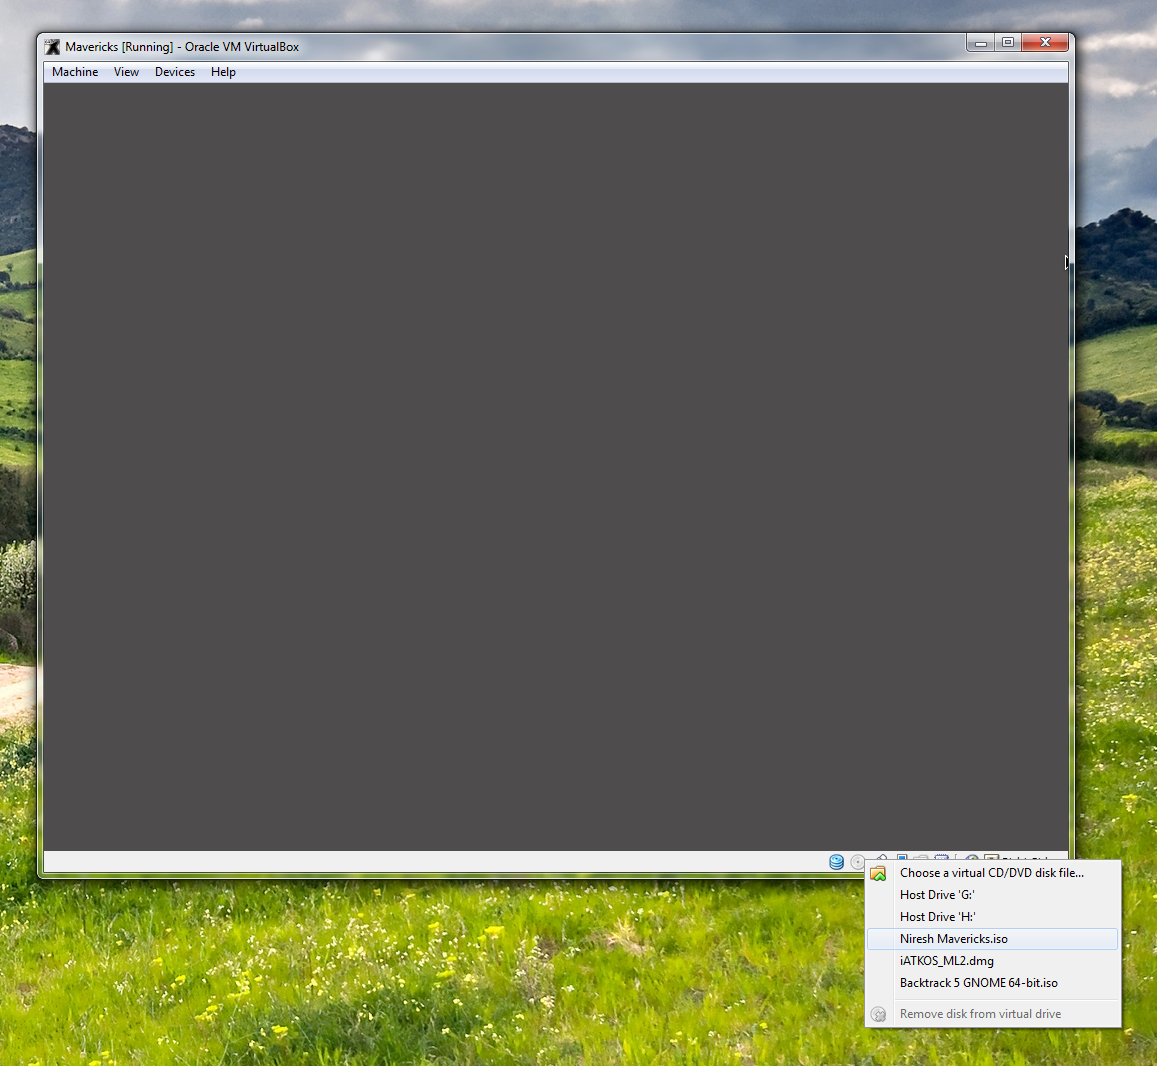
Затем перейдите на вкладку «Хранение> Пустой» и щелкните значок диска в поле «Атрибуты». В раскрывающемся меню выберите «Выбрать виртуальный CD / DVD-диск», затем в диспетчере окон мы найдем место, где мы загрузили ISO-образ Niresh Mavericks и откройте его. Сохраняем.

Установка OS X Mavericks.
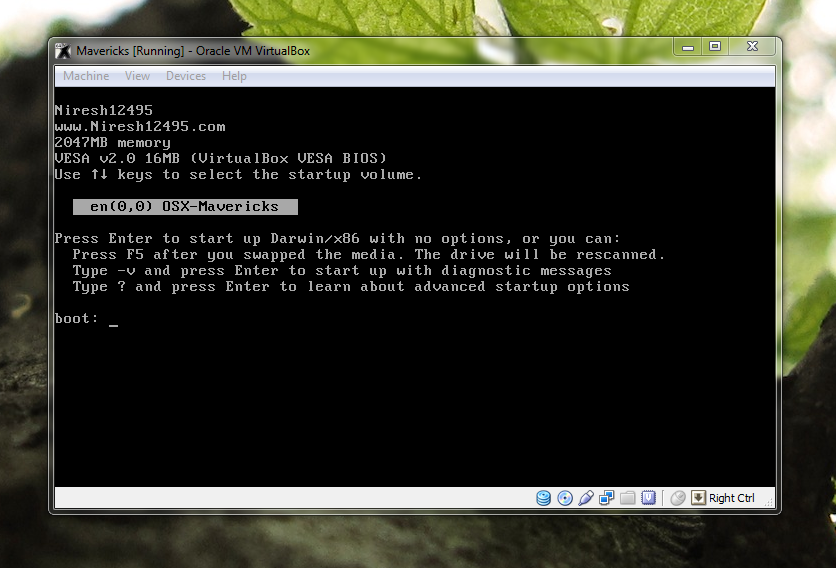
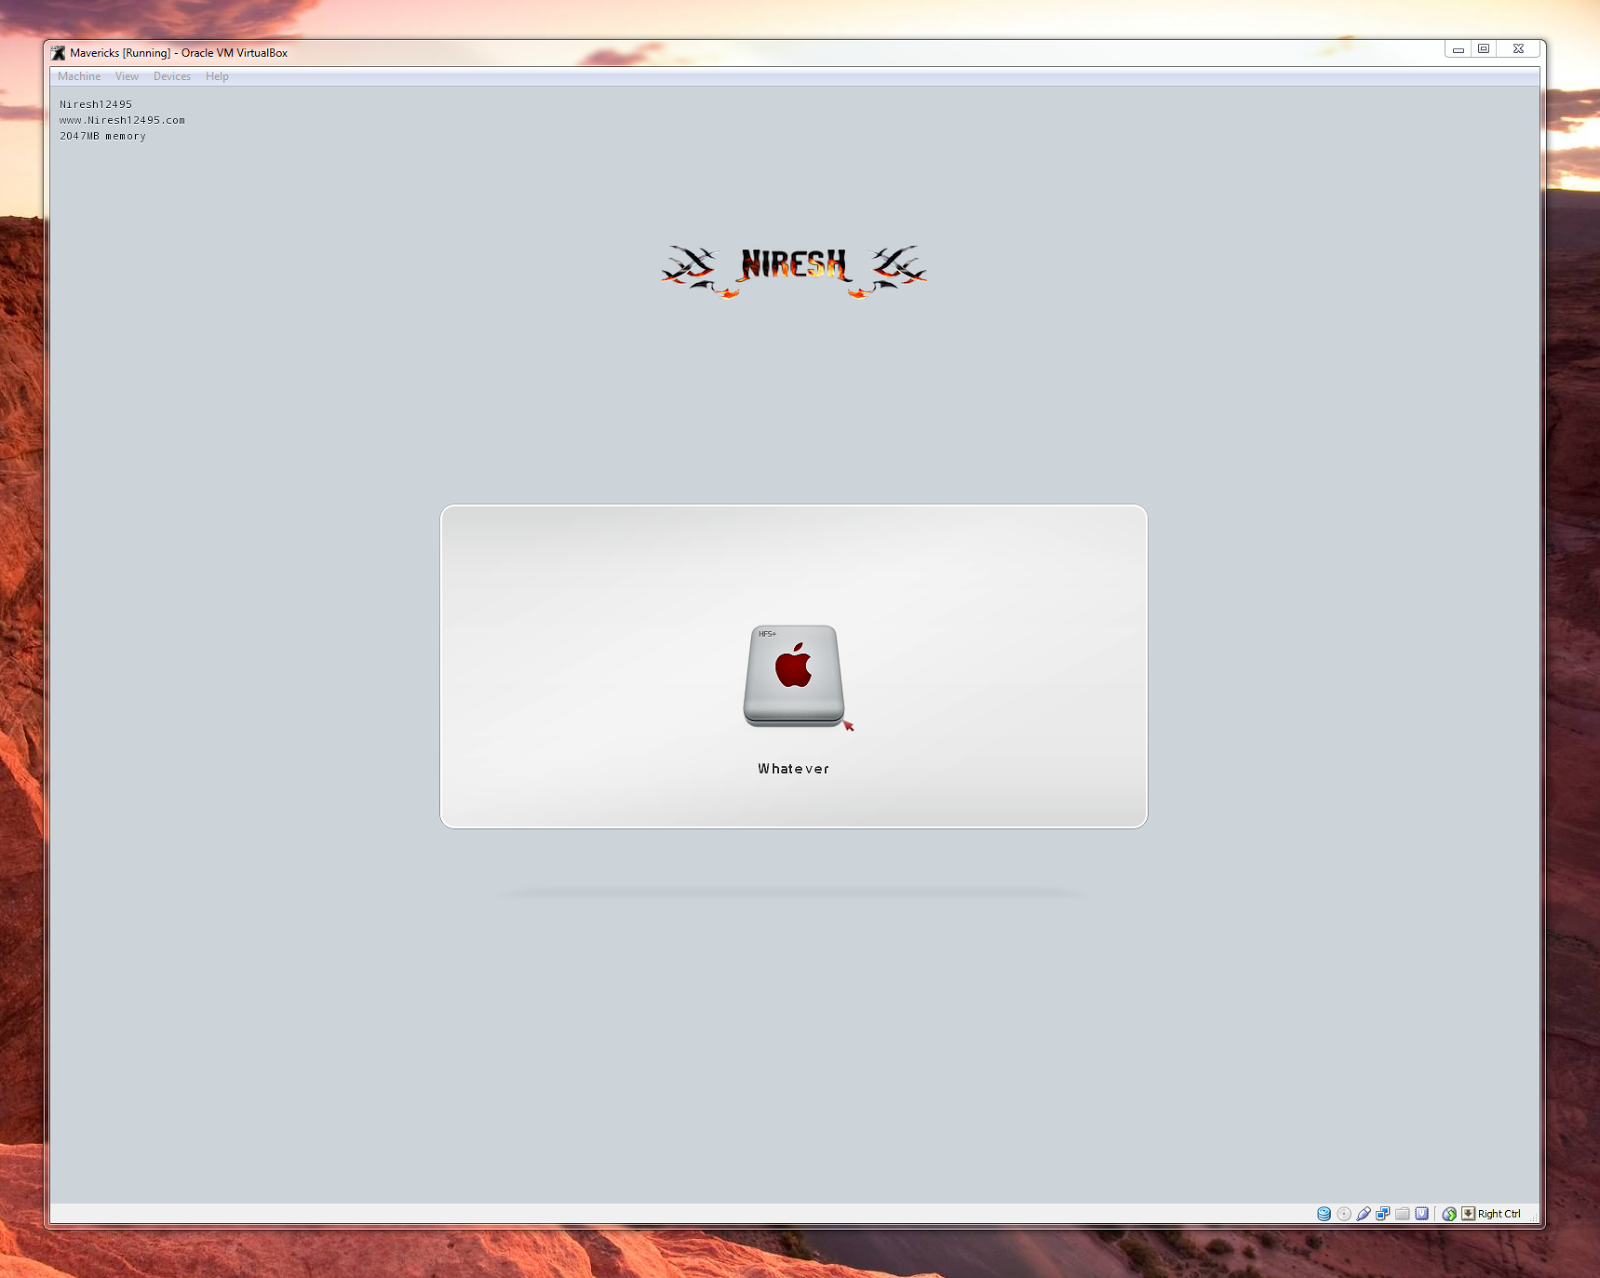
Следующим шагом является запуск машины. Мы делаем это, выбрав нашу машину Mavericks в VirtualBox и щелкнув зеленый значок Start.

ПРИМЕЧАНИЕ . Если на вашем компьютере установлен процессор Intel Haswell, то есть он был выпущен после 2013 года, вам нужно будет сделать еще одно изменение. Мы закрываем VirtualBox и открываем Командную строку. Войдите в поиск CMD и откройте командную строку в режиме администратора.
Теперь вставьте код пути и введите Enter: cd «C: \ Program Files \ Oracle \ Virtualbox».
Затем скопируйте этот код, замените имя машины тем, которое вы дали OS X в VirtualBox, и вставьте в командную строку. И жмите Enter:
VBoxManage modifyvm ИМЯ МАШИНЫ —cpuidset 00000001 000306a9 00020800 80000201 178bfbff
Затем запустите VirtualBox и включите машину.
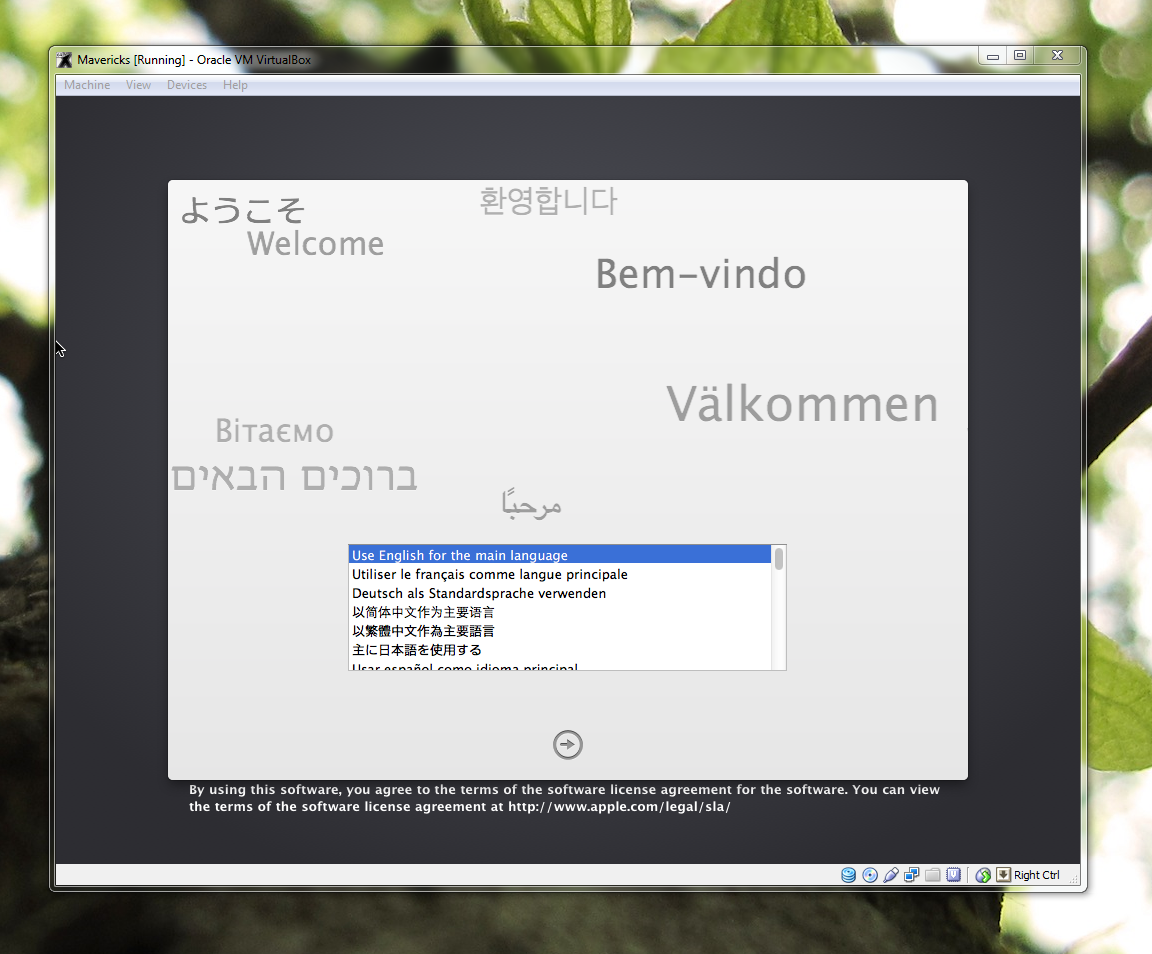
Если все сделано правильно, нас встретит приветственный экран, где мы должны выбрать язык, а затем нажмите «Далее» — в соответствии с инструкциями установщика. При выборе диска для установки появится проблема. Мы должны щелкнуть вкладку «Инструменты» на панели инструментов и выбрать «Дисковая утилита» в раскрывающемся списке.
В окне дисковой утилиты щелкните в левом окне меню наш диск на VirtualBox, затем на вкладке очистка жмем кнопку очистка. Затем мы закрываем утилиту диска.
После стирания у нас есть новый диск, который мы выбираем. Затем нажмите кнопку «Настроить» в нижней части экрана.
В появившемся окне мы отменим выбор: — Установить сетевые драйверы (Kexts)
— Графика -> GraphicsEnabler = Да

Затем нажмите «ОК», и мы вернемся к выбору диска. Теперь мы можем нажать кнопку «Установить». Мы ждем завершения процесса установки системы. Это может занять около получаса. Когда установка будет завершена, Mac OS X Mavericks, вероятно, повиснет и появится черный экран. Это нормально — мы закрываем виртуальную машину и запускаем ее снова.
Последние шаги
Теперь нам нужно сделать несколько вещей, прежде чем мы получим полнофункциональной Mac OS X на нашем ПК. Сначала мы перезапускаем виртуальную машину и отсоединяем загрузочный диск с инсталлятором. Мы делаем это, щелкнув значок диска в правом нижнем углу виртуальной машины. В раскрывающемся меню выберите «Удалить диск с виртуального диска». Закрываем машину и запускаем ее снова.
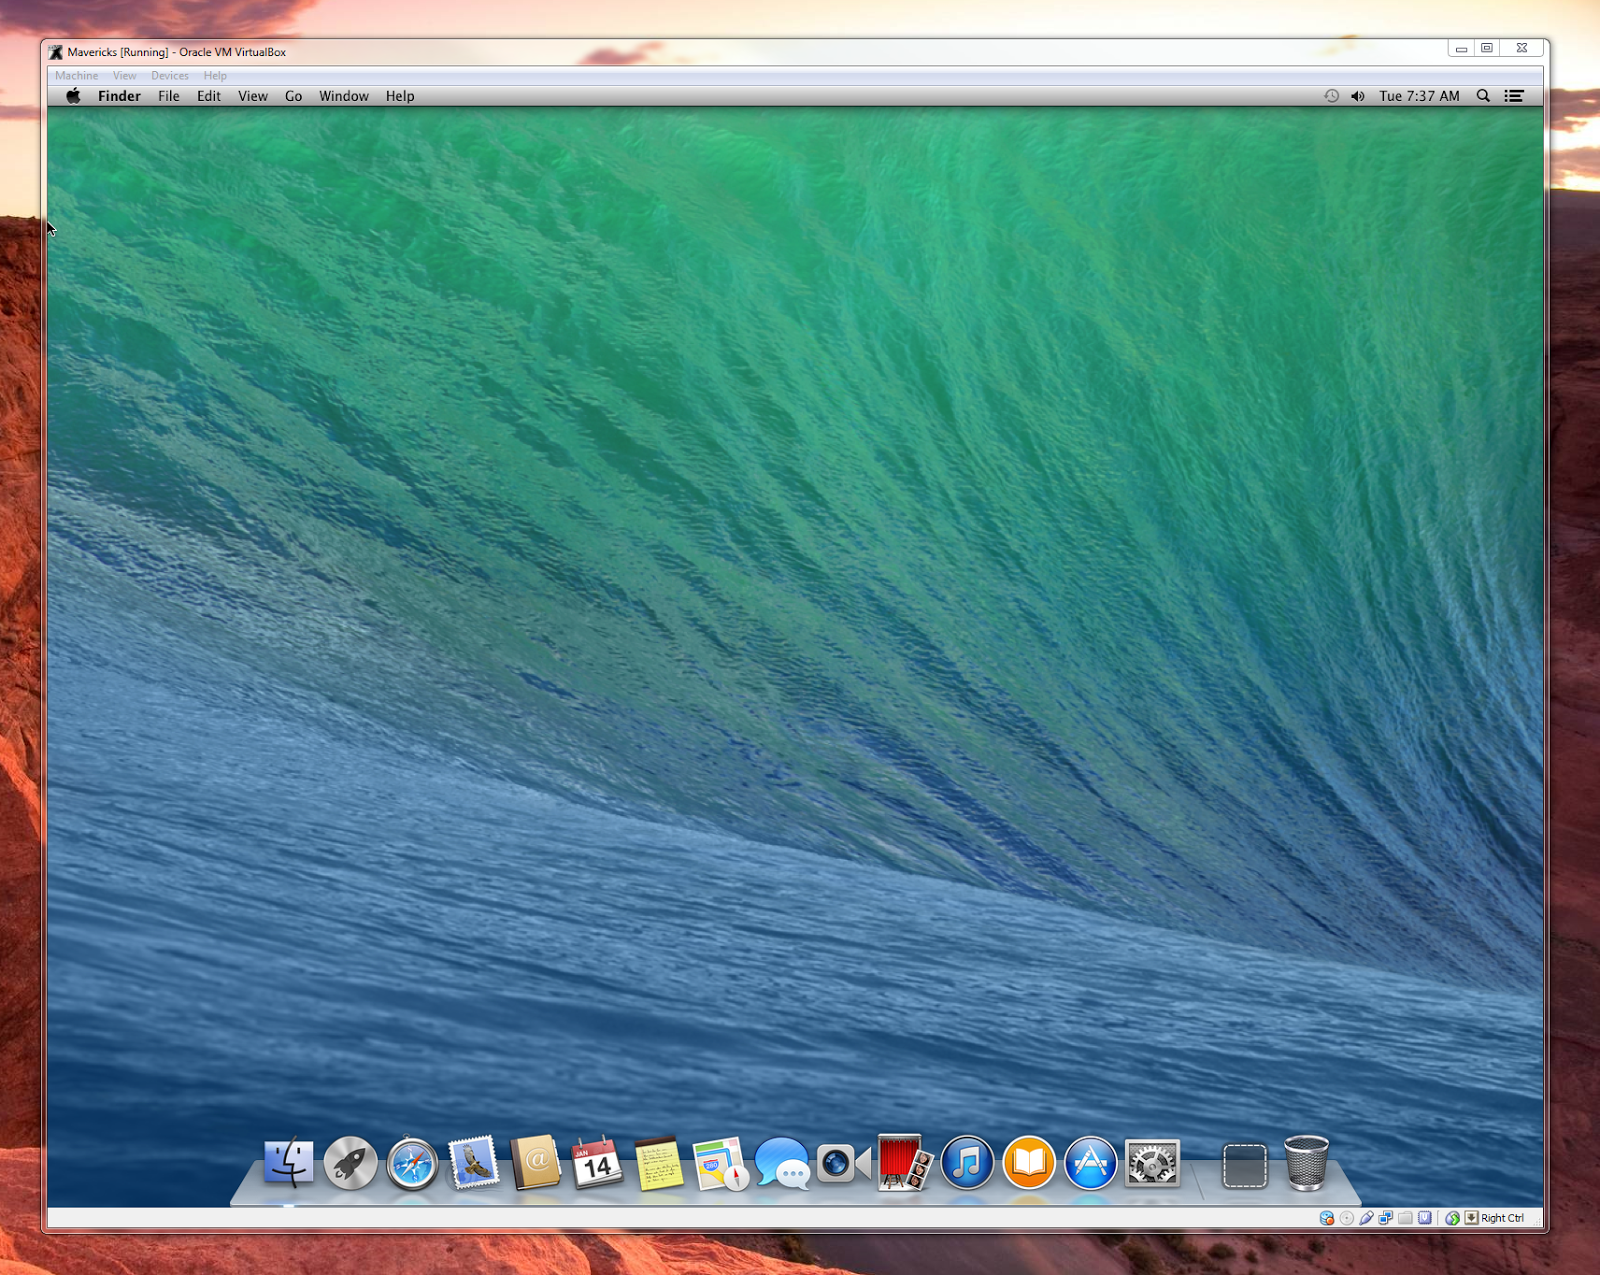
Если все пойдет хорошо, мы увидим экран персонализации OS X Mavericks после перезагрузки. Мы можем добавить здесь имя компьютера, войти в учетную запись Apple ID и т. д. После настройки мы увидим рабочий стол OS X, и мы сможем начать работу.
Стоит выполнить еще два действия. Первое — это нажатие иконки Niresh в правом верхнем углу. Помимо открытия страницы в браузере это позволит сделать дополнительные изменения. Это может занять несколько минут — сообщение о завершении появится на рабочем столе компьютера.
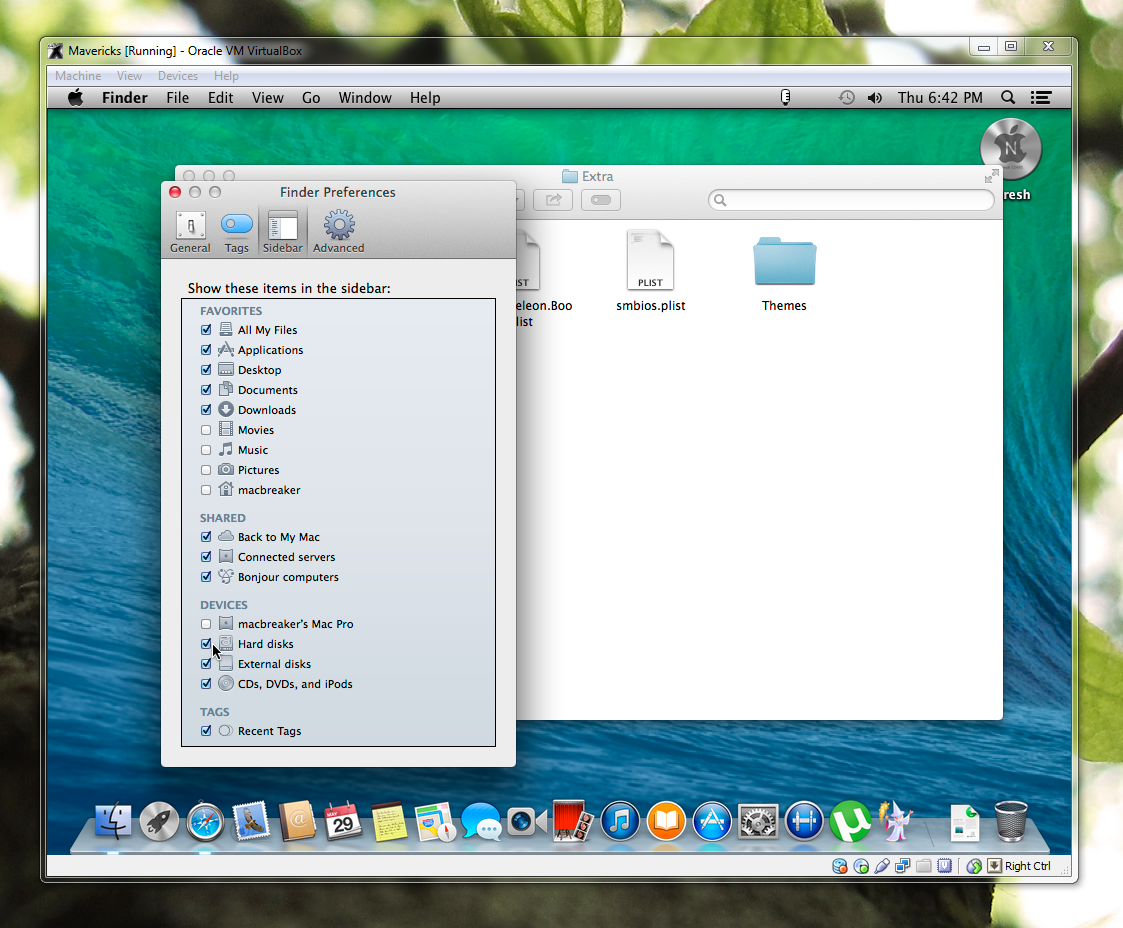
Во-вторых, это изменение в разрешении Mac OS X. По умолчанию система, скорее всего, не поддерживает наш экран, поэтому мы должны изменить его — сделав небольшой трюк. Сначала мы запускаем файловый менеджер Finder и нажимаем на верхнюю панель меню Finder> Preferences. Затем в новом окне выберите Finder для отображения жестких дисков.
Теперь перейдите на жесткий диск и откройте папку «Дополнительно». Мы находим файл с именем org.Chameleon.boot.plist и открываем его в текстовом редакторе TextEdit. Между тегами и вставьте следующий код:
Ранее нам нужно было проверить, какое разрешение экрана нашего ПК и ввести его в нужное место.
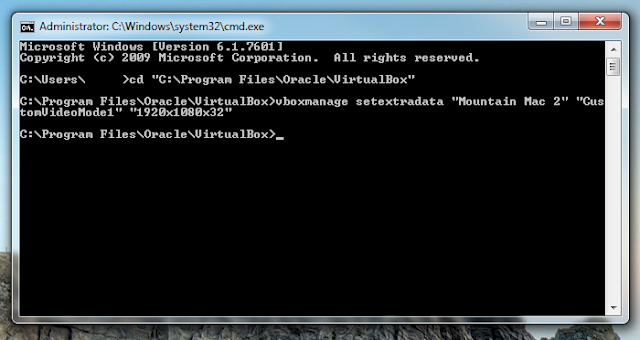
Мы закрываем OS X Mavericks и всю программу VirtualBox. Открыть в режиме администратора командную строки вставить следующие строки:
«C: \ Program Files \ Oracle \ Virtualbox»
vboxmanage setextradata ИМЯ МАШИНЫ «CustomVideoMode1» «ПРЕДПОЧТИТЕЛЬНЫЙ ВАРИАНТ»
В поле Имя машины введите имя машины, которую мы дали в VirtualBox OS X Mavericks. Предпочтительное разрешение — разрешение экрана нашего компьютера. Вот и все. Мы запускаем OS X и получаем полноэкранный просмотр.
Источник
Mac os mavericks virtualbox image
In essence, this method will let you run Mac OS X from inside a program window in Windows. As always, we’re going to use Virtualbox for this. It’s important to note that Windows virtualization programs do not «officially» support Mac OS X, so you will not be able to enable full graphics support. This tutorial should only be taken as a proof of concept.
LATEST UPDATE (January 31, 2015): Want to install Yosemite instead? Check out our new guide on installing OS X Yosemite in Virtualbox with «Yosemite Zone»

- Virtualbox : This virtualization suite is free, and though it doesn’t offer official support for Mac OS X, it works well enough.
- Niresh Mavericks: Unfortunately, the standard «Unibeast» method for installing OS X Mavericks on PCs (which uses an official copy of the Mavericks installer) doesn’t work with Virtualbox. Instead, you’ll have to pirated «distros» of Mac OS X such as Niresh, which is now the most popular distro for Mavericks.
You will need to use a bittorrent client to download the disk image file, which is a little less than 6 GB in size. On the Niresh website, you’ll be given an option to either download the «ISO Version» or the «USB version» of «Niresh — 10.9 — Mavericks». Download the ISO version— the USB version (which is an Apple DMG file) doesn’t appear to work in Virtualbox.
Virtualbox lets you run Mac OS X within Windows by creating a virtual machine, which is a program that simulates a normal computer. To create a virtual machine, open up Virtualbox and click «New» on the upper left. Give your new virtual machine a name, and choose «Mac OS X» for the OS Type.
If your version of Virtualbox asks you to choose between 64-bit and 32-bit, be sure to choose 64-bit. Choosing 32-bit will result in a critical «Guru Meditation» error later on.
Your virtual machine will now be created. But don’t stop now—you still need to change a few settings before your machine will actually work. Your new virtual machine will show up on the left column of the Virtualbox start page. Select your Mac OS X virtual machine (single-click) from the main page of Virtualbox, and open up the virtual machine settings. Once the settings open up, go to «System» and uncheck the «Enable EFI» box. This is by far the most important single setting that you will need to change.
Once you’re done with that, go to the settings for «Storage». In the storage tree box, you’ll see a CD icon labeled «Empty». Click on it and click «Choose a virtual CD/DVD disk file». In the window that pops up, choose the .iso file for Niresh; this file will probably be named «OSX-Mavericks.iso».
Start up your virtual machine. You will come up to the Niresh boot screen, with one option to select: OSX-Mavericks. Press the «Enter» key on your keyboard.
NOTE 1: If your computer uses an AMD processor, you will have to type the boot flag «amd» or «amd64» (without quotation marks)— which flag you need depends on your specific processor, so test one flag at a time. Type the boot flag «amdfx» (also without quotation marks) if your AMD processor has «FX» in its model name.
NOTE 2: Virtualbox may have problems booting Mac OS X if your computer uses an Intel Haswell processor (i.e. if your computer was built/bought in 2013 or later). If this is this case, you will have to trick Virtualbox into thinking that your processor is actually an older model. To do this, open the Command Prompt in Windows (make sure you are logged into an Administrator account on Windows). You can do this by opening the Start Menu, and typing «command prompt» into the Start Menu search bar. Then, type the following command into the Command Prompt.
cd «C:\Program Files\Oracle\Virtualbox»
This command will change the focus of the Command Prompt to the program folder for Virtualbox (if you installed Virtualbox somewhere different, then change the command to wherever you installed it). Next, type in this command:
VBoxManage modifyvm —cpuidset 00000001 000306a9 00020800 80000201 178bfbff
This command activates «vboxmanage», a command-line program included with Virtualbox that allows you to edit the properties of your virtual machine, including its built-in resolutions. Replace «Name of virtual machine» with the name of your virtual machine (no quotation marks)— you can find the name of your virtual machine in the left pane of the Virtualbox main window. This command should do the trick. — Source

Mac OSX can only be installed on a completely clean disk, so you need to use Disk Utility to wipe your Virtualbox hard disk. Click on the Virtualbox hard disk in Disk Utility and erase it. Don’t worry, there’s nothing important on it.

On the installation summary page for Mac OSX, the Virtualbox hard disk should now be showing up. Click the «Customize» button on the lower left-hand corner of the summary page. This is where using a distro becomes really useful: Niresh allows you to install extra Hackintosh drivers and kexts, straight from the OS X Mavericks installer.
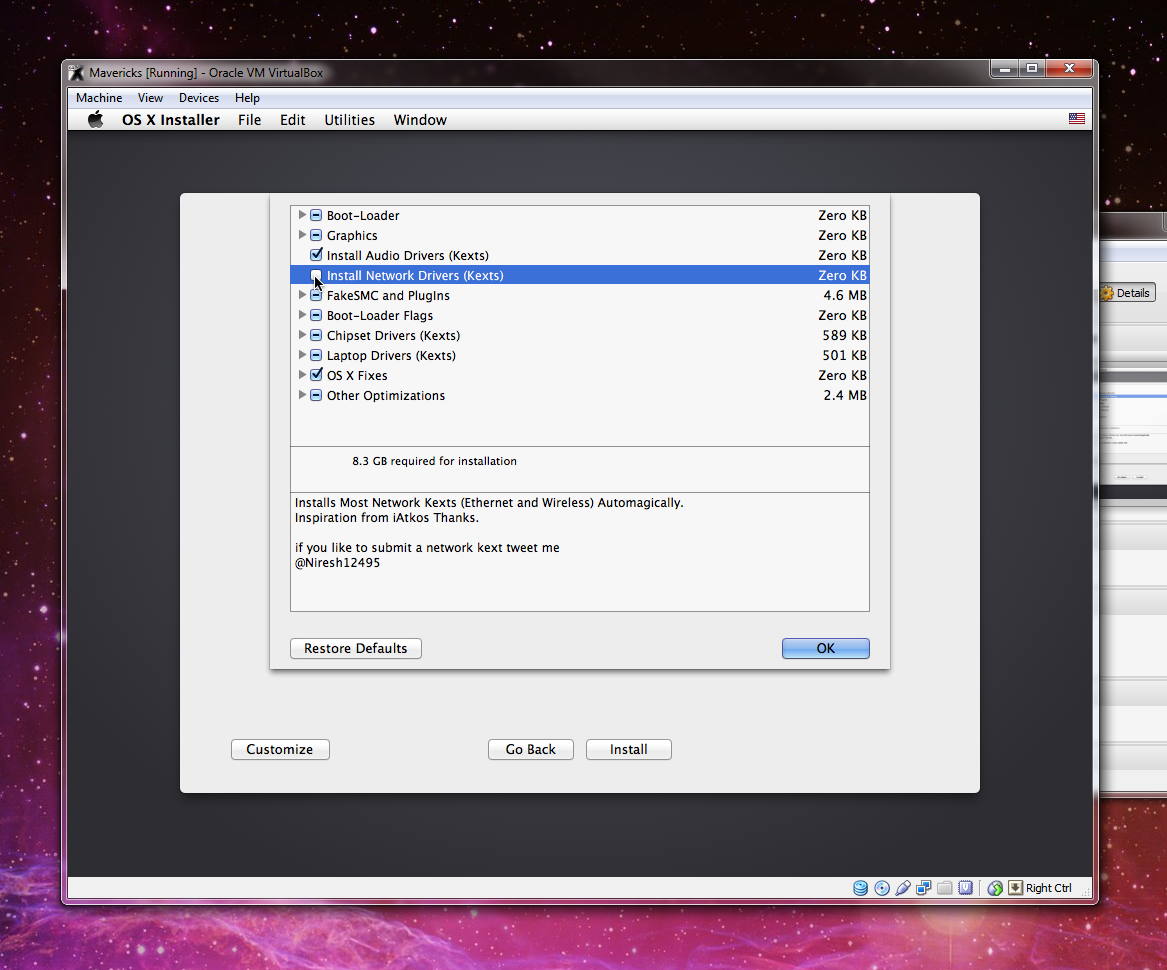
- Uncheck Install Network Drivers (Kexts). This option is checked by default. Normally, it will allow Niresh to automatically detect your computer’s ethernet controller and install the appropriate ethernet kext, so that your internet will work immediately in Mac OS X. However, this feature doesn’t really work in Virtualbox. All it does is break the internet in your virtual machine.
- Uncheck Graphics -> GraphicsEnabler=Yes. This option is also checked by default. Normally, it allows Mac OS X to work better with your computer’s graphics card. However, Virtualbox doesn’t support Mac OS X graphics anyways, so this option is essentially pointless for virtual machines. All it does is decrease the default screen size of your virtual machine from 1280×1024 to 1024×768.
Once you have selected the appropriate options from the «Customize» screen, return to the installation summary page and click «Install». When the installation finishes, Mac OS X will crash into a black screen with white text. This is normal; Mac OS X has installed successfully. Now proceed to the next step.
Step 5: Boot it up
Restart your virtual machine, and eject Niresh from your virtual DVD drive. To eject Niresh, right-click on the CD icon at the bottom right of the Virtualbox window, and un-check the Niresh file (probably named «OSX-Mavericks.iso»). Your mouse cursor will probably be trapped inside the virtual machine. Press the right «Ctrl» key on your keyboard to allow your mouse to escape.
NOTE: One common issue with Niresh is that it tends to lag out of the account creation process, and skip straight to the Mac OS X login screen before you can make your own account. If this happens, simply log into Mac OS X with the following credentials:
Username: root
Password: niresh
This will log you into the «root» account of Mac OS X. From here, open the System Preferences app, go to «Users & Groups», and create your own account. (We don’t recommend that you use the root account permanently, because it is insecure.)
Step 6: Make the screen bigger
Though this step is optional, I still recommend you do it anyways. Anyways, when you first use your virtual machine, you’ll probably notice one thing: your screen resolution is 1280×1024 (or 1024×768 if you forgot to turn off GraphicsEnabler=Yes). Since Virtualbox doesn’t «technically» support Mac OS X, there’s no official way to change this. But here’s how you can change it anyways.
First, you need to access org.Chameleon.boot.plist, the settings file for your virtual machine’s Mac OS X bootloader. You can do this from Finder, the file browser built into Mac OS X. However, Finder hides your hard drives in Mavericks by default. To unhide them, open Finder, and click on File -> Preferences in the menu bar at the top of Mac OS X. Under the «Sidebar» settings, check «Hard disks», so that Finder will display your virtual machine’s hard disks in the sidebar.

Next, turn off your virtual machine. Open the Command Prompt in Windows (make sure you are logged into an Administrator account on Windows). You can do this by opening the Start Menu, and typing «command prompt» into the Start Menu search bar. Then, type the following command into the Command Prompt.
cd «C:\Program Files\Oracle\Virtualbox»
This command will change the focus of the Command Prompt to the program folder for Virtualbox (if you installed Virtualbox somewhere different, then change the command to wherever you installed it). Next, type in this command:
vboxmanage setextradata «Name of virtual machine» «CustomVideoMode1» «1920x1080x32»
This command activates «vboxmanage», a command-line program included with Virtualbox that allows you to edit the properties of your virtual machine, including its built-in resolutions. Replace «Name of virtual machine» with the name of your virtual machine— you can find the name of your virtual machine in the left pane of the Virtualbox main window (in the screenshot below, my virtual machine is named «Mountain Mac 2»). Replace «1920x1080x32» with whatever resolution you’re using.
Recap
I’ll just repeat what I said in my other two Virtualbox guides. Installing Mac OS X on a virtual machine is excellent practice for the real thing: installing Mac OS X on your actual computer. Don’t get too comfortable, though. Compared to most computers, Virtualbox virtual machines are very «vanilla», meaning that they’re very compatible with Mac OS X in the first place. You can’t count on being that lucky with a real PC.
And even if you don’t plan on doing this for real, with a Hackintosh, it’s still a really cool thing to try out over the weekend.
Источник


